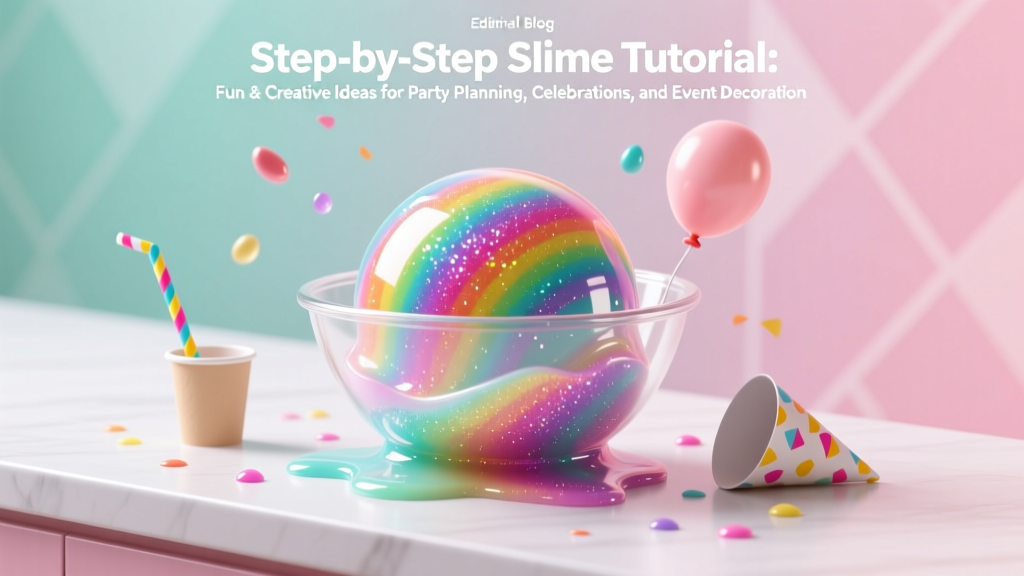
Step-by-Step Slime Tutorial
Slime is one of those DIY crafts that instantly turns a regular afternoon into a creative, hands-on experience—especially when you’re planning a party. It’s tactile, colorful, customizable, and surprisingly versatile. Whether you’re hosting a kid-friendly birthday, a tween sleepover, or a “craft bar” at a family gathering, homemade slime doubles as both an activity and a take-home party favor.
Even better, slime can be tailored to match your party theme. Think galaxy slime for an outer-space celebration, glitter slime for a New Year’s bash, pastel butter slime for a unicorn party, or glow-in-the-dark slime for a spooky Halloween setup. With a few basic supplies and the right mixing method, you’ll get consistent results and a slime table guests will rave about.
This step-by-step slime tutorial is designed for crafters and DIY enthusiasts who love party-related projects and handmade decorations. You’ll find clear measurements, time estimates, beginner-friendly options, advanced variations, and troubleshooting tips so you can create slime that stretches, squishes, and stores well for days.
Project Snapshot (Skill Level + Time)
- Skill level: Beginner (with optional advanced add-ons)
- Active time: 10–20 minutes per batch
- Rest time: 10 minutes (recommended for best texture)
- Cleanup time: 5–10 minutes
- Batch size: About 1 cup of slime (enough for 1–2 small party favor containers)
Materials & Tools (with Estimated Costs)
These are the most reliable slime supplies for consistent, party-ready results. Costs vary by brand and store, but these ranges help you budget for DIY party crafts.
Core Ingredients (1 batch)
- PVA school glue (white or clear), 4 oz (1/2 cup) – $1–$3 (look for washable school glue)
- Baking soda, 1/2 teaspoon – pennies per batch
- Contact lens solution with boric acid, 1–2 tablespoons – $3–$8 per bottle
- Check the label: it should list boric acid and/or sodium borate.
- Water, 1–2 tablespoons (optional) – helps adjust stretch
Color + Texture Add-Ins (choose what fits your theme)
- Food coloring or liquid watercolor – $2–$6
- Fine glitter (polyester craft glitter) – $2–$6
- Confetti sprinkles (polymer “slime-safe” pieces) – $3–$8
- Avoid paper confetti; it can bleed color and get soggy.
- Foam beads (for crunchy “floam”) – $4–$10
- Instant snow (for fluffy slime) – $4–$8
- Modeling clay (soft air-dry or slime clay for “butter slime”) – $3–$8
- Glow pigment (for glow slime) – $5–$12
Tools (recommended for party prep)
- Mixing bowl (plastic or glass, 1–2 qt) – $2–$10
- Measuring spoons (1/2 tsp and 1 tbsp) – $3–$10
- Silicone spatula – $3–$8 (scrapes glue cleanly)
- Disposable cups – $3–$6 (great for slime stations)
- Aprons or old t-shirts – optional but party-friendly
- Storage containers (4 oz or 6 oz plastic screw-top) – $8–$15 for a multipack
- Printable labels or sticker labels – $3–$8 (perfect for handmade party favors)
Safety + Setup for a Slime Party Station
- Ages: Best with adult supervision; avoid for kids who still put items in their mouths.
- Protect surfaces: Cover tables with plastic tablecloths or butcher paper.
- Hand washing: Have soap and water nearby; slime is easier to manage with clean, dry hands.
- Allergy note: Some add-ins (fragrance oils, certain pigments) can irritate sensitive skin—keep it simple for group crafting.
Step-by-Step Instructions: Classic Stretchy Slime (Reliable Party Favorite)
This recipe uses school glue + baking soda + contact solution, a go-to combination for beginner-friendly DIY crafts.
Step 1: Measure and pour the glue
- Add 1/2 cup (4 oz) white school glue to a mixing bowl.
- If you want a more transparent look, use clear glue. (Clear glue slime looks best with glitter and confetti.)
Step 2: Add color and theme sparkle
- Add 1–3 drops of food coloring (or a small dab of gel color).
- For party-themed slime, mix in:
- 1/2 teaspoon fine glitter for shimmer, or
- 1 teaspoon slime-safe confetti for a confetti pop.
- Stir until the color is even. If using clear glue, mix gently to reduce bubbles.
Step 3: Mix in baking soda
- Sprinkle 1/2 teaspoon baking soda into the glue mixture.
- Stir thoroughly for 30–45 seconds until it looks smooth and slightly thicker.
Step 4: Activate with contact solution (slowly)
- Add 1 tablespoon contact lens solution to the bowl.
- Stir continuously. You’ll see the slime start pulling away from the sides.
- If it’s still sticky after 30–60 seconds of mixing, add 1 more teaspoon contact solution at a time. Most batches need 1 to 2 tablespoons total.
Step 5: Knead to finish the texture
- Once the slime clumps together, pick it up and knead with clean hands for 1–2 minutes.
- If it feels sticky, dip your fingertips in a tiny bit of contact solution and continue kneading (don’t pour a lot directly onto the slime).
Step 6: Rest for best stretch (recommended)
- Place the slime in its container and let it sit for 10 minutes.
- This short rest helps the texture settle and improves stretch—great when you’re making multiple batches for party favors.
Pro Tips for Party-Perfect Slime
- Measure your activator carefully: Too much contact solution makes slime stiff or rubbery.
- Mix before you add more: Slime often needs 30–60 seconds of stirring to fully react.
- Use a silicone spatula: You’ll waste less glue and keep your DIY craft station cleaner.
- Make a “slime bar”: Set out add-ins in small bowls (glitter, beads, pigments) and let guests customize.
- Label your containers: Add the party date and a fun name like “Birthday Bash Glitter Goo.” Handmade party favors feel extra special with labels.
Slime Variations for Party Themes (Beginner to Advanced)
1) Galaxy Slime (Intermediate)
- Make 2–3 small batches: dark blue, purple, black.
- Swirl together gently (don’t overmix) to keep the galaxy look.
- Add:
- 1/2 tsp holographic glitter
- A pinch of silver star confetti
2) Fluffy Slime (Beginner-Friendly Add-On)
- Before activation, mix in 1–2 cups shaving cream (foam style, not gel).
- Then proceed with baking soda + contact solution.
- Expect to use slightly more activator (add slowly).
3) Butter Slime (Advanced Texture)
- Make a classic slime base first.
- Knead in 1–2 tablespoons soft modeling clay until smooth and spreadable.
- Perfect for pastel party aesthetics and “slime toast” party photo ops.
4) Crunchy Floam (Intermediate)
- Gently fold in 1/4 to 1/2 cup foam beads.
- Use a thicker slime base (slightly more baking soda) so it holds the beads well.
5) Glow-in-the-Dark Slime (Intermediate)
- Mix in 1/2 to 1 teaspoon glow pigment before activation.
- Charge under bright light for 1–2 minutes for best glow at a nighttime party.
Troubleshooting: Fix Common Slime Problems
- Too sticky:
- Knead longer first (1–2 minutes).
- Add 1/2 teaspoon contact solution to your hands and knead (avoid dumping in a lot).
- Too rubbery or stiff:
- You likely over-activated. Work in 1–2 teaspoons warm water a little at a time and knead.
- Next batch: reduce contact solution and mix longer between additions.
- Slime won’t form (stays gluey):
- Check your contact solution label for boric acid/sodium borate.
- Add another 1 teaspoon solution and stir well.
- Lots of bubbles:
- Stir more slowly, especially with clear glue.
- Let it rest in a container overnight for clearer slime.
- Glitter or add-ins falling out:
- Use finer glitter or lighter confetti.
- Make a slightly thicker base (a pinch more baking soda) so it holds inclusions better.
Common Crafting Mistakes to Avoid
- Pouring in activator too fast: This is the quickest way to get stiff slime. Add in small amounts and mix between each addition.
- Skipping measurements at a slime party: “Eyeballing” works sometimes, but not when you need consistent batches for party favors. Use measuring spoons.
- Using paper confetti: It can bleed dye, tear, and turn mushy—choose slime-safe polymer pieces instead.
- Overmixing colors: For marbled or themed swirls, stop mixing while you still see streaks.
- Storing slime without an airtight lid: It dries out fast. Screw-top containers are ideal for handmade party decorations and favors.
- Adding fragrance oils directly to kids’ slime: Some scents irritate skin. If you use fragrance, keep it minimal and optional.
How to Package Slime as Party Favors (Cute + Practical)
- Use 4 oz containers for individual favors (one batch fills about 2 small containers depending on add-ins).
- Add a label with:
- Slime name (“Glitter Birthday Slime”)
- Date
- Basic care: “Store sealed. Wash hands after use.”
- Display in a basket or on a tray as part of your party decorations.
FAQ: Slime Tutorial Questions Crafters Ask Most
1) How long does homemade slime last?
Stored in an airtight container, most slime lasts 1–2 weeks. If it starts to dry, knead in a few drops of water. If it gets sticky, add a tiny bit of contact solution to your hands and knead.
2) Can I make slime ahead of time for a party?
Yes. Make it 1–3 days ahead for best texture. Store each batch sealed. If you’re creating clear-glue slime, making it ahead helps it become clearer as bubbles settle.
3) Why didn’t my slime activate?
The most common reason is using a contact lens solution that doesn’t contain boric acid or sodium borate. Swap to one that does, then reactivate with small additions while mixing.
4) What’s the best glue for slime crafts?
Washable PVA school glue is the most reliable. White glue gives an opaque, “classic” look; clear glue is best for glitter, confetti, and transparent party-themed slime.
5) How do I make slime less sticky without ruining it?
Knead longer first. If it’s still sticky, add just a few drops of contact solution to your hands (not the bowl) and knead. Go slowly—over-activating makes it rubbery.
6) Can slime stain clothes or furniture?
Some pigments and glitter can transfer, especially on fabric. Use a protected craft surface, choose colorants carefully, and encourage guests to play with slime on the tablecloth or in a tray.
Wrap-Up: Your Party-Ready Slime Starts Here
Slime is a playful DIY craft that works as an activity, a handmade party favor, and even part of your party decorations when displayed in cute labeled containers. Start with the classic stretchy recipe, then experiment with glitter, glow pigment, foam beads, or clay to match your theme. After one or two batches, you’ll feel confident enough to run a full slime bar for your next celebration.
Want more party-related projects and handmade decoration ideas? Explore more DIY craft inspiration on smartpartyprep.com and keep creating celebrations that feel personal, colorful, and fun.
More Articles
 DIY Backdrops for Home Decor
 How to Enable 3rd Party Cookies in Chrome (2024): A Step-by-Step Fix for Blocked Logins, Ad Retargeting & SSO Failures — Before Google Shuts Them Down Completely
 Kids' Craft: Table Runners
 10 Creative Custom Stickers Ideas
 Budget DIY Table Runners Under $20
 Easy Wall Art for Beginners
 Budget DIY Masks Under $5
 DIY Garlands for Home Decor
 DIY Tote Bags Party Favors
 Step-by-Step Pressed Flower Art Tutorial