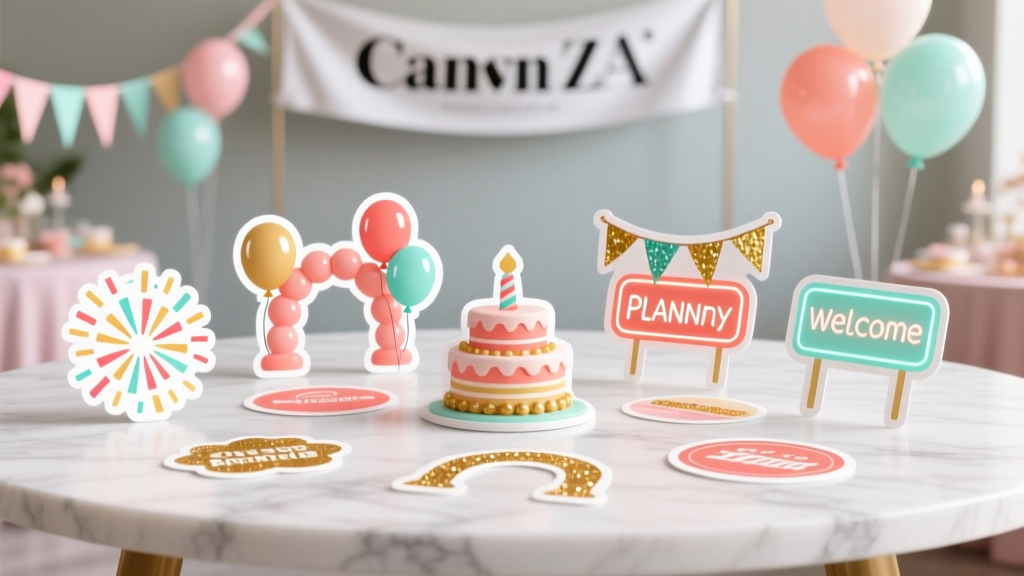
10 Creative Custom Stickers Ideas
Custom stickers are one of those DIY crafts that feel instantly rewarding: you design them, print them, cut them, and suddenly you’ve got party-ready decorations you can use everywhere. They’re affordable, beginner-friendly, and wildly versatile—perfect for birthdays, baby showers, graduations, weddings, and every “just because” celebration in between.
Even better, DIY custom stickers can tie your whole party theme together. Use them on favor bags, invitations, water bottles, treat boxes, candle jars, thank-you cards, and even balloons. If you love handmade projects but want something you can finish in an afternoon, sticker-making hits the sweet spot.
This guide walks you through ten creative custom sticker ideas, plus materials, step-by-step instructions, pro tips, troubleshooting, and common mistakes to avoid—so you can confidently create party decorations that look polished and personal.
Quick Overview: Skill Level & Time Estimates
- Skill level: Beginner to Intermediate (Advanced variations included)
- Time per sticker set: 45–120 minutes (design + print + cut)
- Dry time (if sealing): 15–30 minutes between coats
- Best for: DIY party decorations, handmade party favors, personalized gifts
Materials List (with Estimated Costs)
Pick materials based on how you’ll use your stickers (indoor labels vs. water bottles vs. outdoor use). Prices vary by brand and region, but these estimates help you plan.
Sticker Papers (choose 1–2 types)
- Matte printable sticker paper (letter size 8.5" x 11"): great for planners, treat labels, favor tags. $10–$18 for 20 sheets
- Glossy printable sticker paper: brighter colors, photo-like finish. $12–$22 for 20 sheets
- Vinyl sticker paper (weather-resistant): best for water bottles and party drink tumblers. $14–$30 for 20 sheets
- Clear sticker paper: “no-label” look on jars and cups. $12–$25 for 20 sheets
Tools & Supplies
- Inkjet printer (most sticker papers are inkjet-friendly; check packaging)
- Cutting tool:
- Scissors (beginner-friendly) $5–$12
- Precision craft knife + self-healing cutting mat (clean edges) $10–$25
- Die-cut machine (Cricut/Silhouette) for pro results (optional)
- Ruler (12" or 18") $3–$10
- Squeegee tool or old gift card (smooth application) $0–$8
- Laminating option (recommended for durability):
- Self-adhesive laminate sheets, 9" x 12" $8–$15 for 20 sheets
- Clear packing tape (budget alternative)
- Rubbing alcohol + lint-free cloth (prep bottles/jars) $3–$8
Design Software (free and easy options)
- Canva (great templates and quick resizing)
- Google Slides/PowerPoint (simple shapes, easy layout)
- Procreate (iPad drawing) for hand-illustrated stickers
Before You Start: Sticker Sizing Cheat Sheet
- Favor bag seals: 1.5"–2" circles
- Treat labels (candy bags, cookie sleeves): 2" x 3" rectangles
- Water bottle labels (front logo area): 2.5"–3" wide decals
- Envelope seals: 1"–1.5" circles
- Jar labels: 2" x 2" squares or 2" x 3.5" rectangles
Step-by-Step: How to Make Custom Stickers (Core Method)
Use this method for all ten ideas below. Adjust sizes and materials as needed.
- Choose your sticker type: matte, glossy, vinyl, or clear based on where it will be used.
- Design your sheet layout:
- Create a letter-size canvas: 8.5" x 11"
- Leave margins: 0.25"–0.5" around edges for easier cutting
- Add multiple copies per sheet to reduce waste
- Print a test page on plain paper: check sizing and color.
- Print on sticker paper:
- Set print quality to High/Best
- Select paper type closest to your sheet (e.g., “Glossy Photo Paper” for glossy sticker paper)
- Let ink dry: 10–20 minutes before touching.
- (Optional) Laminate: apply self-adhesive laminate over the printed sheet to make it more durable and smudge-resistant.
- Cut your stickers: scissors for quick cuts, craft knife for crisp edges, or a cutting machine for kiss-cut/ die-cut styles.
- Apply: clean surfaces with rubbing alcohol, position lightly, then press firmly from center outward using a squeegee or card.
10 Creative Custom Sticker Ideas (Party-Ready & Practical)
1) Party Favor Bag Seals
Best for: birthdays, baby showers, bridal showers, school celebrations
Size: 2" circle (standard) or 1.5" for small bags
Time: 30–60 minutes for a batch
- Design with a name + age (“Ava is 7!”) or theme icon (stars, dinos, bows).
- Use as seals on cellophane bags, paper treat bags, or clear boxes.
Variation: Add a QR code linking to party photos or a playlist.
2) DIY Envelope Seal Stickers
Best for: invitations, thank-you cards, save-the-dates
Size: 1"–1.5" circle
Time: 20–45 minutes
- Create a monogram seal, a tiny icon matching your party theme, or a “You’re invited!” badge.
- Matte paper looks elegant; glossy pops for kids’ parties.
Advanced upgrade: Print on clear sticker paper for a faux wax-seal vibe on colored envelopes.
3) Water Bottle & Cup Decals
Best for: party drink stations, kids’ cups, bachelorette weekends
Size: 2.5"–3" wide for a front decal
Time: 45–90 minutes
- Use vinyl sticker paper + laminate for better water resistance.
- Keep the design simple: bold name, icon, or short phrase.
Pro tip: Clean cups with rubbing alcohol and let them dry fully before applying. Avoid textured or powder-coated surfaces for best adhesion.
4) Treat Box Labels (Cupcakes, Cookies, Candy)
Best for: bake sales, party desserts, favor boxes
Size: 2" x 3" or 2" square
Time: 45–75 minutes
- Add “Baked with love,” ingredients/allergen note, or “Made for Mia’s Party.”
- Match the label shape to the box: circles for window boxes, rectangles for flat lids.
Beginner shortcut: Use a simple border + text. Clean typography can look very upscale.
5) Balloon & Party Sign Stickers (Backdrop Helpers)
Best for: photo backdrops, welcome signs, dessert table decor
Size: 3"–5" decals or letter stickers
Time: 60–120 minutes
- Make sticker letters for foam board signs: “WELCOME,” “HAPPY BIRTHDAY,” “BABY.”
- Create mini icon stickers to sprinkle around the edges of a party sign.
Troubleshooting note: Balloons are tricky—stickers may lift on latex. Use stickers on foil balloons or apply to balloon sticks, cups, or nearby signage instead.
6) Personalized “Thank You” Stickers for Favors
Best for: any party where you’re handing out favors
Size: 2" circle or 1" for small items
Time: 30–60 minutes
- Add the event date and a small graphic (heart, confetti, floral sprig).
- Stick them on favor bags, soap wraps, candles, or mini jars.
Variation: Make two versions: one with “Thank you!” and one with “You’re the best!” for variety on the table.
7) Kids’ Party Sticker Sheets (Activity + Favor in One)
Best for: kids’ birthday parties, classroom parties, playdates
Size: 4" x 6" mini sheets or full 8.5" x 11" sheets
Time: 60–120 minutes
- Create a themed sheet: dinosaurs, unicorns, space, sports, emojis.
- Include different sizes: tiny stars (0.5"), medium icons (1"), and big “hero” stickers (2").
Advanced variation: Add “award” stickers like “Dance Champ,” “Game Winner,” “Super Helper” to use during party games.
8) Mini Label Stickers for a DIY Snack Bar
Best for: popcorn bars, candy buffets, hot cocoa bars, charcuterie tables
Size: 1" x 2.5" or 2" x 3" for tent-card style labels
Time: 45–90 minutes
- Make stickers for jars: “Gummy Bears,” “Sprinkles,” “Mini Marshmallows.”
- Use clear sticker paper for a clean “printed-on-the-jar” look.
Pro tip: Apply labels to smooth, room-temperature jars. Cold surfaces can cause bubbling and poor adhesion.
9) Photo Stickers for Party Favors & Memory Tables
Best for: milestone birthdays, weddings, anniversaries, graduations
Size: 2" circle or 2" x 2" square
Time: 60–120 minutes
- Use a favorite photo and add a short caption (“Class of 2026,” “Our Little Sunshine”).
- Stick on favor boxes, thank-you cards, or a memory table guestbook.
Troubleshooting note: Photos can print dark. Increase brightness slightly and print a small test strip first.
10) Custom “Seal & Save” Stickers for Leftovers
Best for: family parties, potlucks, holiday gatherings
Size: 2" x 3" rectangle
Time: 30–60 minutes
- Make stickers that say: “Made on: ____ / Toss after: ____ / Contains: ____.”
- Great for labeling take-home containers and reducing food waste.
Advanced upgrade: Add checkboxes for common allergens (nuts, dairy, gluten) for safer sharing.
Pro Tips for Cleaner Cuts, Better Stick, and Longer-Lasting Results
- For crisp cuts: Use a metal ruler + craft knife for straight edges. Replace blades often (dull blades tear sticker paper).
- For water resistance: Choose vinyl sticker paper and cover with self-adhesive laminate. This helps prevent ink smudging and scratching.
- For bubble-free application: Press from the center outward using a gift card. If a bubble appears, gently lift and re-squeegee.
- For better color: Print using “High/Best Quality” and the correct paper setting. Glossy paper usually needs a glossy setting for accurate color.
- For a professional look: Keep a consistent style: same font pairings, 2–4 theme colors, repeated icons across all party stickers.
Easy Variations (Beginner-Friendly) & Advanced Options
Beginner-Friendly Adaptations
- Use simple shapes (circles, squares, scallops) and plain text.
- Create one master design and duplicate it across the page.
- Buy pre-colored icon packs in your theme and just add names/dates.
Advanced Variations
- Kiss-cut sticker sheets: Cut just the sticker layer (not the backing) if using a cutting machine.
- Holographic overlay: Apply holographic laminate for a fun party sparkle effect.
- Layered look: Print a thin white outline around your design (a “sticker border”) for a true sticker aesthetic.
- Die-cut edges: Make custom shapes like stars, hearts, lightning bolts, or theme silhouettes.
Troubleshooting: Fix the Most Common Sticker Problems
- Ink smears after printing:
- Let sheets dry 20+ minutes.
- Use the correct paper setting (glossy paper often smears on matte settings).
- Laminate after fully dry.
- Stickers won’t stick to bottles/jars:
- Clean with rubbing alcohol.
- Avoid condensation—apply to dry, room-temp surfaces.
- Use vinyl sticker paper for better adhesion.
- Edges lift over time:
- Round the corners (sharp corners peel first).
- Press firmly and warm slightly with your hands to activate adhesive.
- Use laminate for extra durability.
- Print size is off:
- Disable “Fit to page” and set print scaling to 100%.
- Print a test page on plain paper and measure with a ruler.
Common Crafting Mistakes to Avoid
- Skipping a test print: One test page saves sticker paper, ink, and frustration.
- Using the wrong sticker paper for the job: Matte is great for indoor favors; vinyl is better for water bottles and handling.
- Touching the ink too soon: Even “dry-looking” ink can smear under laminate if it hasn’t cured.
- Forgetting margins: Designs placed too close to the edge are harder to cut cleanly.
- Overcrowding the sheet: Leave at least 0.125"–0.25" between stickers for easier cutting.
- Applying to dirty or wet surfaces: Oils, dust, and condensation are sticker enemies.
FAQ: Custom Stickers for DIY Party Decorations
1) What’s the best sticker paper for party favors?
For favor bags, treat boxes, and thank-you stickers, matte or glossy printable sticker paper works well. If favors might be handled a lot (or exposed to moisture), choose vinyl sticker paper and add laminate.
2) Can I make custom stickers without a cutting machine?
Yes. Use scissors for simple shapes and a craft knife + ruler for rectangles and crisp lines. A 2" circle punch is also a great time-saver if you’re making lots of round favor seals.
3) How do I make stickers more waterproof?
Use vinyl sticker paper and cover with self-adhesive laminate sheets. This helps protect ink from smudging and makes stickers more resistant to splashes (great for water bottles and cups).
4) Why do my stickers peel off cups or jars?
Usually it’s surface prep. Clean with rubbing alcohol, apply to a dry surface (no condensation), and press firmly. Also, some textured plastics don’t hold stickers well—smooth surfaces work best.
5) What’s the easiest way to make sticker sheets for kids?
Create an 8.5" x 11" layout with multiple icons, keep outlines bold, and leave space between each design for cutting. Matte paper is easier to write on if you want kids to add names or doodles.
Wrap-Up: Your Party Theme, Tied Together with Stickers
Custom stickers are one of the simplest ways to make DIY party decorations look coordinated and intentional. Whether you’re sealing favor bags, labeling a snack bar, decorating drink cups, or creating sticker sheets for the kids’ table, you’ll get a handmade touch that guests actually notice.
Pick one idea from the list, start with a test print, and enjoy the process—your next party setup is about to look extra polished.
Want more party-ready DIY crafts and handmade decoration ideas? Explore more creative projects on smartpartyprep.com.
More Articles
 No-Sew Embroidered Patches Tutorial
 DIY Wooden Signs in 1 Hour
 Budget DIY Masks Under $5
 How to Install 3rd Party Apps on LG Smart TV (2024): The Only Safe, Step-by-Step Method That Actually Works — No Hacks, No Bricking, No Developer Mode Confusion
 Step-by-Step Wreaths Tutorial
 20 Creative Origami Decorations Ideas
 Paper Craft Tote Bags Ideas
 How to Install 3rd Party Apps on Roku TV (Without Jailbreaking): The Only Legal, Step-by-Step Method That Actually Works in 2024 — No Developer Mode Confusion, No Failed Sideloading, Just Real Results
 How to Enable Third Party Cookies on Mac: A Step-by-Step Safari & Chrome Fix (2024 Verified — No More 'Blocked' Errors or Broken Logins)
 How to Draw a Party in 7 Simple Steps (Even If You Can’t Draw Stick Figures): No Fancy Tools, No Art School Required — Just Paper, Pencil & Joy