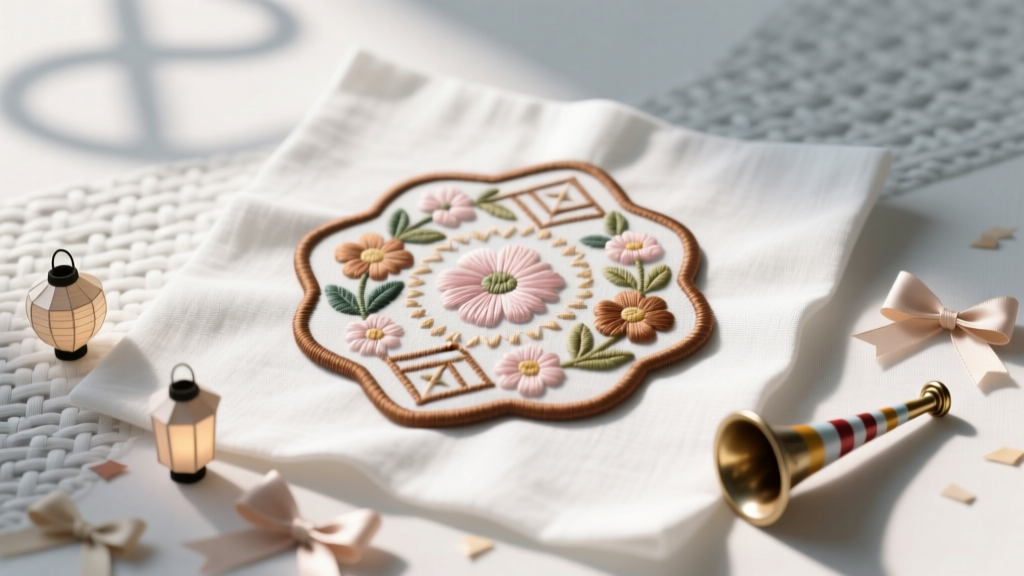
No-Sew Embroidered Patches Tutorial
Embroidered patches have a little bit of magic to them: they turn plain items into personalized keepsakes, they’re quick to make in small batches, and they’re perfect for party themes—without needing a sewing machine. Whether you’re decorating goodie bags for a birthday, customizing denim jackets for a bachelorette weekend, or making “team” patches for a backyard campout party, these no-sew patches add that handmade touch guests always notice.
This tutorial is designed for crafters who want a practical, step-by-step method that works on common party materials like canvas totes, felt banners, paper favor bags (as a decorative tag), and even party aprons. You’ll use simple embroidery stitches and a strong adhesive or iron-on backing—so you can get the look of traditional embroidered patches with a beginner-friendly workflow.
Best of all: you can batch-make a set in one afternoon. Mix and match shapes, add names, and coordinate colors with your party decor for a cohesive, photo-ready setup.
Project Overview (Skill Level + Time)
- Skill level: Beginner (basic hand-stitching) to Intermediate (clean lettering, layered designs)
- Time estimate per patch: 20–60 minutes depending on size and stitch density
- Batch estimate: 6 medium patches in about 3–4 hours (great for party prep)
- Finished size suggestions:
- Small: 1.5–2 in (3.8–5 cm) wide (ideal for name tags, cupcake toppers on sticks, mini banners)
- Medium: 2.5–3.5 in (6.4–8.9 cm) wide (ideal for totes, denim, party aprons)
- Large: 4–5 in (10–12.7 cm) wide (ideal for photo backdrop accents, themed flags)
Materials List (With Product Types + Estimated Costs)
These are common craft-store items; you can swap brands based on what’s available.
Base + Stabilizers
- Felt sheets (stiff or premium felt) or cotton canvas (for the patch front): $0.50–$2 per sheet
- Fusible interfacing (medium weight) OR tear-away embroidery stabilizer (helps prevent puckering): $3–$8 per pack
- Heat-n-Bond Ultrahold (no-sew fusible adhesive) OR iron-on patch backing sheets: $5–$12
Embroidery Supplies
- Embroidery floss (cotton, 6-strand): $0.60–$1 each (3–6 colors is plenty)
- Embroidery needles (size 7–9 for floss): $2–$5
- Embroidery hoop (4 in / 10 cm is versatile): $3–$10
- Small sharp scissors (embroidery snips if you have them): $5–$15
Tools for No-Sew Finishing
- Iron + pressing cloth (a thin cotton towel works): already owned or $15–$30 for a basic iron
- Fabric glue (optional for edge finishing or extra hold): $4–$8
- Fray Check (optional if using woven fabric like canvas): $4–$7
Marking + Templates
- Water-soluble fabric pen or chalk pencil: $3–$7
- Cardstock (for templates): $1–$4
- Ruler + circle stencil (optional): $2–$8
Estimated total cost: $15–$35 if you’re starting from scratch, less if you already have scissors/iron. Each patch typically costs under $1–$3 in consumables depending on size and floss usage.
Design Planning (Party-Themed Ideas That Work Great as Patches)
Choose a simple motif that reads clearly at 2–3 inches. Small patches look best with bold shapes and limited text.
Quick party patch ideas
- Birthday: candles, balloons, confetti, “B-Day Crew,” age number
- Bachelorette: hearts, disco ball, “Bride,” “Team Bride,” initials
- Baby shower: tiny onesie, rattle, stork, “Mama”
- Graduation: cap icon, year, school colors stripe
- Holiday party: stars, snowflake, gingerbread, mini wreath
- Kids party: dinosaurs, mermaids, space rockets, smiley faces
Recommended measurements
- Border width: 1/8 in to 3/16 in (3–5 mm) looks polished without eating up space
- Letter height (for readability): 3/8 in to 1/2 in (1–1.3 cm) for short words
- Outline stitch spacing: aim for 1/16 in (1–2 mm) stitch length for smooth curves
Step-by-Step: How to Make No-Sew Embroidered Patches
Step 1: Create a template and cut your patch front
- Draw your patch shape on cardstock: circle, oval, rounded rectangle, shield, or banner.
- Cut out the template and trace it onto your felt/canvas using a water-soluble pen or chalk.
- Cut the patch front slightly larger than your final size by about 1/8 in (3 mm). You’ll trim neatly later.
Beginner-friendly tip: Start with a 2.5–3 in (6.4–7.6 cm) circle. Circles hide tiny cutting imperfections and look classic on totes and party aprons.
Step 2: Add stabilizer so your stitches stay smooth
- If using fusible interfacing, cut it to match your patch front.
- Iron it to the back of the patch front (follow package heat settings; use a pressing cloth).
- If using tear-away stabilizer instead, place it behind the fabric in the hoop while stitching.
This step helps prevent puckering—especially important when you’re making crisp party-themed icons or lettering.
Step 3: Transfer the design
- Lightly draw your design directly onto the patch front.
- Keep lines thin and minimal; they should be easy to cover with stitching.
Tool recommendation: A fine-tip water-soluble pen gives clean lines for small lettering like “BRIDE” or “BIRTHDAY CREW.”
Step 4: Hoop it (even for small patches)
- Place your fabric in a 4 in (10 cm) hoop with the design centered.
- Pull the fabric taut like a drum—snug but not stretched out of shape.
If you’re using felt: Some felt doesn’t love hoops (it can dent). If that happens, hoop a piece of stabilizer and baste the felt to it with big temporary stitches, then remove afterward.
Step 5: Stitch the design (simple stitches that look amazing)
You don’t need complicated embroidery to get a polished patch. These stitches are reliable and party-project friendly:
- Backstitch (clean outlines and lettering)
- Satin stitch (solid fills for hearts, stars, numbers)
- French knots (confetti dots, balloon highlights)
- Stem stitch (curvy lines like ribbons, vines, swirls)
Floss tip: Use 2–3 strands of embroidery floss for fine detail; use 4–6 strands for bold, chunky shapes. For most 3-inch party patches, 3 strands is the sweet spot.
Mini stitch roadmap for a typical patch
- Outline the main shape in backstitch.
- Fill large areas with satin stitch (keep stitches parallel).
- Add small accents (French knots or tiny straight stitches).
- Add a border outline last so it frames everything neatly.
Step 6: Trim neatly and seal edges (especially for canvas)
- Remove from the hoop and gently press from the back (low heat; pressing cloth).
- Trim your patch to final size using sharp scissors.
- If using canvas or any woven fabric, apply a tiny line of Fray Check around the edge and let it dry fully.
Clean edge goal: Smooth curves and consistent spacing matter more than perfection—your border will visually “tidy up” minor wobbles.
Step 7: Add the no-sew backing (iron-on or adhesive)
You have two solid no-sew options depending on how you’ll use the patch.
Option A: Iron-on backing (best for fabric items)
- Cut Heat-n-Bond Ultrahold slightly smaller than the patch (leave about 1/16 in / 1–2 mm margin).
- Fuse it to the back of the patch following the package directions.
- Let it cool, then peel the paper backing when you’re ready to apply.
Option B: Peel-and-stick adhesive (best for temporary party decor)
- Use heavy-duty double-sided fabric tape or strong craft adhesive dots on the back.
- Press onto your party item (favor bags, cardstock signs, photo booth props backing).
Party tip: For disposable party decor (like a welcome sign or centerpiece label), peel-and-stick is fast and perfectly acceptable.
Step 8: Apply your patch to party-ready items
Iron-on application measurements: Place the patch, then press with firm pressure for 15–25 seconds, lift, and repeat if needed. Let it cool completely before handling.
- Canvas tote bags: Great for favor bags; add each guest’s name or a theme icon.
- Denim jackets or shirts: Fun for a group celebration (bachelorette, birthday crew).
- Party aprons: Add patches for a cookie-decorating party or pizza night.
- Fabric bunting flags: Make one patch per flag for a premium look.
Pro Tips for Crisp, Professional-Looking Patches
- Keep thread lengths short: Cut floss around 18 in (46 cm) to reduce tangles and fraying.
- Use a border stitch to “frame” the patch: A tight backstitch outline hides tiny uneven edges.
- Layer for dimension: Stitch a simple filled shape (like a star), then outline it in a darker shade.
- Press between steps: A quick press from the back helps flatten stitches for a clean finish.
- Batch your process: Cut all shapes first, then transfer designs, then stitch—perfect for party prep timelines.
Fun Variations (Beginner to Advanced)
Beginner-friendly adaptations
- Use felt only: Felt doesn’t fray and is forgiving with tension.
- Skip fills: Outline a balloon, heart, or star and add a couple French knot “confetti” dots.
- Use big shapes: Choose bold icons that don’t require tiny curves.
Advanced variations
- 3D elements: Add a tiny ribbon bow, sequin “disco ball” accents, or bead confetti (best for adult parties, not for kids under 3).
- Gradient floss (variegated): Makes stars, florals, and swirls look extra special with minimal effort.
- Layered patch look: Cut a second felt layer 1/8 in (3 mm) larger behind the first to create a two-tone border.
- Lettering upgrade: Use stem stitch for cursive words like “Bride” or “Cheers.”
Troubleshooting (Fixes for the Most Common Issues)
- My fabric is puckering: Add interfacing/stabilizer, reduce stitch tension, and keep the fabric taut in the hoop.
- My satin stitch looks messy: Use fewer strands (2–3), keep stitches parallel, and outline the shape first to create a boundary.
- The patch edge looks jagged: Trim slowly with sharp scissors, then add a border outline stitch to visually smooth it out.
- Iron-on won’t stick: Increase press time slightly, apply firmer pressure, and make sure you’re using the correct heat setting for the base fabric. Some materials (nylon, waterproof coatings) resist fusing—use fabric glue instead.
- Adhesive is visible around the edges: Cut backing slightly smaller than the patch and keep a clean margin around the perimeter.
Common Crafting Mistakes to Avoid
- Skipping stabilizer on woven fabric: Canvas and cotton will warp without it, especially on small detailed designs.
- Using too many floss strands for tiny designs: Thick thread hides details and makes curves look chunky.
- Drawing heavy transfer lines: Dark marker can show through lighter stitches—use a light hand and thin lines.
- Rushing the trimming step: Clean cutting is half the “professional patch” look.
- Pressing the iron back and forth: Sliding can shift the patch or distort stitches—press straight down and lift.
- Applying iron-on patches to heat-sensitive materials: If the item can’t handle heat, choose peel-and-stick or fabric glue.
FAQ: No-Sew Embroidered Patches
1) Are these patches truly “no-sew”?
You’ll do hand embroidery stitches to create the design, but you won’t sew the patch onto an item. The attachment is no-sew (iron-on backing, adhesive, or fabric glue).
2) What’s the best base fabric for beginners?
Premium felt is the easiest because it doesn’t fray, stays stable, and looks great in party colors. For a more classic patch look, use cotton canvas with interfacing.
3) Can I wash items with iron-on no-sew patches?
Yes, with care. Wait 24 hours after fusing, then wash inside out on cold/gentle and air dry when possible. For frequently washed items, consider reinforcing the edges with a thin line of fabric glue.
4) How do I make a patch that’s safe for kids’ party favors?
Avoid beads, sequins, or anything that could detach. Stick to floss embroidery and secure iron-on backing. If the patch is going on a toddler item, keep it decorative and supervised.
5) Can I use these patches on paper party decorations?
Absolutely. Treat them like premium embellishments: use strong adhesive dots or double-sided fabric tape to attach patches to favor bags, party signs, or photo booth prop backings.
6) What size patch works best for party tote bags?
A 3 in (7.6 cm) patch is the sweet spot—big enough to read from a distance and small enough to batch-make for guests.
Wrap-Up: Make a Set for Your Next Party
No-sew embroidered patches are one of those DIY crafts that feel special without being stressful. You get the cozy, handmade charm of embroidery, plus the convenience of iron-on or adhesive backing—perfect for party decorations and personalized favors. Start with one simple icon, make a small batch in your theme colors, and watch how quickly your party setup looks custom and coordinated.
When you’re ready, try a “patch bar” crafting station at your next get-together—set out floss colors, pre-cut shapes, and a few sample designs, then let guests pick their own patch for a tote or bandana.
Happy making! Explore more DIY party crafts, handmade decorations, and creative project tutorials at smartpartyprep.com.
More Articles
 DIY Resin Jewelry for Weddings
 Advanced Greeting Cards for Crafters
 25 Creative Invitation Ideas (That You Can Make at Home)
 DIY Resin Jewelry Using Cricut
 Advanced Backdrops for Crafters
 Rustic Cake Toppers Ideas
 DIY Place Cards for Birthdays
 How to Draw Party Scenes in 7 Minutes (Even If You Can’t Draw a Stick Figure): A Step-by-Step Guide That Turns Doodles Into Delightful Decorations for Birthdays, Graduations & More
 DIY Gift Boxes Party Favors
 17 Do It Yourself Party Favors That Actually Impress Guests (No Craft Store Run Needed — Just $5, 20 Minutes & What’s Already in Your Drawer)