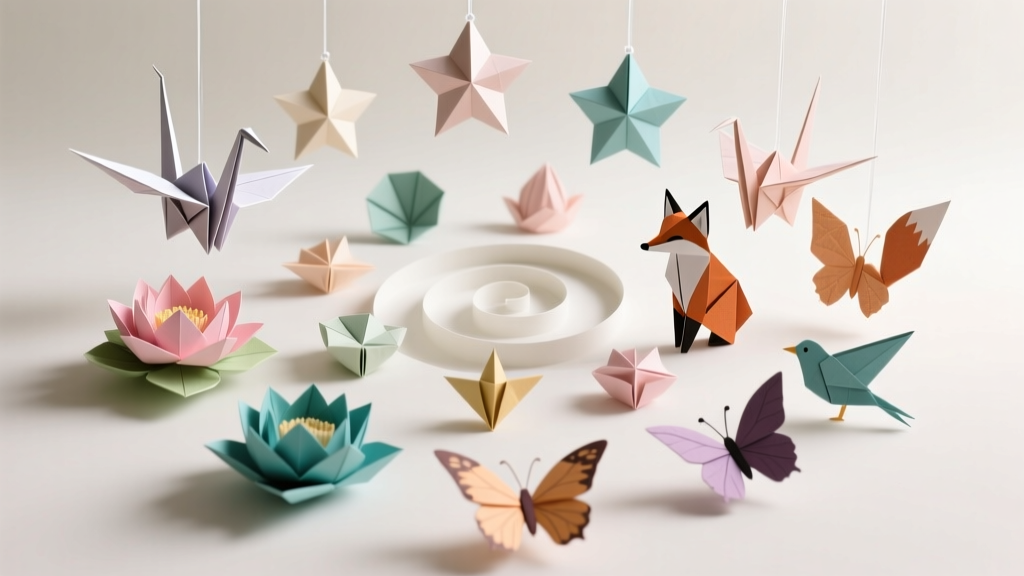
20 Creative Origami Decorations Ideas
Origami decorations are one of those rare DIY party projects that feel both relaxing and exciting. With just paper and a few simple tools, you can create handmade party decorations that look polished, colorful, and totally personalized—without needing paint, glitter, or a craft room full of supplies.
Whether you’re styling a birthday party, baby shower, bridal shower, graduation, or holiday gathering, origami brings instant “wow” factor to tables, walls, and photo backdrops. The best part? Most designs scale easily. Make a few statement pieces for a chic vibe, or fold a whole collection for a bold, festive look.
This guide shares 20 creative origami decoration ideas, plus practical step-by-step instructions, skill-level tips, and troubleshooting help so your folds come out crisp and party-ready.
Materials & Tools (with estimated costs)
You can make most origami party decorations with a small kit. Here’s a smart, budget-friendly shopping list.
- Origami paper pack (6 in x 6 in or 10 in x 10 in, 100–200 sheets): $6–$15
- Look for double-sided color packs for more variety.
- Cardstock (8.5 in x 11 in, 50 sheets): $7–$12 (great for stars, banners, and sturdy pieces)
- Metal ruler (12 in): $5–$10 (for scoring and clean folds)
- Bone folder or scoring tool: $4–$10 (optional, but makes folds sharp)
- Sharp craft scissors: $5–$12
- Glue options:
- Glue stick: $2–$5 (best for paper-to-paper)
- Double-sided tape: $4–$8 (clean, fast, party-friendly)
- Hot glue gun + mini sticks: $10–$20 (best for assembling garlands and backdrops)
- Clear fishing line: $3–$6 (perfect for “floating” decor)
- String/twine (white, metallic, or jute): $3–$8
- Mini clothespins or paper clips: $3–$7
- Foam adhesive dots: $4–$8 (for dimensional wall decor)
Recommended paper weights:
- Standard origami paper (lightweight): easiest for beginners and detailed folds.
- Cardstock (heavier): best for sturdy stars and wall pieces; score folds first.
- Tissue paper: best for pom-style florals; not ideal for precise origami folds.
Before You Start: Quick Setup
- Skill levels: Beginner / Intermediate / Advanced (listed per project)
- Work surface: flat table with good lighting
- Time estimates: based on making 1 piece (or noted when best made in batches)
- Party tip: Choose 2–3 colors max for a cohesive theme (plus metallic accents if you want sparkle).
Core Step-by-Step Folding Basics (useful for many projects)
How to make crisp folds (the secret to pro-looking origami)
- Align corners first, then run your finger along the crease.
- Press firmly with a bone folder or the edge of a ruler.
- For cardstock: lightly score the fold line with a ruler + scoring tool before folding.
- Flatten as you go: open and re-crease if something shifts.
Standard sizes that work well for party decor
- Small accents: 3 in x 3 in to 6 in x 6 in
- Garlands & ornaments: 6 in x 6 in to 8 in x 8 in
- Backdrop stars/flowers: 10 in x 10 in or 12 in x 12 in (or modular units made from 6 in squares)
20 Creative Origami Decorations Ideas (Party-Ready)
1) Origami Crane Mobile
Skill: Intermediate | Time: 10–15 min per crane (batch-folding speeds it up)
- Use for: baby shower, wedding, or serene birthday decor
- How: Fold 12–30 cranes from 6 in x 6 in paper. Thread onto fishing line at varying lengths (18–36 in). Tie to a hoop (embroidery hoop or cardboard ring) and hang above a gift table.
2) Lucky Star Jar Centerpieces
Skill: Beginner | Time: 1–2 min per star
- Measurements: paper strips about 0.4 in x 10 in (1 cm x 25 cm)
- How: Fold strips into puffy stars; fill clear jars and add a tea light (use LED for safety). Great DIY table decor on a budget.
3) Modular Kusudama Ball (Hanging Decor)
Skill: Advanced | Time: 60–90 min per ball
- How: Fold 12–30 identical units (often flower-like modules), then glue/tape together into a sphere. Hang with ribbon. Make them in party colors for a statement ceiling installation.
4) Origami Waterbomb Garland (3D Cubes)
Skill: Beginner | Time: 5–7 min per cube
- How: Fold classic waterbomb base, inflate gently, then string through opposite corners using a needle and thread. Alternate colors every 2–3 cubes for a clean, modern party garland.
5) Origami Butterfly Wall Swarm
Skill: Beginner | Time: 3–5 min each
- How: Fold butterflies from 4 in x 4 in to 6 in x 6 in paper. Attach with foam dots so wings lift off the wall. Arrange from dense cluster to scattered “flight path” for a photo backdrop.
6) Origami Fan Rosettes (Backdrop Stars)
Skill: Beginner | Time: 10–12 min each
- Measurements: Use 2 sheets of 8.5 in x 11 in paper (or 12 in x 12 in) per rosette.
- How: Accordion-fold both sheets (fold width: 1/2 in). Fold each in half, glue/tape center, then join halves into a full circle. Add a center circle cut from cardstock (3–4 in diameter).
7) Origami Lotus Tea Light Holders (LED Only)
Skill: Intermediate | Time: 12–18 min each
- How: Fold lotus petals from thicker origami paper or light cardstock. Nest layers for a fuller flower. Place an LED tealight in the center for glowing table decor.
8) Origami Tulip Place Cards
Skill: Beginner | Time: 6–8 min each
- How: Fold a simple tulip head and stem (two pieces). Write guest names on small cardstock flags (1 in x 2.5 in) and tape to stems. Perfect for spring brunch parties.
9) Origami Heart Garland
Skill: Beginner | Time: 3–4 min per heart
- How: Fold hearts from 4 in x 4 in paper, then string through top corners. Mix solids with patterns for Valentine’s Day or anniversary party decor.
10) Origami Starburst Wall Medallions
Skill: Intermediate | Time: 15–20 min each
- How: Make 8–16 folded “spikes” (triangular units) and glue into a circle. Use metallic cardstock for a glam New Year’s or graduation party backdrop.
11) Origami Gift Bow Toppers
Skill: Beginner | Time: 5–8 min each
- How: Fold bow shapes from 6 in x 6 in paper; attach with double-sided tape. Great for party favors and hostess gifts.
12) Origami Envelope Favor Holders
Skill: Beginner | Time: 6–10 min each
- Measurements: 8 in x 8 in paper makes a nice candy envelope.
- How: Fold into an envelope with a tuck-in flap. Add a sticker seal and a mini tag. Fill with confetti, stickers, or a small thank-you note.
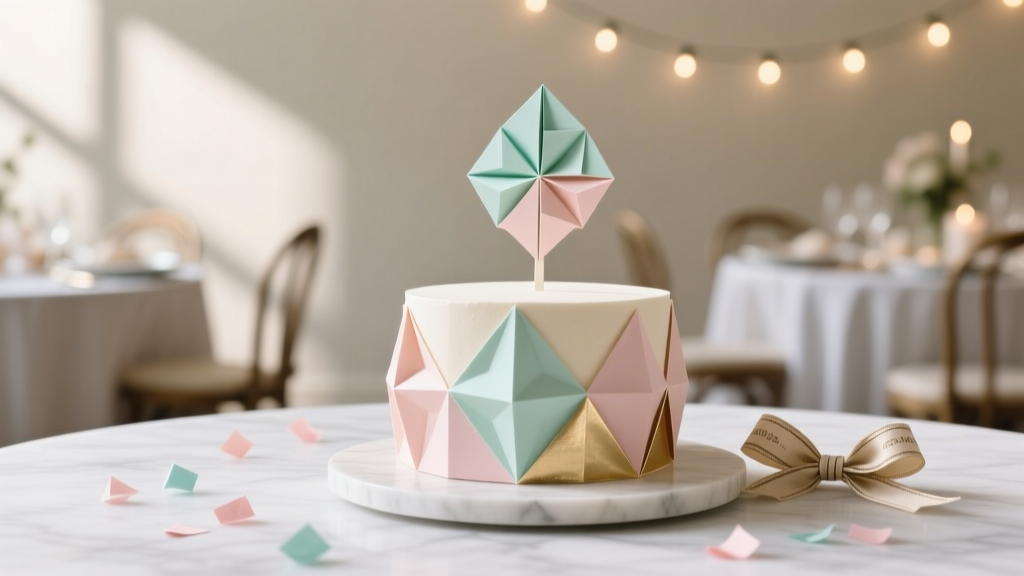
13) Origami Party Hat Accents (Mini)
Skill: Beginner | Time: 5 min each
- How: Make mini cone hats from patterned paper; add a tiny pom (tissue or yarn). Use as cupcake toppers (attach to toothpicks) or scatter on a table as confetti-style decor.
14) Origami Wreath (Door or Dessert Table)
Skill: Intermediate | Time: 60–120 min
- How: Fold 30–60 units (like leaf modules) and attach around a foam wreath form (10–12 in diameter) with pins or hot glue. Match seasonal colors for holidays and showers.
15) Origami Pine Trees (Holiday Table Scene)
Skill: Beginner | Time: 8–12 min each
- How: Fold layered triangular tree shapes from green cardstock. Use as place settings or a winter party centerpiece with mini lights.
16) Origami Lantern Wraps (Jar Sleeves)
Skill: Intermediate | Time: 15–25 min each
- How: Create a folded paper sleeve (accordion or geometric pattern) sized to wrap around a mason jar (regular mouth). Tape seam and add an LED candle. Great for patio party lighting.
17) Origami Lily Stems (Bouquet Alternative)
Skill: Intermediate | Time: 15–20 min each
- How: Fold lilies and mount on floral wire stems (use floral tape). Arrange in a vase for long-lasting handmade party decor.
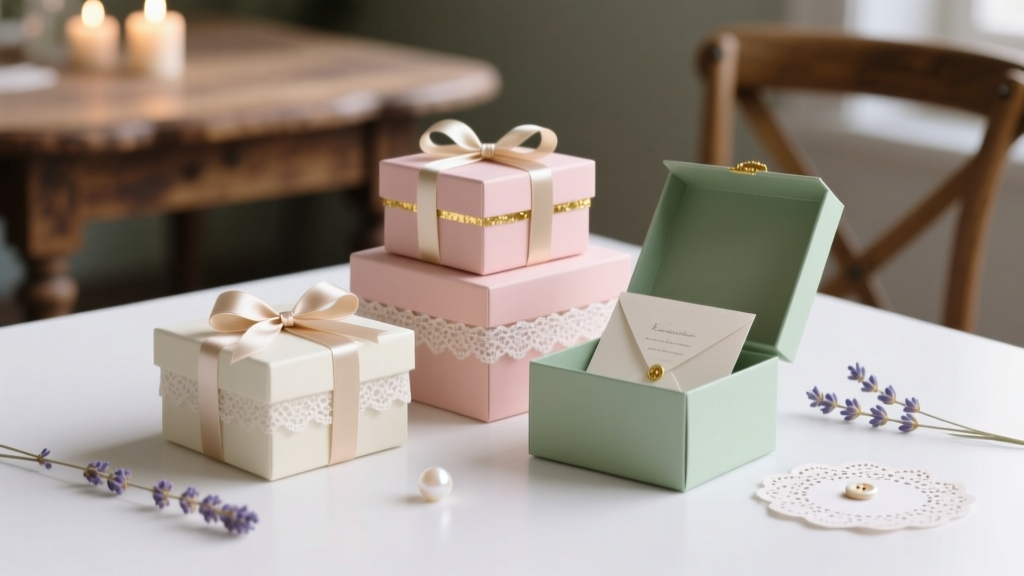
18) Origami Cube Favor Boxes
Skill: Intermediate | Time: 12–15 min each
- Measurements: 8 in x 8 in paper makes a small cube; 10 in x 10 in for slightly larger treats.
- How: Fold box base and lid; reinforce corners with thin double-sided tape if using heavier candy.
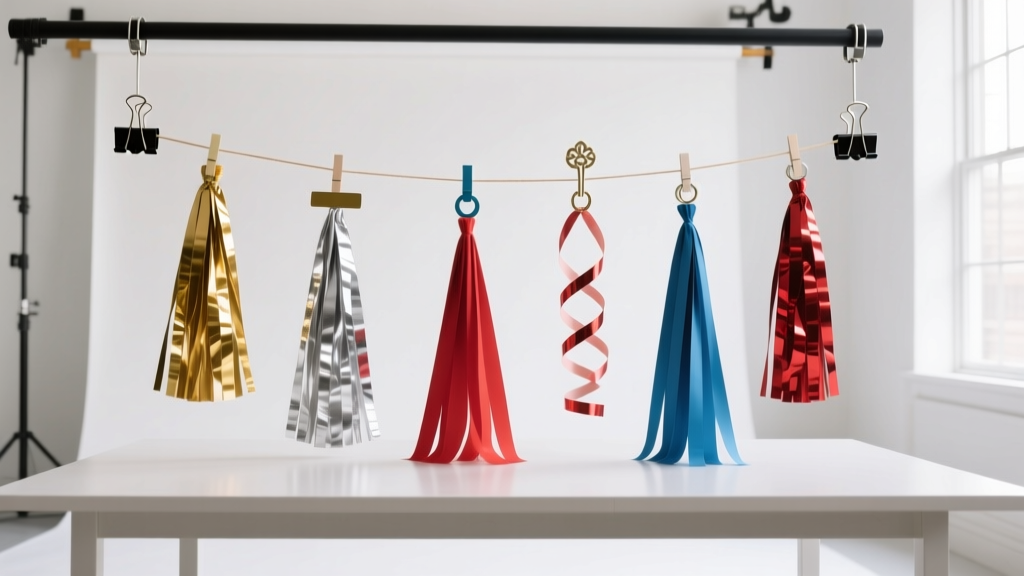
19) Origami Photo Backdrop Chains (Linked Units)
Skill: Beginner | Time: 5–8 min per link
- How: Fold identical units with pockets/tabs and link into a chain. Hang vertically in strands (6–7 ft) for a curtain-style party backdrop.
20) Origami Confetti Crunch (Folded Mini Shapes)
Skill: Beginner | Time: 30–60 min per batch
- How: Fold tiny hearts, stars, or boats from 2 in x 2 in paper. Scatter on tables or fill clear balloons. This is a low-cost way to tie party colors into every surface.
Step-by-Step: 3 Crowd-Pleasing Origami Decorations
A) Origami Fan Rosette (Beginner Backdrop Favorite)
Skill: Beginner | Time: 10–12 min | Makes: 1 rosette (about 10–12 in wide)
- Choose paper: Use two sheets of 8.5 in x 11 in (or two 12 in x 12 in for larger).
- Accordion fold: Fold along the short side in 1/2 in increments.
- Fold in half: Crease the accordion stack at the midpoint.
- Secure the center: Wrap the midpoint with a small strip of tape or a dot of hot glue.
- Create two halves: Repeat with the second sheet.
- Join into a circle: Open each half into a semicircle and glue/tape the edges together.
- Finish: Add a center circle (3–4 in) cut from cardstock. Hang with a loop of string taped to the back.
B) Lucky Stars (Easy Table Decor You Can Make While Watching TV)
Skill: Beginner | Time: 1–2 min each | Makes: dozens quickly
- Cut strips: 0.4 in x 10 in (1 cm x 25 cm). Use a ruler for consistency.
- Tie a knot: Make a loose knot near one end and flatten it into a pentagon shape.
- Wrap the tail: Wrap the long end around the pentagon edges, keeping it snug and flat.
- Tuck the end: Slide the end into a pocket to secure.
- Puff it: Gently pinch the sides to form the star points.
C) Butterfly Wall Swarm (Fast Photo-Backdrop Upgrade)
Skill: Beginner | Time: 3–5 min each | Best quantity: 20–60 butterflies
- Select sizes: Use 4 in, 5 in, and 6 in squares for depth.
- Fold a butterfly: Make symmetrical folds, then pinch the body center tightly.
- Shape wings: Curve wings upward with your fingers for a 3D look.
- Attach: Use foam dots (best) or rolled tape behind the body only—leave wings free.
- Arrange: Start dense in one corner and scatter outward like they’re flying across the wall.
Pro Tips, Variations & Troubleshooting
Pro tips for party-perfect results
- Batch fold: Do one step on all pieces before moving to the next. Faster and more consistent.
- Pick the right paper: If folds feel bulky, switch to lighter origami paper; if decor droops, upgrade to cardstock.
- Make it cohesive: Use 2 main colors + 1 accent (metallic gold/silver works for many party themes).
- Hang smart: Fishing line looks invisible for floating origami decorations; painter’s tape helps prevent wall damage.
- Transport tip: Carry finished pieces in shallow boxes with tissue paper layers to avoid crushed points.
Beginner-friendly adaptations
- Pre-cut squares: Buy a paper pack to skip measuring and cutting.
- Go bigger: Use 8 in squares instead of 4–6 in; larger folds are easier to align.
- Choose forgiving designs: fans, hearts, lucky stars, and simple boxes hide small imperfections.
Advanced variations (if you love a challenge)
- Gradient ombré garlands: Arrange colors from light to dark across a wall.
- Double-layer rosettes: Stack a smaller rosette on top of a larger one for depth.
- Kusudama cluster chandelier: Hang 3–7 balls at different heights above a dessert table.
Troubleshooting: quick fixes
- Problem: Creases won’t stay sharp.
Fix: Use a bone folder; for cardstock, score first. - Problem: Pieces look uneven or lopsided.
Fix: Slow down at corner alignment; make a single “template” piece and match it. - Problem: Modular pieces pop apart.
Fix: Add tiny dots of tacky glue at connection points; let dry 10 minutes before hanging. - Problem: Garlands twist and tangle.
Fix: Use slightly heavier string/twine and add a small bead between paper units as a spacer.
Common Crafting Mistakes to Avoid
- Using dull scissors: ragged edges show, especially on light paper. Keep one sharp pair for paper only.
- Skipping test pieces: fold one sample before mass-making 30 units—saves time and paper.
- Mixing too many patterns: busy prints can look chaotic in party decor. Balance prints with solids.
- Over-gluing: wet glue can warp paper. Use thin layers, glue sticks, or double-sided tape for cleaner results.
- Hanging too close to heat/moisture: paper can curl near candles, heaters, or humid windows. Use LED lights and place decor away from steam/food warming trays.
FAQ: Origami Decorations for Parties
1) What’s the best paper for origami party decorations?
For most DIY party decorations, start with standard origami paper (lightweight, pre-cut squares). For wall decor and large stars/rosettes, use cardstock and score your folds for clean edges.
2) How far in advance can I make origami decorations?
Most origami decorations can be made 1–3 weeks ahead. Store them flat in boxes with tissue paper layers. Avoid damp areas to prevent curling.
3) How do I hang origami without damaging the wall?
Use painter’s tape for lightweight pieces, removable adhesive hooks for garlands, and foam dots for butterflies (attach to the body only). Always test a small spot first.
4) How many origami pieces do I need for a photo backdrop?
A good starting point is 25–40 medium pieces for a 4 ft wide section, or 60–120 small pieces for a fuller wall. Combine sizes for depth and a more professional look.
5) Can kids help with these projects?
Yes. Lucky stars, hearts, and simple fans are great for kids (with supervision). Pre-cut paper squares and assign one design to keep it frustration-free.
6) What if I don’t have origami paper?
You can cut squares from scrapbook paper, wrapping paper (reinforced with a lighter backing sheet), or even printer paper. Printer paper works best for simple shapes; it’s thicker and can feel bulky in complex folds.
Wrap-Up: Make Your Party Decor Handmade and Memorable
Origami is a creative DIY craft that turns simple paper into party decorations guests actually notice. Start with one easy project—like lucky stars or fan rosettes—then level up to garlands, butterflies, and modular statement pieces as your confidence grows. A few hours of folding can transform a dessert table, a mantel, or an entire photo wall into something personal and unforgettable.
Want more handmade party decoration ideas, favor projects, and creative DIY crafts? Explore more tutorials and inspiration on smartpartyprep.com.
More Articles
 How to Enable 3rd Party Cookies in Safari (2024): The Truth No One Tells You — It’s Not Just a Toggle, and Here’s Why Your Login Failures, Analytics Gaps, and Ad Personalization Break Without This Critical Fix
 DIY Gift Boxes for Weddings
 Paper Craft Cake Toppers Ideas
 How to Enable Third Party Cookies on Safari in 2024: A Step-by-Step Guide That Actually Works (No More 'Blocked' Errors or Broken Logins)
 How to Hang Party Streamers Without Tape Marks, Sagging, or Last-Minute Panic: 7 Foolproof Methods (Tested on 37 Parties)
 When the Party Is Over Chords: The Only Complete, Beginner-Friendly Guide You’ll Ever Need (No Theory Required — Just Play in 7 Minutes)
 Personalized Slime Gifts
 Paper Craft Photo Frames Ideas
 Budget DIY Dream Catchers Under $20
 DIY Memory Books for Anniversaries