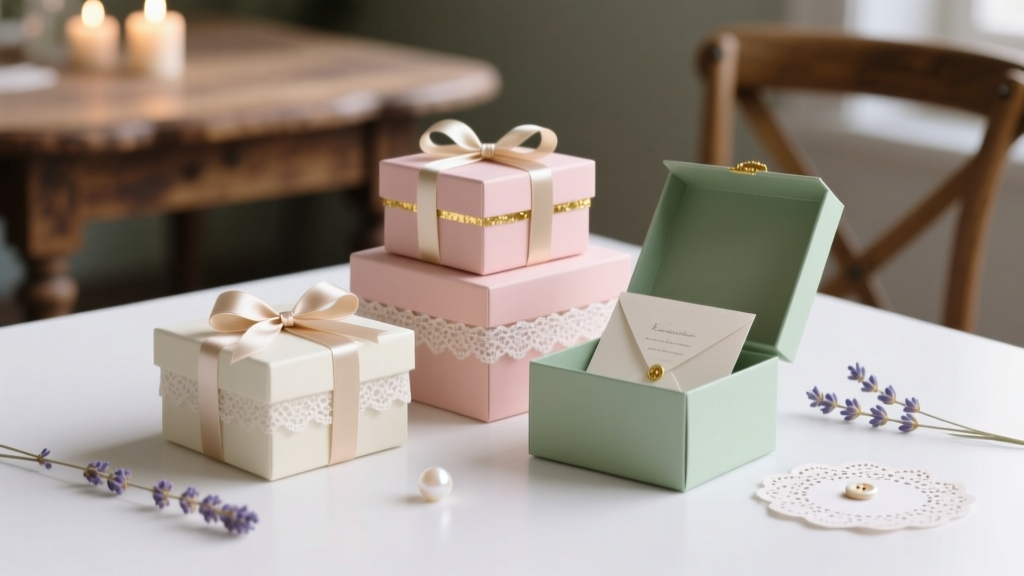
DIY Gift Boxes for Weddings
Wedding days are full of meaningful little moments—sweet favors at each place setting, a heartfelt note for your bridal party, a thank-you gift for parents, or a cozy “welcome” treat for out-of-town guests. DIY wedding gift boxes turn those moments into something personal and memorable, and they double as beautiful party decorations on your tables or welcome stations.
Even better? These handmade gift boxes can be customized to match your wedding colors, theme, and budget. Whether you want a clean modern look, rustic florals, or glam metallic accents, the same basic box-building skills can create dozens (or hundreds) of polished, professional-looking boxes.
This guide walks you through beginner-friendly methods, advanced upgrades, and practical tips to make your DIY wedding gift boxes sturdy, transportable, and camera-ready.
Project Overview: Skill Level, Time, and Best Uses
Skill level
- Beginner: Assembly using pre-made kraft or white folding boxes, simple ribbons, labels, and tissue paper.
- Intermediate: Custom wraps, belly bands, layered tags, wax seals, and simple paper flowers.
- Advanced: Building boxes from cardstock, adding windows, magnetic closures, and coordinated sets for different wedding events.
Time estimates (per box)
- Fast favor box (pre-made box + ribbon/tag): 5–10 minutes
- Custom wrapped box (wrap + belly band + decor): 12–20 minutes
- Build-from-scratch cardstock box: 20–35 minutes
Best ways to use DIY wedding gift boxes
- Wedding favors at each place setting
- Bridesmaid/groomsmen proposal boxes
- Welcome boxes for hotel guests
- Thank-you gift boxes for parents and vendors
- Dessert or treat boxes for cookie tables and send-offs
Materials List (with Product Types + Estimated Costs)
Costs vary by size, quantity, and finishes. The estimates below reflect typical craft store or online bulk pricing for 25–50 boxes.
Box base options
- Pre-made folding favor boxes (2" x 2" x 2" to 3" x 3" x 3"): $0.40–$1.25 each
- Kraft bakery boxes with tuck top (4" x 4" x 2" to 8" x 8" x 2.5"): $0.80–$2.50 each
- Rigid gift boxes with separate lid (6" x 6" x 4"): $2.50–$6.00 each
- Clear PVC favor boxes (great for candy): $0.70–$1.80 each
Papers and wraps
- Cardstock (80–110 lb) in wedding colors for tags/belly bands: $6–$15 per pack
- Text-weight decorative paper (scrapbook paper 12" x 12"): $0.50–$1.25 per sheet
- Vellum sheets for wraps and soft overlays: $8–$18 per pack
- Printed labels (full-sheet or pre-cut): $8–$16 per pack
Adhesives
- Double-sided tape runner (clean + fast): $6–$12
- Strong double-sided tape (1/4" or 3/8"): $5–$10
- Hot glue gun (low-temp recommended) + glue sticks: $10–$25
- PVA craft glue (for paper layers): $4–$8
Decorations and finishing touches
- Satin ribbon (3/8" or 5/8"): $4–$12 per roll
- Grosgrain ribbon (holds shape well): $4–$10 per roll
- Twine (rustic look): $3–$8
- Wax seal kit (optional): $15–$35
- Mini dried florals or faux sprigs (optional): $6–$20
- Foil alphabet stickers or vinyl initials: $4–$12
Tools (recommended)
- Paper trimmer (for clean edges)
- Metal ruler + craft knife (for precision cuts)
- Scoring board or bone folder (crisp folds)
- Corner rounder punch (optional, elevates tags)
- Hole punch (1/8" to 1/4")
- Self-healing cutting mat (protects surfaces)
Choose Your Box Style (Quick Guide)
Style A: Pre-made folding favor boxes (fastest)
- Best for: wedding favors, place settings
- Look: clean and consistent
- Customization: ribbon + tag + small floral accent
Style B: Kraft bakery boxes (sturdy and versatile)
- Best for: welcome boxes, treats, cookies
- Look: rustic or modern minimal
- Customization: belly band + label + tissue filler
Style C: Build-from-scratch cardstock boxes (fully customized)
- Best for: color-matched themes, unique shapes
- Look: boutique, handmade
- Customization: endless (windows, monograms, layered details)
Step-by-Step: DIY Wedding Favor Box (Pre-Made Box + Tag + Ribbon)
Finished size example: 3" x 3" x 3" favor box
Estimated time: 8 minutes per box (after you get a rhythm)
What you’ll need
- 1 pre-made favor box
- Ribbon: 5/8" wide satin or grosgrain
- Gift tag cardstock: 2" x 3" (or 2.25" x 3.5" for larger boxes)
- Double-sided tape runner or strong double-sided tape
- Hole punch
- Optional: small greenery sprig or mini dried flower
Instructions
- Assemble the box. Fold along pre-scored lines and lock tabs in place. Press edges firmly for crisp corners.
- Create your tags. Cut tags to 2" x 3". For a polished look, round the corners using a corner punch.
- Punch the hole. Punch a hole centered at the top of each tag, about 3/8" down from the edge.
- Add personalization. Write guest names, print “Thank you,” or add a monogram sticker. Let ink dry before handling.
- Fill the box. Add candy, a tea sachet, mini candle, or a small treat bag. If your item is heavy, add a bit of crinkle paper filler to prevent shifting.
- Ribbon wrap. Cut ribbon to 22" for a standard 3" box. Wrap around the box in a cross (front-to-back, then side-to-side), bring ends to the top.
- Attach the tag. Thread tag onto one ribbon tail, then tie a neat bow. Adjust loops and tails to match your style.
- Optional floral finish. Tuck a tiny sprig under the bow and secure with a dot of hot glue (use low-temp and a very small amount).
Step-by-Step: Elegant Belly Band Gift Box (Perfect for Welcome Boxes)
Finished size example: 6" x 6" x 4" rigid box or 8" x 8" x 2.5" bakery box
Estimated time: 12–18 minutes per box
What you’ll need
- Box base (rigid or bakery style)
- Cardstock strip for belly band: 2" wide and long enough to wrap around the box
- Strong double-sided tape
- Label or tag (2" circle, 2" x 3" rectangle, or 2.5" arch tag)
- Ribbon (optional): 3/8" for minimal, 5/8" for more presence
Measurements for the belly band
- Band width: 2" (classic), 2.5" (bold), 1.5" (minimal)
- Band length formula: (box width + box height) x 2 + 1" overlap
- Example (6" x 6" x 4" box): (6 + 4) x 2 + 1 = 21" long
Instructions
- Cut and score. Cut cardstock to your band width and length. Lightly score the fold points where the band turns corners (use a bone folder for clean edges).
- Wrap and test fit. Wrap the band around the box without tape first. It should be snug but not tight (tight bands can buckle).
- Secure the overlap. Add strong double-sided tape to the inside of one end and overlap by about 1". Press firmly.
- Add a focal label. Center a printed label or tag on the front. For a layered look, mount it on a slightly larger backing shape (about 1/8" border all around).
- Optional ribbon detail. Tie a thin ribbon around the belly band only (not the whole box) so guests can slide it off easily.
Step-by-Step: Build a Simple Cardstock Gift Box (Advanced, Fully Custom)
Finished size: 4" x 4" x 2" (great for small gifts or cookies)
Estimated time: 25–35 minutes per box
What you’ll need
- Cardstock: 12" x 12", 100–110 lb recommended
- Scoring board or ruler + bone folder
- Double-sided tape (strong)
- Paper trimmer
Cut and score measurements
- Start with: 12" x 12" cardstock
- Score at: 2" and 6" on all four sides (you’ll create a grid)
- This yields: base panel 4" x 4" with 2" sides
Instructions
- Score your grid. Score at 2" and 6" from each edge on all sides to form a 3x3 grid.
- Cut corner squares. Remove the four 2" x 2" corner squares (one at each corner) so the sides can fold up.
- Create glue tabs. On each side flap, cut a small tab by trimming the flap edges at a slight angle (about 1/8") to reduce bulk.
- Fold and crease. Fold along all score lines and press with a bone folder for sharp corners.
- Assemble. Apply strong double-sided tape to the tabs and attach to adjacent side walls. Hold each seam for a few seconds to bond.
- Make a lid (optional). For a lid, cut cardstock to 8-1/8" x 8-1/8" and score at 2" on all sides. Assemble like the base for a slightly looser fit.
Pro Tips for Polished, Wedding-Ready Gift Boxes
- Batch your workflow: Cut all tags first, then punch holes, then write names, then tie ribbons. Assembly lines save hours.
- Use a bow-making method: Keep bow sizes consistent by wrapping ribbon loops around two fingers or a small piece of cardboard cut to your ideal loop width.
- Choose the right adhesive: Tape runners are clean for paper; use strong double-sided tape for belly bands; reserve hot glue for florals and thicker trims.
- Keep décor proportional: On a 3" box, a 5/8" ribbon is bold; a 3/8" ribbon looks refined.
- Test one complete box: Add the real contents before mass-making to confirm fit, weight, and closure.
- Make them transport-safe: Pack finished boxes in shallow bins with non-slip shelf liner at the bottom to prevent sliding.
Creative Variations (Beginner-Friendly to Advanced)
Beginner-friendly upgrades
- Monogram sticker seal: Place on the lid or on tissue paper for a boutique feel.
- Two-tone ribbon: Layer a thin 3/8" ribbon over a 5/8" ribbon for depth.
- Simple label + twine: Perfect for rustic wedding favors and budget-friendly party decorations.
Intermediate variations
- Vellum wrap: Cut vellum to wrap around the box and secure with a small piece of double-sided tape under the overlap.
- Die-cut tag shapes: Arches, ovals, and scallops instantly elevate handmade wedding details.
- Stamped patterns: Use ink pads in your wedding colors to add a subtle pattern to kraft boxes.
Advanced variations
- Window boxes: Cut a 2" x 2.5" window in the lid and tape acetate behind it for a professional finish.
- Magnetic closure: For proposal boxes, add adhesive magnets under a wrapped cardstock flap.
- Layered paper florals: Build small blooms from cardstock and attach with hot glue for dramatic statement boxes.
Troubleshooting: Fix Common Problems Fast
- My belly band is buckling. Loosen it slightly and add score lines at corners. Use heavier cardstock (80–100 lb) for cleaner wraps.
- Ribbon bows look uneven. Trim tails after tightening the knot. Use the same ribbon length each time (pre-cut in batches).
- Glue is showing. Switch to strong double-sided tape for paper-to-paper areas. Use tiny dots of hot glue only behind thick décor.
- Boxes won’t close neatly. Reduce filler volume, reposition bulky items, or choose a deeper box. For food items, keep packaging slim.
- Tags smudge. Use quick-dry pens or print tags. If handwriting, let ink dry fully before threading ribbon.
Common Crafting Mistakes to Avoid
- Skipping a test run: Always make one complete “final” box to check sizing, color match, and how it photographs.
- Using the wrong paper weight: Lightweight paper can tear or warp. For box-building, aim for 100–110 lb cardstock.
- Over-decorating favor boxes: Too many layers can make boxes hard to open (and expensive). Choose one focal detail: ribbon, tag, or floral accent.
- Not planning quantity extras: Make 10% more than you need for last-minute guests and any accidental damage.
- Waiting too long to assemble: If you’re handwriting names, schedule it early—hand-lettering always takes longer than expected.
FAQ: DIY Wedding Gift Boxes
How far in advance can I make wedding favor boxes?
You can assemble the boxes and decorations 2–4 weeks ahead. Add perishable items (cookies, chocolate, fresh treats) as close to the wedding as possible—typically 1–3 days before, depending on freshness and packaging.
What’s the best adhesive for DIY paper crafts like gift boxes?
For clean, fast results, use a tape runner for paper layers and strong double-sided tape for structural seams and belly bands. Use low-temp hot glue for thicker trims like florals, twine knots, and ribbon clusters.
How do I keep handmade gift boxes consistent when making a lot?
Use a simple “assembly line” setup: pre-cut all paper pieces, pre-punch all tags, and pre-cut ribbon to the same length. A paper trimmer and scoring board will keep measurements consistent across your batch.
What size gift box works best for welcome bags or hotel gifts?
A box around 8" x 8" x 2.5" (bakery style) is a sweet spot for snacks, a mini water bottle, itinerary card, and a small local treat. For larger items (like a full-size candle), choose 10" x 10" x 4" or a medium rigid box.
Can I use DIY gift boxes as table decorations too?
Yes—favor boxes at each place setting look intentional and elevate your wedding reception décor. Coordinate colors with your linens and florals, and consider adding name tags so each box doubles as a place card.
What are budget-friendly ways to make wedding gift boxes look expensive?
Stick with kraft or white boxes, then add one premium detail: a crisp satin ribbon, a monogram sticker, or a vellum wrap. Keeping the design minimal and consistent often looks more high-end than adding lots of different embellishments.
Wrap-Up: Your Wedding, Your Handmade Details
DIY gift boxes for weddings are one of those satisfying projects that feel both creative and practical—you’ll save money, add personality to your celebration, and create party decorations that guests actually take home. Start with a simple box-and-ribbon design, then level up with belly bands, labels, and coordinated color palettes as you go.
Make one “perfect sample” first, set up a comfy crafting station, and enjoy the rhythm of assembly. Your future self (and your wedding photos) will thank you.
Want more handmade party ideas? Explore more DIY crafts, wedding décor projects, and celebration prep inspiration on smartpartyprep.com.
More Articles
 How to Make Paper Lanterns at Home
 How to Install 3rd Party Apps on LG Smart TV (2024): The Only Safe, Step-by-Step Method That Actually Works — No Hacks, No Bricking, No Developer Mode Confusion
 DIY Pressed Flower Art Party Favors
 DIY Soap Bars with Dollar Store Supplies
 Budget DIY Place Cards Under $50
 What Is Party Craft? (And Why Your Next Celebration Doesn’t Need Store-Bought Decor — Here’s the Real, Low-Stress, High-Joy Definition Most People Get Wrong)
 DIY Painted Rocks Using Cricut
 Easy Custom Stickers for Beginners
 Budget DIY Table Runners Under $20
 DIY Balloon Arches in 30 Minutes