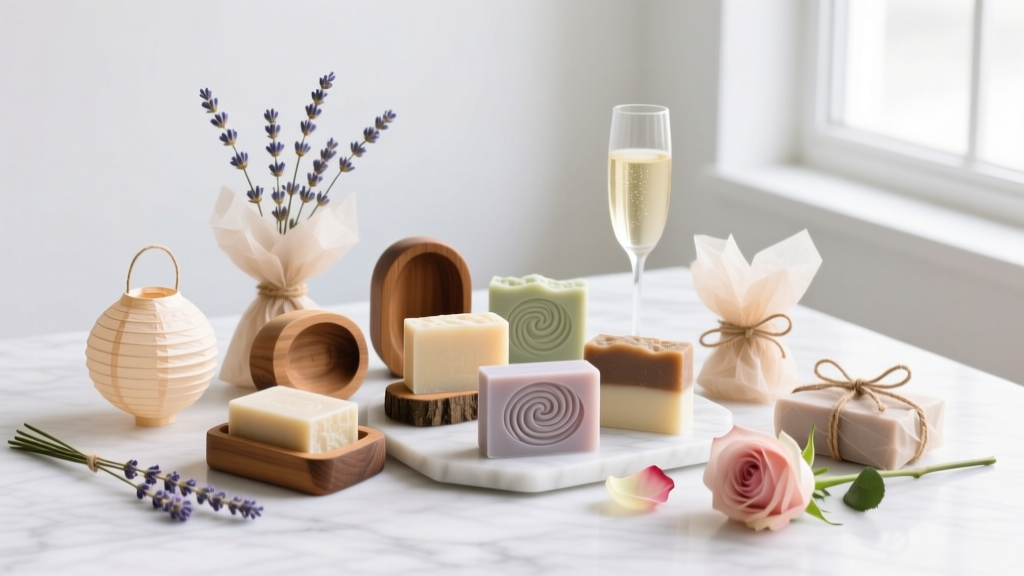
DIY Soap Bars with Dollar Store Supplies
Handmade soap bars are one of those DIY crafts that feel extra special without being complicated. With a few dollar store supplies, you can create colorful, good-smelling soap that doubles as a practical party favor, a cute bathroom decoration, or a thoughtful hostess gift. If you love party-related projects—like themed tablescapes, gift bags, and handmade decorations—this one checks all the boxes.
What makes this project so satisfying is the instant payoff. You melt, mix, pour, and (after a short set time) you’re holding a finished soap bar that looks like it came from a boutique. Plus, you can customize everything: color scheme, scent, shapes, and even the packaging to match birthdays, baby showers, bridal showers, holidays, and “just because” gatherings.
Whether you’re a beginner looking for a low-mess craft or an experienced DIY enthusiast ready to level up with swirls and embeds, dollar store soap making is a smart, budget-friendly way to create handmade party favors that guests will actually use.
Project Overview: Skill Level, Time & What You’ll Make
- Skill level: Beginner (with optional advanced upgrades)
- Active time: 20–35 minutes
- Set time: 1–3 hours (varies by base and mold size)
- Total time: About 2–4 hours including cooling
- Yield: Typically 4–8 small bars (depending on mold size)
You’ll be making melt-and-pour soap bars, which is ideal for party crafts because there’s no lye handling, minimal equipment, and quick results.
Dollar Store Materials List (with Estimated Costs)
Prices vary by location, but this list is designed to keep your DIY soap bars affordable while still looking polished enough for party decorations and favors.
Soap-Making Supplies
- Melt-and-pour soap base (clear or white) – 1–2 lb total for a small batch (often found at craft sections; if not available, check discount craft stores) – $3–$8
- Silicone molds (cupcake molds, candy molds, or soap molds) – $1.25–$5
- Liquid soap colorant or food coloring (use sparingly) – $1.25–$3
- Fragrance oil (craft fragrance) or essential oil (if available) – $1.25–$6
- Rubbing alcohol in a small spray bottle (helps remove bubbles and helps layers stick) – $1.25–$3
Mix-Ins & Decorative Add-Ons (Optional but Fun)
- Dried flowers (tiny amounts) – $1.25–$4
- Oatmeal (gentle exfoliation) – $1.25
- Honey (a few drops) – $1.25–$4
- Cosmetic-grade glitter (if you can find it; otherwise skip) – $1.25–$4
- Party sprinkles look-alikes: Avoid edible sprinkles (they can melt/bleed). Choose safe, cosmetic-friendly additions only.
Tools You’ll Need
- Microwave-safe measuring cup (glass is best) – $1.25–$4
- Silicone spatula or craft stick for stirring – $1.25–$3
- Kitchen scale (helpful, optional) – $10–$15
- Knife for cutting soap base into cubes – already at home
- Parchment paper or a tray for transporting molds – $1.25–$3
Packaging for Party Favors
- Cellophane treat bags or plastic wrap – $1.25–$3
- Ribbon/twine – $1.25–$3
- Gift tags or cardstock to DIY labels – $1.25–$3
- Stickers (theme colors) – $1.25–$3
Before You Start: Safety & Setup
- Keep it food-safe separate: Don’t reuse soap-making tools for food afterward.
- Protect surfaces: Cover your work area with parchment paper or a disposable tablecloth.
- Work in a ventilated area: Some fragrances can be strong.
- Soap base gets hot: Use oven mitts and stir carefully.
Step-by-Step: How to Make DIY Soap Bars (Dollar Store Method)
Step 1: Choose Your Party Theme & Mold Size
Start with your event colors and vibe—this helps you avoid overbuying supplies and keeps the finished bars cohesive with your party decorations.
- Baby shower: clouds, stars, pastel blocks
- Bridal shower: floral, pearl white, soft pink
- Birthday party: bright layers, confetti-style embeds
- Holiday party: red/green layers, gold accents, peppermint scent
Step 2: Cut and Measure Your Soap Base
Cut the melt-and-pour soap base into small cubes so it melts evenly.
- Basic measurement: Plan about 2–3 oz (56–85 g) of soap base per standard guest-favor bar.
- Batch suggestion: Start with 1 lb (16 oz) soap base for a small party batch.
Step 3: Melt the Soap Base
- Place soap cubes into a microwave-safe measuring cup.
- Microwave in 15–20 second bursts, stirring between each round.
- Stop heating when it’s mostly melted; stir until smooth.
Target temperature: roughly 125–140°F (warm and fully liquid, not boiling). Overheating can cause sweating, bubbles, or a rubbery texture.
Step 4: Add Color (Slowly)
Color can intensify as it cools, so start tiny.
- Add 1–2 drops of liquid colorant, stir, and adjust.
- For a soft pastel: try 1 drop per 4 oz base.
- For bold color: increase gradually, mixing thoroughly each time.
Step 5: Add Fragrance
A little fragrance goes a long way, especially for party favors.
- Beginner-friendly guideline: 10–20 drops fragrance oil per 8 oz soap base.
- Stir gently to avoid extra bubbles.
Step 6: Pour into Molds
- Place molds on a tray so you can move them without spills.
- Pour slowly into each cavity.
- Spritz the top with rubbing alcohol to pop surface bubbles.
Step 7: Add Mix-Ins (Optional)
If you’re adding dried flowers or oatmeal, less is more—too much can make soap crumbly or scratchy.
- Dried flowers: Use 1/8–1/4 tsp per bar, and press them lightly into the top after pouring.
- Oatmeal: Use 1/4 tsp per 3 oz soap for gentle exfoliation.
Spritz once more with rubbing alcohol to help toppings settle and reduce bubbles.
Step 8: Let Set, Then Unmold
- Leave soaps undisturbed at room temperature for 1–3 hours.
- For faster setting, place them in the fridge for 20–30 minutes (avoid the freezer; it can cause cracking or sweating).
- Gently peel the mold away from the soap to release.
Pro Tips for Party-Perfect Handmade Soap Bars
- Keep a consistent size: For party favors, matching bars look more professional on a display table.
- Use rubbing alcohol for layers: Spritz between layers so they stick instead of separating.
- Pour at the right moment: If soap is too hot, it can warp molds and create more bubbles; if too cool, it may clump or form a skin.
- Label your scents: A small tag that says “Lavender Vanilla” or “Citrus Mint” elevates the favor instantly.
- Match your party decorations: Coordinate ribbon color, tag shape, and label fonts with your party theme for a cohesive look.
Easy Variations (Beginner-Friendly)
1) Simple Two-Tone Layers
- Pour the first color to fill the mold halfway.
- Let it cool until the top is set but still slightly tacky (about 10–15 minutes depending on room temp).
- Spritz with rubbing alcohol.
- Pour the second color on top.
2) Confetti Soap (Great for Birthdays)
- Make a small batch of brightly colored soap first, let it set, then cut into tiny cubes.
- Mix the cubes into a clear base and pour.
3) Oat & Honey “Spa Favor” Bars
- Add 1/4 tsp oatmeal per bar.
- Add 2–3 drops honey per 8 oz base (too much can soften soap).
Advanced Variations (For Experienced Crafters)
Swirl Design (Two Colors)
- Prepare two cups of melted soap in different colors.
- Pour both colors into the mold at the same time from opposite sides.
- Use a toothpick or skewer to gently swirl once or twice (don’t overmix).
Embed Shapes (Stars, Hearts, Mini Flowers)
- Pour a small amount of soap into mini molds and let set.
- Unmold embeds, place them in larger molds.
- Pour clear base over embeds and spritz with alcohol.
Troubleshooting: Quick Fixes for Common Soap Issues
- Lots of bubbles on top: Spritz rubbing alcohol immediately after pouring; stir more gently next time.
- Soap layers separating: Always spritz alcohol between layers; pour the next layer when the first is set but still slightly warm.
- Soap “sweating” (glycerin dew): Common in humid climates. Wrap soaps tightly in plastic wrap once fully cool.
- Cloudy clear soap: Overheating can cause haze; melt in short bursts and avoid boiling.
- Soft bars: Too much added liquid (like excess honey or fragrance). Keep add-ins small and measure carefully.
Common Crafting Mistakes to Avoid
- Using edible glitter or edible sprinkles: They can bleed color, melt, or create a sticky surface. Stick to cosmetic-safe add-ins.
- Overheating the soap base: Boiling creates bubbles, texture issues, and can dull fragrance.
- Adding too many botanicals: Dried flowers can turn brown over time or feel scratchy. Use tiny amounts and consider “top-only” decoration.
- Pouring too fast: Fast pouring traps air and creates uneven tops.
- Skipping packaging: Unwrapped soaps attract moisture and scuffs. Wrapping makes them party-ready and giftable.
Packaging Ideas for Party Favors & Decor Displays
- Classic favor wrap: Plastic wrap + ribbon + tag with scent name and event date.
- Treat bag style: Slip soap into a clear cellophane bag and seal with a themed sticker.
- Mini “spa kit” favor: Pair a soap bar with a dollar store loofah or mini hand towel for a wow-factor favor table display.
- Decor idea: Stack wrapped soaps in a small crate or tray as part of your party bathroom basket or guest refresh station.
FAQ: DIY Soap Bars with Dollar Store Supplies
1) Can I make these soaps without a microwave?
Yes. Use a double boiler setup: place the soap base in a heat-safe cup or bowl over a pot of gently simmering water. Stir until melted and smooth.
2) How far in advance can I make soap party favors?
You can make melt-and-pour soap favors 1–4 weeks ahead. Once fully cooled, wrap each bar tightly to prevent sweating and store in a cool, dry place away from sunlight.
3) Is food coloring okay for melt-and-pour soap?
It can work in a pinch for simple projects, but use it sparingly—too much can bleed or stain. If your dollar store has craft colorant, that’s the better pick for DIY crafts meant as gifts.
4) Why did my soap turn out rubbery or tough?
This usually happens from overheating. Melt slowly in short bursts and stir often. Also avoid adding too many extras (like honey or heavy fragrance loads).
5) What’s the best mold for beginners?
Silicone molds are the easiest to unmold cleanly. Cupcake silicone molds from the dollar store are a great starter option and make cute party favor sizes.
6) Can kids help with this project?
Kids can help choose colors, pick scents, and decorate with safe toppings, but an adult should handle melting and pouring because the soap base gets hot.
Ready to Make Your Own Handmade Soap Bars?
DIY soap bars are a creative, budget-friendly way to add a handmade touch to party decorations and favor tables. Start simple with one color and one scent, then try layers, swirls, and embed shapes as you get comfortable. Even a small batch can make your event feel more personal—and guests love taking home something practical and pretty.
Have fun experimenting with themes, colors, and packaging, and keep your next celebration stocked with easy handmade projects. Stop by smartpartyprep.com for more DIY craft ideas, party decorations, and creative party-prep inspiration.
More Articles
 Is Levels Protein Third Party Tested? We Investigated Every Batch Report, Lab Certificate, and FDA Compliance Record So You Don’t Have to Waste Money on Unverified Supplements
 How to Install 3rd Party Apps on LG Smart TV (2024): The Only Safe, Step-by-Step Method That Actually Works — No Hacks, No Bricking, No Developer Mode Confusion
 Seasonal Photo Frames Ideas
 Kids' Craft: T-Shirts (Party-Perfect DIY Shirts Kids Can Make)
 Step-by-Step Paper Flowers Tutorial
 DIY Mugs for Home Decor
 Budget DIY Wreaths Under $25
 How Do I Unblock Third Party Cookies? (2024 Step-by-Step Guide for Chrome, Safari, Firefox & Edge — No Tech Degree Required)
 How to Make Confetti at Home
 Modern Paper Lanterns Designs