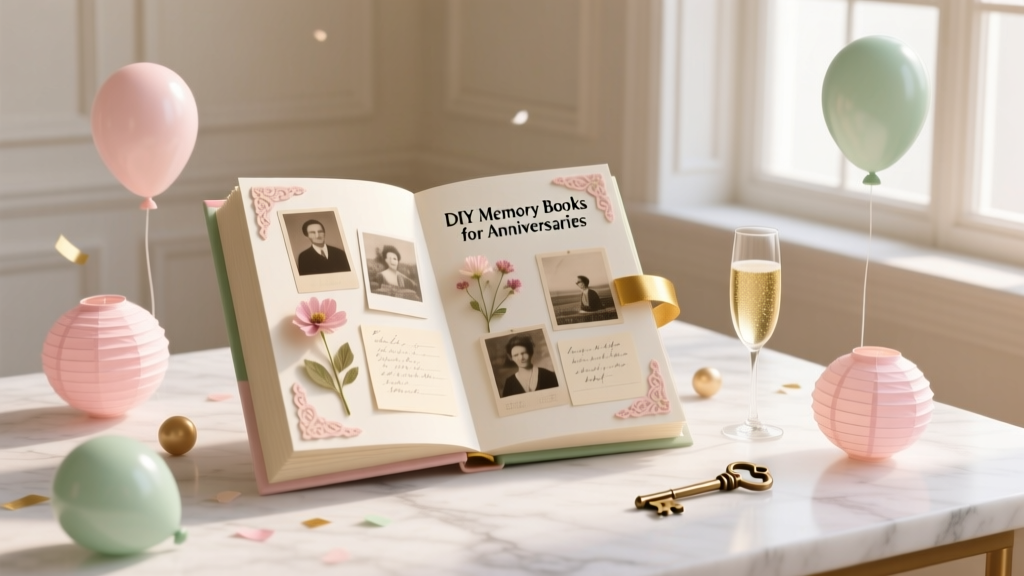
DIY Memory Books for Anniversaries
Anniversaries deserve more than a quick toast and a phone photo dump. A DIY memory book turns your favorite moments into something you can actually hold, flip through, and bring out at parties year after year. It’s part scrapbook, part love letter, and part party decoration—especially when you style it on a dessert table or gift table with a few candles and framed photos.
This project is also wonderfully flexible. You can keep it beginner-friendly with simple printed photos and journaling cards, or go all-out with layered paper, pockets, and interactive elements. Either way, you’ll end up with a handmade keepsake that feels personal—and looks impressive.
Best of all, making an anniversary memory book is a feel-good craft session you can do solo, with your partner, or as a party activity with friends and family. Put on music, gather your supplies, and let the storytelling begin.
Project Overview: Skill Level, Time, and Finished Size
- Skill level: Beginner to Intermediate (Advanced options included below)
- Total time: 2–6 hours depending on detail level (spread across a weekend is perfect)
- Finished size options:
- 8.5" x 11" (great for standard photo prints and lots of journaling)
- 8" x 8" (classic scrapbook feel; compact and cute for party tables)
- 6" x 8" (easy, giftable, and quick to fill)
Materials List (With Product Types and Estimated Costs)
Costs vary by brand and what you already have. These estimates assume you’re buying most items new.
Base Book Options (Choose One)
- Post-bound scrapbook album (8.5" x 11" or 12" x 12") – $15–$35
- 3-ring binder + page protectors (8.5" x 11") – $10–$25
- Blank hardbound sketchbook (at least 60 pages, thick paper) – $12–$30
- Disc-bound notebook system (expandable pages) – $20–$45
Papers & Adhesives
- Cardstock (80–110 lb, assorted colors) – $8–$15
- Patterned paper pad (coordinated designs) – $10–$20
- Acid-free photo-safe tape runner – $6–$12
- Liquid glue (quick-dry, craft) – $4–$8
- Foam adhesive squares (for dimension) – $4–$8
- Photo corners (optional, vintage look) – $4–$10
Photos & Printing
- Printed photos (4" x 6" or collage sheets) – $0.20–$0.50 per print
- Optional: Sticker paper for captions – $8–$15
Tools (Recommended)
- Paper trimmer (12" preferred) – $15–$35
- Precision scissors – $6–$15
- Craft knife + self-healing mat (advanced, for windows/pockets) – $10–$25
- Corner rounder punch (optional, polished look) – $6–$15
- Hole punch (if using binder/disc system) – $8–$25
- Ruler (metal is best) – $5–$12
- Pencil + eraser
Decor (Pick What Fits Your Theme)
- Washi tape (2–4 rolls) – $6–$15
- Letter stickers (titles) – $5–$12
- Die cuts or ephemera packs – $6–$15
- Ribbon or twine – $3–$8
- Envelope/pocket templates or ready-made pockets – $4–$12
- Optional party extras: mini tags, vellum, confetti accents – $3–$10
Planning Your Anniversary Memory Book (Before You Glue Anything)
A little planning makes your DIY memory book feel cohesive—like a polished handmade project rather than a pile of pretty paper.
1) Pick a Story Structure
- Timeline: Year-by-year highlights
- Chapters: “How We Met,” “Trips,” “Home,” “Family,” “Traditions”
- Party-style: “Best Moments,” “Funniest Moments,” “Reasons I Love You,” “Guests’ Notes”
2) Choose a Color Palette (3–5 Colors)
Try anniversary-inspired palettes that work beautifully with party decorations:
- Classic: Black + white + gold
- Romantic: Blush + cream + rose gold
- Modern: Navy + silver + eucalyptus green
- Rustic: Kraft brown + ivory + burgundy
3) Curate Photos (Don’t Use Every Photo)
- Start with 25–60 photos for a 10–20 page book.
- Include a mix of:
- Close-ups (faces)
- Wide shots (venues, trips, home)
- Details (rings, invitations, menus, outfits)
Step-by-Step: How to Make a DIY Memory Book for an Anniversary
Step 1: Prep Your Pages
Time: 20–40 minutes
- Decide your page size (example: 8" x 8").
- If using a post-bound album, confirm how many page protectors you have and plan for 10–20 page layouts (a “layout” is often two facing pages).
- Cut background cardstock to size:
- For an 8" x 8" album, cut cardstock to 8" x 8".
- If using page protectors, keep pages 1/8" smaller (e.g., 7 7/8" x 7 7/8") for easier sliding.
Step 2: Create a Simple Page Formula (So Every Page Looks Good)
Time: 10–15 minutes
Use a repeatable recipe. Here are two beginner-friendly formulas:
- Formula A (clean and quick): 1 large photo + 1 title strip + 3–5 lines journaling
- Formula B (classic scrapbook): 2 photos + a patterned paper block + a small embellishment cluster
Step 3: Print and Trim Photos
Time: 30–60 minutes
- Standard photo sizes that work well:
- 4" x 6" (classic)
- 3" x 4" (great for collages)
- 2" x 3" wallet prints (perfect for mini grids)
- Trim with a paper trimmer for crisp edges.
- Optional: round corners with a corner punch for a soft, finished look.
Step 4: Assemble Each Page (Dry Fit First)
Time: 5–15 minutes per page
- Lay your background paper down.
- Place photos without adhesive first (dry fit).
- Add mats behind photos for contrast:
- Cut photo mats 1/8" to 1/4" larger than the photo on all sides.
- Example: for a 4" x 6" photo, cut a mat to 4 1/4" x 6 1/4".
- Add a title strip:
- Cut a strip about 1" x 6" (adjust to your page size).
- Use letter stickers or hand lettering with a fine-tip pen.
- When it looks balanced, adhere:
- Use a tape runner for flat items.
- Use foam squares behind one element per page for subtle dimension.
Step 5: Add Journaling and Keepsake Details
Time: 2–8 minutes per page
- Write short captions:
- Date + place
- A one-sentence memory (“We laughed the entire drive home.”)
- A meaningful quote or inside joke
- Include party-related keepsakes if you have them:
- Invitation, menu, or vow renewal program (trim to fit)
- Restaurant receipt (photocopy it to prevent fading)
- Pressed flower (seal in a pocket or under vellum)
Step 6: Make Interactive Elements (Optional, but So Fun)
Time: 20–45 minutes
- Pocket page: Create a pocket from cardstock:
- Cut 6" x 4 1/2" cardstock.
- Score 1/2" on three sides, fold, and glue tabs.
- Add a thumb notch by punching a 1" circle halfway into the top edge.
- Flip-up photo: Use washi tape as a hinge along the top edge of a photo.
- Pull-out timeline card: Slide a journaling card into a pocket labeled “Our Year in Review.”
Step 7: Finish the Cover and Spine
Time: 20–40 minutes
- Add a cover title:
- “10 Years of Us”
- “Our Story”
- “Anniversary Memories”
- Attach a ribbon closure:
- Use 3/8" to 5/8" ribbon.
- Cut two pieces about 18" each, glue ends under the inside cover lining.
- Optional: Add a shaker element or vellum overlay for an advanced, party-worthy look.
Pro Tips for a Polished, Party-Ready Memory Book
- Keep embellishments flatter near the spine so pages turn easily; add dimension toward the outer edges.
- Use odd numbers for embellishment clusters (3 pieces usually looks best).
- Repeat 2–3 design elements throughout (same washi tape, same title font, same color accents) for a cohesive handmade project.
- Photo-safe supplies matter: look for “acid-free” and “lignin-free” on papers and adhesives.
- Party display idea: set the book open on a stand with a “Our Favorite Moments” sign and pens nearby for guests to add notes on inserts.
Creative Variations (Beginner-Friendly to Advanced)
Beginner: Minimalist Memory Book
- One photo per page
- One caption block (use pre-cut journaling cards)
- Washi tape borders instead of layered paper
Intermediate: Theme-Based Anniversary Album
- Color palette matching your anniversary party decorations
- Pockets for notes and small keepsakes
- Two-page spreads: left page photos, right page journaling + quotes
Advanced: Interactive “Party Guestbook” Memory Book
- Add envelopes for guests to tuck in advice cards
- Include a “Guess the Year” trivia section with flaps that reveal answers
- Use stitched details (hand-stitch or sewing machine) on paper layers
Troubleshooting: Fix Common DIY Memory Book Problems
- Pages won’t lie flat: You may have too many bulky embellishments. Remove thickness near the spine, or move to a larger binder/disc system.
- Wrinkled photos: Too much liquid glue. Switch to a tape runner or use glue sparingly and spread thinly.
- Paper peeling up: Oils from hands or dusty paper can reduce adhesion. Wipe surfaces lightly with a clean, dry cloth and re-adhere with stronger double-sided tape.
- Ink smudging: Use an archival fine-liner pen and let journaling dry before closing the book. Test pens on cardstock first.
- Design feels messy: Reduce patterns. Stick to one patterned paper per page plus solids, and leave a little “breathing room.”
Common Crafting Mistakes to Avoid
- Skipping the dry fit: Always arrange first, then glue. It prevents awkward spacing and crooked titles.
- Overcrowding the page: Every page doesn’t need every supply. Let photos be the star.
- Using non-photo-safe materials: Avoid random school glue, acidic paper, or unknown adhesives if you want this keepsake to last.
- Not leaving room for journaling: Captions are what transform a scrapbook into a true memory book.
- Forgetting about thickness: Puffy stickers and heavy chipboard add up fast. Balance bulky pages with simpler ones.
FAQ: DIY Anniversary Memory Books
How many pages should an anniversary memory book have?
For a satisfying keepsake without feeling overwhelming, aim for 10–20 pages (or 5–10 two-page spreads). If you’re including guest notes from an anniversary party, add 5 extra pages or pockets.
What’s the best album type for beginners?
A 3-ring binder with page protectors is the most forgiving. You can rearrange pages, add more later, and protect photos easily—great for beginner DIY crafts.
How do I make my memory book match our anniversary party decorations?
Choose a palette that matches your party theme (napkins, balloons, table runner) and repeat it in your patterned paper, washi tape, and title stickers. Even simple pages look coordinated when the colors match.
Can I include original keepsakes like tickets or dried flowers?
Yes—use pockets or place items behind vellum. For delicate items (receipts, flowers), consider adding a photocopy or photo of the item as a backup.
What if I don’t have enough printed photos?
Mix in journaling cards, printed quotes, and “story pages” like “Our Favorite Meals,” “Songs from Our Year,” or “Top 10 Moments.” You can also print photo collages to fit more memories on fewer pages.
How do I keep the pages from getting too bulky?
Limit 3D embellishments to one raised element per page, keep chipboard away from the spine, and alternate thicker interactive pages with flatter photo-only pages.
Wrap-Up: Make One Memory Book Now, Add to It Every Year
A DIY memory book is one of those handmade projects that keeps getting better with time. Each page becomes part of your celebration—something to bring out during anniversaries, display at a party, and pass around while everyone shares stories.
Start simple, focus on your favorite moments, and let the book grow as you do. You’ve got everything you need to make it meaningful—one photo, one caption, one page at a time.
Want more party-ready DIY crafts, handmade decorations, and creative celebration ideas? Explore more projects on smartpartyprep.com and keep the inspiration going.
More Articles
 Personalized Confetti Gifts
 How to Make Tents for a Slumber Party: 7 No-Sew, Budget-Friendly Ideas That Take Under 20 Minutes (Plus Pro Tips to Keep Them Standing All Night!)
 How to Make Party in Infinity Craft: 7 Foolproof Steps (No Modding Skills Needed) + Free Blueprint Pack for Instant Build-Ready Celebrations
 Kids' Craft: T-Shirts (Party-Perfect DIY Shirts Kids Can Make)
 DIY Greeting Cards Party Favors
 DIY Painted Canvas for Weddings
 How to Make Dream Catchers at Home
 DIY Confetti in 30 Minutes
 Advanced Coasters for Crafters
 Modern Wall Art Designs (DIY Party-Ready Decor You Can Make at Home)