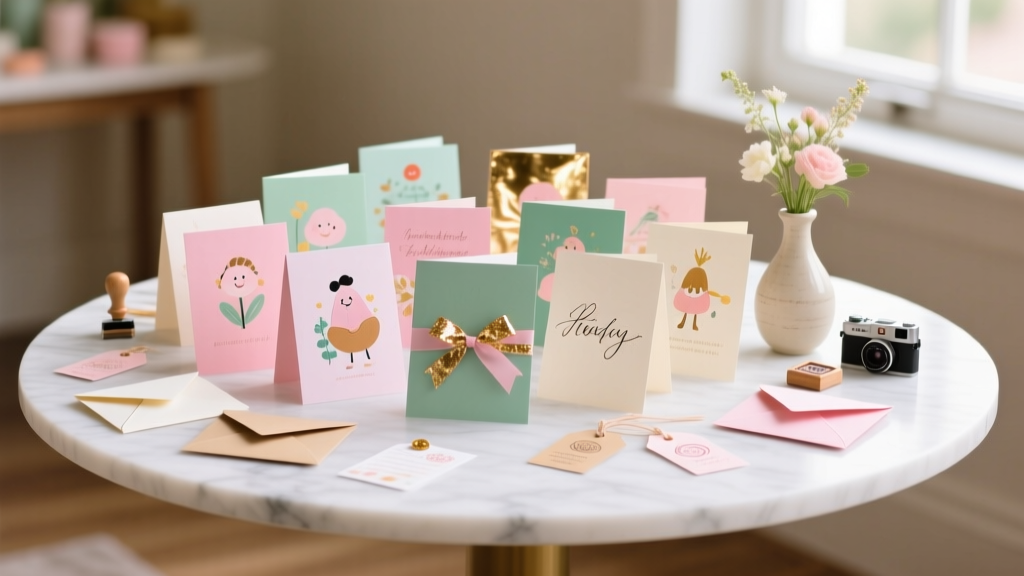
DIY Greeting Cards Party Favors
Handmade greeting cards are already a thoughtful gift—but when you turn them into party favors, they become a keepsake guests actually want to take home. Whether you’re hosting a birthday, baby shower, bridal shower, graduation, or holiday gathering, DIY greeting card favors add color to your party décor and give everyone a personal moment to remember.
This project is especially fun because it’s flexible: you can keep it beginner-simple with patterned paper and stickers, or level up with embossing, vellum overlays, and custom cutouts. Best of all, you can batch-make a full set of favors in an afternoon and coordinate them with your party theme—think pastel florals, disco glam, rustic kraft, or bright confetti.
Below you’ll find a practical, step-by-step guide (with measurements, time estimates, and troubleshooting) to create greeting cards that double as party favors—complete with optional treat inserts, mini envelopes, and display ideas that look amazing on a favor table.
Project Overview
- Skill level: Beginner (basic cutting + gluing) to Advanced (die-cutting, heat embossing, layered designs)
- Time estimate:
- Per card: 10–20 minutes (simple)
- Batch of 12: 2–3.5 hours (including prep + drying time)
- Finished size options:
- A2 card (classic): 4.25" x 5.5"
- Mini favor card: 3" x 4" (great for place settings)
- Party uses: favor table display, place cards, thank-you notes, treat holders, photo-booth companion notes
Materials & Tools (With Estimated Costs)
Costs vary by brand and what you already have. These estimates are typical for craft store or online bundles.
Paper & Card Bases
- Cardstock (heavyweight 80–110 lb): 12" x 12" or 8.5" x 11" sheets, $8–$15 per pack
- Pre-made blank cards + envelopes (A2): set of 25–50, $10–$18
- Patterned paper (6" x 6" pad): $6–$12
- Kraft cardstock (optional, rustic look): $7–$12
Adhesives
- Tape runner or permanent adhesive: $6–$12
- Liquid craft glue (fine-tip): $3–$7
- Foam adhesive squares/dots (dimension): $3–$8
- Double-sided tape (strong hold for vellum/ribbon): $4–$8
Decor & Finishing Supplies
- Stickers or sentiment labels: $3–$8
- Washi tape (theme colors): $4–$10
- Ribbon or twine (1/8"–3/8" width): $4–$9
- Confetti or sequins (optional): $4–$10
- Mini clothespins or favor clips (display): $5–$10
- Clear cellophane sleeves (A2): pack of 50, $7–$15
Optional “Favor” Add-Ons
- Tea bag, instant coffee packet, or hot cocoa packet: $0.25–$1.00 each
- Mini candy (2–4 pieces): $0.20–$0.80 per card
- Seed packet (wedding/bridal showers): $0.50–$2.00 each
- Scratch-off ticket or mini game card: varies
Tool Recommendations
- Paper trimmer (preferred for clean edges): $15–$35
- Scissors (detail + general): $5–$15
- Bone folder or scoring tool: $5–$12
- Corner rounder punch (optional): $6–$15
- Hole punch (1/8" or standard): $4–$10
- Self-healing cutting mat + craft knife (advanced option): $15–$35
Choose Your Party Favor Card Style
Pick one style for the whole party (fastest), or mix two coordinating designs for a “mini collection” look.
Style A: Classic A2 Card Favor (Most Versatile)
- Looks like a real greeting card
- Fits a short handwritten message
- Easy to package in a clear sleeve with a treat
Style B: Mini Place-Setting Favor Card (Cute + Quick)
- Small, table-friendly, and affordable
- Works as a place card + favor combo
- Great for showers, brunches, kids’ parties
Style C: Pocket Card Favor (Treat Holder)
- Includes a built-in pocket for tea/candy
- More “wow” factor without needing special machines
Step-by-Step: Make DIY Greeting Cards That Double as Party Favors
Step 1: Pick Your Card Size & Cut the Base
Option 1 (A2 size):
- Cut cardstock to 8.5" x 5.5".
- Score at 4.25" on the long side.
- Fold to create a 4.25" x 5.5" card.
Option 2 (Mini size 3" x 4"):
- Cut cardstock to 6" x 4".
- Score at 3" on the 6" side.
- Fold to create a 3" x 4" mini card.
Tool tip: A paper trimmer gives straighter edges than scissors—especially helpful when batch-making party favors.
Step 2: Add a Front Panel (Fast Theme Matching)
- Cut patterned paper slightly smaller than the card front:
- For A2: 4" x 5.25"
- For mini: 2.75" x 3.75"
- Attach using a tape runner for a smooth, wrinkle-free finish.
Why the smaller panel? That tiny border (about 1/8") makes the card look polished—like a store-bought design, but handmade.
Step 3: Create a Focal Point (Sentiment + Simple Layering)
Choose one focal style for speed and consistency across your party décor.
Beginner-friendly focal ideas:
- Large sticker sentiment (“Thank you,” “Celebrate,” “Let’s Party”)
- Washi tape strip + small label
- Single die-cut shape (heart, star, balloon) glued on top
Easy layered focal formula:
- Cut a rectangle mat: 2.75" x 3.5" (A2) or 2" x 2.5" (mini).
- Add a smaller label on top: about 2.25" x 1.25".
- Pop the top label with foam squares for dimension.
Step 4: Add the “Favor” Element
Here are three reliable ways to incorporate the party favor part without making the card bulky.
Option A: Treat in a Clear Sleeve (Quickest)
- Write a short note inside the card (or leave blank for guests to write later).
- Slip the card into an A2 cellophane sleeve.
- Add 2–4 small candies or a tea bag behind the card.
- Seal the sleeve and tie a 1/8" ribbon or twine bow at the top.
Option B: Attach a Tea Bag or Candy Packet Inside
- Open the card and position the tea bag centered on the inside right panel.
- Use 2 small glue dots or a strip of double-sided tape to secure it.
- Add a message above it: “A little something to sip & celebrate!”
Option C: Make a Simple Pocket (Best for Seeds or Candy)
- Cut a pocket piece: 4.25" x 2.25" for A2 (or 3" x 1.75" for mini).
- Score a 1/4" tab on the left, right, and bottom edges.
- Fold tabs inward.
- Glue tabs to the inside bottom of the card, creating an open-top pocket.
- Slide in a seed packet, candy, or a mini note.
Step 5: Personalize for the Party
Personal touches make these feel like true handmade party favors (not just “extra crafts”). Try one of these:
- Name personalization: Write guest names in metallic marker for place-card favors.
- Date + event: Stamp or write “Ava’s 8th Birthday • 06.14.26” on the back.
- Photo moment: Leave space inside: “Add a photo from tonight!”
Pro Tips for Clean, Consistent Results
- Batch like a pro: Cut all bases first, then all panels, then all labels. Assembly goes twice as fast.
- Use a “layout template” card: Make one card you love, then use it as a visual guide for the rest.
- Keep dimension mail-friendly: If guests will travel, avoid bulky embellishments (thick gems, tall bows). Flat favors pack better.
- Prevent glue warping: Use tape runner for large paper panels; save liquid glue for small items.
- Sharp creases matter: Score first, then fold with a bone folder for a crisp, professional edge.
Creative Variations (Beginner to Advanced)
Beginner Variations
- Sticker collage theme: Use coordinating sticker sheets (balloons, stars, florals) across each card front.
- Monochrome party décor match: One color cardstock + one patterned panel + one sentiment.
- Kid-friendly: Let kids add stamped dots or simple crayon doodles, then you assemble the final cards.
Intermediate Variations
- Shaker window: Cut a 2" circle window, add acetate, foam tape border, and a pinch of sequins.
- Vellum overlay: Wrap a vellum strip (about 2" tall for A2) across the front; secure on the back with double-sided tape.
- Layered die-cuts: Stack 2–3 die-cut shapes for a raised look without foam.
Advanced Variations
- Heat embossing: Stamp a sentiment in embossing ink and heat-set with gold/white powder for an elegant finish.
- Foiled accents: Use a foil transfer sheet or foil tape for glam party decorations.
- Interactive pull tab: Add a small pull-out message strip inside the card (great for “fun facts” about the guest of honor).
Troubleshooting (Quick Fixes That Save a Project)
- Problem: Card won’t stay closed.
Fix: Re-score the fold line and press firmly with a bone folder. Store finished cards under a heavy book for 30 minutes. - Problem: Paper panel looks crooked.
Fix: Use a grid ruler or align to the card edge with a 1/8" border on all sides before pressing down. - Problem: Glue is wrinkling patterned paper.
Fix: Switch to tape runner for large areas; use liquid glue only in tiny dots near corners. - Problem: Foam squares show from the side.
Fix: Trim foam smaller than the top label shape, or edge the label with a matching marker. - Problem: Pocket tears when inserting treats.
Fix: Use heavier cardstock (at least 80 lb) and reinforce pocket corners with an extra dot of glue.
Common Crafting Mistakes to Avoid
- Skipping scoring: Folding thick cardstock without scoring can crack the spine and look messy.
- Using too many embellishments: A crowded design takes longer and can look less “party polished.” Pick one focal point.
- Mixing too many patterns: Stick to 1–2 patterned papers and 1 solid to keep your DIY party décor cohesive.
- Not testing your adhesive: Some tapes don’t hold vellum or textured cardstock well. Test on a scrap first.
- Forgetting a drying plan: If you use liquid glue, set cards on a flat surface and give them 10–15 minutes before stacking.
FAQ: DIY Greeting Cards as Party Favors
How many cards can I make from one 12" x 12" cardstock sheet?
For A2 bases, a 12" x 12" sheet can yield two 8.5" x 5.5" bases (with leftover strips). For mini 3" x 4" bases, you can often get up to 6–8 depending on your cutting layout.
What’s the best cardstock weight for party favor greeting cards?
80–110 lb cardstock is ideal. It’s sturdy enough to feel premium, holds pockets better, and stands up well as a party decoration on a display table.
Can I make these without a paper trimmer?
Yes. Use scissors and a ruler, then take extra time to measure and mark cut lines. If you’re making more than 10–12 favors, a basic paper trimmer is worth it for speed and clean edges.
How do I keep my designs consistent when batch-making?
Create one “master” card first. Then:
- Cut all pieces to the same measurements.
- Assemble in stages (all panels, then all labels, then all embellishments).
- Use the master as a placement guide.
What can I put in the card to make it feel like a real party favor?
Great options that stay fairly flat:
- Tea bag or coffee packet
- 2–4 wrapped candies
- Seed packet
- A small “party bingo” or mini game card
How far in advance can I make DIY party favor cards?
You can make them 2–4 weeks ahead. Store finished cards in a box or plastic bin, flat and away from humidity. Add edible treats closer to the event if freshness matters.
Make a Favor Display That Doubles as Party Décor
- Mini clothesline: Hang cards with mini clothespins across a ribbon backdrop.
- Favor basket: Stand A2 cards upright in a small basket with shredded paper filler.
- Place-setting style: Set mini cards at each plate as both décor and take-home favor.
DIY greeting cards as party favors bring the best kind of handmade energy to your celebration: personal, creative, and totally customizable. Start simple, make one test card, then batch your favorites until you’ve got a full set that matches your theme—and feels like something guests will genuinely keep.
Want more DIY crafts, party decorations, and handmade party projects? Explore fresh ideas and step-by-step inspiration at smartpartyprep.com.
More Articles
 Step-by-Step Wreaths Tutorial
 Kids' Craft: Thank You Cards
 How to Make Tie-Dye Shirts at Home
 Step-by-Step Paper Flowers Tutorial
 DIY Soap Bars with Dollar Store Supplies
 No-Sew Beaded Bracelets Tutorial
 30 Creative Invitations Ideas
 Advanced Greeting Cards for Crafters
 How to Allow Third Party Cookies on a Mac in 2024: A Step-by-Step Safari & Chrome Guide (No Tech Degree Required)
 Kids' Craft: Table Runners