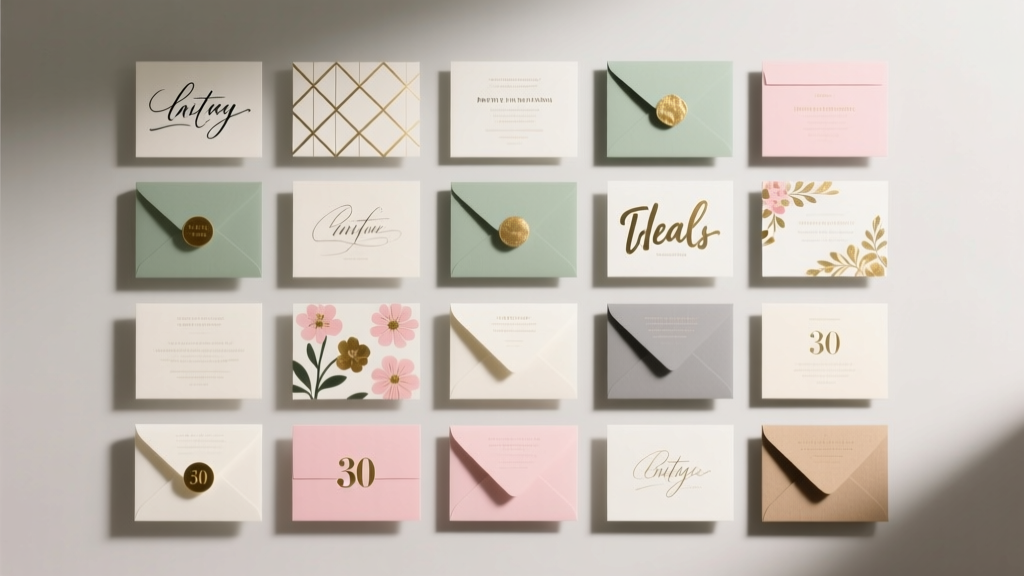
30 Creative Invitations Ideas
A great party starts long before guests arrive—it starts the moment they open the invitation. Handmade invitations set the mood instantly, whether you’re planning a birthday bash, baby shower, wedding, graduation, holiday gathering, or themed dinner party. They’re also one of the most satisfying DIY crafts because the results feel personal, polished, and totally unique.
The best part? You don’t need fancy equipment or pro-level skills to make handmade party invitations that look store-bought. With a few basic tools, some cardstock, and creative details like ribbons, wax seals, or mini pop-ups, you can create invitations that double as keepsakes and mini party decorations.
Below you’ll find 30 creative invitation ideas, plus a simple “base method” you can use for almost all of them. Pick one style and make it your own—or mix elements from several ideas for a custom look.
At-a-Glance: Skill Level, Time, and Yield
- Skill level: Beginner to Advanced (each idea labeled)
- Time estimate: 10–45 minutes per invitation (batching saves time)
- Typical size: 5" x 7" (standard A7) or 4" x 6"
- Recommended batch: 12–24 invitations
Materials List (with Estimated Costs)
These are the core supplies used across most DIY invitation projects. Prices vary by brand and location, but the ranges below are realistic for craft stores and online marketplaces.
Paper + Printing
- Cardstock (80–110 lb) in white/colored, 8.5" x 11" or 12" x 12" ($8–$18 per pack)
- Patterned scrapbook paper 12" x 12" ($6–$15 per pad)
- Vellum sheets 8.5" x 11" ($6–$12 for 25 sheets)
- Envelopes A7 (5.25" x 7.25") or A6 ($6–$15 for 25–50)
- Printer paper (for prototypes) ($3–$8)
Adhesives + Finishing
- Double-sided tape runner ($6–$12)
- Foam adhesive squares ($4–$8)
- Glue stick (acid-free) ($2–$5)
- Liquid craft glue (fine-tip preferred) ($3–$7)
- Hot glue gun + mini sticks (use for heavier embellishments) ($10–$20)
Tools (Recommended)
- Paper trimmer (for crisp, repeatable cuts) ($15–$35)
- Scissors (precision tip) ($5–$12)
- Bone folder (clean folds) ($6–$10)
- Corner rounder punch ($6–$15)
- Circle punches 1" and 2" (optional) ($8–$20)
- Craft knife + cutting mat (for windows/pop-ups) ($10–$25)
- Ruler + pencil ($2–$8)
Decor (Pick Your Style)
- Ribbon 3/8" or 5/8" satin/grosgrain ($3–$8 per roll)
- Baker’s twine ($3–$7)
- Stickers or vinyl decals ($3–$10)
- Wax seal kit + wax sticks ($12–$30)
- Metallic marker pens (gold/silver/white) ($5–$12)
- Confetti (fine + flat shapes) ($3–$8)
- Mini clothespins (for photo invites) ($3–$6)
The Base Method (Use This for Most Invitation Designs)
This simple structure helps your DIY party invitations look cohesive and professional, even if you’re trying a new technique.
Step-by-Step: Classic Layered Invitation (Beginner)
- Choose your finished size: A7 (5" x 7") is the easiest for printing and mailing.
- Cut the base card: Trim cardstock to 10" x 7", then score at 5" and fold for a 5" x 7" folded invite. (Or skip folding and use a flat 5" x 7" card.)
- Add a background layer: Cut patterned paper to 4.75" x 6.75" to create a clean border.
- Add a text panel: Cut a solid cardstock panel to 4.25" x 6". Print or hand-letter your party details and glue it on top.
- Decorate: Add ribbon, a tag, sticker, or wax seal (keep embellishments thin for mailing).
- Test fit: Slide into your envelope before making the full batch.
Time: 15–25 minutes for the first invite, then 8–12 minutes each when batching.
Tools you’ll use most: paper trimmer, tape runner, bone folder.
30 Creative Invitation Ideas (With Quick How-To)
1) Watercolor Wash Invitations (Beginner)
- How: Paint a light watercolor wash on 5" x 7" watercolor paper, let dry, then print/handwrite details on top.
- Tip: Use painter’s tape border for crisp edges.
2) Vellum Wrap + Wax Seal (Intermediate)
- How: Wrap vellum around a flat invite (cut vellum to 7.5" x 10"), secure with a wax seal at the back.
- Variation: Add dried flower sprigs under the vellum (keep it flat).
3) Confetti Shaker Window (Advanced)
- How: Cut a 3" x 4" window in the front. Tape clear acetate behind it, add foam tape borders, fill with confetti, and seal with a backing panel.
- Troubleshooting: Use chunky confetti so it doesn’t cling with static.
4) Scratch-Off Reveal (Advanced)
- How: Cover a secret message with clear packing tape, brush on scratch-off paint (acrylic paint + dish soap), let dry.
- Best for: Surprise parties and gender reveals.
5) Photo Strip “Photo Booth” Invite (Beginner)
- How: Print a 2" x 6" photo strip and attach it to a 4" x 6" card with mini foam squares.
- Pro look: Add a tiny “Date/Time/Place” caption beneath like a real photo booth print.
6) Ticket Stub Invitations (Beginner)
- How: Design as a ticket, cut to 2" x 6", and use a hole punch or faux perforation line.
- Theme: Concert, movie night, sports, Broadway.
7) Origami Heart Insert (Intermediate)
- How: Fold a small origami heart from 4" square paper and glue to the front corner.
- Best for: Bridal shower, Valentine’s party.
8) Mini Banner Garland Invite (Intermediate)
- How: Cut tiny pennants (1" wide), string on baker’s twine, and tape to the card top edge.
- Tip: Use a glue dot behind each pennant for stability.
9) Pop-Up Cake Slice (Advanced)
- How: Create a simple pop-up tab inside a folded card and attach a cardstock “cake slice.”
- Time: 30–45 minutes each (worth it for milestone birthdays).
10) Pressed Flower Frame (Intermediate)
- How: Glue pressed flowers around the border of a 5" x 7" card; keep the center clean for text.
- Mailing: Hand-cancel at the post office; use a rigid mailer if thick.
11) Balloon String Pull Tab (Advanced)
- How: Attach a paper balloon with a ribbon “string” that slides out to reveal details on a hidden strip.
- Troubleshooting: Use washi tape guides so the strip doesn’t snag.
12) Puzzle Piece Invite (Advanced)
- How: Print details on cardstock, then cut into large puzzle pieces (3–6 pieces). Send in a small envelope.
- Variation: Make each guest receive one piece for a group reveal.
13) Kraft Paper + White Gel Pen (Beginner)
- How: Use kraft cardstock as the base; hand-letter with a white gel pen.
- Look: Rustic, farmhouse, outdoor party vibes.
14) Chalkboard Style (Beginner)
- How: Print white typography on black cardstock or black background paper.
- Pro tip: Add a thin white border (4.75" x 6.75") for contrast.
15) Passport Invitation (Intermediate)
- How: Make a small booklet: cover 4" x 6", fold inner pages, staple or sew at the spine.
- Perfect for: Travel-themed parties and destination weddings.
16) Boarding Pass Invite (Beginner)
- How: Design like a boarding pass; add a faux barcode and “Gate/Seat” details for fun.
- Extra: Include a “baggage tag” RSVP card.
17) Lace Doily Layer (Beginner)
- How: Place a paper doily behind the text panel (trim to fit) for instant elegance.
- Variation: Spray lightly with metallic mist for sparkle.
18) Envelope Liner + Matching Seal (Beginner)
- How: Cut patterned paper to fit the envelope flap as a liner; seal with a sticker or wax seal.
- Quick win: Simple invite card looks 10x more special.
19) Pocketfold Invitation (Intermediate)
- How: Score a 12" x 12" cardstock to create a pocket that holds RSVP and details cards.
- Best for: Weddings and multi-event weekends.
20) Mini Accordion Timeline (Advanced)
- How: Fold a 2.5" x 10" strip into an accordion; each panel shares party info or a story.
- Theme: Anniversary, retirement, graduation.
21) Paint Chip Color Palette Invite (Beginner)
- How: Cut a paint chip to 5" x 7" or mount it on cardstock; print details on a label.
- Party type: Color-themed birthdays, craft nights.
22) Polaroid Frame Invitation (Beginner)
- How: Cut a “Polaroid” frame (approx. 4" x 5" outer) and mount a photo or party icon inside.
- Pro tip: Use foam squares for depth.
23) Garden Seed Packet Invite (Intermediate)
- How: Fold a tiny envelope to resemble a seed packet and tuck the invite card inside.
- Perfect for: Spring parties and bridal showers.
24) “Message in a Bottle” Scroll (Advanced)
- How: Print on a 2.5" x 8" strip, roll into a scroll, tie with twine, and place in a clear tube (instead of glass for safety).
- Mailing: Hand-deliver or ship in a small box.
25) Felt Appliqué Icon (Intermediate)
- How: Cut a small felt shape (star, heart, pumpkin) and glue it to the card front.
- Troubleshooting: Use a strong tacky glue and press under a book for 10 minutes.
26) Layered Die-Cut Silhouette (Advanced)
- How: Use a cutting machine or metal dies to create layered shapes (florals, skyline, animals).
- Beginner adaptation: Use pre-cut cardstock shapes and layer them.
27) Foil Accent Invitations (Intermediate)
- How: Use foil transfer sheets with a laminator or foil pens to add metallic names or borders.
- Pro tip: Keep foil elements large and simple for cleaner results.
28) Sticker Collage “Mood Board” (Beginner)
- How: Create a fun collage with themed stickers and washi tape; add a clean text box for details.
- Theme ideas: Spa night, Taylor-inspired party, disco, picnic.
29) Tear-Off RSVP Tab (Intermediate)
- How: Add a 1.5" perforated strip at the bottom guests can tear and mail back.
- Tip: Create a faux perforation with a tracing wheel if you don’t have a perforation blade.
30) Mini Calendar Save-the-Date (Beginner)
- How: Print a tiny calendar month (about 3" x 3") with the date circled, mount it on the invite.
- Great for: Engagement parties and annual events.
Step-by-Step Project: Make a Set of 12 Layered DIY Invitations
This walkthrough uses a layered design that works for nearly any theme. Once the base set is done, you can add one of the creative styles above (like vellum wrap, wax seal, or sticker collage).
What You’ll Need
- 12 sheets cardstock (base): cut into 10" x 7" pieces (or use 12 sheets 8.5" x 11" and trim)
- Patterned paper for background layers: 12 pieces 4.75" x 6.75"
- White/solid cardstock for text panels: 12 pieces 4.25" x 6"
- Tape runner + foam squares
- Paper trimmer, bone folder
- Envelopes (A7)
Design + Layout (10–20 minutes)
- Write your invitation wording (who/what/when/where/RSVP + dress code if needed).
- Choose font sizes: Keep the main title 18–28 pt, details 11–14 pt for readability.
- Print a test on regular paper first and check spacing and typos.
Cutting + Folding (20–40 minutes for 12)
- Trim base cards: Cut to 10" x 7" and score at 5". Fold using a bone folder.
- Cut background layers: 4.75" x 6.75" (make a cardboard template for speed).
- Cut text panels: 4.25" x 6".
Assembly (30–60 minutes for 12)
- Attach background layer to the base using tape runner.
- Attach text panel with foam squares for a raised, professional look.
- Add a focal embellishment: a 5/8" ribbon band, a sticker seal, a small die-cut, or a wax seal (choose one main accent so the design doesn’t feel crowded).
- Stuff and seal envelopes once everything is fully dry.
Pro Tips, Variations, and Troubleshooting
Batching Tips (Saves Time)
- Work assembly-line style: cut everything first, then glue everything, then embellish everything.
- Use a spacing jig: Mark a scrap piece of cardstock to help align panels consistently.
- Print extras: Always print 2–3 extra text panels for mistakes and last-minute guests.
Beginner-Friendly Adaptations
- Skip foam squares and keep everything flat for easy mailing.
- Use stickers instead of layered die-cuts.
- Choose a single paper pad so all patterns coordinate automatically.
Advanced Variations
- Add heat-embossing (embossing ink + powder + heat tool) for raised metallic text.
- Try letterpress-style debossing with an embossing folder and machine.
- Create custom envelope liners and matching RSVP cards for a full invitation suite.
Troubleshooting
- Problem: Cardstock cracks at the fold.
Fix: Score first with a bone folder; fold slowly. Use 80–100 lb cardstock for folded cards. - Problem: Glue warps paper.
Fix: Use tape runner for large areas; apply liquid glue in tiny dots, not swirls. - Problem: Printer smudges on glossy paper.
Fix: Use matte cardstock or let ink dry longer; test print settings (photo vs. matte). - Problem: Invitations won’t fit the envelope after embellishing.
Fix: Keep bulky items off the card front; place wax seals on the envelope exterior instead.
Common Crafting Mistakes to Avoid
- Skipping the prototype: Make one full sample first (print, cut, assemble, and fit into the envelope).
- Not measuring twice: A 1/8" inconsistency shows up fast in a stacked pile of invitations.
- Over-embellishing: One “hero” detail looks more professional than five competing accents.
- Forgetting postage realities: Thick invitations may require extra postage; bring one finished invite to the post office to confirm.
- Using weak adhesive for heavy decor: Foam tape or tacky glue is better for layered pieces; hot glue can create bumps and strings.
- Ignoring dry time: Stack too soon and you’ll smear ink, dent wax seals, or glue pieces together.
FAQ: DIY Invitations
How many invitations should I make?
Plan one per household, plus 10–15% extra. For example, if you’re inviting 30 people from 18 households, make 20–22 invitations to cover mistakes and late additions.
What cardstock weight is best for handmade invitations?
Use 80–110 lb cardstock for a sturdy feel. If you’re making folded invites, 80–100 lb folds more cleanly. For flat cards, 100–120 lb feels extra premium (but may need extra postage).
Can I make these without a cutting machine?
Yes. Most designs here work with a paper trimmer, scissors, and punches. For intricate shapes, use pre-cut embellishments, stickers, or simple geometric layers.
What’s the easiest way to keep invitations consistent?
Cut using a paper trimmer, make templates from scrap cardstock, and assemble in batches. A quick alignment guide (a marked scrap piece) helps every layer land in the same spot.
How do I mail 3D or bulky invitations?
Keep thickness as uniform as possible, use a slightly larger envelope if needed, and bring one finished invitation to the post office for a weight/thickness check. For very dimensional designs (like shaker invites), consider hand-delivery or small rigid mailers.
What wording must be included on a party invitation?
Include who is hosting, what the event is, date, start time, location, and RSVP method. Optional but helpful: end time, dress code, gift info, and parking notes.
Ready to Make Your Own?
Pick one invitation style that matches your theme, gather your supplies, and make a single prototype before you commit to the full set. Once you get the first one right, the rest feel like a fun rhythm—cut, layer, decorate, repeat—and you’ll end up with handmade invitations that make your party feel special from the very first moment.
Want more DIY crafts, party decorations, and step-by-step handmade projects? Explore fresh ideas and printable-friendly inspiration on smartpartyprep.com.
More Articles
 DIY Tote Bags for Baby Showers
 How to Draw Party Scenes in 7 Minutes (Even If You Can’t Draw a Stick Figure): A Step-by-Step Guide That Turns Doodles Into Delightful Decorations for Birthdays, Graduations & More
 How to Enable 3rd Party Cookies on Safari in 2024: The Real Truth (Spoiler: You Can’t — But Here’s What Actually Works Instead)
 DIY Scrapbook Pages Using Cricut
 No-Sew Scrapbook Pages Tutorial
 How to Allow Third Party Cookies on a Mac in 2024: A Step-by-Step Safari & Chrome Guide (No Tech Degree Required)
 How to Install 3rd Party Apps on Firestick in 2024: The Only Step-by-Step Guide You’ll Ever Need (No Tech Degree Required)
 Rustic Mugs Ideas: DIY Projects for Cozy Parties, Weddings, and Giftable Decor
 Step-by-Step Wall Art Tutorial (Perfect for Party Backdrops & Handmade Decor)
 How Do I Make a Party Hat in Under 12 Minutes? (No Glue Gun, No Scissors Required — Just Paper, Tape & 3 Clever Hacks That 92% of First-Timers Miss)