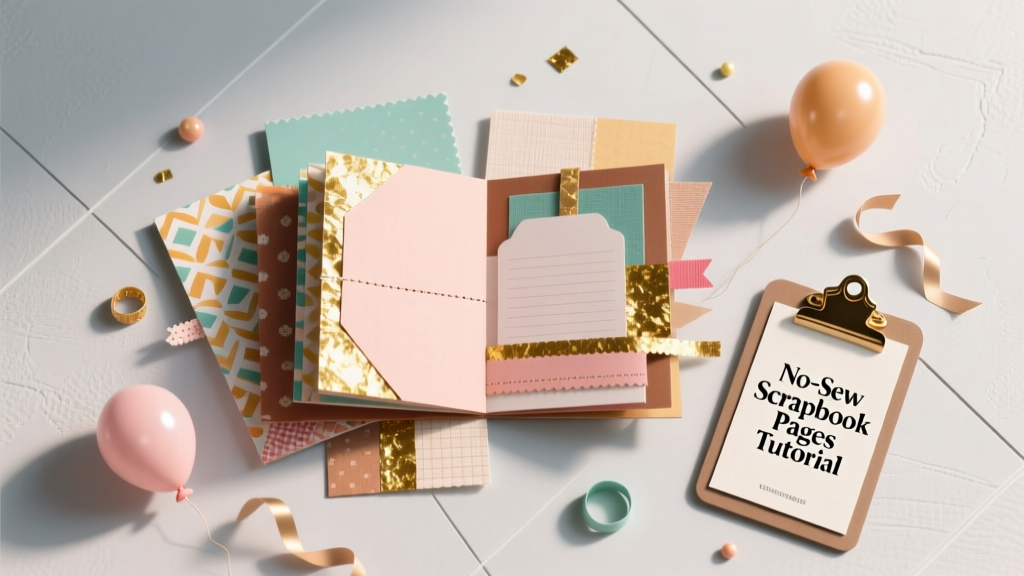
No-Sew Scrapbook Pages Tutorial
Want a party keepsake that feels just as special as the celebration itself—without dragging out a sewing machine or learning tricky techniques? No-sew scrapbook pages are the sweet spot: fast, beginner-friendly, and totally customizable. Whether you’re preserving photos from a birthday bash, a baby shower, graduation party, or holiday gathering, these pages let you tell the story with color, texture, and a little sparkle.
What makes this project extra fun is how flexible it is. You can keep it clean and simple for a modern look, or go bold with layered paper, ribbon, and dimensional embellishments. Plus, no-sew methods (think adhesives, tape runners, and photo corners) are perfect when you’re crafting on a kitchen table before the next event.
Best of all, these scrapbook pages can double as party decorations: frame one as a memory station sign, place a finished page on the gift table, or create a “party timeline” display along a wall. You’ll end up with handmade décor now—and a memory book later.
Project Overview
- Skill level: Beginner (with easy upgrades for intermediate/advanced crafters)
- Time estimate: 30–60 minutes per page (faster once you batch-cut pieces)
- Finished size: 12 in x 12 in page (standard) or 8.5 in x 11 in (printer-paper size)
- Best for: Birthday parties, bridal showers, baby showers, graduation parties, holiday gatherings, and DIY party decorations
Materials & Tools (With Estimated Costs)
These are common, easy-to-find supplies. Costs vary by brand and store, so the ranges below help you budget for a few pages at a time.
Base Supplies
- Cardstock base page (12x12 scrapbooking cardstock, 1–2 sheets): $1–$3 each
- Patterned paper pack (12x12, party-themed colors or prints): $8–$15 per pad
- Photos (printed 4x6, 3x4, or wallet size): $0.20–$1 each depending on where you print
- Journaling card stock (white or cream for notes): $1–$3 per sheet
Adhesives (No-Sew “Workhorses”)
- Tape runner (permanent adhesive): $6–$12
- Double-sided tape (1/4 in or 1/2 in width): $4–$10
- Foam tape or foam squares (for pop-up dimension): $4–$8
- Photo corners (clear or kraft): $3–$8
- Liquid glue (fine-tip craft glue for small pieces): $2–$6
Tools (Recommended)
- Paper trimmer (12 in): $15–$35
- Precision scissors (small detail scissors): $6–$15
- Ruler (12 in metal preferred): $3–$10
- Pencil (for light guidelines): $1–$3
- Corner rounder punch (optional, for a polished look): $8–$18
- Bone folder or old gift card (for crisp folds): $0–$8
Decor & Embellishments (Choose a Few)
- Washi tape (party colors, confetti, stripes): $3–$10
- Ribbon (3/8 in or 5/8 in grosgrain works well): $2–$6 per spool
- Stickers or die-cuts (balloons, cake, stars, “Hooray”): $4–$12
- Alphabet stickers (for titles): $4–$10
- Twine (baker’s twine for party vibes): $3–$6
- Optional sparkle: adhesive gems or sequins: $3–$8
Choose Your Page Style (Pick One to Start)
If you’re new to scrapbooking, choosing a simple layout template keeps the page looking intentional and helps you finish faster.
Style A: Clean Grid (Beginner-Friendly)
- 2–3 photos aligned in a neat grid
- One bold title strip
- Minimal embellishments
Style B: Layered Party Collage (Intermediate)
- 1 hero photo centered with layered mats behind it
- Ticket stubs, party invites, confetti bag tags, or favor labels tucked in
- Foam tape dimension and clusters of embellishments
Style C: Timeline Strip (Advanced Variation)
- 3–5 photos in a row showing the party progression
- Small caption boxes under each photo
- Decorative banner or garland element across the top
Step-by-Step: No-Sew Scrapbook Page Instructions
Step 1: Plan Your Story (5 minutes)
Before gluing anything down, decide what this page is about.
- Theme ideas: “First Birthday,” “Sweet 16,” “Baby Shower Brunch,” “Graduation Party,” “Holiday Cookie Swap”
- Color palette: Pull 2–3 main colors from your party decor (balloons, tableware, banner)
- Photos: Choose 2–4 favorites for one page; too many can look crowded
Step 2: Prep the Base & Background (10 minutes)
- Select your base cardstock (12x12). Solid colors work best for party-themed pages.
- Create a background panel by cutting patterned paper to 11 in x 11 in. This leaves a clean border around the edge.
- Adhere the background panel using a tape runner. Add adhesive to all four edges and a couple of lines across the center to prevent lifting.
Quick measurement option: If you’re using an 8.5x11 page protector album, cut your background to 8 in x 10.5 in for a neat border.
Step 3: Mat Your Photos for a Polished Look (10–15 minutes)
Photo “mats” are the paper frames behind photos. They instantly elevate the page.
- Trim photos if needed. A common size is 4 in x 6 in.
- Cut a mat that is 1/4 in larger on each side than your photo. For a 4x6 photo, cut the mat to 4.5 in x 6.5 in.
- For extra dimension, add a second mat 1/8 in larger than the first (example: 4.625 in x 6.625 in).
- Attach the photo to the mat with tape runner. If you want lift, attach the matted photo to the page using foam tape.
Step 4: Arrange Your Layout Before Sticking (5 minutes)
Lay everything on the page first. Move pieces around until it feels balanced.
- Keep heavier visual elements (big photos, dark papers) spread out
- Leave breathing room for journaling
- Group embellishments in 2–3 small clusters instead of scattering them everywhere
Step 5: Add a Title (5–10 minutes)
Your title ties the page to the party theme and makes it feel finished.
- Title strip measurement: Cut cardstock to 2 in x 10 in (trim to fit your layout).
- Placement ideas: across the top, down the side, or tucked under the main photo.
- Title examples: “Make a Wish,” “Baby on the Way,” “Cheers to 30,” “Grad Day,” “Let’s Party”
Step 6: Add Journaling (5–10 minutes)
Don’t overthink journaling—short and sweet is perfect.
- Journaling card size: 3 in x 4 in or 4 in x 6 in
- Write: date, location, guest of honor, and one funny or meaningful moment
- If handwriting isn’t your favorite, print journaling on cardstock and trim it to size
Step 7: Decorate With No-Sew Texture (10–15 minutes)
Here’s where “no-sew” techniques shine. You can add texture with ribbon, twine, and layered paper without stitching a thing.
- Washi tape accents: Use 2–3 short strips (1–2 in long) to “hold” photos visually.
- Ribbon banner: Cut ribbon pieces to 3–4 in and notch the ends into a “V.” Adhere with double-sided tape.
- Paper bunting: Cut triangles 1.5 in wide x 2 in tall, string them visually with a drawn line or a thin strip of twine taped down.
- Embellishment clusters: Place stickers/die-cuts near photo corners and the title. Use foam squares for dimension.
Step 8: Final Press & Clean Edges (2 minutes)
- Press everything down firmly with a bone folder or gift card
- Erase any pencil guidelines
- Check that nothing bulky will snag in a page protector (move thick items inward if needed)
Pro Tips for Crisp, Professional Results
- Use odd numbers: Clusters of 3 embellishments often look more natural than 2 or 4.
- Stick to one “star” element: If your hero is a big photo, keep the rest simpler so the page isn’t competing for attention.
- Repeat shapes: If you use stars, repeat stars in 2–3 places (small sticker, die-cut, or printed paper).
- Pop selectively: Foam tape looks best when used on 1–2 focal pieces (like the title or hero photo), not everything.
- Party decor match: Pull colors from your party tableware, balloons, and banner for a cohesive DIY party decoration feel.
Variations for Different Party Themes
Kids’ Birthday Party Page
- Add a paper “candle” row: small rectangles 1/4 in x 1 in with tiny flame shapes
- Use confetti-pattern paper and bright alphabet stickers
- Include a mini pocket for a candle wrapper or a small photo booth strip
Bridal Shower or Bachelorette Keepsake
- Use soft neutrals plus metallic accents (gold washi, foil letter stickers)
- Add a vellum overlay on the journaling card (adhere only at corners)
- Include a tiny envelope for advice notes or a “recipe for love” card
Graduation Party Memory Page
- Create a simple timeline with 3 photos: “Arrived,” “Speeches,” “Celebration”
- Use school colors for mats and title
- Add a tassel-inspired element with twine (taped down, no sewing)
Advanced Upgrade: Interactive Flap (Still No-Sew)
- Make a photo flap using cardstock cut to 4.25 in x 6.25 in
- Score a 1/2 in hinge on one side and adhere the hinge only
- Add a photo or journaling underneath for hidden details
Troubleshooting: Fix Common Issues Fast
- Paper is bubbling or lifting: Use more adhesive coverage (edges + center). Press firmly with a bone folder.
- Layout looks messy: Remove a few embellishments and increase “white space.” Limit yourself to 2 patterned papers max.
- Photo corners won’t stick well: Clean the photo edges (dry cloth) and use stronger double-sided tape or a fresh tape runner.
- Foam tape is too thick for album protectors: Switch to thin foam squares or pop up only one small element.
- Washi tape peeling: Layer it over cardstock instead of directly onto textured paper; burnish it down firmly.
Common Crafting Mistakes to Avoid
- Gluing before arranging: Always dry-fit first. A 2-minute layout check saves a lot of frustration.
- Using too many fonts/sticker styles: Choose one alphabet style for titles and one for small accents.
- Skipping photo mats: Photos can blend into busy backgrounds. Even a simple white mat makes them stand out.
- Overloading with bulky embellishments: Dimensional elements are fun, but too many can warp pages or tear protectors.
- Not balancing color: If you have a bright element in the top right, echo that color somewhere else for harmony.
- Writing with a bleeding pen: Test pens on cardstock first. Use archival or pigment pens when possible.
FAQ: No-Sew Scrapbook Pages
What adhesive is best for scrapbook pages?
A permanent tape runner is a great everyday choice for paper-to-paper. Use photo-safe adhesive (or photo corners) for pictures, and add foam tape when you want dimension for party-themed embellishments.
Can I make scrapbook pages without a paper trimmer?
Yes. Use a ruler and sharp scissors, and measure carefully. If you craft often, a 12-inch paper trimmer is one of the best upgrades for cleaner edges and faster DIY craft projects.
How do I keep pages from getting too bulky in an album?
Limit foam tape to one focal element, keep embellishments mostly flat, and avoid stacking thick items (like chipboard) on top of each other. If you love dimension, consider making fewer pages per album so the spine isn’t stressed.
What size photos work best for a 12x12 page?
Two 4x6 photos or three 3x4 photos usually fit comfortably with room for a title and journaling. For a clean grid, try 3 photos trimmed to 3.5 in x 5 in.
How can I turn these pages into party decorations?
Frame a finished page as part of a memory table display, prop it on an easel near the guest book, or create a mini gallery wall of pages from past celebrations. They work beautifully as handmade party decorations that guests actually want to look at.
Is this project good for beginners or kids?
Absolutely. Beginners can stick to a simple grid layout and use stickers and washi tape. Kids can help by choosing papers, placing stickers, and arranging photos (with an adult handling cutting tools).
Wrap-Up: Make a Page, Save the Party Magic
No-sew scrapbook pages are one of those DIY crafts that feel relaxing but still give you a big “wow” payoff. You get a party-ready look with layered paper, bright color, and thoughtful details—plus a keepsake you’ll love flipping through long after the balloons are gone.
Pick one celebration, choose 2–4 favorite photos, and try one layout style today. Once you’ve finished your first page, you’ll be surprised how quickly you’ll want to make a whole set for birthdays, showers, holidays, and every handmade moment in between.
Want more party-perfect DIY crafts and handmade decoration ideas? Explore more creative projects on smartpartyprep.com and keep the celebration going—one crafted memory at a time.
More Articles
 DIY Resin Jewelry for Weddings
 DIY Wreaths for Birthdays: Handmade Party Decorations That Wow
 Personalized Photo Frames Gifts
 Seasonal Invitations Ideas
 DIY Mugs Party Favors
 How to Turn Off 3rd Party Cookies in 2024: A Step-by-Step Guide That Actually Works (No Tech Jargon, Just Real Browser Instructions)
 How to Make a Party Popper in 7 Minutes (No Glue, No Mess, No Store-Bought Kits) — A Foolproof DIY Guide That Actually Works Every Time
 DIY Cupcake Wrappers Using Cricut
 Budget DIY Table Runners Under $20
 No-Sew Coasters Tutorial