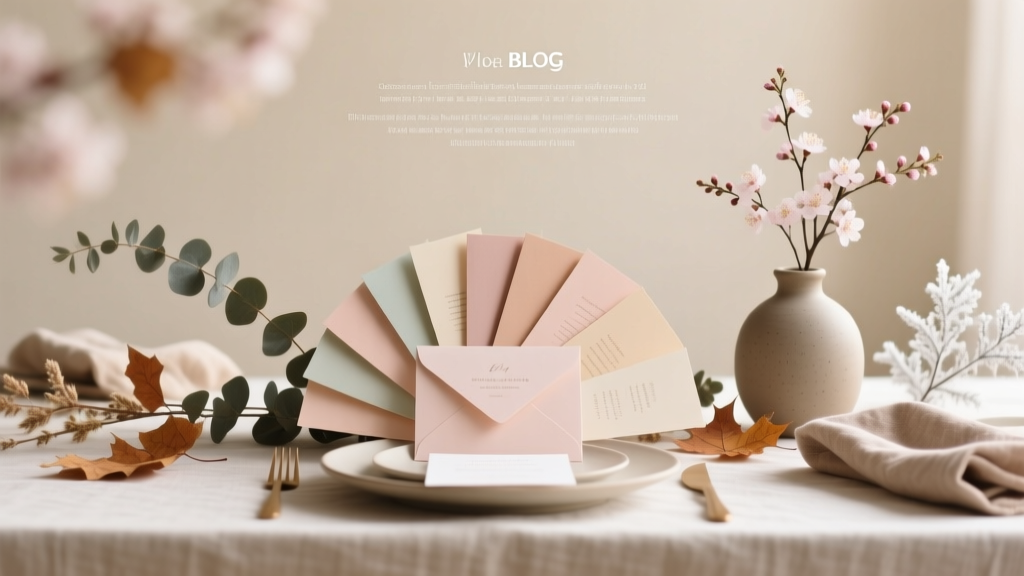
Seasonal Invitations Ideas
There’s something extra satisfying about mailing (or hand-delivering) an invitation you made yourself—especially when it matches the season outside your window. Seasonal invitations set the mood before the party even starts, whether you’re hosting a cozy fall bonfire, a spring brunch, a summer pool party, or a winter cookie exchange. They’re also one of the easiest DIY party decorations to create because you can make a big visual impact with simple materials: cardstock, a few embellishments, and thoughtful wording.
Even better: handmade invitations let you customize everything. You can match your color palette, reflect a theme (pumpkins, florals, sunshine, snowflakes), and tailor details like RSVP options and dress code. This guide walks you through four beginner-friendly invitation styles—one for each season—plus pro tips, variations, troubleshooting fixes, and common crafting mistakes to avoid. Pick one design or mix elements from several to create your own signature look.
Skill level: Beginner to Intermediate (with optional advanced upgrades)
Time estimate: 10–25 minutes per invitation (plus drying time if using glue/ink)
Best for: DIY party planning, handmade party decorations, themed events, showers, birthdays, holiday gatherings
Quick Planning: Choose Your Seasonal Style
Before you cut a single piece of paper, decide on three basics:
- Format: Flat card (simple), folded card (classic), or postcard (budget-friendly).
- Delivery: Envelope + stamp, hand-delivered, or tucked into gift bags.
- Design “hero” element: One standout feature per invite (wax seal, vellum wrap, pressed flower, die-cut shape).
Recommended Invitation Size (Easy + Standard)
- A7 flat card: 5" x 7" (fits A7 envelope). Great for most parties.
- A2 folded card: 4.25" x 5.5" folded (requires 8.5" x 5.5" scoring). Great for formal events.
- Postcard style: 4" x 6" (budget + cute).
Materials List (With Estimated Costs)
These are reliable, widely available craft supply types. Costs vary by brand and where you shop, but these estimates help you budget.
Paper & Printing
- Cardstock (80–110 lb / 216–300 gsm): 25–50 sheets, $8–$18
- Envelope set (A7 or A2): pack of 25, $6–$15
- Vellum sheets (8.5" x 11"): pack of 25, $8–$14
- Printer paper (for test prints): $3–$7
Adhesives & Embellishments
- Double-sided tape runner: $5–$12 (cleanest for paper crafts)
- Liquid craft glue (fine-tip): $3–$8 (best for small items)
- Foam adhesive dots/squares: $4–$9 (adds dimension)
- Satin ribbon (3/8" to 5/8" wide): $4–$10 per spool
- Twine (jute or cotton): $3–$8
- Metallic marker (gold/silver): $2–$6
- Stickers or die-cuts (seasonal): $3–$10
Tools (Worth Having)
- Paper trimmer (guillotine or rotary): $15–$45
- Scoring board + bone folder: $10–$25 (for clean folds)
- Corner rounder punch (optional): $6–$15
- Craft scissors + detail scissors: $6–$18
- Cutting mat + craft knife (optional): $10–$25
- Ink pad (seasonal color): $4–$10
Season-Specific Add-Ons (Optional)
- Pressed flowers (real or faux): $6–$15
- Mini pine sprigs (faux) or confetti: $4–$12
- Wax seal kit (advanced look): $12–$30
Prep Steps (Works for Every Season)
- Choose your wording first. Keep it short and readable. Include: event name, date, time, location, RSVP, dress code (if any).
- Set a simple layout. Use one headline font and one body font. Leave generous margins (at least 1/2").
- Print a test page. Check spelling, alignment, and ink quality before printing on cardstock.
- Batch cut your cards. For 5" x 7", cut cardstock to 5" x 7" using a paper trimmer.
Tool tip: A paper trimmer gives cleaner edges than scissors and helps every invitation look professionally made.
Spring Invitation Idea: Pressed Flower Corner Card
Look: Soft, fresh, garden-party vibes. Great for bridal showers, baby showers, Easter brunch, or spring birthdays.
Skill level: Beginner (Intermediate if adding vellum wrap)
Time per invite: 15–20 minutes + drying time
Measurements
- Card base: 5" x 7" (flat) or 10" x 7" scored at 5" (folded)
- Optional vellum band: 2" x 10" (trim to fit and overlap)
Step-by-Step
- Cut and prep the card. Trim cardstock to size. Optional: round corners with a corner punch.
- Arrange the flowers. In the lower-left or upper-right corner, lay out 2–4 pressed flowers and a few leaves. Keep the center area clear for text.
- Glue carefully. Use a fine-tip liquid glue. Apply tiny dots under petals and stems. Press gently with clean paper over the top.
- Let it dry flat. Place the card under a light book for 5–10 minutes (don’t crush textured flowers).
- Add your invitation text.
- Easiest: Print text on cardstock first, then add flowers after.
- Alternative: Print a separate 4" x 6" insert and mount it with tape runner.
- Optional vellum band. Wrap vellum around the card, overlap at the back, and secure with double-sided tape. Add a thin twine bow.
Summer Invitation Idea: Citrus Slice Pop-Out (Bright + Fun)
Look: Bold colors with a 3D focal point—perfect for BBQs, pool parties, and patio celebrations.
Skill level: Beginner to Intermediate
Time per invite: 12–18 minutes
Measurements
- Card base: 4" x 6" postcard or 5" x 7" flat card
- Citrus circle: 2.25" diameter (orange/lemon/lime)
- Small wedge details: about 1" long paper triangles
Step-by-Step
- Create the citrus circle. Use a circle punch (2") or trace a round lid and cut a 2.25" circle from bright cardstock.
- Add the rind. Cut a slightly larger ring (about 1/8" wider all around) from a lighter shade. Glue the circle on top.
- Make segment wedges. Cut 6–8 small paper triangles from pale yellow/peach cardstock. Arrange like pizza slices and glue down.
- Outline with a marker. Use a fine-tip pen or metallic marker to draw segment lines for a crisp, graphic look.
- Attach with foam dots. Place 2–4 foam dots behind the citrus and stick it near the top of the invitation. This adds a “pop” without bulky layers.
- Add summer text. Place party details below. Consider a playful headline like “Squeeze the Day!” or “Citrus & Sunshine Party.”
Fall Invitation Idea: Layered Pumpkin Patch Card (Cozy + Textured)
Look: Warm layers, earthy tones, and a touch of twine—ideal for Friendsgiving, harvest parties, and autumn birthdays.
Skill level: Beginner (Intermediate if adding stitching)
Time per invite: 18–25 minutes
Measurements
- Card base: 5" x 7"
- Pumpkin body: 3.5" wide x 3" tall (approx.)
- Stem: 3/4" x 1"
- Twine: 6"–8" per card
Step-by-Step
- Cut pumpkin layers. Cut 3 oval shapes in coordinating fall colors (rust, orange, golden yellow). Each oval should be about 3" tall. Overlap them to form a pumpkin.
- Glue the layers. Attach the center oval first, then overlap left and right ovals by about 1/4" each for dimension.
- Add the stem and leaf. Cut a small stem and a simple leaf shape. Use foam dots for the leaf if you want extra texture.
- Wrap twine. Wrap twine around the invitation once or twice, crossing near the pumpkin. Secure on the back with tape. Tie a small bow on the front if desired.
- Add a label for text. Cut a cream cardstock rectangle 3.5" x 2" and mount it with foam dots. Print or hand-letter the party details on the label.
Winter Invitation Idea: Snowflake Vellum Wrap (Elegant + Easy)
Look: Clean, sparkly, and modern—great for holiday parties, New Year’s gatherings, and winter weddings.
Skill level: Beginner (Advanced if using wax seals)
Time per invite: 10–15 minutes
Measurements
- Card base: 5" x 7" (white or navy)
- Vellum wrap: 7.5" x 10" (trim to fit)
- Ribbon: 18" of 3/8" satin per invite
Step-by-Step
- Prepare your printed card. Print the invitation text on cardstock. Let ink dry fully (especially with inkjet printers).
- Stamp or decorate vellum. Stamp snowflakes with a pale ink pad, or add a few sticker snowflakes. Keep the center mostly clear.
- Wrap the vellum. Wrap vellum around the invitation and secure the seam on the back with double-sided tape.
- Tie with ribbon. Tie a simple bow on the front. Trim ribbon tails at an angle.
- Optional upgrade: Add a wax seal over the bow knot (make sure your envelopes can still close comfortably).
Pro Tips, Variations & Troubleshooting
Pro Tips for Clean, Professional Results
- Use tape runner for paper-to-paper bonding. It prevents wrinkling and dries instantly.
- Batch your process. Cut everything first, then glue, then embellish. Assembly-line crafting saves time for big guest lists.
- Keep a “design rule of three.” Three main colors, three main elements (example: pumpkin + label + twine).
- Mind the mail. Bulky embellishments may require extra postage or hand-canceling at the post office.
Beginner-Friendly Adaptations
- Skip layered elements and use seasonal stickers instead.
- Print your design on cardstock and add just one tactile detail: twine wrap or metallic marker accents.
- Use pre-cut shapes (craft store die-cuts) to avoid tricky cutting.
Advanced Variations (For Extra Wow)
- Heat embossing: Stamp a snowflake, add embossing powder, heat set for raised sparkle.
- Paper stitching: Use a needle tool to pre-punch holes and stitch around a label border (fall especially).
- Laser-cut look: Use a craft cutting machine to cut intricate seasonal silhouettes.
- Envelope liners: Add patterned paper liners (about 1/8" smaller than envelope flap) for a polished finish.
Troubleshooting (Quick Fixes)
- Problem: Cardstock edges look fuzzy.
Fix: Replace blade on paper trimmer or cut slower; use a metal ruler + craft knife on a cutting mat for precision. - Problem: Glue wrinkles paper.
Fix: Switch to tape runner for large areas; use tiny dots of liquid glue only for small embellishments. - Problem: Ink smears on vellum.
Fix: Use pigment ink designed for vellum or let dry longer; avoid touching stamped areas for 10–15 minutes. - Problem: Invitation feels “too busy.”
Fix: Remove one embellishment and increase whitespace; keep the focal point in one corner or at the top.
Common Crafting Mistakes to Avoid
- Skipping a test print. One typo can ruin a whole batch of DIY invitations.
- Using thin paper. Lightweight paper curls and looks less polished. Aim for 80–110 lb cardstock.
- Over-gluing. Excess glue seeps out and leaves shiny spots. Use minimal adhesive.
- Not accounting for drying time. Pressed flowers and stamped vellum need time to set before stacking.
- Placing text too close to edges. Keep at least a 1/2" margin so the design feels balanced.
- Bulky embellishments inside tight envelopes. If it doesn’t slide in smoothly, switch to flatter details or size up the envelope.
FAQ: Seasonal DIY Invitations
How many invitations should I make for my party?
Count by households, not guests, for mailed invites. For example, a couple or family usually needs one invitation. Add 2–4 extras for last-minute additions or mistakes.
What’s the best printer for DIY invitations?
An inkjet printer handles color beautifully, while a laser printer gives crisp text and is less likely to smear. If you’re printing on vellum, test first—vellum can be picky about ink drying.
How can I make handmade invitations look consistent?
Use a paper trimmer, batch your steps (cut everything first), and limit your design to 2–3 core elements. Consistent placement—like keeping your focal icon 1" from the top—makes a big difference.
Can I make these invitations if I’m not good at drawing?
Yes. Lean on punches, stickers, pre-cut die-cuts, and printed templates. The “handmade” charm comes from assembly and texture, not illustration skills.
How far in advance should I send seasonal party invitations?
For casual parties, 2–3 weeks is usually plenty. For holiday events or anything during a busy season, aim for 3–5 weeks so guests can plan.
What’s the cheapest way to create seasonal invitations?
Use postcard-style 4" x 6" cards, skip dimensional embellishments, and decorate with one accent like a seasonal sticker or a simple stamped icon. You’ll save on materials and sometimes postage.
Wrap-Up: Make the Season Part of the Celebration
Seasonal invitations are a practical DIY craft that instantly elevates your party planning—guests feel the theme before they even arrive. Start simple with a flat card and one standout detail, then level up with vellum wraps, layered paper shapes, or textured accents as your confidence grows. Your invitations don’t have to be perfect to be memorable—they just need to feel joyful, clear, and made with care.
Keep creating, keep experimenting, and when you’re ready for more handmade party decorations and DIY craft projects, explore more ideas on smartpartyprep.com.
More Articles
 No-Sew Friendship Bracelets Tutorial
 How to Unblock 3rd Party Session Cookies on Mac: A Step-by-Step Safari & Chrome Fix That Actually Works (No Extensions Needed)
 10 Creative Custom Stickers Ideas
 DIY Party Banners Using Cricut
 Paper Craft Soap Bars Ideas
 How Do I Unblock Third Party Cookies? (2024 Step-by-Step Guide for Chrome, Safari, Firefox & Edge — No Tech Degree Required)
 How to Know If a Supplement Is Third Party Tested: 7 Non-Negotiable Checks That Reveal Hidden Contaminants, Fake Labels, and Dangerous Gaps — Before You Swallow One Capsule
 How to Make a Backdrop for Party in Under 90 Minutes (No Sewing, No Pro Tools — Just $12 & Your Dining Table)
 DIY Custom Stickers Party Favors
 Advanced Greeting Cards for Crafters