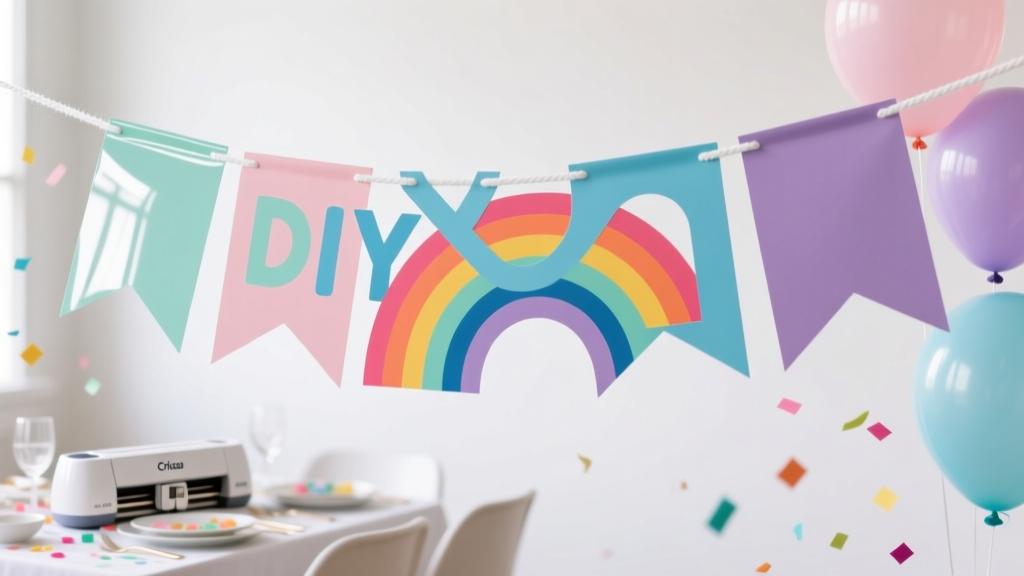
DIY Party Banners Using Cricut
Nothing sets the mood for a celebration faster than a gorgeous party banner. It’s one of those DIY party decorations that instantly makes a space feel styled—whether you’re decorating a mantle, dessert table, gift station, or photo backdrop. The best part? When you make it yourself, you can match the theme perfectly: colors, fonts, shapes, and even the exact wording.
Using a Cricut machine takes banner-making from “cute but time-consuming” to “clean, professional, and repeatable.” You’ll get crisp cuts, consistent shapes, and the freedom to create everything from classic pennants to layered cardstock letters, glitter accents, and reusable fabric pieces. If you love handmade party decor, this is one project you’ll come back to again and again.
This guide walks you through a beginner-friendly banner, plus upgrades for advanced crafters. You’ll get measurements, material options, time estimates, and troubleshooting help so your banner looks party-ready every time.
Project Overview: Skill Level, Time, and Finished Size
- Skill level: Beginner to Intermediate (Advanced variations included)
- Time estimate:
- Simple “Happy Birthday” cardstock banner: 60–90 minutes
- Layered/3D banner with extra accents: 2–3 hours
- Finished size: Most banners are 5–7 ft wide depending on letter count and spacing
- Recommended pennant size: 5 in wide x 7 in tall (classic, readable from across the room)
- String length guideline: For a 5–7 ft banner, cut 8–10 ft of twine/ribbon to allow for tying
Materials & Estimated Costs
Costs vary by brand and what you already own. These estimates are typical for craft stores and online shops.
Must-Have Tools
- Cricut cutting machine (Cricut Joy, Explore Air 2/3, Maker): already owned or borrowed
- StandardGrip cutting mat (12 x 12 in) or Joy mat for smaller pieces: $10–$15
- Fine-Point Blade (standard for cardstock/vinyl): usually included; replacement $10–$20
- Weeding tool (helpful even for cardstock details): $7–$12
- Scraper or brayer (optional but helpful): $8–$15
- Scissors for trimming twine/ribbon: $5–$12
Banner Materials
- Cardstock (65–80 lb) for pennants: $6–$12 per pack
- Cardstock (80–100 lb) for layered letters or backing: $8–$15 per pack
- Twine, baker’s twine, satin ribbon (3/8 in to 5/8 in wide), or jute: $4–$10
- Adhesive:
- Glue runner or double-sided tape (clean + fast): $5–$12
- Foam tape/squares for 3D effect: $4–$8
- Hot glue gun + mini sticks (great for heavy elements): $10–$20
- Optional upgrades:
- Glitter cardstock (mess-free sparkle): $8–$18
- Iron-on vinyl (HTV) + felt/fabric (reusable banner): $10–$25
- Grommet kit or hole punch reinforcement rings: $6–$15
Estimated Total Cost
- Budget-friendly cardstock banner: $15–$30 (if you own the Cricut)
- Premium layered banner: $25–$55 (glitter, foam tape, specialty ribbon)
- Reusable fabric banner: $30–$70 (felt/fabric + HTV + extra tools)
Design Choices That Make a Banner Look “Store-Bought”
Pick a Readable Font Pair
- Use one “statement” font (script or bold) and one simple font for balance.
- For clean cutting, choose fonts with thicker strokes. Tiny swirls can tear on cardstock.
- Letter height recommendation: 3.5–4.5 in tall for a 5 x 7 in pennant.
Choose a Banner Style
- Classic pennant banner: Triangles, notched flags, or rounded bottoms.
- Layered banner: Pennant + offset shadow + top letter layer.
- Mini banner: 3 x 4 in pennants for centerpieces and high chairs.
- Photo backdrop banner: Oversized 7 x 9 in pennants with big letters.
Step-by-Step: DIY Cardstock Party Banner with Cricut
This tutorial creates a crisp, party-ready cardstock banner with optional layered letters. It’s perfect for birthdays, baby showers, graduations, and holiday parties.
Step 1: Measure Your Hanging Space
- Choose where your banner will hang (mantle, dessert table, wall, arch).
- Measure the width. Most setups look great with 60–84 in of banner coverage.
- Plan for extra string on both ends: add 12–18 in per side.
Step 2: Decide Your Pennant Count and Spacing
- For 5 in wide pennants, a comfortable spacing is 0.5–0.75 in between flags.
- Quick math example for a 72 in span:
- Each pennant + spacing ≈ 5.5 in
- 72 ÷ 5.5 ≈ 13 pennants
- Typical phrases:
- “HAPPY BIRTHDAY” = 13 letters (perfect for many setups)
- “BABY SHOWER” = 10 letters + space; consider two rows or a shape spacer
Step 3: Create the Design in Cricut Design Space
- Start a new project and set your pennant shape:
- Use a triangle, flag, or tag shape.
- Set size to 5 in wide x 7 in tall (or your preferred size).
- Add letters:
- Type your phrase in uppercase for easy reading.
- Size letters to 3.75–4.25 in tall for 5 x 7 pennants.
- If using script, make sure letters are thick enough to cut cleanly.
- Optional layered look:
- Duplicate each letter and use an offset (about 0.08–0.12 in) to create a shadow layer.
- Cut the shadow in a darker color, and the top letter in a lighter or glitter cardstock.
- Add holes for stringing:
- Insert two small circles (holes) near the top corners.
- Circle size: 0.2–0.25 in diameter.
- Place holes about 0.4 in from the top edge and 0.4 in from each side.
- Select the pennant and the two holes and choose Attach (so the holes cut in the correct place).
Step 4: Cut Your Pennants and Letters
- Place cardstock on your mat and brayer it down for the cleanest cuts.
- Choose material setting:
- Light cardstock (65 lb): “Cardstock” or “Light Cardstock”
- Heavier cardstock (80–100 lb): “Medium Cardstock”
- Glitter cardstock: “Glitter Cardstock” (often needs more pressure)
- Send to cut. If your design has tiny interior cuts, use More Pressure only if needed.
- Unload carefully to prevent curling.
Step 5: Weed and Prep the Pieces
- Remove small cutouts (like centers of A, O, P, R) with a weeding tool.
- Keep letters organized in order. A simple trick: lay them left-to-right on your table before gluing.
Step 6: Assemble the Banner
- Attach letters to pennants:
- Use a glue runner for quick, flat adhesion.
- For layered letters, glue the shadow first, then the top letter.
- For a 3D look, use foam tape behind letters.
- String the banner:
- Cut 8–10 ft of twine or ribbon.
- Thread through the holes. Keep spacing consistent (about 0.5–0.75 in).
- Tie small knots behind each pennant if you want them to stay evenly spaced.
- Test hang before the party:
- Use painter’s tape for walls, command hooks for a clean setup, or tie to a balloon garland frame.
Pro Tips for Clean Cuts and Fast Assembly
- Prevent cardstock tears: Use a sharp blade and a clean mat. If the cardstock fibers pull, reduce pressure or switch to a newer blade.
- Stop curling: Flip the mat upside down and peel the mat away from the cardstock (instead of lifting cardstock off the mat).
- Speed up repeating shapes: Duplicate your pennant shape and use “Make It” to cut a full mat at once.
- Keep spacing perfect: Tie knots between pennants or use mini clothespins for an adjustable banner.
- Make it photo-friendly: Use high-contrast colors (dark letter on light pennant) for banners that read well in pictures.
Creative Variations (Beginner-Friendly and Advanced)
Beginner-Friendly Adaptations
- No holes needed: Skip hole circles and attach pennants with mini clothespins to the string.
- Pre-cut shapes: Use ready-made blank pennants and cut only letters with the Cricut.
- Single-layer banner: Cut letters directly from adhesive vinyl and apply to cardstock pennants for quick assembly.
Advanced Variations
- Reusable felt banner with HTV:
- Cut felt pennants (5 x 7 in) and add iron-on vinyl letters.
- Use a heat press or household iron with firm pressure and proper heat settings for your HTV brand.
- Foil or metallic accents: Add foil cardstock layers or metallic vinyl for a glam party banner.
- 3D rosettes and tassels: Attach paper rosettes (3–4 in) or tassels between words for extra dimension.
- Two-tier banner: Create two rows (example: “HAPPY” on top, “BIRTHDAY” on bottom) for large backdrops.
Troubleshooting: When Your Banner Doesn’t Cut or Assemble Nicely
- Problem: Letters rip or look fuzzy on the edges.
Fix: Use a fresh blade, lighter pressure, and sturdier cardstock (80–100 lb). Avoid super-thin script fonts. - Problem: Cardstock won’t stay stuck to the mat.
Fix: Use a cleaner/newer StandardGrip mat, brayer the cardstock down, and keep lint off the adhesive. - Problem: Holes tear when stringing.
Fix: Increase hole distance from the edge (0.5 in), reinforce holes with small cardstock rings, or use a ribbon (softer on holes than stiff twine). - Problem: Pennants won’t hang evenly.
Fix: Tie knots between flags, measure spacing, and hang with two anchor points level with each other. - Problem: Glue shows or letters lift at the corners.
Fix: Use a glue runner for clean edges, burnish letters gently, and add tiny foam dots at corners if needed.
Common Crafting Mistakes to Avoid
- Using paper that’s too thin: Lightweight paper curls and tears easily. Choose 65–100 lb cardstock for a sturdy banner.
- Overcomplicated fonts for small letters: Ultra-thin script looks pretty on screen but can cut poorly. Save it for bigger designs or thicker materials.
- Skipping a test cut: When using glitter cardstock or intricate fonts, a small test cut saves tons of time and material.
- Placing holes too close to the edge: Keep holes at least 0.4–0.5 in from the edge to prevent tearing.
- Not planning for hanging hardware: Decide early if you’re using command hooks, tape, or tying to a frame so your string length and spacing work.
- Rushing assembly: Lay out pieces in order first. One swapped letter can turn into a full re-stringing session.
FAQ: DIY Party Banners Using Cricut
What Cricut machine works best for party banners?
Any Cricut that cuts cardstock works great. Cricut Explore and Cricut Maker are ideal for full-size 12 x 12 cuts and thicker specialty materials. Cricut Joy can do banners too—just scale pennants smaller or cut fewer per mat.
What cardstock weight should I use for a sturdy banner?
For pennants, 65–80 lb is a sweet spot. For layered designs or big letters, 80–100 lb gives a more professional, non-floppy finish.
How do I make a banner that can be reused?
Use felt or fabric pennants and apply iron-on vinyl (HTV) letters, or make interchangeable letters using mini clothespins. Store flat in a large envelope or plastic bin to avoid bending.
How big should letters be so guests can read them?
For a standard banner, aim for 3.5–4.5 inches tall letters. If the banner will be part of a photo backdrop or hung high, go bigger—5–6 inches tall is easy to read across a room.
Can I use vinyl instead of cardstock letters?
Yes. Adhesive vinyl letters are fast and clean—especially for simple block fonts. Apply vinyl to cardstock pennants with a scraper tool for smooth results.
What’s the easiest way to keep spacing even?
Thread all pennants onto the string, then tie a small knot between each one, or use mini clothespins so you can slide pieces into perfect alignment after hanging.
Make One Banner… Then You’ll Want to Make Them for Every Party
A Cricut banner is one of those handmade party decorations that looks thoughtful, photographs beautifully, and can be customized endlessly—birthdays, baby showers, bridal showers, graduations, holidays, classroom parties, and more. Start with a simple cardstock version, then try layering, glitter accents, or a reusable felt set once you’re comfortable.
If you make this banner, personalize it with your favorite colors and theme details, and keep your template saved so the next party is even faster. For more DIY crafts, party decor ideas, and creative handmade projects, explore more inspiration on smartpartyprep.com.
More Articles
 Kids' Craft: Vision Boards
 How to Allow Third-Party Cookies on Chrome iPad in 2024: The Only 4-Step Guide That Actually Works (No More ‘Settings Not Found’ Errors)
 How to Buy a House as a Secured Party Creditor: The Truth About UCC-1 Filings, Property Titles, and Why 97% of These Attempts Fail Legally (and What Actually Works Instead)
 Upcycled Custom Stickers from Recycled Materials
 DIY Painted Canvas for Weddings
 Rustic Invitations Ideas (That You Can DIY at Home)
 Seasonal Garlands Ideas
 Seasonal Wooden Signs Ideas
 Advanced Centerpieces for Crafters
 DIY Vision Boards in 10 Minutes