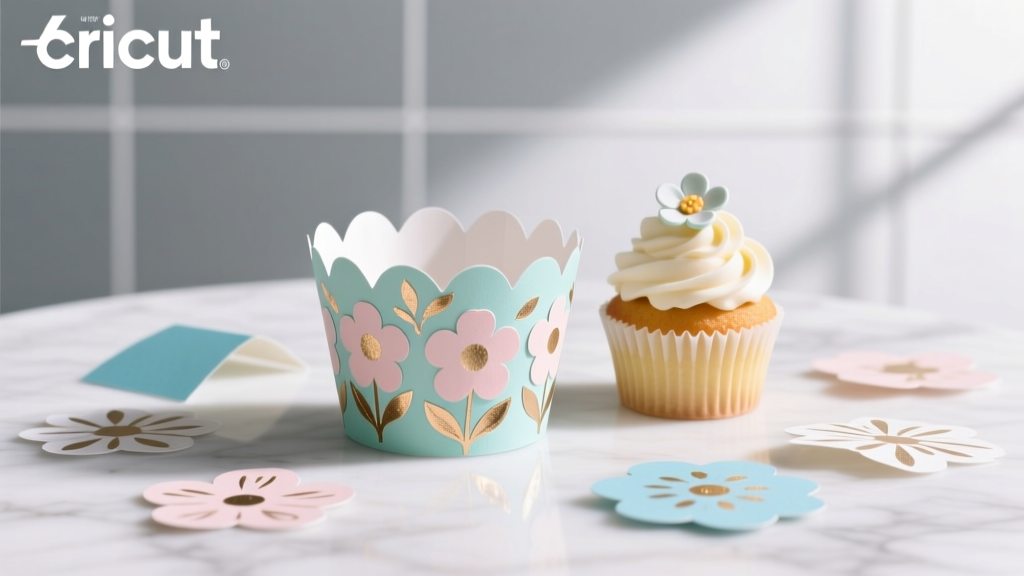
DIY Cupcake Wrappers Using Cricut
There’s something extra satisfying about party treats that look like they came from a boutique bakery—especially when you made the “fancy” part yourself. DIY cupcake wrappers are one of those small details that instantly elevate a dessert table, and they’re perfect for birthdays, baby showers, weddings, holidays, and themed celebrations.
Using a Cricut makes this project even more fun because you can cut crisp, consistent wrappers in minutes, customize the design to match your party décor, and create coordinated sets (cupcake toppers, banners, treat labels—you name it). Whether you’re a beginner who wants an easy win or an experienced crafter ready for layered cardstock and specialty finishes, these handmade party decorations are a creative way to make your cupcakes feel personal and polished.
This guide walks you through materials, sizing, Cricut settings, assembly, and pro-level tweaks—so you can confidently craft cupcake wrappers that fit well, hold their shape, and look amazing on your dessert table.
Project Overview
- Skill level: Beginner (basic wrapper) / Intermediate (layered or specialty finishes) / Advanced (custom shapes, foiling, intricate cutouts)
- Time estimate:
- Design setup: 10–20 minutes (less if using a template)
- Cutting: 10–25 minutes for 12–24 wrappers (depending on complexity)
- Assembly: 15–30 minutes for 12 wrappers
- Best for: DIY party decorations, handmade birthday décor, baby shower treats, wedding dessert tables, holiday cupcakes
- Works with: Cricut Explore Air 2, Cricut Maker, Cricut Joy (Joy needs resized patterns and smaller mats)
Materials & Tools (With Estimated Costs)
Paper & Adhesives
- Cardstock (primary wrapper material) – 65–80 lb cardstock recommended for structure.
- 12x12 cardstock packs or assorted colors
- Estimated cost: $6–$15 per pack
- Optional specialty cardstock – glitter cardstock, metallic, pearl, or textured paper (use carefully with intricate cuts).
- Estimated cost: $8–$20 per pack
- Double-sided tape (strong, clean finish) – 1/4 in or 3/8 in width works well.
- Estimated cost: $4–$10
- Glue options – glue tape runner (fast), liquid craft glue (precise), or glue dots (quick tacking).
- Estimated cost: $3–$12
Cricut Tools
- Cricut cutting machine (Explore/Maker/Joy)
- StandardGrip mat (green) for most cardstock
- Estimated cost: $12–$18
- Fine-Point Blade (standard for cardstock)
- Brayer (helps cardstock stick evenly to mat)
- Estimated cost: $10–$15
- Weeding tool (for intricate cutouts)
- Estimated cost: $6–$12
- Scoring tool – Cricut Scoring Stylus or Scoring Wheel (Maker)
- Estimated cost: $10–$40
Helpful Extras
- Paper trimmer or scissors for quick adjustments
- Bone folder for crisp folds
- Estimated cost: $5–$10
- Ruler for checking sizing
- Optional embellishments: satin ribbon (1/8 in to 3/8 in), tiny adhesive pearls, vinyl decals, labels
Measurements That Fit Real Cupcakes
Cupcake wrappers are meant to wrap around the baked cupcake (the paper liner), not bake in the oven. The goal is a snug wrap that sits neatly without popping open or looking too tall.
Standard Cupcake Wrapper Size
- Bottom diameter: ~2 inches (matches most standard cupcake liners)
- Top diameter: ~3 to 3.25 inches (slight flare looks best)
- Wrapper height: 1.75 to 2 inches
- Overlap tab: 0.5 inches (enough space for tape or glue)
Mini Cupcake Wrapper Size
- Bottom diameter: ~1.25 inches
- Top diameter: ~2 inches
- Wrapper height: 1.25 inches
- Overlap tab: 0.375 inches
Quick check: Wrap a strip of paper around a cooled cupcake liner and mark where it overlaps. This gives you a “real-life” circumference that matches your specific pan/liners.
Design Options: Simple Bands vs. Decorative Wraps
Option 1: Simple Smooth Wrapper (Beginner-Friendly)
- Clean curved band with a tab
- Fast to cut and assemble
- Great for solid colors, printed cardstock, or adding a vinyl name
Option 2: Scalloped or Lace-Edge Wrapper (Intermediate)
- Decorative top edge (scallops, waves, hearts)
- Looks “bakery-level” with minimal extra effort
- Pairs beautifully with bridal showers and tea parties
Option 3: Intricate Cutout Wrapper (Advanced)
- Filigree, floral cutouts, geometric patterns
- Best with 80 lb cardstock and a clean mat/blade
- Consider adding a solid backing layer for contrast
Step-by-Step: DIY Cupcake Wrappers Using Cricut
Step 1: Choose or Create Your Wrapper Template
- Use a Cricut Design Space template (search terms like “cupcake wrapper,” “cupcake sleeve,” “scallop wrapper”).
- Or upload an SVG from a trusted designer if you prefer specific themes.
- Or create your own shape:
- Start with a curved trapezoid (wider at top, narrower at bottom).
- Add a small tab on one side for overlap (about 0.5 inches wide).
- Add a score line where the tab meets the wrapper for a cleaner fold.
Design tip: If you’re adding text (names, “Happy Birthday,” age numbers), keep it bold and slightly larger than you think—small letters can get lost behind frosting.
Step 2: Size the Wrapper Correctly
- In Design Space, select the wrapper design.
- Set the height to 1.75–2 inches for standard cupcakes.
- Check the overall width so it wraps fully with a 0.5-inch overlap.
- Cut a single test wrapper from plain cardstock to confirm fit before making a full batch.
Step 3: Prepare Your Mat and Cardstock
- Place cardstock on a StandardGrip (green) mat.
- Use a brayer to smooth it down—especially near the edges.
- If using glitter cardstock, place it glitter-side up (most glitter cardstock is “backed” and cuts best this way).
Step 4: Select Cricut Cut Settings
- Material: Cardstock (65 lb) or Medium Cardstock (80 lb)
- Pressure: Default to start; increase if the cut doesn’t go through cleanly
- Blade: Fine-Point Blade
- Scoring: Enable scoring if your design includes a tab fold
For intricate cutouts: Use a clean blade, and consider setting the cut to “More” pressure. A fresh mat makes a big difference for tiny details.
Step 5: Cut the Wrappers
- Load your mat and start the cut.
- When finished, unload and check a small detail area (especially for filigree).
- If needed, press the Go button again for a second pass (don’t unload the mat between passes).
Step 6: Remove Cardstock Without Curling
- Flip the mat face-down onto your table.
- Slowly peel the mat away from the cardstock (not the other way around).
- Use a spatula tool if needed for delicate pieces.
Step 7: Assemble the Wrapper
- Fold along the score line (or gently pre-curve the wrapper by rolling it around a marker).
- Apply double-sided tape to the tab:
- Use a strip about 1.5 inches long for standard wrappers.
- Keep tape close to the edge so it grips well.
- Overlap the other end and press firmly for 10–15 seconds.
Food-safety reminder: Cupcake wrappers should sit outside the cupcake liner. Avoid placing adhesives where they could touch the cupcake itself.
Step 8: Add Optional Decorations
- Vinyl name decals: Great for birthdays and place settings on a dessert table
- Layered cardstock shapes: Stars, florals, bows, or themed icons
- Ribbon trim: Wrap 1/8–3/8 inch ribbon around the top edge (use glue dots)
- Foil accents: Use Cricut Foil Transfer Kit or pre-foiled cardstock for sparkle
Pro Tips for Crisp, Professional Results
- Test cut first: One test wrapper can save a whole pack of cardstock.
- Use medium cardstock for structure: 80 lb cardstock holds its shape better on humid days or outdoor parties.
- Pre-curve before taping: A gentle curve helps the wrapper sit smoothly without buckling.
- Hide the seam: Place the overlap seam at the back of the cupcake (or align it with a cupcake liner seam).
- Batch your workflow: Cut all wrappers first, then assemble all, then add embellishments. This speeds everything up.
- Match your party theme: Repeat 2–3 colors across wrappers, toppers, and banners for a cohesive DIY party decoration look.
Variations to Match Any Party Theme
Beginner Variations
- Printed cardstock: Polka dots, stripes, florals, or themed prints—no extra decoration needed.
- Monogram circles: Add a simple circle tag with an initial using foam tape for dimension.
- Two-tone wrappers: Cut the wrapper base in one color and add a thin band (0.5 inch tall) in a second color.
Advanced Variations
- Layered lace: Cut a lace overlay and glue it to a solid backing wrapper for contrast.
- Shaped wrappers: Create themed silhouettes (castle edge, bunny ears, pumpkin scallops) while keeping the bottom circumference standard.
- Personalized sets: Add names to each wrapper for place settings or party favors.
- Heat-embossed details: Stamp and emboss small icons, then attach as tags.
Troubleshooting: When Things Don’t Cut or Fit Right
My cardstock is tearing or ripping on intricate cuts
- Switch to a fresh blade or reserve a blade for paper-only projects.
- Use slightly heavier cardstock (80 lb).
- Reduce design complexity (thicken delicate lines in the file if possible).
- Make sure cardstock is firmly brayered to the mat.
The wrapper pops open
- Use strong double-sided tape instead of light tape runners.
- Increase the tab width to about 0.6 inches.
- Press and hold the seam longer before letting go.
The wrapper doesn’t fit around my cupcake
- Resize the width slightly in Design Space (increase by 0.25–0.5 inches).
- Check whether your cupcake liners are “tall” or “standard”—liners vary.
- Make sure you’re wrapping around the liner, not the frosting.
The wrapper is wavy or buckling
- Use sturdier cardstock (80 lb) and avoid overly thin paper.
- Pre-curve the wrapper before taping.
- If your party is outdoors, store wrappers flat in a dry box until setup time.
Common Crafting Mistakes to Avoid
- Baking with the wrapper on: Cupcake wrappers are decorative sleeves, not bake-safe liners.
- Skipping the test fit: A single sample saves time and prevents last-minute resizing panic.
- Using flimsy paper: Lightweight paper can collapse, especially with taller cupcakes.
- Overloading with heavy embellishments: Big gems and thick layers can make wrappers tip or separate.
- Not scoring the tab fold: A score line creates a clean seam and helps the wrapper sit smoothly.
- Peeling cardstock up from the mat: This curls the wrapper pieces—flip the mat and peel the mat away instead.
FAQ: DIY Cupcake Wrappers with Cricut
1) Are cupcake wrappers food-safe?
They can be used safely as long as the wrapper sits outside the cupcake liner and doesn’t touch the cake or frosting. Stick to clean cardstock and keep adhesives on the outside seam only.
2) What cardstock weight works best for cupcake wrappers?
For most DIY party decorations, 65–80 lb cardstock is ideal. If you’re doing intricate cutouts, 80 lb often cuts cleaner and holds shape better.
3) Can I use Cricut Joy to make cupcake wrappers?
Yes, but you’ll need to use designs sized for smaller mats and possibly slice the wrapper into sections depending on the template. Smooth, simple wrappers are the easiest Joy-friendly option.
4) How far in advance can I make cupcake wrappers?
You can make them 1–2 weeks ahead. Store flat or gently stacked in a box with tissue paper, and keep them in a dry spot to prevent warping.
5) Why do my wrappers look too short or too tall?
This is usually a sizing mismatch between the wrapper height and your liner style. Standard wrappers look best at 1.75–2 inches tall. If you’re using tall liners, increase height slightly and test again.
6) Can I match my wrappers to other handmade party decorations?
Absolutely. Use the same cardstock colors and motifs for cupcake toppers, banners, straw flags, favor tags, and table labels so your party theme looks coordinated and intentional.
Wrap-Up: Make Your Dessert Table Look Custom (Because It Is)
DIY cupcake wrappers using Cricut are the kind of handmade project that delivers big visual impact with a relatively small time investment. Once you’ve made one batch, you’ll have a go-to party craft you can customize for every theme—bright birthdays, elegant showers, cozy holidays, and everything in between.
Pick a color palette, do one quick test cut, and let your Cricut handle the repetition. Your cupcakes will instantly look styled, coordinated, and truly party-ready.
Want more DIY crafts and party decoration ideas? Explore more creative projects, printables, and celebration tips on smartpartyprep.com.
More Articles
 Easy Wall Art for Beginners
 What Is 'A Party of Patches'? The Surprisingly Viral DIY Crafter’s Guide to Hosting a Low-Stress, High-Joy Fabric-Fueled Gathering That Builds Community (Not Just Quilts)
 Seasonal Favor Bags Ideas
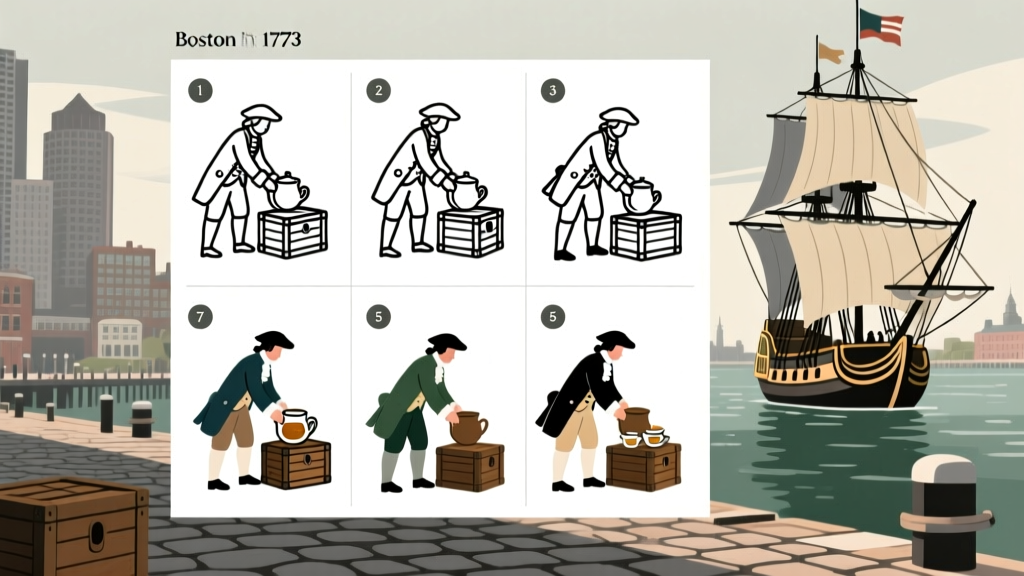 How to Draw the Boston Tea Party in Just 7 Simple Steps — No Art Degree Needed! (Beginner-Friendly Tutorial with Historical Accuracy & Printable Reference Sheets)
 How to Make Party Hats for Stuffed Animals in Under 15 Minutes (No Sewing Required!) — 7 Adorable, Budget-Friendly Designs That Actually Stay On
 30 Creative Party Banner Ideas
 How to Enable Third Party Cookies on iPhone in 2024: The Real Truth (Spoiler: You Can’t — But Here’s What Actually Works Instead)
 When the Party Is Over Chords: The Only Complete, Beginner-Friendly Guide You’ll Ever Need (No Theory Required — Just Play in 7 Minutes)
 DIY Embroidered Patches Party Favors
 DIY Candles with Dollar Store Supplies