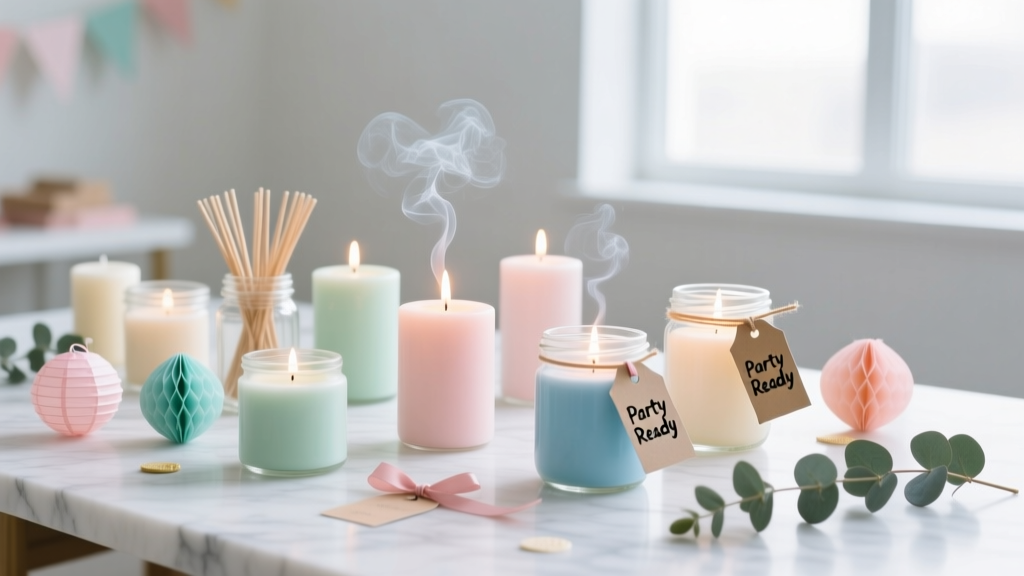
DIY Candles with Dollar Store Supplies
Handmade candles have a way of instantly making a party feel warm, intentional, and styled—without needing a big decorating budget. The best part? You can create beautiful, giftable candles using mostly dollar store supplies and a few basic tools you may already have in your kitchen.
This project is especially fun for party prep because it’s flexible: you can match your candle colors to a birthday theme, create table-centerpiece candles for a bridal shower, or make mini favor candles for guests to take home. Whether you’re a beginner who wants a simple, no-fuss win or an experienced crafter ready to layer colors and try scent blends, you’ll find a version that fits your skill level and timeline.
Expect a craft that feels relaxing, creative, and surprisingly practical—plus your space will smell amazing while you work.
Project Overview (Skill Level + Time + Yield)
- Skill level: Beginner to Intermediate (advanced options included)
- Active time: 30–60 minutes (depending on batch size)
- Cooling/curing time: 2–4 hours to set; best burn results after 24 hours
- Yield: Varies by container; typically 3–6 small candles (4 oz jars) per 1 lb wax
- Best for: Party decorations, DIY gifts, party favors, tablescapes, holiday centerpieces
Dollar Store Candle Supplies (Materials List + Estimated Costs)
You can find many of these at a dollar store (Dollar Tree-style). For items that may vary by store, alternatives are listed.
Wax + Scent + Color
- Candle wax (recommended): Soy wax flakes, paraffin wax, or “wax melts” bags (if available) — $1.25–$8
- If your dollar store doesn’t carry wax, pick up a 1–2 lb bag of soy wax flakes online or at a craft store for the best results.
- Fragrance (budget-friendly): Fragrance oils, essential oil (limited scent throw), or scented wax melts to “boost” scent — $1.25–$6
- Color: Crayons (small shaved pieces), candle dye chips (best), or mica powder (for shimmer) — $1.25–$5
Wicks + Wick Tools
- Pre-tabbed cotton wicks (best) — $1.25–$6
- Wick stickers or double-sided tape — $1.25
- Wick centering tool: clothespins, chopsticks, pencils, or popsicle sticks — $1.25
Containers (Party-Perfect Options)
- Small glass jars (4–8 oz), mini mason-style jars, or votive holders — $1.25–$5
- Metal tins (if available) — $1.25–$5
- Heat-safe mugs or glass cups: choose thick glass; avoid thin, cracked, or decorative-only glass — $1.25–$5
Tools (Mostly Kitchen-Friendly)
- Pouring pitcher: metal or heat-safe measuring cup — $1.25–$10
- Double boiler setup: saucepan + heat-safe bowl/pitcher — use what you have
- Thermometer: candy thermometer or infrared thermometer (helpful for consistent results) — $5–$15
- Stir stick: wooden skewer or popsicle stick — $1.25
- Rubbing alcohol (for cleaning jars and removing bubbles) — $1.25–$3
- Scissors (wick trimming) — use what you have
Decorating Supplies (Optional, Party-Ready)
- Sticker labels or kraft tags — $1.25
- Ribbon/twine — $1.25
- Metallic markers for names/dates — $1.25–$3
Safety Notes for Candle Making (Quick + Practical)
- Work on a protected surface (foil, parchment, or a tray).
- Never leave melting wax unattended.
- Keep water away from melted wax (it can splatter).
- Use heat-safe containers only; avoid glass that feels thin or decorative-only.
- Keep pets/kids away from hot wax and fragrance oils.
Step-by-Step: How to Make DIY Candles with Dollar Store Supplies
Step 1: Prep Your Containers (5–10 minutes)
- Wash and dry jars/tins fully.
- Wipe the inside with rubbing alcohol to remove oils or dust.
- Warm the containers slightly (optional but helpful): let them sit near a warm oven (turned off) or rinse with warm water and dry. This helps reduce “wet spots” (wax pulling away from glass).
Step 2: Attach and Center the Wick (5 minutes)
- Place a wick sticker or a small piece of double-sided tape on the metal wick tab.
- Press the wick tab firmly into the center of the container.
- Use a clothespin, chopsticks, or pencils across the top of the jar to keep the wick upright and centered.
Party tip: If you’re making favors, line up all containers on a tray first. Assembly-line style is faster and cleaner.
Step 3: Measure Your Wax (2 minutes)
- Rule of thumb: 1 cup of wax flakes makes roughly 1 cup of melted wax (varies slightly by wax type).
- Easy measuring: Fill your container(s) with wax flakes (not packed), then pour into your melting pitcher. For multiple candles, measure total volume and add about 10% extra for topping off.
Step 4: Melt the Wax Using a Double Boiler (10–20 minutes)
- Add a few inches of water to a saucepan and bring it to a gentle simmer.
- Place your wax in a metal pouring pitcher or heat-safe bowl, then set it over the simmering water.
- Stir occasionally until fully melted.
Temperature guide (general):
- Soy wax melts around 120–180°F depending on blend.
- Aim to add fragrance around 160–185°F (varies by product).
- Pour often works best around 120–150°F for soy (helps reduce frosting), and warmer for paraffin.
Step 5: Add Color (2–5 minutes)
- For crayons: shave a small amount (about 1/8–1/4 crayon per 8 oz candle) and melt fully.
- For dye chips: start tiny—1 chip can go a long way.
- For mica: use 1/8 tsp per 8 oz for shimmer (note: mica can clog wicks in some candles, so it’s best for decorative or wider-wick containers).
Step 6: Add Fragrance (2 minutes)
- A safe, simple range is 6–8% fragrance load for many waxes.
- Simple measuring: For 8 oz (227 g) wax, use about 14–18 g fragrance (roughly 1 tablespoon, depending on oil).
- Stir slowly for 60–90 seconds to bind scent with wax.
Party-friendly scents: vanilla, coconut, clean cotton, lavender, citrus, or “birthday cake” style blends.
Step 7: Pour the Wax (5 minutes)
- Pour slowly into the container, leaving about 1/2 inch space at the top.
- Keep the wick centered as you pour.
- Let candles sit undisturbed on a flat surface.
Step 8: Cool, Top Off, and Finish (2–4 hours)
- If a small sinkhole forms near the wick, re-melt a little leftover wax and top off once the candle is mostly set.
- Once fully cool, trim wick to 1/4 inch (6 mm).
- For best burn and scent throw, let candles rest for 24 hours before lighting (soy often improves even more after 48 hours).
Pro Tips for Party-Perfect DIY Candles
- Batch for events: Make candles 3–7 days before the party so they cure and burn evenly during the event.
- Label like a pro: Add a simple sticker label with scent name + date. For favors, add “Thank you!” plus the event name.
- Prevent messy pours: Pour from a spouted metal pitcher and wipe drips with paper towel while wax is still warm.
- Smooth tops hack: If tops cool unevenly, use a hair dryer or heat gun briefly to re-melt the top layer until smooth.
- Keep colors on-theme: Match party decorations—pastels for baby showers, black/gold for milestone birthdays, pink/red for Galentine’s.
Creative Variations (Beginner-Friendly to Advanced)
Easy Beginner Variations
- Single-color jar candles: One pour, one scent, clean look—perfect for beginners.
- Mini favor candles: Use 2–4 oz jars or small glass holders. Add ribbon and a tag for instant party favors.
- Floating candles look (no float required): Pour into short clear glasses and decorate the outside with a wraparound label.
Intermediate Party Variations
- Layered color candles: Pour first layer (about 1/3 of jar), cool until a thick skin forms (about 20–40 minutes), then pour the next layer slightly cooler to reduce melting lines.
- Two-tone ombré: Pour a darker shade first, then gradually lighten the mix for later pours.
- Confetti-style look: Add tiny shaved wax bits (from wax melts) near the edges for a speckled party vibe.
Advanced Variations
- Embed shapes: Use silicone molds (hearts/stars) to make wax embeds, then place them in the jar and pour around them.
- Custom scent blending: Mix oils like 2 parts vanilla + 1 part coconut for a “party dessert” candle, or 2 parts citrus + 1 part lavender for a fresh event vibe.
- Wood wick upgrade: If you can source wood wicks, they add a high-end crackle effect (test burn is essential).
Troubleshooting: Fix Common Candle Problems
- Sinkhole near the wick: Wax cooled too fast or air pocket formed. Fix by poking 2–3 small relief holes near the wick and topping off with a bit of warm wax.
- Wax pulling away from glass (wet spots): Container was cool or wax poured too hot/cold for your wax type. Warm jars next time and pour at a consistent temperature.
- Frosting (white crystal look on soy): Common and cosmetic. Reduce by pouring a bit cooler and letting candles cool slowly away from drafts.
- Weak scent throw: Too little fragrance, wrong oil type, or not enough cure time. Increase within safe limits, stir longer, and allow 24–48 hours cure.
- Wick drowning (flame goes out): Wick too small or jar too wide. Use a larger wick or a narrower container.
Common Crafting Mistakes to Avoid
- Using non-heat-safe containers: Thin glass can crack. Choose sturdy jars designed to handle heat.
- Eyeballing wick size: A wick that’s too small tunnels; too large smokes. Match wick to container diameter when possible.
- Skipping the alcohol wipe: Oils and dust reduce adhesion and can create surface issues.
- Adding fragrance when wax is too hot: It can burn off scent. Use a thermometer if you can.
- Moving candles while setting: This can create slanted tops and off-center wicks.
- Over-coloring with crayons: Too much pigment can clog the wick. Use small amounts and test one candle first.
FAQ: DIY Dollar Store Candles
1) Can I use dollar store candles to make new candles?
Yes. You can chop up plain unscented candles or tea lights and melt them as your wax source. Remove any old wick pieces and metal tabs before pouring. Results vary by wax type, but it’s a great budget-friendly option for party decor candles.
2) What are the best dollar store containers for candle making?
Look for thick glass jars, simple votive holders, or metal tins. Avoid thin glass, anything cracked, and containers with glued-on decorations that could loosen with heat.
3) How much wax do I need for one 8 oz jar candle?
Plan for about 7–8 oz of wax by weight (it depends on jar shape). If measuring by volume, an 8 oz jar typically needs close to 1 cup of wax flakes, plus a little extra for topping off.
4) Can I use essential oils instead of fragrance oils?
You can, but scent throw is often lighter, and some essential oils can be expensive or fade faster. For party favors or table candles where scent matters, fragrance oils made for candle making usually perform better.
5) Why is my candle tunneling (burning a hole down the middle)?
Tunneling usually means the wick is too small or the first burn wasn’t long enough. On the first light, burn until the melted wax pool reaches close to the jar edges (often 1–2 hours for small jars). If tunneling continues, switch to a larger wick next batch.
6) How do I package these as party favors?
Let candles cure 24–48 hours, then add a label, tie on a tag, and place each candle in a small bag or box. Include a simple burn instruction card (trim wick to 1/4 inch, burn 2–3 hours max per session).
Wrap-Up: Your Next Favorite Party Decoration (Made by You)
DIY candles are one of those handmade projects that look high-end, feel personal, and fit almost any party theme. Start simple with one color and one scent, then build up to layered designs and custom labels once you’ve made a batch or two. Your future self (and your party guests) will love the cozy glow.
Want more budget-friendly DIY crafts, party decorations, and handmade project ideas? Explore more creative inspiration on smartpartyprep.com—your next party-perfect project is waiting.
More Articles
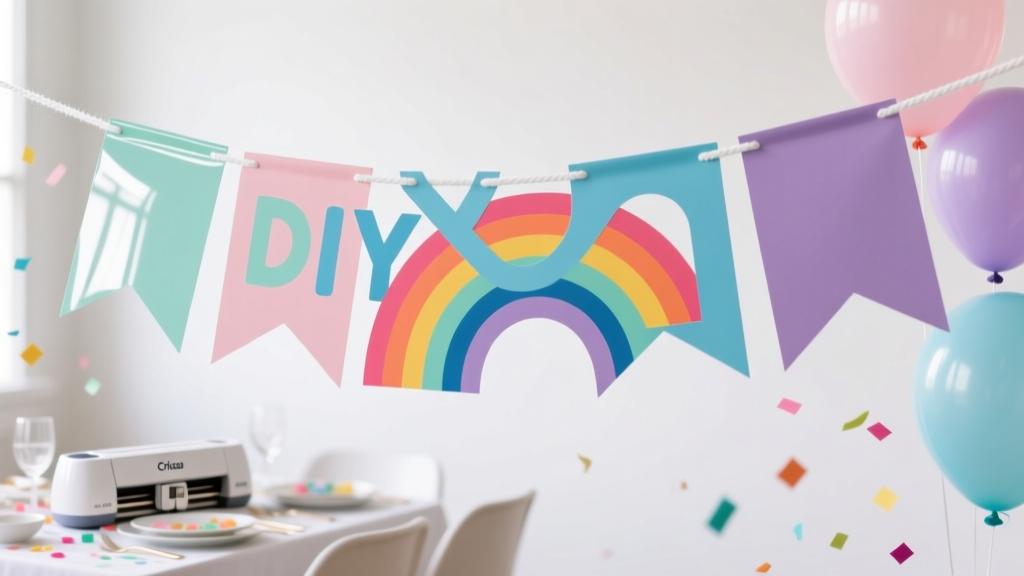 DIY Party Banners Using Cricut
 How to Enable Third Party Cookies on iPhone in 2024: The Real Truth (Spoiler: You Can’t — But Here’s What Actually Works Instead)
 Budget DIY Origami Decorations Under $15
 Step-by-Step Dream Catchers Tutorial
 How to Make a Party Popper in 7 Minutes (No Glue, No Mess, No Store-Bought Kits) — A Foolproof DIY Guide That Actually Works Every Time
 DIY Thank You Cards Party Favors
 How to Enable Third Party Cookies in My Browser (2024 Guide): Step-by-Step Fixes for Chrome, Safari, Firefox & Edge — Because Yes, You *Can* Still Do It (Without Compromising Security)
 How to Install 3rd Party Apps on Vizio Smart TV (Without Jailbreaking): A Step-by-Step Guide That Actually Works in 2024 — No Developer Mode Myths, No App Store Limits, Just Real Methods That Unlock Netflix Alternatives, Plex, and More
 Easy Tie-Dye Shirts for Beginners
 How to Know If a Supplement Is Third Party Tested: 7 Non-Negotiable Checks That Reveal Hidden Contaminants, Fake Labels, and Dangerous Gaps — Before You Swallow One Capsule