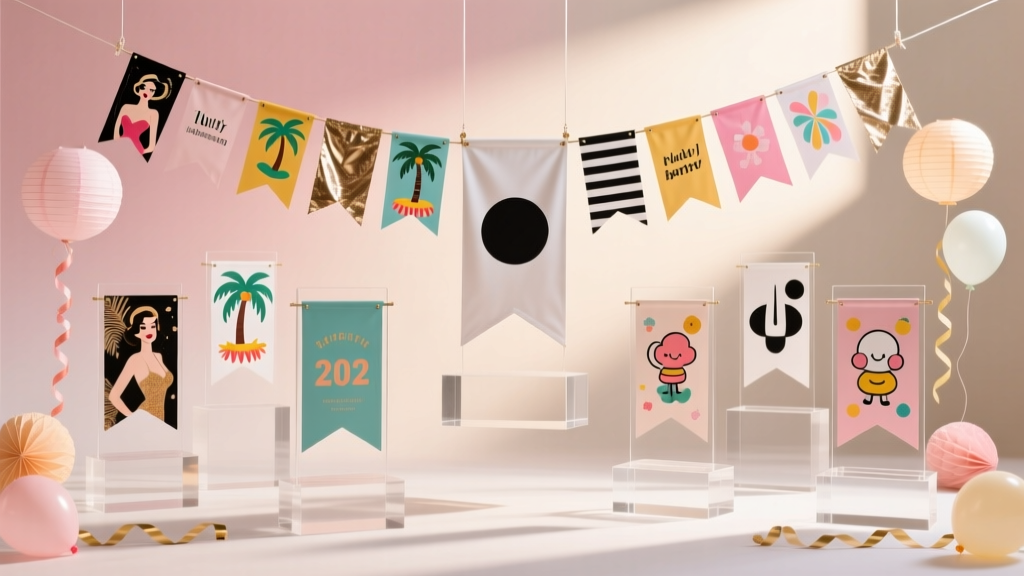
30 Creative Party Banner Ideas
Few DIY party decorations deliver as much “wow” for so little time (and money) as a handmade party banner. You can customize the colors, the message, the size, and the texture to match any theme—from a cozy backyard birthday to a bold graduation bash. Plus, banners are photo-ready: they instantly frame dessert tables, gift stations, and party backdrops.
The best part? A banner is flexible. Make it simple with paper triangles and string, or go all-out with layered cardstock, vinyl lettering, lights, and 3D embellishments. This guide shares 30 creative party banner ideas, along with step-by-step instructions, materials with estimated costs, time estimates, and practical tips to help your DIY party banner look polished (even if you’re a beginner).
Pick one idea and run with it, or mix and match techniques to create a one-of-a-kind handmade party decoration your guests will remember.
Quick Planning: Size, Placement, and Style
Recommended banner sizes
- Standard “mantel/table” banner: 5–7 ft long, 5–7 in tall flags
- Photo backdrop banner: 8–12 ft long, 7–10 in tall flags
- High-impact wall statement: 10–15 ft long, layered flags + extra tails/streamers
Skill level and time estimates
- Beginner: 30–60 minutes (simple cut shapes + string)
- Intermediate: 60–120 minutes (layering, lettering, tassels)
- Advanced: 2–4 hours (3D elements, lighting, sewing, vinyl)
Materials List (With Specific Product Types + Estimated Costs)
These are common supplies for DIY banners. You won’t need everything for every idea—choose what fits your design.
Core materials
- Cardstock (65–110 lb) in theme colors, 12x12 in or 8.5x11 in (pack): $6–$15
- Kraft paper or brown cardstock (rustic base): $5–$12
- Felt sheets (9x12 in multi-pack): $6–$12
- Fabric (cotton or canvas), 1 yard for bunting: $6–$18
- Baker’s twine or satin ribbon (25–50 ft): $4–$10
- Jute twine (rustic look, 100 ft): $6–$10
Adhesives and fasteners
- Hot glue gun (mini or full-size) + glue sticks: $10–$25
- Double-sided tape runner (clean, quick): $6–$12
- Liquid craft glue (paper + light embellishments): $3–$7
- Mini clothespins for clip-on banners (pack): $3–$6
Tools (recommended)
- Paper trimmer (straight cuts fast): $12–$30
- Scissors (8 in) + detail scissors: $6–$20
- Hole punch (single or 1/4 in): $6–$12
- Ruler + self-healing cutting mat + craft knife (for precision): $15–$35
- Optional: Cutting machine + vinyl (Cricut/Silhouette style), if you already own one
Decor extras
- Tissue paper (tassels/flowers), pack: $4–$10
- Glitter cardstock (accent letters), pack: $6–$15
- Pom-pom trim or ric-rac: $4–$12
- LED fairy lights (battery pack): $8–$18
- Vinyl letters or letter stickers: $4–$15
Step-by-Step: The Classic Pennant Banner (Best Beginner Base)
Skill level: Beginner
Time: 45–75 minutes for a 6 ft banner (10–12 flags)
Finished size: About 6 ft long, flags approx. 6 in wide x 7 in tall
Measurements (simple and reliable)
- Flag size: 6 in wide x 7 in tall (triangle or swallowtail)
- Spacing: 1/2 in between flags
- String allowance: Add 12–18 in of extra twine on each end for tying
Instructions
- Cut the flags. Use a paper trimmer for rectangles first (6x7 in), then trim into triangles or cut a 1.5 in “V” notch for swallowtails.
- Mark hole placement. Measure 3/4 in down from the top corners. Mark two dots per flag.
- Punch holes. Use a 1/4 in hole punch. Keep hole placement consistent for a straight-looking banner.
- Add letters or designs. Use letter stickers, hand-letter with a marker, or glue on cut-out cardstock letters. Let glue dry 5–10 minutes.
- Thread the twine. Lay flags in order and thread twine through the holes, leaving 1/2 in spacing between flags.
- Hang and adjust. Tape the ends to the wall temporarily, step back, and adjust spacing before tying it up for real.
30 Creative Party Banner Ideas (Pick Your Favorite Style)
Each idea works as a standalone DIY party banner or as a mix-and-match feature for a larger party backdrop.
Paper + Cardstock Banners
- Layered scallop banner: Glue a 5 in circle scallop behind a 4 in circle for a clean, “store-bought” look.
- Mini flag cake-table banner: Make 3–4 in flags and hang across the front of a dessert stand or table.
- Ombre color-wash banner: Use cardstock shades from light to dark in the same color family for a smooth gradient.
- Accordion fan banner: Add paper rosettes (6–8 in) between letter flags to fill space fast.
- Geometric gem banner: Cut diamond shapes (about 6 in tall) and outline with metallic marker.
- Confetti shaker banner: Add a small clear pocket (laminated or plastic sleeve) with sequins for 1–2 “shaker” flags.
- 3D fringe banner: Cut 4 in long fringe strips and layer them like feathers on each flag.
- Origami-inspired folded banner: Fold paper into simple “kite” shapes for texture without extra supplies.
Fabric + Felt Banners
- No-sew fabric bunting: Cut fabric triangles (7x8 in), fold over twine, secure with fabric glue or hot glue.
- Felt letter pennants: Felt doesn’t fray, so it’s perfect for reusable birthday banners.
- Patchwork banner: Mix 3–5 coordinating cotton prints; keep the shapes identical for a cohesive look.
- Appliqué name banner: Layer smaller felt letters on large fabric flags for baby showers and birthdays.
- Macramé-inspired yarn banner: Tie lengths of yarn (10–14 in) to a dowel for a soft, boho backdrop.
- Denim upcycle banner: Cut triangles from old jeans and stencil letters with fabric paint.
- Pom-pom edge felt banner: Glue pom-pom trim along the bottom of each felt flag for instant charm.
Theme Banners for Popular Parties
- Balloon-shaped banner: Cut balloon silhouettes (4x6 in) and draw strings down from each one.
- Rainbow birthday banner: Use arches (5 in wide) and arrange colors in real rainbow order for maximum pop.
- Jungle leaves banner: Cut monstera and palm leaves from green cardstock; add gold paint splatters.
- Princess crown banner: Use glitter cardstock crowns (about 5 in wide) and pearl stickers.
- Space/galaxy banner: Blend dark blues/purples with sponge paint, then add star stickers.
- Under-the-sea banner: Layer fish scales (half circles) and add a few paper coral pieces.
- Halloween spooky pennants: Black/orange triangles plus mini bat cutouts on the string line.
- Winter “snow day” banner: White + silver flags with paper snowflakes (3–4 in) as accents.
Interactive + Photo-Worthy Banners
- Photo clip banner: String twine and mini clothespins to display baby photos or birthday milestones.
- Scratch-off message banner: Write the message in bold, cover with scratch-off sticker paper for a fun reveal.
- Glow party banner: Use neon cardstock and add glow sticks behind or around the banner line.
- LED fairy light banner: Weave micro lights through the string line; keep battery pack hidden behind the backdrop.
- Chalkboard-style banner: Use black cardstock and write with a white paint pen; update it for every party.
- Pin-the-tail style banner game: Make a large animal/banner center plus removable pieces for guests to place.
- Oversized letter banner: One huge letter per flag (8–10 in tall) for a dramatic photo background.
Assembly Options: Choose Your Hanging Method
- Hole-punch + twine: Best for paper and cardstock; quick and adjustable.
- Fold-over top edge: Create a 1 in flap at the top of each flag and glue/seal around ribbon for a clean look.
- Clothespin clip-on: Best for reusability and photo banners; no holes needed in the flags.
- Dowel rod banner: Great for yarn, tassels, and macramé styles; hangs flat and looks intentional.
Pro Tips, Variations, and Troubleshooting
Pro tips for a polished look
- Use a template. Cut one perfect flag and trace it for consistent shapes.
- Keep letter height consistent. For 7 in tall flags, aim for 3.5–4.5 in tall letters.
- Build a “center-out” layout. Place the middle flag first, then work outward to keep spacing even.
- Add weight if it curls. Use a tiny dot of removable putty behind stubborn corners.
Easy variations for beginners
- Pre-cut shapes: Use craft store paper shapes (circles, stars) instead of cutting everything yourself.
- Sticker letters: Faster and cleaner than hand-cutting alphabet letters.
- Single-layer design: Skip layering and let patterned paper do the work.
Advanced upgrades for experienced crafters
- Vinyl lettering: Heat transfer vinyl on fabric flags for a crisp, professional finish.
- Stitched fabric bunting: Sew two triangles together (right sides facing), turn, press, topstitch.
- Foil accents: Use foil transfer sheets or metallic vinyl for luxe party decor.
Troubleshooting
- Problem: Banner sags in the middle. Solution: Use a thicker cord (1.5–2 mm), reduce flag weight, or add a center wall hook.
- Problem: Holes rip. Solution: Reinforce with small circle stickers (hole reinforcements) or punch farther from edges (at least 3/4 in).
- Problem: Letters look uneven. Solution: Lightly pencil a baseline on each flag; use a ruler for alignment.
- Problem: Hot glue bumps show. Solution: Use a tape runner for paper, or apply hot glue in tiny dots and press quickly.
Common Crafting Mistakes to Avoid
- Skipping a quick mock layout: Arrange flags on the floor before threading—fixing spelling or spacing later is frustrating.
- Making flags too small for the viewing distance: For photo backdrops, go bigger (7–10 in tall flags, bold letters).
- Overloading with heavy embellishments: Thick layered elements can pull the banner down or twist it on the string.
- Not accounting for hanging space: Measure your wall/mantel first; leave 12–18 in of twine at each end.
- Using weak adhesives for textured items: Pom-poms, felt, and trim need hot glue or strong tacky glue.
- Forgetting lighting: Banners look best when they’re well-lit—especially for photos.
FAQ: DIY Party Banners
How many flags do I need for a 6-foot banner?
With 6 in wide flags and about 1/2 in spacing, plan on 10–12 flags. If you want a fuller look, reduce spacing to 1/4 in or add rosettes/tassels between flags.
What paper weight works best for banners?
65 lb cardstock is a great all-around choice. If you’re layering or adding heavy letters, use 80–110 lb cardstock to prevent curling.
How do I make a banner reusable?
Choose felt or fabric flags, and attach them with clothespins or create a fold-over sleeve at the top. Store flat in a large envelope or hang it on a pants hanger.
Can I make a banner without a hole punch?
Yes. Use a fold-over top edge (fold 1 in down and glue to form a channel), or clip flags to twine with mini clothespins.
How far in advance can I make DIY party decorations like banners?
Paper banners can be made 1–2 weeks ahead and stored flat. Fabric/felt banners can be made even earlier and reused for future parties.
What’s the easiest way to hang a banner without damaging walls?
Use painter’s tape for light banners or removable adhesive hooks for heavier ones. For brick or textured walls, try removable mounting putty in small dots behind corners.
Wrap-Up: Your Party, Your Handmade Style
A creative party banner is one of those DIY crafts that instantly upgrades your party decorations—without requiring a huge budget or advanced tools. Start with the classic pennant banner, then experiment with tassels, fabric, lights, and themed shapes until it feels perfectly “you.”
Make one for the next birthday, shower, graduation, or holiday gathering, and keep it as a signature handmade decoration you can bring out again and again. For more party-ready DIY crafts, printable ideas, and smart decorating tips, explore more projects on smartpartyprep.com.
More Articles
 Advanced Paper Lanterns for Crafters
 DIY Origami Decorations with Dollar Store Supplies
 How to Make Diddy Party in Infinite Craft: The Only 4-Step Method That Actually Works (No Random Combos, No Wasted Time)
 How to Allow Third Party Cookies in Safari (2024): The Only Step-by-Step Guide You’ll Need — No More 'Blocked' Warnings, Login Failures, or Broken Tools
 Seasonal Origami Decorations Ideas
 No-Sew Scrapbook Pages Tutorial
 DIY Friendship Bracelets for Birthdays
 DIY Resin Jewelry Using Cricut
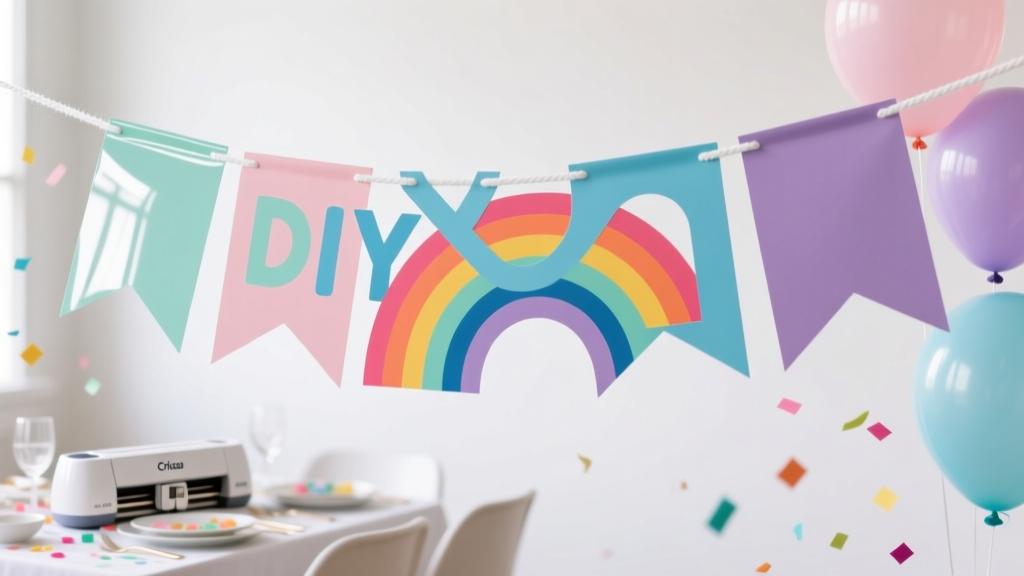 DIY Party Banners Using Cricut
 Personalized Balloon Arches Gifts