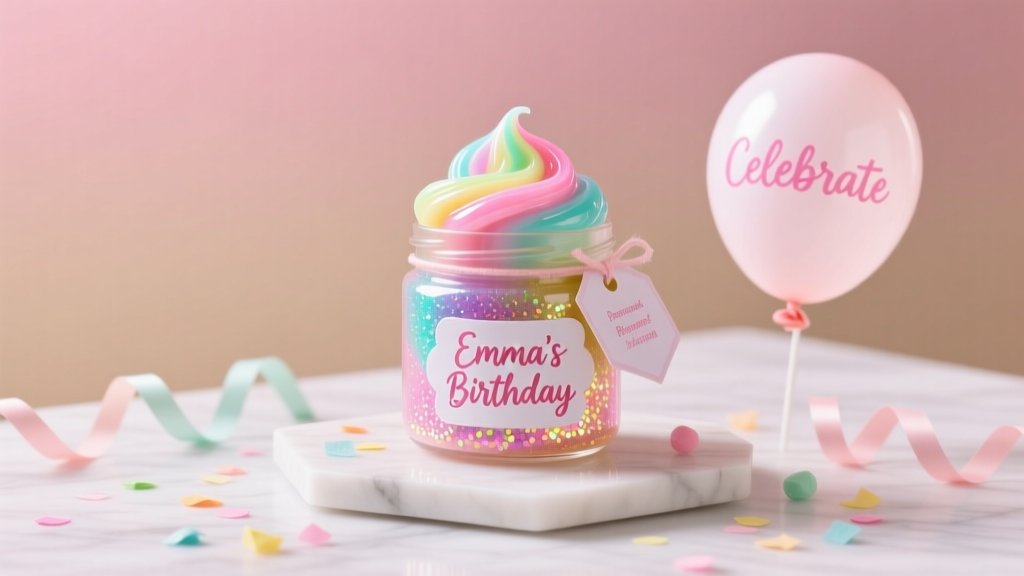
Personalized Slime Gifts
Handmade slime gifts are the kind of party favor people actually play with—during the party and long after. They’re colorful, tactile, and endlessly customizable, which makes them perfect for birthdays, sleepovers, classroom celebrations, and holiday gatherings. Best of all, you can tailor each jar to match a theme (mermaids, space, dinosaurs, pastel bakeshop vibes) or personalize them with names and tiny charms.
This project is also a win for party prep: you can make a batch in an afternoon, package them neatly, and set them out as a favor table display that doubles as party decoration. Whether you’re a beginner who wants a no-stress craft or an advanced maker ready for glossy, scented, texture-packed creations, personalized slime gifts scale easily to your skill level.
Get ready for a practical, step-by-step guide—plus pro tips, variations, and troubleshooting—so your DIY slime favors look polished and feel amazing.
Project Overview (Skill Level, Time, Yield)
- Skill level: Beginner-friendly (with optional advanced upgrades)
- Active time: 45–90 minutes (depending on batch size and add-ins)
- Cure/rest time: 8–24 hours for best texture
- Yield: About 8–10 small party favor jars (2 oz/60 ml each) from one standard batch
- Best for: DIY party favors, handmade gifts, party table decor, classroom treats (where allowed)
Safety First (Especially for Parties)
- Ages: Adult supervision recommended. Not suitable for children under 3 (choking hazard from add-ins).
- Allergies/sensitivities: Use skin-safe colorants and fragrance oils labeled for skin/cosmetic use. Offer unscented options.
- Do not eat: Label clearly: “NOT EDIBLE.” Slime can look like candy, especially with sprinkles.
- Surface protection: Work on a wipeable table covering or craft mat.
Materials List (With Product Types and Estimated Costs)
Core Slime Ingredients
- PVA school glue (white glue): 16 oz (473 ml) bottle ($3–$8)
- Activator: Choose one:
- Borax powder (sodium borate), 4 oz ($4–$7)
- Contact lens solution + baking soda (contains boric acid and sodium borate), 8–12 oz ($3–$8) + baking soda ($1–$3)
- Warm water: for mixing activator (free)
Color, Scent, and Texture Add-Ins
- Colorant: Food coloring gel, liquid watercolor, or cosmetic-grade mica ($3–$12)
- Softener (optional): Glycerin or unscented lotion (small bottle $3–$8)
- Scent (optional): Skin-safe fragrance oil or essential oil (small bottle $6–$15)
- Glitter: Fine or chunky craft glitter ($3–$8)
- Mix-ins: Foam beads, confetti, fimo slices, mini charms, polymer “sprinkles,” fake snow, or sequins ($3–$15)
Packaging and Personalization Supplies
- 2 oz (60 ml) plastic or PET jars with lids: pack of 10–20 ($8–$20)
- Waterproof labels or sticker paper: ($5–$12)
- Ribbon/twine + gift tags: ($3–$10)
- Cellophane bags (optional for extra polish): ($4–$10)
Tool Recommendations
- Mixing bowls: 2 medium bowls (one for slime, one for activator)
- Measuring cups/spoons: 1 Tbsp, 1 tsp, and 1 cup measures
- Silicone spatula: easier scraping and less waste
- Disposable gloves: helpful for kneading and color mixing
- Digital kitchen scale (optional): for consistent batch sizing
- Funnel or piping bag (optional): clean jar filling
Choose Your Slime Style (Great for Personalized Gifts)
For party favors, you want slime that holds up in jars, travels well, and doesn’t get sticky too quickly.
- Classic glossy slime: smooth, stretchy, best for bright colors and swirls
- Glitter slime: sparkly, party-ready, hides minor imperfections
- Confetti/“birthday cake” slime: add polymer sprinkles or fimo slices
- Floam slime: foam beads add crunchy texture (advanced: seal well to reduce fallout)
- Cloud-style texture: uses instant snow; looks amazing but can be fussier (advanced)
Step-by-Step: Personalized Slime Gifts (Classic Glossy Base)
Batch size: Makes about 16–20 oz of slime total, enough for roughly 8–10 two-ounce favor jars.
Step 1: Prep Your Workspace (5 minutes)
- Cover your surface with a washable mat or disposable tablecloth.
- Set out jars, lids, and labels so you can fill and cap quickly.
- If you’re making multiple colors, line up small bowls or cups for portioning.
Step 2: Mix the Activator (5 minutes)
Borax activator (recommended for consistency):
- Add 1 cup (240 ml) warm water to a bowl or measuring cup.
- Stir in 1/2 teaspoon borax powder until mostly dissolved.
- Set aside. (Undissolved grains are okay; don’t overthink it.)
Contact solution activator (alternative):
- In a small bowl, mix 1/2 teaspoon baking soda into 1 tablespoon contact lens solution.
- Scale up as needed. Texture can vary by brand—test first.
Step 3: Make the Glue Base (10 minutes)
- Pour 16 oz (473 ml) white school glue into a mixing bowl.
- Add 1–2 tablespoons water for extra stretch (optional).
- Add colorant:
- Gel food coloring: 1–3 drops to start
- Mica powder: 1/8 teaspoon for shimmer
- Add scent (optional): 2–4 drops fragrance oil (less is more for party favors).
- Stir slowly with a silicone spatula until smooth and evenly colored.
Step 4: Activate Slowly (10–15 minutes)
- Add activator 1 tablespoon at a time while stirring.
- After each addition, stir for 20–30 seconds. You’ll see the mixture begin to pull away from the bowl.
- When it starts forming a blob, stop adding activator and switch to kneading.
Step 5: Knead to Finish (5–10 minutes)
- Pick up the slime and knead it in your hands.
- If it’s too sticky, add 1–2 teaspoons activator and knead again.
- If it feels stiff or rippy, work in 2–3 drops glycerin or 1/2 teaspoon unscented lotion and knead until stretchy.
Step 6: Portion and Personalize (15–25 minutes)
- Divide slime into portions:
- 2 oz (60 ml) jar: fill about 3/4 full so there’s room for mix-ins and stretching
- Add themed mix-ins:
- Glitter: 1/8–1/4 teaspoon per jar
- Fimo slices/confetti: 1/2 teaspoon per jar
- Foam beads: 1–2 teaspoons per jar (press in well)
- For name personalization, choose one:
- Label the lid: “Ava’s Galaxy Slime” (clean and easy)
- Label the jar front: add date/event name for party decor value
- Charm topper: attach a small charm to twine around the lid
Step 7: Rest for Best Texture (8–24 hours)
- Cap jars tightly and let them rest at room temperature.
- This improves stretch and reduces stickiness, especially for freshly activated slime.
Packaging Ideas That Double as Party Decorations
- Favor bar display: Arrange jars on a tiered stand with themed confetti and a “Pick Your Slime!” sign.
- Color-coordinated sets: Match slime colors to balloons, tablecloths, and cake accents for cohesive party decor.
- Gift-ready bundles: Pair a slime jar with a small packet of extra glitter or a charm (in a tiny bag) and a tag that says “Mix it in!”
- Personal message tags: “Thanks for celebrating!” + guest name makes it feel truly handmade.
Pro Tips for Better Slime (And Happier Gift Recipients)
- Go slow with activator: Over-activating is the #1 cause of stiff slime. Add in small amounts and knead between additions.
- Use airtight jars: PET plastic jars with screw lids help slime last longer and keep it from drying out.
- Make a “test mini” first: If you’re trying a new brand of glue or contact solution, test with 2 tablespoons glue before committing to a whole batch.
- Keep add-ins balanced: Too many beads or confetti can make slime crumble. Start small; you can always add more.
- Label clearly: Include “NOT EDIBLE,” suggested age, and basic care (wash hands before play, store sealed).
Creative Variations (Beginner to Advanced)
Beginner-Friendly Adaptations
- One-color party batch: Make one big color, then personalize only with labels and small glitter choices.
- Pre-mixed “add-in kits”: Prepare little cups of sprinkles/glitter so each jar gets a consistent amount.
- Unscented + minimal dye: Reduces sensitivity concerns and keeps cleanup easier.
Advanced Variations
- Two-tone swirl jars: Split base into two colors, twist together gently, then coil into the jar for a candy-shop look.
- Butter-style texture: Knead in small amounts of air-dry clay (start with 1–2 tablespoons per 1 cup slime). Makes a soft, spreadable texture.
- Galaxy slime: Mix black + deep purple base; add fine silver glitter and star confetti. Top with a “space” charm.
- Crunchy floam: Add foam beads slowly until the slime is packed but still stretchy; use slightly thicker slime so beads stay suspended.
Troubleshooting: Fix Common Slime Problems
- Too sticky:
- Add activator 1 teaspoon at a time, kneading between additions.
- Let it rest overnight in the jar; fresh slime often gets less sticky after resting.
- Too stiff / rips easily:
- Knead in 2–3 drops glycerin or 1/2 teaspoon lotion.
- Let it warm in your hands for a minute before playing.
- Watery layer or separation:
- Too much water or not enough mixing—knead thoroughly.
- Reduce added water next time; stick to glue + color first, then activate.
- Beads/glitter falling out:
- Your base is too thin—activate slightly more for a stronger hold.
- Press add-ins in during kneading rather than sprinkling on top at the end.
- Slime smells “off” after a while:
- Encourage clean hands before use.
- Store airtight; discard if it develops mold or an unpleasant odor.
Common Crafting Mistakes to Avoid
- Adding activator all at once: This can turn a perfect batch into rubbery putty fast.
- Overfilling favor jars: Slime needs room to stretch; filled-to-the-top jars get messy and frustrate kids.
- Using paper labels without protection: They wrinkle and peel. Choose waterproof labels or clear tape over the top.
- Too many chunky add-ins: Sequins and large charms can scratch surfaces or poke fingers. Keep the chunky items small and limited.
- Skipping rest time: Resting improves texture and reduces stickiness—especially helpful if you’re gifting the next day.
- No care instructions: A tiny care tag prevents most complaints (“Mine dried out!”). Remind guests to keep lids tight.
FAQ: Personalized Slime Gifts
How far in advance can I make slime party favors?
For best texture, make them 1–3 days before the party. Keep jars sealed and stored at room temperature. If you need to prep earlier, test a sample jar after a week to confirm it’s still stretchy with your ingredients.
What size jars work best for party favors?
2 oz (60 ml) jars are ideal for goodie bags and favor tables. For close friends or “VIP” guests, use 4 oz (120 ml) jars and add extra mix-ins.
Can I make slime without borax?
Yes. Use contact lens solution + baking soda (make sure the solution contains boric acid/sodium borate). Results vary by brand, so do a small test batch first.
How do I keep slime from sticking to hands at the party?
Make sure slime is fully kneaded and rested overnight. Provide a small “slime station” with baby wipes and remind guests to play with clean, dry hands. Slightly firmer slime travels better and feels less sticky.
What are the best themes for personalized slime gifts?
Popular party themes include unicorn (pastels + glitter), galaxy (dark colors + star confetti), mermaid (teal + pearl glitter), dinosaur (green + foam beads), and birthday cake (white base + sprinkles + “frosting” swirl).
Can I ship slime gifts or send them home in goody bags?
For goody bags, seal jars tightly and consider placing each jar in a small zip bag. For shipping, use leak-proof jars, bag each one, and cushion them well—temperature changes can affect texture, so include a simple care note.
Ready to Make Your Own Slime Gift Set?
Personalized slime gifts bring big party energy with a handmade touch—bright colors, satisfying textures, and custom labels that make every guest feel remembered. Start with a simple glossy base, keep your activator slow and steady, and let your theme guide the mix-ins. After one batch, you’ll have a repeatable DIY party favor that’s easy to scale for any celebration.
Want more DIY crafts, party decorations, and handmade project ideas? Explore more creative how-tos on smartpartyprep.com and keep the party prep fun.
More Articles
 DIY Memory Books for Anniversaries
 Seasonal Origami Decorations Ideas
 DIY Thank You Cards with Dollar Store Supplies
 DIY Party Hats Using Cricut
 12 Stunning Do It Yourself Western Party Decorations You Can Make in Under 2 Hours (No Craft Store Run Needed — Just Dollar Store & Recycled Supplies!)
 How to Enable Third Party Cookies on iPad in 2024: A Step-by-Step Guide That Actually Works (No More 'Blocked' Errors or Broken Logins)
 Seasonal Painted Rocks Ideas
 How to Draw Party Hat in 5 Minutes (Even If You Can’t Draw): A Foolproof Step-by-Step Guide for Kids, Teachers & DIY Crafters Who Hate Frustrating Tutorials
 How to Make a Partiful: The 7-Step No-Stress Guide That Turns Craft Panic Into Confident Creativity (Even If You’ve Never Glued Sequins Before)
 How to Allow Third Party Cookies on MacBook Air (2020–2024): A Step-by-Step Safari & Chrome Fix That Actually Works in 2024 — No Tech Degree Required