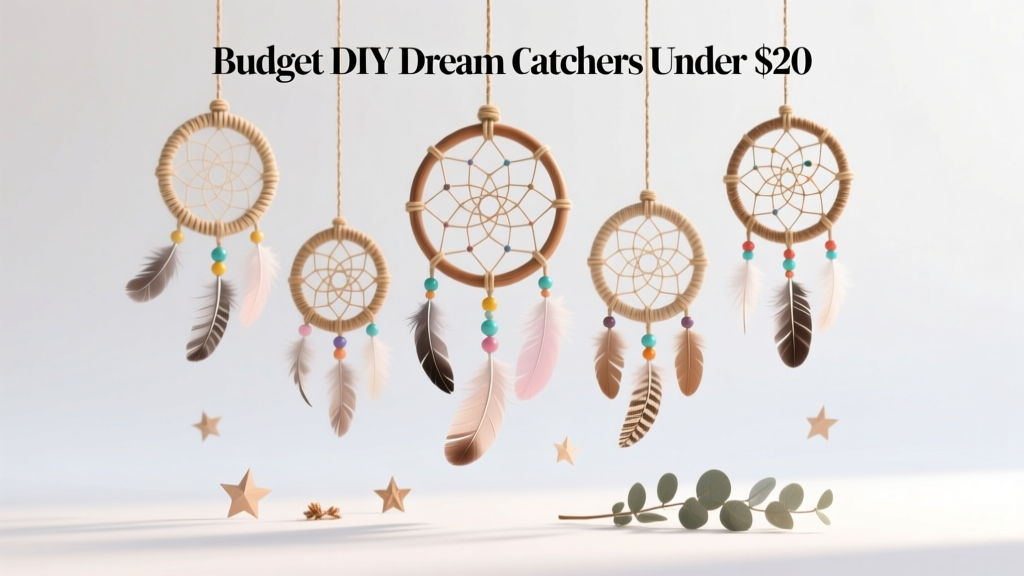
Budget DIY Dream Catchers Under $20
Dream catchers are one of those handmade decorations that instantly make a space feel special—soft textures, pretty movement, and tons of ways to match a theme. They’re also a surprisingly perfect DIY for parties: hang them as a photo backdrop, use them as table decor, or send mini versions home as favors. Best of all, you can make a gorgeous DIY dream catcher for under $20 without fancy tools or hard-to-find supplies.
This project is fun because it’s flexible. You can keep it simple with a classic web and a few ribbons, or go all-out with florals, tassels, and layered hoops for a “wow” statement piece. Whether you’re crafting for a boho birthday, a bridal shower, a baby shower nursery corner, or a sleepover party setup, dream catchers fit right in.
Below you’ll find a budget-friendly materials list, step-by-step directions, pro tips, variations (beginner and advanced), and common mistakes to avoid—so you can confidently create a handmade party decoration that looks far more expensive than it is.
Project Overview
- Skill level: Beginner (basic knotting) to Intermediate/Advanced (multi-hoop + detailed web)
- Time estimate: 45–90 minutes for one standard 8-inch dream catcher (add 30–60 minutes for advanced variations)
- Finished size: Approx. 8-inch hoop + 12–18 inches of hanging ribbons/trim
- Best for: DIY party decorations, photo backdrops, nursery/room decor, handmade gifts, party favors
Materials List (Under $20 Per Dream Catcher)
Prices vary by store, but these estimates keep the total comfortably under $20. Shop craft stores, dollar stores, and online multipacks for the best value.
Core Supplies
- Hoop (6–10 inch) — metal hoop, embroidery hoop, or floral hoop ($2–$6)
- Recommended size for parties: 8 inch (easy to see on walls and backdrops)
- Suede lace, cotton cord, or satin ribbon for wrapping the hoop (2–3 yards) ($2–$5)
- String for the web — waxed cord, crochet thread, embroidery floss, or strong cotton string (3–6 yards) ($1–$4)
- Ribbons/trim for tails — mix of satin ribbon, lace trim, yarn, or fabric strips (6–10 pieces, 18–24 inches each) ($3–$6)
- Beads — pony beads, wood beads, or acrylic pearls ($1–$3)
- Feathers (optional) — craft feathers or faux feather trim ($2–$5)
Tools (Budget-Friendly Recommendations)
- Sharp scissors (fabric scissors if cutting cloth strips)
- Hot glue gun + glue sticks (helpful for securing wraps and knots)
- Measuring tape or ruler
- Large-eye needle or beading needle (optional, makes threading beads easier)
- Clips or clothespins (optional, to hold ribbons in place while you work)
Example Budget Breakdown (Typical 8-Inch Dream Catcher)
- 8-inch hoop: $3.50
- Ribbon/suede wrap: $3.00
- Waxed cord for web: $2.50
- Assorted ribbon pack (tails): $5.00
- Beads: $2.00
- Feathers (optional): $3.50
Total: $16.00–$19.50 (and you’ll likely have leftovers for more)
Step-by-Step: DIY Dream Catcher Under $20
Step 1: Choose a Color Palette (Party-Ready)
Pick 2–4 main colors so your dream catcher looks coordinated—especially if it’s going into a party backdrop or themed table display.
- Boho neutral: cream + tan + gold
- Baby shower: blush + ivory + soft sage
- Birthday pop: teal + purple + silver
- Halloween chic: black + orange + metallic copper
Step 2: Wrap the Hoop
Measurement: For an 8-inch hoop, plan 2–3 yards of ribbon or suede lace depending on width and overlap.
- Start by securing the end of your wrap material to the hoop:
- Option A (clean finish): tie a tight knot and add a tiny dot of hot glue.
- Option B (fast): hot glue the end and press firmly for 10 seconds.
- Wrap around the hoop at a slight angle, overlapping each pass by about 1/8 inch so no metal shows.
- When you reach the starting point, trim the end and glue or knot it down neatly.
Beginner-friendly tip: A 1/2-inch satin ribbon wraps quickly and hides gaps better than thin cord.
Step 3: Create the Hanging Loop
- Cut a piece of cord or ribbon about 10–12 inches long.
- Fold it in half and tie it at the top of the hoop with a secure double knot.
- Adjust the loop height based on where you’ll hang it (backdrop stands usually need a slightly longer loop).
Step 4: Make the Web (Classic Dream Catcher Pattern)
Measurement: Cut 4–6 yards of web string for an 8-inch hoop. It’s better to have extra than come up short.
- Anchor the string: Tie the web string to the hoop near the top, just beside the hanging loop. Use a double knot.
- First round (even spacing):
- Move about 1.5–2 inches along the hoop.
- Pass the string behind the hoop, bring it forward, then loop the working end through to create a snug hitch knot around the hoop.
- Repeat around the hoop, aiming for 10–14 evenly spaced loops on an 8-inch hoop.
- Second round (webbing inward):
- Instead of knotting around the hoop, you’ll knot into the middle of each “bridge” from the previous round.
- Make the same loop-and-pull motion, but catch the center of the previous loop segment.
- Add beads (optional): Every 2–4 knots, thread on a bead before tightening the next knot. Use a needle if needed.
- Continue until the center: Keep looping inward until the hole in the center is about the size you like:
- Party backdrop look: smaller center (about 1 inch) reads more intricate
- Airy minimal look: slightly larger center (about 1.5–2 inches)
- Finish the center: Tie a tight knot at the final loop and add a tiny dot of glue for security. Trim excess string.
Step 5: Add Tails (Ribbons, Lace, and Texture)
Measurement: Cut 6–10 tails at 18–24 inches each. For a fuller, photo-friendly look, go toward 10 tails.
- Gather your ribbons, lace, yarn, or fabric strips.
- Fold each piece in half and attach it to the bottom of the hoop using a lark’s head knot:
- Fold ribbon in half → place loop under hoop → pull ends through the loop → tighten.
- Mix widths for a designer look:
- 1-inch ribbon
- 3/8-inch ribbon
- Lace trim
- Thin yarn or twine
- Trim the tails into a V-shape or staggered lengths (example: shortest 12 inches, longest 20 inches).
Step 6: Add Feathers, Tassels, or Floral Accents (Optional)
- Feathers: Tie feathers onto a few tails with thread, or glue them to ribbon ends.
- Tassel: Make a simple yarn tassel and attach it at the center bottom for a modern look.
- Florals: Glue a small cluster of faux flowers at the top-left or top-right of the hoop for a party statement piece.
Pro Tips for a Polished, Party-Worthy Finish
- Keep tension consistent: The web looks best when each loop is snug but not warping the hoop.
- Use a dab of glue strategically: A tiny amount on knots prevents slipping, especially if you’re using slippery satin cord.
- Pre-plan your ribbon layout: Arrange tails in your hands before attaching so colors alternate evenly.
- Quick photo backdrop trick: Make 3–5 matching dream catchers in different sizes (6", 8", 10") and hang them in a cluster.
- Cleaner bead threading: Wrap clear tape around the end of the string, then trim to a point—instant DIY needle.
Variations (Beginner-Friendly to Advanced)
Beginner: No-Web “Ribbon Center” Dream Catcher
If knotting the web feels intimidating, you can still get a dreamy look fast.
- Wrap the hoop as usual.
- Crisscross 6–10 ribbons across the center like a starburst and glue on the back.
- Add a few beads at intersections.
Time: 20–35 minutes
Intermediate: Double Hoop Layered Dream Catcher
- Use a 10-inch hoop as the base and a 6-inch hoop attached inside or slightly offset.
- Web both hoops, then connect them with ribbon or small chain pieces.
Party use: Gorgeous as a focal point over a dessert table.
Advanced: Ombré Web + Beaded Center Drop
- Use two colors of thread and switch halfway through the web for an ombré look.
- Add a beaded strand hanging from the center knot with a small charm at the end.
Troubleshooting: Fix Common Issues Fast
- My web looks uneven: Count your first-round loops and keep spacing consistent (10–14 for an 8-inch hoop). If one section is too tight, gently loosen and re-knot before you reach the center.
- The hoop wrap keeps slipping: Add a small dot of hot glue every 2–3 inches on the back side of the hoop as you wrap.
- My knots slide on the hoop: Use waxed cord or cotton thread instead of slick nylon. Or add a tiny glue dot on each knot.
- Ribbons look messy: Steam or lightly iron ribbons first (low heat for synthetic). Then trim tails after hanging for the most accurate length.
- Feathers won’t stay put: Tie them on with thread first, then add a tiny glue dot as backup.
Common Crafting Mistakes to Avoid
- Cutting web string too short: Always cut extra (4–6 yards for an 8-inch hoop). Running out mid-web is the most frustrating fix.
- Overloading with heavy beads: Too many large beads can distort the web and pull the hoop out of shape. Mix in lighter beads for balance.
- Using only one ribbon width: A single width can look flat. Combine at least 2 textures (satin + lace, or ribbon + yarn) for that boutique handmade look.
- Ignoring the back side: If it’s for a party backdrop, people may see it from angles. Keep glue strings minimal and trim knot tails.
- Not testing the hanger: Hang it for a minute before final trimming. Weight distribution changes once tails are attached.
FAQ: Budget DIY Dream Catchers
1) What’s the easiest hoop to use for a DIY dream catcher?
An embroidery hoop is the easiest because it’s sturdy, widely available, and simple to wrap. A metal floral hoop looks modern and sleek but can be slippery—use more glue while wrapping.
2) How do I keep this project under $20?
Buy multipacks (ribbon bundles, bead assortments, feather packs), use what you already have (yarn, scrap fabric), and keep add-ons minimal. One hoop + cord + a ribbon pack usually stays under budget.
3) Can I make mini dream catchers as party favors?
Yes—use 3–4 inch hoops. Cut tails to 6–10 inches. They’re adorable tied onto favor bags or used as place cards with a small name tag.
4) What’s the best way to hang dream catchers for a party backdrop?
Use clear fishing line, removable hooks, or a backdrop stand with clips. For a fuller DIY party decoration display, hang multiple sizes at different heights and keep colors consistent with your party theme.
5) Are dream catchers safe for kids to help make?
Kids can help with wrapping the hoop, choosing ribbon colors, and tying simple knots. Adults should handle hot glue and any small beads for younger children (choking hazard). For kid parties, skip feathers and use ribbon tassels instead.
6) How do I transport dream catchers without crushing them?
Lay them flat in a large box with tissue paper between layers. If tails wrinkle, a quick steam (or hanging them in a steamy bathroom) helps them relax before the event.
Make It Yours (and Make It Party-Ready)
A budget DIY dream catcher is one of the most satisfying handmade projects: it’s creative, forgiving, and looks amazing in photos. Try one in your party colors, then make a matching set for a wall cluster or a dreamy dessert-table backdrop. Once you’ve made one, you’ll start seeing new variations everywhere—different textures, seasonal colors, tiny favor versions, even personalized name tags for parties and showers.
Ready for more DIY crafts, party decorations, and handmade project ideas? Browse more creative how-tos on smartpartyprep.com and keep the crafting momentum going.
More Articles
 Advanced Coasters for Crafters
 Paper Craft Wall Art Ideas
 Easy Tote Bags for Beginners
 How to Make Party Hats Out of Construction Paper in Under 12 Minutes (No Glue Gun, No Scissors Required for Kids!) — 7 Foolproof Designs That Actually Stay On Heads
 How to Make T-Shirts at Home
 Modern Table Runners Designs
 Step-by-Step Photo Booth Props Tutorial
 DIY Scrapbook Pages Party Favors
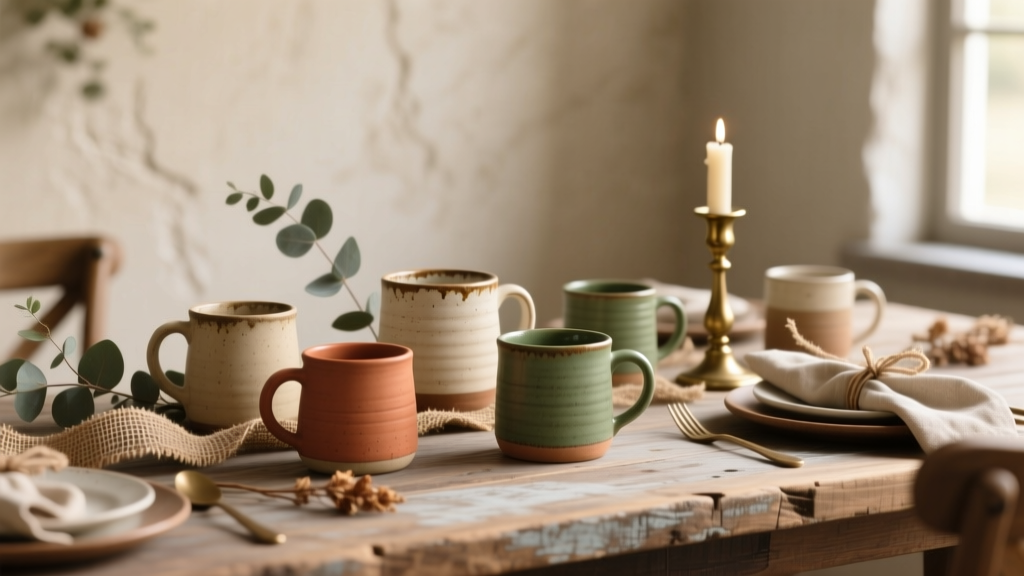 Rustic Mugs Ideas: DIY Projects for Cozy Parties, Weddings, and Giftable Decor
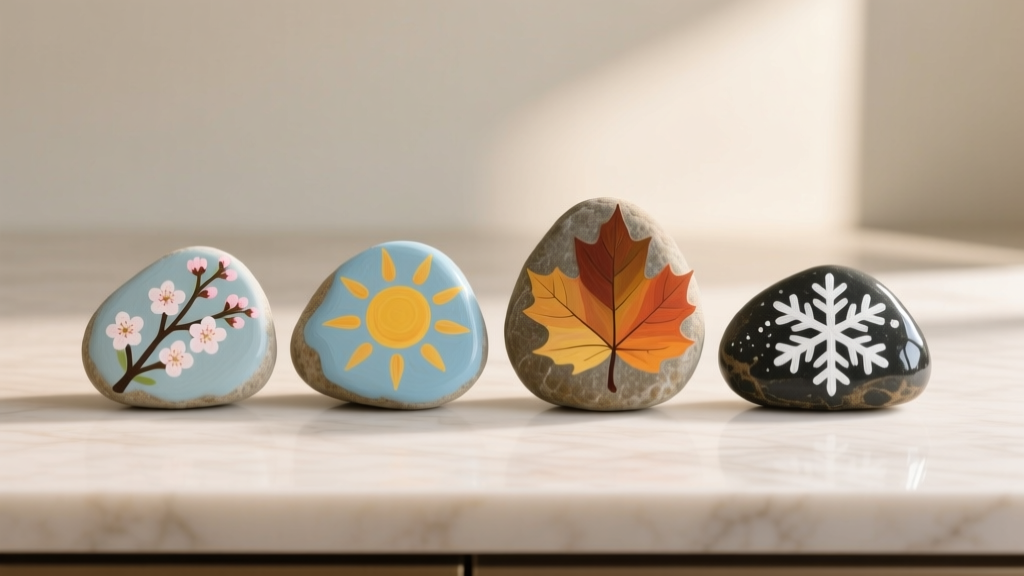 Seasonal Painted Rocks Ideas