
Step-by-Step Photo Booth Props Tutorial
Photo booths are one of those party extras that instantly pull people in—no awkward “What do we do now?” moments, just big smiles and silly poses. The best part? You don’t need a rental or fancy equipment to make the experience feel special. A set of handmade photo booth props can transform a plain wall into a memory-making station in minutes.
This tutorial walks you through creating a coordinated prop set (think: speech bubbles, mustaches, glasses, crowns, and signs) that looks polished, photographs beautifully, and holds up through the whole event. Whether you’re prepping for a birthday party, baby shower, graduation, wedding, or holiday gathering, these DIY photo booth props are a budget-friendly way to add personality and color to your party decorations.
You’ll get beginner-friendly options (simple shapes, printable templates, minimal tools) and advanced upgrades (layered cardstock, foam dimension, metallic accents) so you can match your skill level—and your theme.
Project Overview: Skill Level, Time, and Finished Size
- Skill level: Beginner to Intermediate (Advanced variations included)
- Estimated time: 60–120 minutes for a set of 10–12 props
- Approx. finished size: 6–10 inches wide for most props; signs can be 8x10 inches
- Best for: DIY party decorations, handmade party projects, photo booth setups, party games
Materials & Tools (With Estimated Costs)
Core Craft Supplies
- Cardstock (65–110 lb / 176–300 gsm) in theme colors (pack of 50–100 sheets): $8–$15
- Foam board (3/16 in thick) OR chipboard for extra-sturdy props (2–4 sheets): $6–$12
- Wooden dowels (1/8 in to 1/4 in diameter) or paper straws for handles (pack of 25–100): $4–$10
- Hot glue gun + glue sticks (mini or full-size): $10–$25 (glue sticks $4–$8)
- Double-sided tape or strong craft glue (optional for cleaner finish): $4–$8
- Scissors (sharp, detail scissors help) OR craft knife: $5–$12
- Cutting mat (recommended if using a craft knife): $8–$15
Decorative Add-Ons (Choose What Fits Your Theme)
- Glitter cardstock (pack): $6–$12
- Metallic markers (gold/silver/rose gold): $5–$10
- Washi tape (2–5 rolls): $4–$12
- Self-adhesive gems or sequins: $3–$8
- Sticker letters for signs (optional): $4–$10
Tool Recommendations (Nice-to-Have Upgrades)
- Circle punch (1 in or 1.5 in): great for dots, lenses, and accents
- Corner rounder punch: makes speech bubbles and signs look professionally finished
- Craft cutting machine (optional): ideal for batch-making and precise shapes
Step 1: Pick a Theme and Build a Prop List
Before you start cutting, choose a quick theme so your DIY photo booth props look cohesive in pictures. Aim for 2–4 main colors plus one accent (metallic or black/white).
Easy Theme Ideas
- Birthday: confetti, candles, party hats, “It’s my day!” signs
- Baby shower: bottles, pacifiers, “Hello Baby,” tiny crowns
- Graduation: caps, “Class of 2026,” stars, glasses
- Holiday: Santa hats, reindeer antlers, snowflakes, candy canes
- Retro: lips, mustaches, oversized sunglasses, “Groovy!” bubbles
Recommended Starter Set (10–12 Props)
- 2 speech bubbles (one “Say cheese!” and one blank for guests to write)
- 2 pairs of glasses (classic + heart-shaped)
- 2 mustaches (one small, one oversized)
- 1 lips prop
- 1 crown or tiara
- 1 bow tie
- 1 “Party Time!” sign
- Optional: 1–2 themed props (stars, balloons, florals, lightning bolts)
Step 2: Create or Print Templates (Beginner-Friendly)
If you’re new to DIY crafts, templates make this project fast and frustration-free. You can:
- Hand-draw shapes on printer paper first (easy to adjust sizing).
- Print outlines from a basic shape set (speech bubble, glasses, mustache).
- Trace everyday items (cups for circles, a ruler for banners, etc.).
Suggested Measurements (So Props Look Great in Photos)
- Speech bubble: 8–10 in wide x 6–7 in tall
- Glasses: 7–8 in wide x 3–4 in tall (each lens about 2.5–3 in)
- Mustache: 6–8 in wide x 2–3 in tall
- Lips: 6–7 in wide x 3–4 in tall
- Crown: 6–7 in wide x 5–6 in tall
- Handle length: 8–10 in (comfortable for adults and kids)
Step 3: Cut Your Prop Shapes Cleanly
- Trace templates onto cardstock or foam board with a pencil.
- Cut with sharp scissors for curves and a craft knife for straight lines or inner cutouts.
- For glasses: cut out the lens holes so faces show through (use a craft knife on a cutting mat).
- Make duplicates of popular props (glasses and speech bubbles disappear fast at parties).
Time saver: Stack 2 sheets of cardstock and cut them together for simple shapes like mustaches and lips (only if your scissors are sharp and you can keep edges aligned).
Step 4: Reinforce for Durability (Cardstock vs. Foam Board)
For a one-night party, sturdy cardstock is often enough. For props you want to reuse (or parties with lots of kids), reinforcement is worth it.
Option A: Double-Layer Cardstock (Best for Beginners)
- Cut two identical shapes.
- Apply glue or double-sided tape across the full surface (not just the edges).
- Press together and smooth from the center outward to prevent wrinkles.
Option B: Foam Board Backing (Most Durable)
- Cut the prop from cardstock.
- Glue it onto foam board.
- Once dry, trim the foam board to match the shape exactly.
Step 5: Add Color, Text, and Details
This is where your handmade party decorations go from “cute” to “camera-ready.” Keep details bold—fine lines can disappear in photos.
Simple Decorating Ideas (Fast + Photogenic)
- Outline edges with a black marker for high contrast.
- Add highlights with a white gel pen (especially on dark props).
- Use glitter cardstock for crowns, stars, or “WOW!” text.
- Layer shapes (a smaller heart on the glasses, a banner across a speech bubble).
- Lettering options: thick marker, sticker letters, or printed words glued on top.
Quick Sign Phrases That Work for Any Party
- “Say cheese!”
- “Best day ever”
- “Squad goals”
- “Celebrate!”
- “Too cute”
- “I came for the cake”
Step 6: Attach Handles (Securely, So They Don’t Spin)
Handles are the difference between props that look great for one photo and props that survive the whole party.
Handle Placement Tips
- Position the dowel 1–2 inches inside the prop for stronger support.
- For speech bubbles, attach the handle at a slight angle (more comfortable to hold).
- For glasses, attach the handle near one outer corner so faces stay centered.
Attachment Method (Sturdy + Party-Proof)
- Flip the prop face-down.
- Apply a line of hot glue where the handle will sit.
- Press the dowel into the glue and hold for 10–15 seconds.
- Reinforce with a 1 x 3 inch cardstock “strap” over the handle (glue the strap ends to the prop). This prevents twisting.
Beginner-friendly alternative: Use paper straws and strong double-sided tape for lightweight props.
Pro Tips for Better-Looking DIY Photo Booth Props
- Go bigger than you think: Props that are 6–10 inches wide read better on camera.
- Choose high-contrast colors: Dark props with light outlines (or vice versa) stand out.
- Keep a “photo test” handy: Snap a quick phone photo before making the whole set. Adjust size and contrast early.
- Make a matching set: Repeat one detail (gold outline, polka dots, the same font) across all props for a curated look.
- Prep a prop basket: Put finished props in a small bin near the photo booth so guests can grab quickly.
Variations: Beginner Adaptations and Advanced Upgrades
Beginner-Friendly Adaptations
- No inner cutouts: Skip lens holes in glasses; draw lenses instead.
- One-color props: Use bold cardstock and add a simple outline.
- Printable words: Print “Happy Birthday” or “Celebrate!” and glue onto a bubble.
Advanced Variations (Extra Wow)
- 3D foam tape layering: Pop letters or accents up with foam squares.
- Shaker props: Create a clear window (acetate) and fill with sequins (best for speech bubbles).
- Vinyl lettering: Cut crisp phrases using adhesive vinyl for professional-looking signs.
- Fabric details: Add small tulle bows or felt flowers (keep them flat so they photograph cleanly).
Troubleshooting: Fix Common Prop Problems
- Prop bends or flops: Add a second cardstock layer or back with foam board. Avoid thin printer paper as the main base.
- Handle keeps spinning: Use the cardstock “strap” reinforcement and extend the handle farther into the prop.
- Hot glue shows on the front: Use less glue, keep it 1 inch away from the edge, and press gently. For a cleaner finish, use strong double-sided tape for flat layers.
- Edges look rough: Touch up with a marker around the perimeter, or trim slowly with small scissors for curves.
- Lettering looks uneven: Lightly pencil guidelines first or use sticker letters for quick alignment.
Common Crafting Mistakes to Avoid
- Making props too small: Tiny props get lost in photos—aim for at least 6 inches wide.
- Using only a dot of glue: Handles need a solid glue line plus reinforcement to last.
- Over-decorating with tiny details: Small gems and thin writing can look messy from a distance.
- Skipping a test photo: Colors can blend into the background; test with your actual booth backdrop.
- Not planning for drying time: If you’re layering cardstock with wet glue, give it 10–15 minutes under a book to dry flat.
FAQ: Photo Booth Props DIY
1) What’s the best paper weight for DIY photo booth props?
Use 65–110 lb cardstock. If you want props that can be reused, glue cardstock onto foam board or double-layer the cardstock.
2) Are paper straws strong enough for prop handles?
Paper straws work well for lightweight props (single-layer cardstock). For heavier props or foam board backing, use wooden dowels for better stability.
3) How do I make props look good in photos?
Choose high-contrast colors, make props 6–10 inches wide, and outline shapes with a dark marker. A quick phone photo test helps you adjust sizing and contrast before finishing the full set.
4) Can I make these without a cutting machine?
Absolutely. Scissors and a craft knife are enough. Stick to simple shapes, trace templates, and cut slowly for clean edges—especially around curves and inner cutouts.
5) How far in advance can I make photo booth props?
Make them 1–2 weeks ahead and store them flat in a shallow box. Keep them away from humidity so cardstock stays crisp.
6) How many props should I make for a party?
For 10–20 guests, aim for 10–15 props. For larger groups, add duplicates of favorites (glasses, speech bubbles, and signs) so multiple people can pose at once.
Wrap-Up: Your Party Photo Booth Just Got a Handmade Upgrade
With a little cardstock, a few simple templates, and sturdy handles, you can create photo booth props that look festive, photograph beautifully, and match your party theme perfectly. Start with a small set, keep your shapes bold, and let your creativity show—these are the kinds of DIY crafts guests remember (and ask you to make again).
If you make your own set, add your personal twist—inside jokes, custom phrases, or colors that match your party decorations. Then set them out in a basket by the backdrop and watch everyone jump in.
Want more handmade party projects, DIY crafts, and creative decoration ideas? Explore more tutorials and inspiration on smartpartyprep.com.
More Articles
 How to Make Party Hat in 7 Minutes Flat — No Glue Gun, No Scissors, No Stress (Just Paper, Tape & Joy)
 10 Creative Custom Stickers Ideas
 Advanced Scrapbook Pages for Crafters
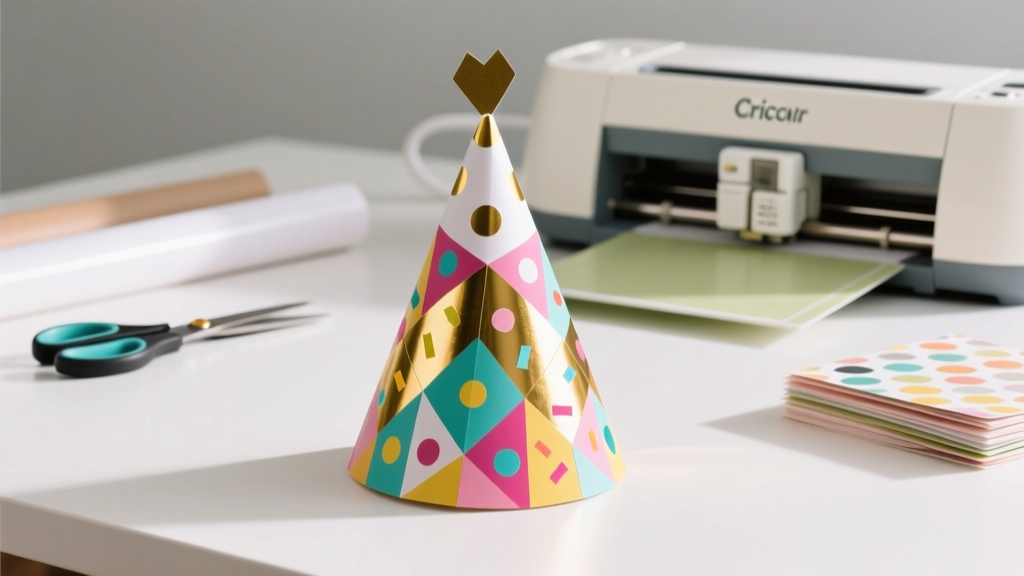 DIY Party Hats Using Cricut
 How to Enable Third Party Cookies on MacBook Air (2020–2024): A Step-by-Step Fix for Safari, Chrome & Firefox — Because Yes, It’s Still Possible (and Here’s Exactly How)
 Budget DIY Painted Rocks Under $10
 How to Make a Party Backdrop That Looks Pro (Without Spending $200): 7 Foolproof DIY Methods Using Dollar Store Supplies, Reusable Frames & Zero Sewing
 DIY Fabric Bunting for Home Decor
 How Do You Enable 3rd Party Cookies in 2024? (Spoiler: It’s Not Just One Click — Here’s Exactly What Changes in Chrome, Safari, Edge & Firefox)
 DIY Greeting Cards Party Favors