How to Make T-Shirts at Home
Custom T-shirts are one of those DIY crafts that feel like magic: you start with a plain tee and end with something that looks party-ready, personal, and totally you. Whether you’re planning a birthday bash, a family reunion, a bachelorette weekend, or a themed game night, handmade shirts instantly pull the whole celebration together—plus they double as favors guests will actually wear again.
Even better? You don’t need a big crafting studio to make professional-looking DIY T-shirts at home. With a few basic tools (many you might already own), you can create matching party shirts, team tees for backyard Olympics, or fun “host crew” tops that make photos look coordinated and intentional.
This guide walks you through the most popular home methods—heat transfer vinyl (HTV), iron-on transfer paper, and freezer-paper stenciling—so you can choose what fits your budget, timeline, and skill level.
Pick Your Method: Which DIY T-Shirt Technique Works Best?
All three methods below can make party-worthy results. The “best” one depends on whether you want crisp lettering, full-color images, or a hand-painted look.
1) Heat Transfer Vinyl (HTV) — Best for bold party text and simple graphics
- Skill level: Beginner to Intermediate
- Time: 45–90 minutes for one shirt (faster after you learn the flow)
- Look: Clean, crisp, boutique-style
- Great for: Names, dates, “Birthday Crew,” “Bride Tribe,” team numbers
2) Printable Iron-On Transfer Paper — Best for photos and full-color designs
- Skill level: Beginner
- Time: 30–60 minutes per shirt
- Look: Printed image feel (varies by paper type)
- Great for: Photo shirts, detailed illustrations, gradients, multi-color logos
3) Freezer Paper Stencil + Fabric Paint — Best for handmade, artsy party shirts
- Skill level: Beginner
- Time: 60–120 minutes including dry time
- Look: Handcrafted, slightly textured
- Great for: One-color designs, rustic themes, kids’ parties, crafting stations
Materials List (with Estimated Costs)
Costs vary by brand and where you shop, but these estimates help you budget for a small batch of party shirts.
Base Materials (for any method)
- Blank T-shirt (cotton or cotton/poly blend): $3–$12 each
- For HTV and paint: 100% cotton is forgiving.
- For sublimation (advanced): needs 65%+ polyester in light colors.
- Lint roller: $2–$6
- Measuring tape or ruler: $1–$8
- Scissors (sharp craft scissors): $5–$15
- Heat-resistant pressing surface (folded towel + sturdy table, or pressing mat): $0–$25
- Cardstock or butcher paper (to place inside shirt): $2–$8
If You’re Using HTV (Iron-on Vinyl)
- HTV rolls/sheets (12" x 5 ft roll): $8–$18 (one roll can do multiple shirts)
- Cutting machine (optional but ideal; Cricut/Silhouette): $200–$350
- Weeding tool (hook tool): $3–$10
- Heat source:
- Household iron (no steam): $15–$60
- Recommended: heat press (9" x 9" or 15" x 15"): $120–$300
- Parchement paper or Teflon sheet: $3–$15
If You’re Using Printable Transfer Paper
- Iron-on transfer paper (for light or dark fabrics—buy the correct type): $10–$20 per pack
- Inkjet printer (most transfer papers are inkjet): varies
- Craft knife (optional for precision cutting): $3–$8
If You’re Using Freezer Paper Stencils + Paint
- Freezer paper: $4–$8
- Fabric paint (or acrylic + fabric medium): $4–$12
- Foam pouncer or stencil brush: $2–$8
- Painter’s tape (optional): $3–$8
Design Planning: Size, Placement, and Party-Friendly Layouts
A little planning makes your DIY T-shirts look intentional (and helps avoid the classic “why is the design so high?” moment).
Common design placements (with measurements)
- Center chest: Place the top of the design about 3" down from the collar on adult shirts. (For youth sizes: 2"–2.5".)
- Left chest (small logo): Design size 3"–4" wide. Place about 3" down from collar and 3"–4" from center toward the left.
- Full front: Common size 10"–11.5" wide for adult; 7"–9" for youth.
- Back name/number: Name line 2"–3" below collar; number centered and scaled to shirt (often 8"–11" tall).
Party design ideas that photograph well
- “Birthday Crew” + party year
- “Team [Color]” for backyard games
- “First Trip / Girls Weekend” + destination
- “Host / Setup Crew / Cleanup Crew” for event roles
- Kid parties: character-inspired colors + simple icon (crown, rocket, dinosaur silhouette)
Method 1: Make a T-Shirt with HTV (Iron-on Vinyl)
Best for: crisp lettering and simple party graphics. If you want a “store-bought” finish, HTV is your friend.
Tools you’ll use
- HTV vinyl (smooth or glitter)
- Cutting machine (or scissors + lots of patience for simple shapes)
- Weeding tool
- Iron or heat press
- Parchment paper/Teflon sheet
Step-by-step: HTV on a T-shirt
- Pre-wash (optional) and dry. If your shirt is known to shrink, wash and dry it first. Skip fabric softener for best adhesion.
- Prep the shirt. Lay it flat. Use a lint roller where your design will go. Slide cardstock inside the shirt to prevent heat/adhesive bleeding through to the back.
- Measure and mark placement. Lightly fold the shirt in half vertically to find center. Finger-press a crease, then unfold. Use a ruler to set the top of your design about 3" below the collar.
- Cut your design (mirror it!). For HTV, you must mirror/flip the design before cutting. Place vinyl shiny side down on the cutting mat.
- Weed the vinyl. Remove the extra vinyl so only your design remains on the clear carrier sheet.
- Pre-press the shirt. Press the shirt for 5–10 seconds to remove wrinkles and moisture.
- Press the vinyl. Place the design carrier-side up. Cover with parchment/Teflon. Press:
- Household iron: firm pressure, small circles + holds, 20–30 seconds per area. No steam.
- Heat press: follow your vinyl brand settings (commonly 305°F–320°F for 10–15 seconds, medium pressure).
- Peel carrier sheet. Check if your vinyl is warm peel or cool peel. Peel slowly. If edges lift, lay it back down and press again for 5–8 seconds.
- Final press (recommended). Cover and press for 5–10 seconds to seal edges.
Method 2: Make a T-Shirt with Printable Iron-On Transfer Paper
Best for: full-color party graphics, photos, and detailed designs without layering vinyl.
Step-by-step: Transfer paper on a T-shirt
- Choose the correct paper. Buy light-fabric transfer paper for white/pastel shirts, and dark-fabric transfer paper for black or bright shirts.
- Print your design. Use your printer’s best quality setting. For light-fabric paper, print mirrored (the paper instructions will tell you).
- Trim carefully. Cut close to the design edge. Rounded corners help prevent peeling.
- Prep the shirt. Lint roll, flatten, and pre-press for 5–10 seconds. Insert cardstock inside the shirt.
- Iron/press the transfer. Place the transfer as directed (some face down, some face up). Press with firm pressure for the time listed on the package (often 60–120 seconds with an iron, less with a heat press).
- Peel and finish. Peel hot/warm/cool per instructions. Let the shirt rest 24 hours before washing if recommended.
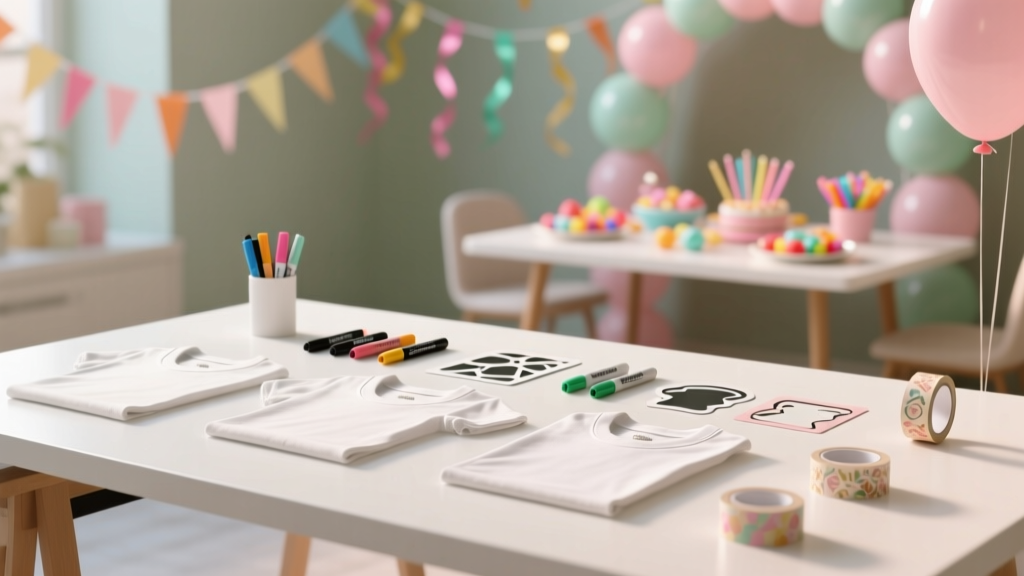
Method 3: Make a T-Shirt with Freezer Paper Stencils + Fabric Paint
Best for: a crafty party activity (think: “decorate your own tee” station) or a charming handmade look for themed decorations.
Step-by-step: Painted stencil tee
- Create your stencil. Draw or print a simple design. Tape freezer paper (shiny side down) over your pattern and cut with a craft knife.
- Iron the stencil onto the shirt. Place shiny side against the fabric. Use a dry iron on medium heat for 10–15 seconds to seal edges.
- Insert cardstock. Prevent paint bleed-through.
- Apply paint in thin layers. Use a foam pouncer with an up-and-down motion. Less paint = cleaner edges. Let each layer dry 2–5 minutes before adding another.
- Peel stencil carefully. Peel while paint is slightly damp for crisp edges, or wait until fully dry for less smearing—test what your paint brand prefers.
- Heat set. After the paint dries (often 4–24 hours), heat set with an iron per paint instructions (commonly pressing for a few minutes through parchment paper).
Pro Tips for Party-Ready Results
- Batch like a pro: Cut all designs first, then weed all, then press all. This speeds up making sets for party crews.
- Make alignment foolproof: Use a “T-shirt ruler” guide (clear acrylic) or a simple cardstock template centered on the collar seam.
- Choose the right blanks: For kids’ parties, soft ring-spun cotton tees feel nicer and photograph better than stiff promotional shirts.
- Use parchment paper between layers: Especially when pressing the back side, to protect vinyl/transfer from overheating.
- Add names without redoing everything: For HTV, press the main design first, then add names last so you don’t waste personalized cuts if you change the plan.
Beginner-Friendly Adaptations (Low Tool, Low Stress)
- No cutting machine? Use bold, simple shapes you can cut with scissors (hearts, stars, numbers) or buy pre-cut iron-on letters.
- No heat press? A household iron works—just slow down and apply firm, even pressure in sections.
- Crafting with kids? Try freezer paper stencils with foam pouncers. Keep designs large and simple (5"+ wide) for success.
Advanced Variations (Next-Level DIY T-Shirts)
- Layered HTV: Use 2–3 colors for punchy party graphics. Lightly tack the first layers for 2–3 seconds, then final press all layers together.
- Glitter + matte mix: Combine glitter HTV accents with matte text for a “party spotlight” effect.
- Back print + sleeve detail: Add a small icon on the sleeve (about 2"–3" wide) to make shirts feel premium.
- Mix-and-match personalization: Same front design, different nicknames on the back—great for bachelorette parties and birthday squads.
Troubleshooting: Fix Common DIY T-Shirt Problems
- Vinyl edges lifting:
- Cause: not enough heat/pressure, lint, or uneven pressing surface.
- Fix: cover with parchment and press again 5–10 seconds with firmer pressure. Lint roll next time.
- Design looks crooked:
- Cause: eyeballing placement.
- Fix: fold shirt to find center + measure from collar seam. Use a ruler template.
- Transfer paper cracking after wash:
- Cause: wrong paper type, too hot wash, or heavy design coverage.
- Fix: wash inside-out on cold, air dry. Consider HTV for large text blocks.
- Paint bleeding under stencil:
- Cause: too much paint or stencil not fully sealed.
- Fix: pounce with less paint, re-iron stencil edges, use multiple thin coats.
Common Crafting Mistakes to Avoid
- Skipping the lint roller: Tiny fibers can cause peeling corners—especially on dark shirts.
- Using steam: Steam reduces adhesion for HTV and some transfers. Keep the iron dry.
- Forgetting to mirror HTV designs: If your text reads backward on the carrier sheet, you’re on the right track.
- Pressing on an ironing board: The soft surface absorbs pressure. Use a solid table with a pressing mat or folded towel.
- Overheating glitter or specialty vinyl: Follow the vinyl brand’s temperature and peel instructions for best results.
- Washing too soon: Give your shirt time to set—often 24 hours is ideal.
FAQ: Making T-Shirts at Home
How long does it take to make a DIY T-shirt?
Plan for 45–90 minutes for HTV if you’re cutting and weeding a design, 30–60 minutes for printable transfers, and 60–120 minutes for stenciling (plus drying/heat-setting time).
Can I make party shirts without a Cricut or Silhouette?
Yes. Use printable iron-on transfer paper, pre-cut iron-on letters, or freezer paper stencils. You can still get cute, coordinated DIY party decorations and shirts without a cutting machine.
What fabric works best for homemade T-shirts?
100% cotton is the easiest for HTV and fabric paint. For printable transfers, cotton also works well. (Sublimation is different and typically needs high-polyester light shirts.)
How do I wash homemade T-shirts so they last?
- Wait 24 hours before the first wash.
- Wash inside out on cold, gentle cycle.
- Skip bleach and harsh detergents.
- Air dry or tumble dry low.
How big should my design be for an adult shirt?
A common full-front width is 10"–11.5". For a left-chest logo, aim for 3"–4" wide. If you’re making matching party shirts for a group photo, slightly larger designs often read better from a distance.
What’s the most budget-friendly method for a group of kids?
Freezer paper stenciling can be very affordable for multiples—especially if you’re using one-color paint and simple shapes. It also works great as a party craft station.
Wrap-Up: Your Party, Your Shirts, Your Style
Making T-shirts at home is one of the most satisfying handmade projects because it’s practical, creative, and instantly useful for parties and celebrations. Start simple—bold text and one color go a long way—then level up with layering, sleeve details, or personalized backs once you’ve made your first set.
If you try these DIY T-shirt methods, keep one shirt as your “tester” so you can dial in placement and pressing time before you make the whole party crew’s set. You’ve got this—and your next event is about to look beautifully coordinated.
Want more DIY crafts, party decorations, and handmade project ideas? Explore more creative how-tos and printable inspiration on smartpartyprep.com.
More Articles
 DIY Pressed Flower Art Party Favors
 Step-by-Step T-Shirts Tutorial
 What Is Party Craft? (And Why Your Next Celebration Doesn’t Need Store-Bought Decor — Here’s the Real, Low-Stress, High-Joy Definition Most People Get Wrong)
 How to Allow Third Party Cookies on MacBook Air (2020–2024): A Step-by-Step Safari & Chrome Fix That Actually Works in 2024 — No Tech Degree Required
 Stop Wasting $47 on Boring Party Favors: 12 Stunning, Low-Effort DIY Party Favors for Adults That Guests Actually Keep (Not Toss!) — No Glue Gun Required
 Budget DIY Custom Stickers Under $25
 Seasonal Wreaths Ideas
 Step-by-Step Invitations Tutorial
 Paper Craft Fabric Bunting Ideas
 Budget DIY Coasters Under $15