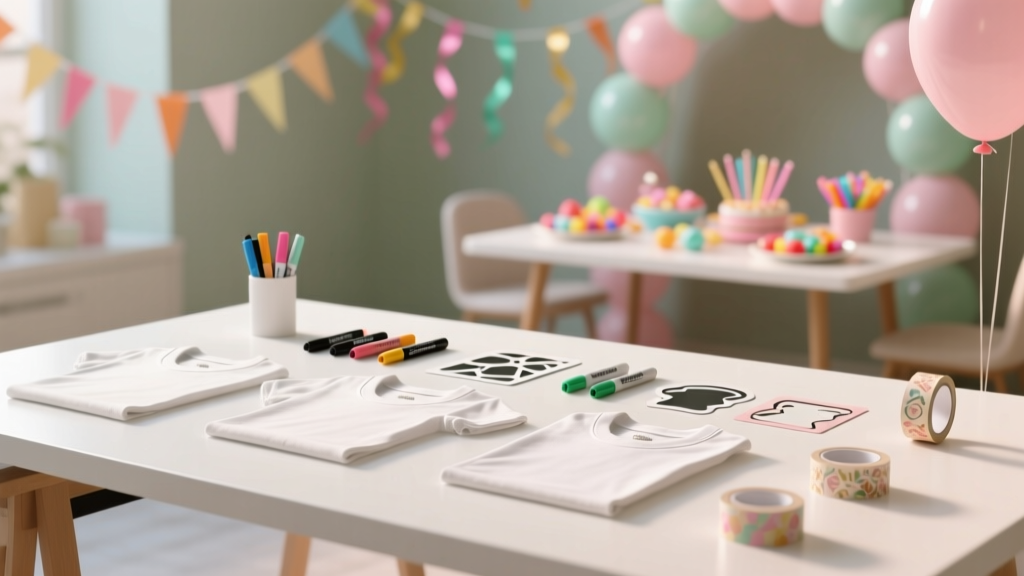
Step-by-Step T-Shirts Tutorial
Matching t-shirts are one of those party details that instantly make an event feel “planned” (in the best way). Whether you’re hosting a birthday bash, family reunion, bachelorette weekend, team celebration, or holiday party, a handmade shirt pulls everyone into the theme—and doubles as a take-home favor your guests will actually wear again.
This step-by-step t-shirts tutorial is designed for DIY enthusiasts who want a practical, beginner-friendly method that still looks polished. You’ll learn two reliable decorating approaches—iron-on vinyl (HTV) and freezer-paper stencil painting—plus pro tips for crisp results, common mistakes to avoid, and fun party-ready variations.
Skill Level: Beginner to Intermediate (advanced options included)
Time Estimate: 45–90 minutes for one shirt (add 10–20 minutes per additional shirt once your setup is ready)
Best For: DIY party decorations, handmade party favors, group shirts, themed events
Project Overview: Choose Your DIY T-Shirt Method
Both methods below create bright, durable designs that are perfect for party-related projects:
- Option A: Heat Transfer Vinyl (HTV) – Clean lines, professional look, great for names, dates, logos, and bold graphics.
- Option B: Freezer-Paper Stencil + Fabric Paint – Great for playful shapes, simple graphics, and a handcrafted vibe (especially for kids’ parties).
If you want the easiest “wow” factor, start with HTV. If you love paint and want a more artsy feel, the stencil method is a blast.
Materials & Tools (With Estimated Costs)
Base Materials
- Blank t-shirt (100% cotton or cotton blend; light colors are easiest): $4–$12 each
- Recommended: ringspun cotton for softness, or cotton/poly blend for less wrinkling
- Lint roller (essential for HTV): $2–$6
- Painter’s tape (for placement guides): $3–$7
- Measuring tape or clear ruler: $2–$10
Option A: Heat Transfer Vinyl (HTV) Supplies
- HTV sheets or rolls (standard matte is easiest to start): $10–$20 for a basic bundle
- Cutting machine (Cricut/Silhouette) or precision craft knife:
- Machine (if you already own it): varies
- Craft knife + self-healing mat: $8–$20
- Weeding tools (hook and tweezers): $6–$15
- Heat press (ideal) or household iron:
- Heat press: $150–$300+ (optional upgrade)
- Iron: most households already have one
- Teflon sheet or parchment paper: $4–$10
Option B: Freezer-Paper Stencil + Fabric Paint Supplies
- Freezer paper (shiny side bonds with heat): $4–$10
- Fabric paint (soft fabric paint or textile paint): $4–$10 per color
- Stencil brush or dense foam pouncer: $3–$8
- Cardboard insert (from a shipping box): free
- Iron (for adhering freezer paper): already owned or $15–$40
Helpful Extras (Worth It for Party Batches)
- Pressing pillow or folded towel (for pressing over seams): $0–$15
- Heat-resistant tape (to prevent shifting): $6–$10
- Heat gun (quick touch-ups; optional): $15–$30
Design Planning: Sizing, Placement, and Party-Friendly Ideas
Popular Party Shirt Design Themes
- Birthday: “Aged to Perfection,” name + age, themed icons (stars, dinos, disco balls)
- Bachelorette: “Bride,” “Team Bride,” location + date
- Family reunion: family name + year, simple crest
- Kids party: character-inspired shapes (avoid trademarked designs if selling)
- Holiday party: “Merry & Bright,” simple ornaments, snowflakes, or hearts
Simple Measurement Guide (Adult Unisex Tee)
- Center-chest design width: 9–11 in (23–28 cm)
- Left-chest logo width: 3–4 in (7.5–10 cm)
- Back design width: 10–12 in (25–30.5 cm)
Placement Shortcut (No Guessing)
- Find the shoulder seams.
- Visualize a line down the center between them.
- Place the top of a full chest design about 3 in (7.5 cm) below the collar for adult tees (about 2–2.5 in (5–6.5 cm) for youth).
Step-by-Step T-Shirts Tutorial (Option A): Heat Transfer Vinyl (HTV)
Step 1: Prewash and Prep Your Shirt
- Prewash the shirt if possible (especially if it’s new). Skip fabric softener—softener can reduce adhesion.
- Dry completely and smooth wrinkles.
- Use a lint roller on the area where vinyl will go. Tiny lint bits can cause lifting later.
Step 2: Create or Choose a Design
- Keep designs bold and readable from 6–10 feet away—perfect for party photos.
- If using a cutting machine, set your design size (example: 10 in wide for a front graphic).
- Mirror your design before cutting HTV. (This is the #1 beginner slip-up.)
Step 3: Cut and Weed the Vinyl
- Load HTV with the shiny carrier sheet side down.
- Cut your design, then gently weed away the negative vinyl using a hook tool.
- For tiny letters, use tweezers and work from the center outward.
Step 4: Position the Design on the Shirt
- Lay the shirt flat on a hard surface (avoid thick ironing board padding if possible).
- Use a ruler to confirm it’s centered:
- Measure from the design edge to each side seam
- Or fold the shirt in half to lightly crease the center
- Use heat-resistant tape if the design is large or layered.
Step 5: Press (Iron or Heat Press)
- If using a household iron:
- Turn steam OFF.
- Set to Cotton/High (typically around 300–315°F / 150–157°C equivalent).
- Pre-press the shirt for 10–15 seconds to remove moisture and wrinkles.
- Cover with parchment paper or a Teflon sheet.
- Press with firm pressure for 20–30 seconds per section. Lift and reposition—don’t slide.
- If using a heat press:
- Follow your HTV brand settings (commonly 305°F / 152°C for 10–15 seconds at medium pressure).
- Pre-press shirt 5 seconds, then apply vinyl.
Step 6: Peel the Carrier Sheet
- Check whether your vinyl is cold peel or warm peel (brand instructions matter).
- Peel slowly at a sharp angle.
- If any edge lifts, lay it back down and press for 5–10 more seconds with parchment on top.
Step 7: Final Set Press
Cover the design and press again for 5–10 seconds to set the finish and edges. Let the shirt cool flat for a few minutes before moving it.
Step-by-Step T-Shirts Tutorial (Option B): Freezer-Paper Stencil + Fabric Paint
Step 1: Cut a Stencil
- Draw or print a simple design (bold shapes work best).
- Trace onto freezer paper and cut with scissors or a craft knife.
- Remember: stencil “holes” are where paint will go.
Step 2: Adhere the Stencil
- Slide a piece of cardboard inside the shirt to prevent bleed-through.
- Place the freezer paper shiny side down on the shirt.
- Iron for 10–15 seconds to bond it in place (no steam).
Step 3: Paint Carefully (Less Paint = Cleaner Edges)
- Dip your foam pouncer lightly into fabric paint.
- Offload excess onto a paper plate.
- Apply paint with an up-and-down pouncing motion. Avoid brushing side to side (that pushes paint under edges).
- Add 2–3 thin layers for solid color.
Step 4: Peel and Heat-Set
- Peel the stencil while the paint is slightly damp for crisp edges.
- Let dry per paint instructions (often 24 hours).
- Heat-set with an iron (through parchment) for 30–60 seconds.
Pro Tips for Party-Perfect Results
- Batch like a pro: Cut all names at once, weed while watching a show, then press assembly-line style.
- Use a “registration box” for names: Make a rectangle guide in your design software to keep every name aligned at the same height.
- Pressing over seams: Put a folded towel inside the shirt behind the design area so the seam doesn’t steal pressure.
- Photo-ready contrast: Light shirt + dark design (or vice versa) reads best in party photos.
- Metallics and glitter: Use for short words and bold shapes; tiny glitter letters can be harder to weed.
Fun Variations (Beginner-Friendly to Advanced)
Beginner Variations
- Single-color HTV with a bold phrase: “Birthday Crew,” “Squad Goals,” “Let’s Party”
- Left-chest icon (3.5 in wide) plus a small back date
- Stencil hearts or stars with fabric paint for kids’ party shirts
Intermediate Variations
- Layered HTV (2 colors): Press the bottom layer for 2–3 seconds (tack press), then add the top layer and press fully.
- Mix fonts: script for names + bold sans serif for dates (easy to read, looks custom).
- Sleeve decals: 1–2 in tall text (great for “Bride,” “Mom,” “Coach”).
Advanced Variations
- Multicolor stencil painting with separate stencils per layer (let each layer dry slightly before adding the next).
- Gradient HTV (specialty vinyl) for a high-impact party theme.
- Personalized numbering (sports party, team event): 8–10 in numbers centered on the back.
Troubleshooting Guide
- Vinyl is lifting at the edges:
- Cause: not enough heat/pressure or lint under vinyl
- Fix: cover with parchment and press 10 seconds more; lint roll next time
- Vinyl looks wrinkled or bubbly:
- Cause: shirt wasn’t pre-pressed or surface wasn’t flat
- Fix: pre-press 10–15 seconds; press on a firm surface
- Paint bled under stencil:
- Cause: too much paint or brushing motion
- Fix: use less paint, pounce gently, re-iron stencil edges before painting
- Design is crooked:
- Cause: eyeballing placement
- Fix: measure from side seams or use a folded center crease + ruler
Common Crafting Mistakes to Avoid
- Forgetting to mirror HTV before cutting (classic DIY moment).
- Using steam while pressing HTV—steam can weaken adhesion.
- Sliding the iron instead of lifting and pressing, which can shift the design.
- Pressing on a squishy surface (thick ironing board padding reduces pressure).
- Making tiny text for party shirts—small letters can weed poorly and won’t read well in photos.
- Skipping the lint roller—lint is the sneaky enemy of crisp vinyl edges.
FAQ: DIY Party T-Shirts
1) What’s the easiest method for beginners?
Single-color HTV is the most beginner-friendly because the edges come out sharp and you don’t have to worry about paint bleed. Start with a bold design, a matte vinyl, and simple placement on the front chest.
2) Can I make these without a cutting machine?
Yes. Use a precision craft knife to cut HTV (simple shapes and block letters are easiest), or choose the freezer-paper stencil method and cut your stencil by hand.
3) How do I wash DIY t-shirts so the design lasts?
Wait 24 hours before washing. Turn shirts inside out, wash cold or warm on gentle, and tumble dry low. Avoid harsh bleach. For HTV, inside-out washing is especially helpful for longevity.
4) What size should a front design be?
For an adult unisex shirt, aim for 9–11 inches (23–28 cm) wide for a centered front design. For a left-chest logo, 3–4 inches (7.5–10 cm) wide looks balanced.
5) How many shirts can I make for a party efficiently?
Once your design is finalized, batching is fast. Many crafters can complete 10–20 shirts in an afternoon by cutting everything first, then weeding, then pressing in a steady assembly line.
6) HTV or fabric paint—which is better for party shirts?
HTV is best for crisp text, names, and a pro finish. Fabric paint is best for playful, artsy designs and kid-friendly crafting sessions. Both can last well when applied and washed correctly.
Ready to Make Your Party Shirts?
A DIY t-shirt project is the sweet spot between practical and memorable: it ties your theme together, makes group photos look amazing, and gives guests a handmade keepsake. Start simple with a one-color design, then try layered vinyl or stencil painting once you’re comfortable.
When you finish your shirts, set them out in a cute stack near the party entrance—instant decor and a fun kickoff to the celebration.
Want more DIY crafts, party decorations, and handmade party project ideas? Keep exploring fresh inspiration at smartpartyprep.com.
More Articles
 Budget DIY Memory Books Under $15
 Rustic Mugs Ideas: DIY Projects for Cozy Parties, Weddings, and Giftable Decor
 How to Hang Streamers for a Party Without Tape Mess, Sagging, or Last-Minute Panic: 7 Foolproof Methods That Actually Stick (Tested on 32 Parties)
 Is Organic India Third Party Tested? We Investigated Lab Reports, Certifications & Hidden Gaps—Here’s What Independent Testing *Actually* Reveals About Their Turmeric, Ashwagandha & Triphala
 Personalized Favor Bags Gifts
 DIY Clay Ornaments Party Favors
 How to Unblock Third Party Cookies on iPhone (2024): The Real Reason It’s So Hard — And Exactly What You Can & Cannot Do Without Jailbreaking or Switching Browsers
 How to Install 3rd Party Apps on Firestick in 2024: The Only Step-by-Step Guide You’ll Ever Need (No Tech Degree Required)
 Easy Photo Frames for Beginners
 Budget DIY Coasters Under $15