Easy Photo Frames for Beginners
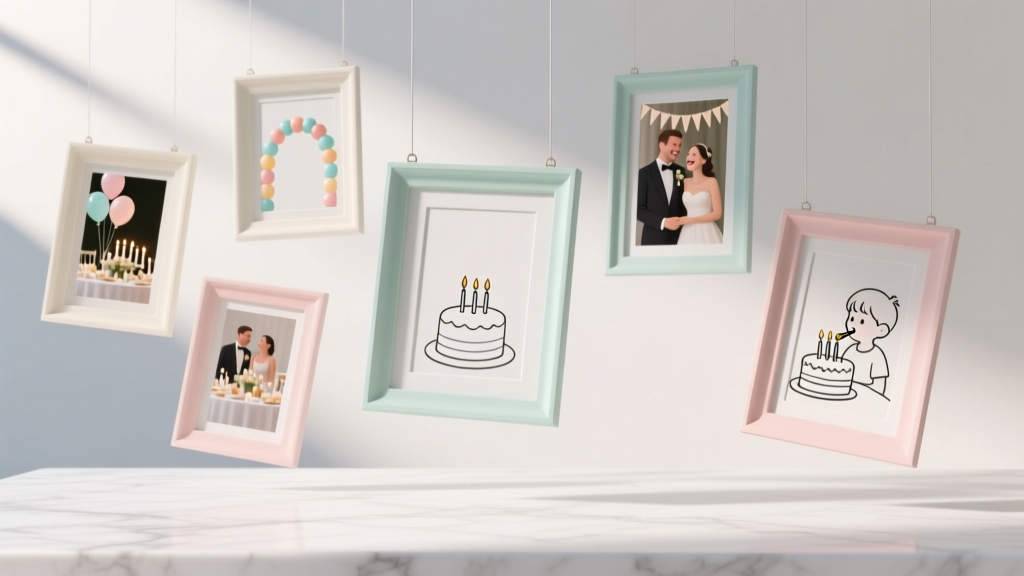
Photo frames are one of those DIY crafts that feel instantly rewarding: you start with basic supplies and end with a piece of decor that makes people smile. They’re also incredibly flexible—dress them up for a birthday party, keep them rustic for a baby shower, or go glam for a bridal brunch photo table. If you’re new to handmade projects, this is a friendly place to begin because the steps are simple, the materials are easy to find, and small “oops” moments are easy to fix.
These beginner-friendly photo frames are perfect for party decorations: think welcome tables, gift tables, dessert displays, memory walls, and photo booth stations. You can match your party theme with color, texture, and embellishments—and you can make a set without needing advanced tools.
This guide walks you through three easy styles (cardboard, foam board, and popsicle-stick frames), plus tips, variations, and troubleshooting. Choose one method or mix them for a coordinated party look.
Quick Overview: Skill Level, Time & Best Uses
- Skill level: Beginner (with optional advanced variations)
- Time estimate:
- 1 frame (basic): 20–35 minutes + drying time
- Set of 6 frames (assembly-line style): 1.5–2.5 hours + drying time
- Best for party decor: photo booth table, memory lane display, centerpiece accents, place card alternatives, dessert table signage
- Recommended photo sizes: 4x6 inches (easiest), 5x7 inches (still beginner-friendly)
Materials & Tools (With Estimated Costs)
Core Materials (Pick Based on Frame Style)
- Chipboard or thick cardboard (12x12 sheet or recycled box) – $0–$3
- Foam board (20x30 inches, 3/16-inch thick) – $5–$10
- Wood craft sticks (popsicle sticks, pack of 100) – $3–$6
- Decorative paper (scrapbook paper 12x12, cardstock, or wrapping paper) – $0.50–$2 per sheet
- Ribbon (3/8-inch to 1-inch wide) – $2–$6 per roll
- Embellishments (stick-on gems, faux flowers, letter stickers, mini banners) – $2–$10
Adhesives (Choose One Main + One Optional)
- Glue stick (great for paper-to-paper) – $1–$3
- Craft glue (PVA/white glue) – $2–$5
- Hot glue gun + glue sticks (best for quick party batches) – $10–$25
- Double-sided tape (clean finish, minimal warping) – $3–$8
Tools (Beginner-Friendly Recommendations)
- Safety scissors (for paper and ribbon) – $2–$8
- Craft knife/utility knife (for foam board and crisp windows) – $5–$12
- Cutting mat (protects your table; highly recommended) – $8–$20
- Metal ruler (for straight, safe cuts with a craft knife) – $5–$12
- Pencil + eraser – $1–$3
- Binder clips or clothespins (hold layers while drying) – $2–$6
- Optional: acrylic paint + brush set – $5–$15
Budget Notes
- Estimated cost per frame: $1–$4 (less if using recycled cardboard and leftover party supplies)
- Best value for party prep: foam board + double-sided tape for crisp results; hot glue for speedy assembly
Before You Start: Choose a Size (With Simple Measurements)
For beginners, a 4x6 photo is the easiest to frame because it’s widely printed and fits on standard craft materials.
Option A: 4x6 Photo Frame Measurements
- Outer frame size: 6x8 inches
- Photo window opening: 3.75x5.75 inches (slightly smaller than the photo so it doesn’t slip through)
- Border width: about 1 inch all around
Option B: 5x7 Photo Frame Measurements
- Outer frame size: 7x9 inches
- Photo window opening: 4.75x6.75 inches
- Border width: about 1 inch all around
Project 1: Wrapped Cardboard Frame (Fast + Great for Kids’ Parties)
Best for: colorful DIY party decorations, themed birthday tables, casual photo booth displays
Time: 25–35 minutes + drying time
Tools: scissors, ruler, pencil, glue stick or double-sided tape
Step-by-Step Instructions
- Cut the base. Cut two rectangles of thick cardboard:
- Front piece: 6x8 inches
- Back piece: 6x8 inches
- Mark and cut the window. On the front piece, measure a 1-inch border. Draw the inner rectangle (3.75x5.75 inches for a 4x6 photo). Carefully cut out the window using scissors or a craft knife.
- Cover the front with decorative paper. Cut decorative paper to about 7x9 inches (slightly larger than your frame). Center the cardboard front on the paper, then wrap the paper around to the back like you’re wrapping a present.
- Use glue stick or double-sided tape for a smooth finish.
- Cut diagonal slits at the window corners, fold paper into the window opening, and press firmly.
- Create a photo pocket. Place the back piece behind the front. Glue three edges only (left, right, bottom), leaving the top open so you can slide the photo in.
- Add a stand (optional but helpful). Cut a stand strip: 1.25x6 inches. Fold 1 inch at the top to make a tab. Glue the tab to the back of the frame about 1.5 inches from the top. For stability, add a small “kickstand stopper” strip (0.75x3 inches) lower down.
- Decorate. Add ribbon, stickers, or a mini banner across a corner. Keep embellishments flat if the frame needs to sit flush on a table.
Beginner-Friendly Adaptation
- Skip the stand and simply lean frames against a vase, dessert stand, or a small easel.
- Use double-sided tape instead of liquid glue to prevent warping.
Project 2: Foam Board “Floating” Frame (Crisp, Clean, Party-Table Ready)
Best for: modern party decor, bridal showers, baby showers, graduation parties, memory tables
Time: 20–30 minutes + drying time
Tools: craft knife, metal ruler, cutting mat
Step-by-Step Instructions
- Cut the outer frame. Cut one foam board rectangle: 6x8 inches (for a 4x6 photo).
- Cut the window opening. Measure a 1-inch border and draw the inner opening (3.75x5.75 inches). Use a metal ruler and craft knife to cut clean lines. Use light pressure and make 2–3 passes for a smoother edge.
- Add a “floating” photo backer. Cut a second foam board rectangle: 6x8 inches (same size as the frame). This will be the back layer.
- Create spacers. Cut four foam board strips:
- Two strips: 0.5x8 inches
- Two strips: 0.5x6 inches
- Assemble. Attach the front frame on top of the spacers. Press firmly. If using hot glue, work in short sections so it doesn’t cool before you align.
- Mount the photo. Use photo-safe tape or small loops of removable tape in the center of the backer to hold the photo. Then close the frame.
- Add an easy stand. Cut a foam board stand: 2x7 inches. Score a line 1 inch from the top (don’t cut through), fold, and glue the tab to the back.
Advanced Variation
- Add a vellum overlay: Tape vellum behind the window and add vinyl text or letter stickers (“Happy Birthday,” “Our Story,” “Baby Name”).
- Go metallic: Wrap the border with metallic adhesive paper for a glam party theme.
Project 3: Popsicle Stick Frame (Cute, Rustic, and Great for Photo Booths)
Best for: rustic party decorations, garden parties, kids’ crafts stations, memory wall frames
Time: 30–45 minutes + drying time
Tools: hot glue gun (recommended), scissors
Step-by-Step Instructions
- Build the basic rectangle. Lay down two craft sticks vertically (about 4 inches apart). Glue two sticks horizontally across the top and bottom to create a rectangle.
- Add thickness and style. Glue additional sticks on top, overlapping corners like a log-cabin pattern. Keep checking the opening size by holding your photo behind it.
- Create a backing. Cut a piece of cardstock or thin cardboard slightly larger than the back of your frame (about 5x7 inches for a 4x6 opening). Glue it to the back, leaving the top edge unglued for a photo pocket.
- Paint or stain (optional). Acrylic paint works well. For a “stained” look, use watered-down brown paint brushed on lightly.
- Add a hanger (optional). Glue a loop of 3/8-inch ribbon to the back top corners for hanging on a wall or display board.
- Decorate for your theme. Add mini faux flowers for a baby shower, tiny pennants for a birthday party, or letter beads for a graduation year.
Pro Tips for Clean Results (Even If You’re New)
- Measure once, mark clearly, then cut slowly. Clean window edges make frames look store-bought.
- Use a metal ruler for knife cuts. Plastic rulers can slip or get nicked.
- Prevent warping: Use double-sided tape for large paper areas; if using liquid glue, spread it thin and press under a heavy book for 10–15 minutes.
- Batch crafting for party prep: Cut all pieces first, then assemble. This saves time when making sets of 6–12 frames.
- Photo safety: If you’re framing printed photos you want to keep, use photo-safe tape or corners (avoid heavy hot glue near the photo).
Fun Variations for Party Themes
Birthday Party Frames
- Add a paper rosette corner (3–4 inches wide) in matching party colors.
- Use confetti-pattern scrapbook paper and a “Wish” or “Make a Wish” banner strip across the bottom border.
Baby Shower / First Birthday
- Soft pastel ribbon (1 inch wide) wrapped around one side as a fabric accent.
- Add tiny felt hearts or stars (about 1 inch) in a cluster.
Wedding / Bridal Shower
- Use white + gold paper with a thin lace ribbon strip (1/2 inch) across the bottom.
- Create a “table number + photo” frame for centerpieces (print numbers on cardstock and place behind the window).
Graduation Party
- School-color border + year numbers in stickers.
- Add a mini tassel using embroidery floss tied to one corner.
Troubleshooting: Quick Fixes for Common Problems
- My paper is bubbling or wrinkling. Use less liquid glue, switch to double-sided tape, and smooth from the center outward with a clean card (like a gift card).
- My window cut looks jagged. Replace the blade (dull blades tear foam), cut with multiple light passes, and keep the ruler firmly pressed.
- The frame won’t stand up. Make the stand wider (2–2.5 inches), angle it slightly back, and add a small stopper strip near the bottom.
- Hot glue strings are everywhere. Let the glue cool slightly before lifting the gun; remove strings with a quick blast of cool air or gently roll them off with your fingers once cooled.
- My photo slips inside the pocket. Add a small piece of tape at the top corners inside the pocket or use photo corners.
Common Crafting Mistakes to Avoid
- Making the window the exact size of the photo. If the opening is 4x6 inches, the photo can fall through. Make the opening about 1/8 inch smaller on each side.
- Using thin cereal-box cardboard for the whole frame. It bends easily. Use shipping-box cardboard, chipboard, or foam board for sturdier party decorations.
- Over-decorating the border. Chunky embellishments can make the frame tip forward or look cluttered. Choose one focal point (top corner, bottom strip, or one side accent).
- Rushing paint time. Paint that feels “dry” can still smudge. Give it at least 30–60 minutes (or use a hair dryer on low, held 8–10 inches away).
- Skipping a test photo. Slide in a test print or scrap paper cut to size before sealing pockets or gluing layers.
FAQ: Easy DIY Photo Frames
What’s the easiest frame style for total beginners?
The wrapped cardboard frame is the simplest because you can cut with scissors and use a glue stick or double-sided tape. It’s also the most forgiving if your cuts aren’t perfectly straight.
How do I make a set of frames look coordinated for a party?
Use the same outer size and repeat 2–3 elements across all frames, such as:
- One main color + one accent color
- The same ribbon width (like 1/2-inch satin)
- Matching corner embellishments (paper flowers, stars, or letter stickers)
Can I hang these frames on a wall for a photo display?
Yes. Add a ribbon loop (about 4–6 inches long) to the back with hot glue or strong double-sided tape. For lighter frames, removable poster strips also work well for party setups.
What adhesive is best for party decorations that need to hold up for a full day?
For speed and strength, use a hot glue gun (especially for wood sticks and heavier embellishments). For clean paper finishes, combine double-sided tape (large areas) with a few dots of craft glue (corners and edges).
How can I protect printed photos from glue or damage?
Use photo corners, photo-safe tape, or mount the photo on a separate cardstock panel and tape that panel in place. Avoid placing hot glue directly on photos you want to keep.
Can kids help with these frames?
Absolutely—choose the cardboard method and pre-cut the window for them. Kids can wrap paper, add stickers, and decorate. Keep hot glue and craft knives for adult use.
Make One… Then Make a Set
Once you finish your first frame, you’ll see how quickly these come together—especially when you repeat the same measurements and decorations. A small set of handmade photo frames can transform a plain table into a themed party display, and they’re a sweet way to spotlight memories at birthdays, showers, graduations, and family celebrations.
Try one style today, then personalize it with your party colors and a few fun details. When you’re ready for your next DIY craft, explore more creative party decorations and handmade projects on smartpartyprep.com.
More Articles
 Seasonal Origami Decorations Ideas
 DIY Memory Books with Dollar Store Supplies
 Step-by-Step Wall Art Tutorial (Perfect for Party Backdrops & Handmade Decor)
 How to Allow Third Party Cookies on Chrome in 2024: A Step-by-Step Guide That Actually Works (No More 'Blocked' Errors or Broken Logins)
 Upcycled Wall Art from Recycled Materials
 DIY Tie-Dye Shirts with Dollar Store Supplies
 Stop Struggling with 'When the Party's Over' Guitar Chords: The Exact 4-Chord Progression (with Capo-Free & Beginner-Friendly Versions) That 92% of Learners Miss — Free Printable Chart Inside
 DIY Vision Boards in 10 Minutes
 25 Creative Slime Ideas
 Step-by-Step Photo Booth Props Tutorial