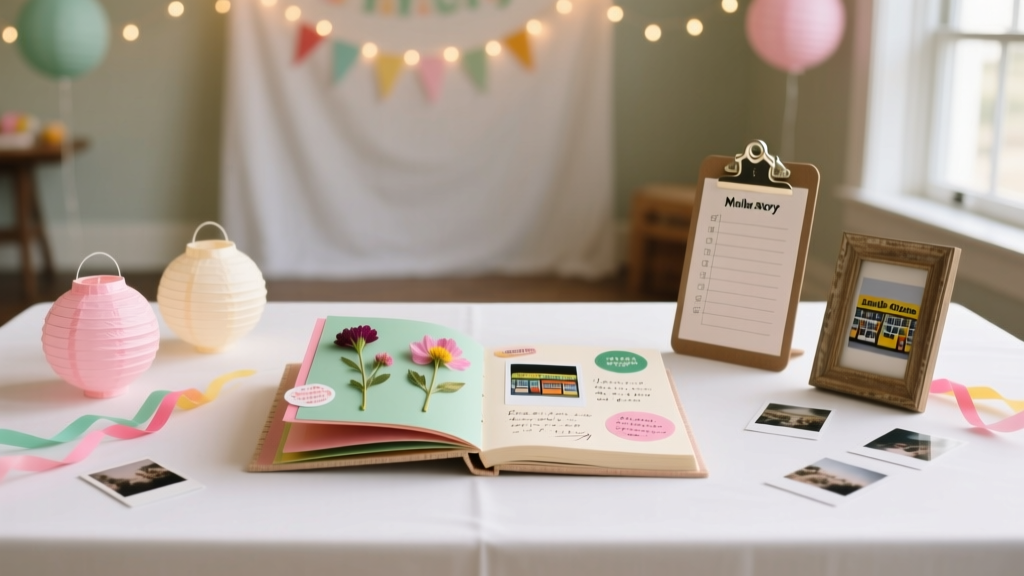
DIY Memory Books with Dollar Store Supplies
A good party goes by fast. One minute you’re setting out the cupcakes, the next you’re cleaning up confetti and wondering how it all flew by. A DIY memory book is a fun, practical way to hold onto the moments—photos, little notes, inside jokes, and the tiny details that make celebrations feel personal.
The best part: you can make a gorgeous, handmade memory book using mostly Dollar Store supplies. This project works for birthdays, baby showers, bridal showers, graduation parties, retirement celebrations, holiday gatherings, and even “just because” get-togethers. It also doubles as a party activity—set out a memory table and let guests contribute pages.
If you love DIY crafts, party decorations, and handmade projects that look like you spent way more than you did, this is your kind of craft. You’ll end up with a keepsake that feels meaningful, not mass-produced—and you’ll still have budget left for balloons.
Project Overview
- Skill level: Beginner-friendly (with optional advanced upgrades)
- Time estimate:
- Simple version: 45–75 minutes
- Party-ready memory station + extra pages: 2–3 hours
- Finished size: Most Dollar Store albums and notebooks land around 8.5" x 11" or 6" x 8"
- Best for: Party keepsakes, guest books, birthday scrapbooks, shower advice books, graduation memory books
Materials List (Dollar Store Finds + Estimated Costs)
Base Options (Pick One)
- Composition notebook (wide-ruled, 9.75" x 7.5") – $1.25
- Spiral notebook (8" x 10" or similar) – $1.25
- Photo album with sleeve protectors – $1.25–$5 (varies by store/season)
- Mini binder (often seasonal) + paper – $2.50–$6 total
Paper + Page Decor
- Cardstock or patterned paper (12" x 12" sheets or multi-pack) – $1.25–$3
- Construction paper (for mats and frames) – $1.25
- Index cards (for guest prompts) – $1.25
- Stickers (letters, icons, seasonal themes) – $1.25
- Washi tape (if available) – $1.25
Adhesives + Tools
- Glue stick – $1.25
- Double-sided tape (recommended for cleaner pages) – $1.25–$3
- Clear tape (for quick fixes) – $1.25
- Scissors (8" craft scissors) – $1.25
- Ruler (12") – $1.25
- Black permanent marker (fine tip if possible) – $1.25
Optional “Looks Expensive” Upgrades
- Corner rounder punch (if you already own one) – optional
- Foam adhesive dots/squares (for 3D elements) – $1.25
- Ribbon (for binding or page ties) – $1.25
- Sheet protectors (if using binder) – $1.25–$3
- Mod Podge (some Dollar Stores carry it; otherwise craft store) – varies
Estimated Total Cost
- Ultra-budget version: $5–$8
- Decor-heavy version: $10–$20
Choose Your Memory Book Style
Option A: “Guest Book Meets Scrapbook” (Best for Parties)
This format mixes photos and guest messages. Great for birthdays, baby showers, bridal showers, anniversaries, and graduation parties.
Option B: Photo-First Memory Book (Fast + Clean)
Use a Dollar Store photo album with sleeves. Add journaling cards or small notes beside photos for a polished look without much glue.
Option C: Interactive Memory Book (Best for Kids’ Parties)
Add prompts, coloring spaces, and mini pockets for keepsakes like confetti, invitations, and photo booth strips.
Step-by-Step Instructions: DIY Memory Book (Notebook Version)
Step 1: Prep the Cover (10–20 minutes)
- Measure your cover. Most composition notebooks are about 9.75" x 7.5".
- Cut a cover wrap. Cut cardstock to 10.25" x 16" so you have a little overhang to fold neatly around the front and back.
- Attach with clean adhesive. Use double-sided tape around the perimeter and a few strips down the middle. Smooth from the center outward.
- Fold edges. Trim corners at a 45° angle leaving about 1/8" from the notebook edge, then fold and tape down.
- Add a title. Use letter stickers or hand-letter with marker:
- “Emily’s 10th Birthday”
- “Baby Shower Memories”
- “Graduation 2026”
Tool recommendation: A metal ruler helps you crease the folds neatly. If you have a butter knife (clean!) it can act as a bone folder for crisp edges.
Step 2: Create a Simple Page Layout System (10 minutes)
Keeping pages consistent makes the book look cohesive even when multiple people contribute.
- Photo mat size: Cut cardstock mats to 4.5" x 6.5" for standard 4" x 6" photos.
- Journaling block: Cut rectangles to 3" x 4" (perfect for quick notes).
- Header strip: Cut strips to 1.25" x 7" for page titles (date, party theme, location).
Make a small stack of each piece before you start assembling. It’s a time-saver and helps prevent “every page looks different” chaos.
Step 3: Build 3–5 Starter Pages (20–40 minutes)
Starter pages guide your guests and give the book instant personality.
- Page 1: Title + event details
- Add the celebrant’s name, date, and theme.
- Leave space for a favorite photo from the day.
- Page 2: “How we know you”
- Prompt ideas: “I know you from…” “My first memory of you…”
- Page 3: Wishes + advice
- Great for showers and graduation parties.
- Page 4: Favorite moments
- Add 2–3 photo mats and a journaling block.
- Page 5: “Make us laugh”
- Prompt ideas: “Funniest thing you’ve seen me do…” “A song that fits today…”
Adhesive tip: Use double-sided tape for flat pieces (mats, headers) and glue stick for lightweight paper. Avoid liquid glue unless you’re very sparing—it can ripple notebook pages.
Step 4: Add Guest Prompt Cards (10–15 minutes)
This is the secret weapon for party success: guests often want to contribute, but they don’t know what to write.
- Cut index cards to 3" x 5" (or use them as-is).
- Write prompts at the top and leave blank space below.
- Attach to pages with washi tape (easy to remove and reposition).
Prompt ideas:
- “My favorite memory with you is…”
- “A wish I have for you this year…”
- “Three words that describe you…”
- “A party highlight I don’t want you to forget…”
- “Advice for your next chapter…”
Step 5: Create a Pocket Page for Party Keepsakes (10–20 minutes)
Pockets make your memory book feel like a true keepsake from the event.
- Cut cardstock to 7.5" x 7" (adjust to fit your notebook page).
- Round the top corners (scissors work fine).
- Tape or glue the left, right, and bottom edges only, leaving the top open.
- Label it: “Save the fun!” or “Little keepsakes.”
Perfect items to tuck inside: invitation, photo booth strips, confetti (in a small bag), cupcake topper, a written toast, or a “best wishes” card.
Setting Up a Party Memory Book Station
Turn your handmade memory book into an easy party activity. This works beautifully for birthday parties, bridal showers, baby showers, and graduation parties.
- Table sign: “Write a note for the memory book!”
- Supplies basket: markers, pens, glue dots, tape, stickers
- Photo corner: instant prints (if you have them) or a “leave space for photos” note
- Time saver: pre-tape a few blank mats so guests can just write and stick
Best pen choice: A black fine-tip permanent marker reduces smudging and shows up on patterned paper.
Pro Tips for Clean, Durable Pages
- Use the “less is more” rule with glue. Too much adhesive causes warping and wrinkles.
- Anchor chunky items. If you add bows or thick foam stickers, keep them near the outer edge so the book still closes nicely.
- Stick to 2–3 colors. Matching your party decorations (balloons, tableware, banners) makes the book look coordinated.
- Label dates. Add a small date stamp area on each page: 1" x 2" is plenty.
- Mat photos every time. A 1/4" border around photos instantly upgrades the look.
Beginner-Friendly Adaptations
- No cutting confidence? Use full sheets of patterned paper as backgrounds and only cut simple rectangles for journaling blocks.
- No fancy tools? Scissors + ruler + tape is enough. Keep shapes simple (rectangles, strips, banners).
- Short on time? Make just:
- 1 cover title
- 1 prompt page
- 1 pocket page
- 3 blank pages with a header strip
Advanced Variations (For Extra “Wow”)
- Shaker pocket page: Create a sealed pocket with clear plastic (like a trimmed zipper bag) filled with sequins/confetti for party sparkle.
- Envelope fold-out: Tape an envelope into the spine edge so it flips open for hidden notes or extra photos.
- Layered scrapbook clusters: Use foam dots to layer a sticker + banner + mini bow for dimension (keep layers small so pages don’t bulk up too quickly).
- Theme pages: Match party decorations—“Under the Sea,” “Taco Bar Night,” “Tea Party,” “Disco,” “Rustic Picnic.”
Troubleshooting: Fixes for Common Issues
- Pages are wrinkling: Switch to double-sided tape, use less glue, and press pages under a heavy book for 30 minutes.
- Stickers won’t stick: Reinforce with a tiny piece of clear tape or glue dot underneath.
- Notebook won’t close: Remove bulky decorations near the spine and move them toward the outer edge, or limit 3D elements to every other page.
- Ink smudges: Use permanent marker, or place a scrap paper under the writing hand. Let ink dry before closing the book.
- Photos peeling up: Use photo-safe double-sided tape or add a thin washi tape “frame” around corners.
Common Crafting Mistakes to Avoid
- Overloading every page. A memory book needs breathing room for photos and writing. Leave blank space on purpose.
- Skipping a test page. Test your pens and adhesives on one page first—Dollar Store paper quality varies.
- Putting thick items near the spine. This makes pages fight each other and can tear the binding.
- Using watery glue on thin paper. It warps quickly. Choose glue stick or tape whenever possible.
- No prompts for guests. Prompt cards turn “Umm…” into heartfelt notes in seconds.
FAQ: DIY Memory Books for Parties
What’s the easiest Dollar Store base to use?
A composition notebook is the simplest and most flexible. It’s sturdy, inexpensive, and easy to cover with cardstock for a customized look.
Can I make this a guest book for a baby shower or bridal shower?
Yes—this is one of the best party-related projects for showers. Use prompt pages like “Advice for the parents,” “Date night ideas,” or “Marriage tips,” plus space for photos and messages.
How do I keep the memory book from getting too bulky?
Limit foam dots and chunky embellishments to a few accent pages, keep thicker items away from the spine, and mix in flatter designs (washi tape borders, stickers, journaling cards).
What if I don’t have printed photos yet?
Leave 4" x 6" photo mats blank with a note: “Add photo here.” You can also tuck prints into the pocket page and attach them later.
What pens work best for guests?
Black fine-tip permanent markers are reliable and less likely to smear. If kids are writing, include a couple of thicker markers for easier grip.
How far in advance should I make it for a party?
Make the base (cover + 3 starter pages + pocket page) 2–7 days before the event. Set up the memory book station the day of the party so it’s ready when guests arrive.
Wrap-Up: Make the Party Memories Last
A DIY memory book is one of those handmade decorations that keeps giving long after the balloons pop. It’s budget-friendly, meaningful, and easy to tailor to any celebration theme—exactly the kind of smart DIY craft that turns a fun party into a lasting keepsake.
Grab a notebook, a handful of Dollar Store stickers, and your favorite party colors, then start with just a few pages. Once you see how quickly it comes together, you’ll want to make one for every big moment.
Want more party-ready DIY crafts, handmade projects, and creative decoration ideas? Explore more tutorials and inspiration on smartpartyprep.com.
More Articles
 DIY Candles with Dollar Store Supplies
 Budget DIY Place Cards Under $50
 DIY Tie-Dye Shirts for Holidays
 How to Make Slumber Party Tents That Actually Stay Up (No Glue Guns, No Tears): 7 Foolproof Methods Using Stuff You Already Own — From Cardboard Castles to Fairy-Light Canopies
 How Do I Unblock Third Party Cookies? (2024 Step-by-Step Guide for Chrome, Safari, Firefox & Edge — No Tech Degree Required)
 Budget DIY Invitations Under $25
 ‘Is Just Ingredients Third Party Tested?’ — The Truth Behind Label Claims (and How to Verify What You’re Really Buying)
 How to Allow 3rd Party Cookies on Safari in 2024: A Step-by-Step Guide (Without Breaking Privacy or Breaking the Internet)
 Personalized Tie-Dye Shirts Gifts
 Seasonal T-Shirts Ideas