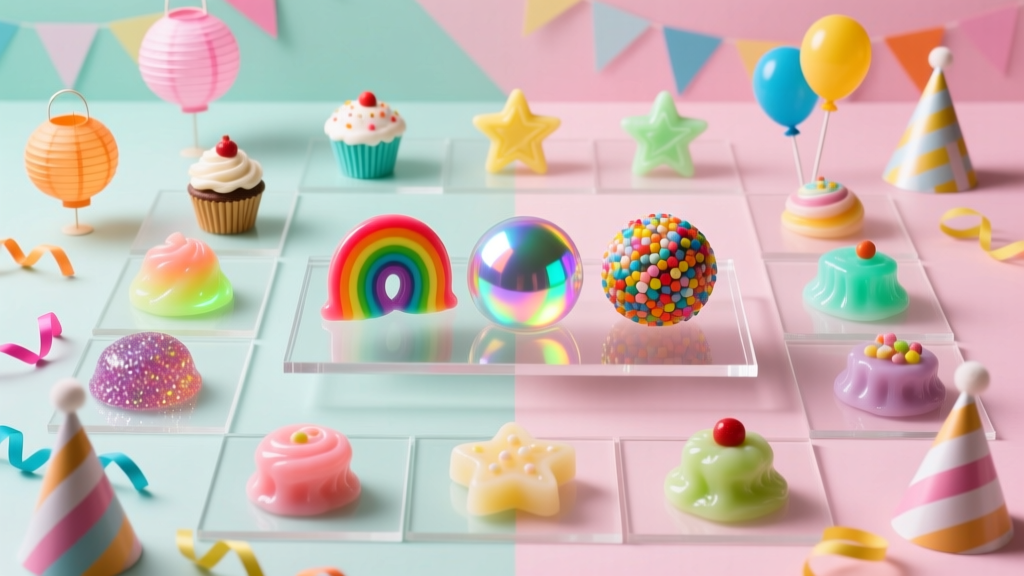
25 Creative Slime Ideas
Slime isn’t just a kids’ craft—it’s a party-ready, hands-on activity that doubles as a handmade favor, table décor accent, or even a themed “science lab” station. Whether you’re hosting a birthday bash, planning a sleepover, or prepping DIY party decorations for a holiday gathering, slime gives you color, texture, sparkle, and surprise in one simple project.
What makes slime especially fun for parties is how customizable it is. You can match it to your theme (mermaid, galaxy, neon, pastel, Halloween), portion it into mini jars as take-home gifts, and even set up a quick slime bar where guests mix their own add-ins. With the right base recipe and a few smart tips, you’ll get consistent, stretchy slime that looks impressive and feels satisfying.
This guide includes a reliable slime base, a shopping list with estimated costs, step-by-step instructions, and 25 creative slime ideas—plus party-friendly packaging tips, troubleshooting, and common mistakes to avoid.
Project Overview (Skill Level + Time)
- Skill level: Beginner (base recipe) to Advanced (layered, butter, cloud variations)
- Active time: 10–20 minutes per batch
- Rest time: 10–30 minutes (improves stretch)
- Best for: DIY party activities, handmade party favors, themed decorations, sensory play
Materials List (with Product Types + Estimated Costs)
Costs vary by brand and where you shop, but these estimates are realistic for craft stores, big-box retailers, or online.
Core Ingredients
- PVA school glue (white glue or clear glue), 4–8 oz bottle: $1–$4
- Baking soda (sodium bicarbonate): $1–$3
- Contact lens solution with boric acid and/or sodium borate (activator): $3–$8
- Shaving cream (for fluffy slime), foam type: $2–$5
- Foam clay or soft modeling clay (for butter slime): $3–$8
Color + Texture Add-Ins
- Food coloring or gel color: $2–$6
- Mica powder (for shimmer/metallic): $6–$12
- Fine glitter and chunky glitter: $3–$10
- Confetti sprinkles (polymer clay slices work best): $3–$8
- Foam beads (for crunchy texture): $3–$7
- Instant snow powder (for cloud slime): $6–$12
- Scented oils or skin-safe fragrance (optional): $4–$10
Tools + Party Packaging
- Mixing bowls (plastic or glass): $1–$10
- Measuring spoons (1 tsp, 1 tbsp): $3–$8
- Spatula or silicone spoon: $2–$7
- Disposable gloves (optional but great for color mixing): $3–$8
- Mini plastic jars with lids (2–4 oz) for party favors: $8–$18 per 12-pack
- Printable labels or sticker labels: $3–$10
Base Slime Recipe (Reliable + Party-Friendly)
This is a dependable glue-and-activator slime that you can customize into many of the ideas below.
Ingredients (One Small Batch)
- 4 oz (1/2 cup) PVA glue (white or clear)
- 1/2 tsp baking soda
- 1–2 tbsp contact lens solution (add slowly)
- Color/add-ins of choice (start small—more is easy to add later)
Step-by-Step Instructions
- Prep your station: Cover the table with a disposable tablecloth or parchment paper. Set out bowls, spoons, and jars for finished slime.
- Pour glue: Add 4 oz (1/2 cup) glue to a mixing bowl.
- Add color and sparkle: Mix in 1–3 drops of food coloring (or a pinch of mica). Stir until even.
- Mix in baking soda: Add 1/2 tsp baking soda and stir well. This helps the slime firm up smoothly.
- Activate slowly: Add 1 tbsp contact lens solution. Stir. If it’s still very sticky, add another 1 tsp at a time.
- Knead by hand: Once it clumps, pick it up and knead 1–2 minutes. If it’s sticky, add a few drops of solution to your hands (not directly into the bowl).
- Rest for best texture: Let it sit in a sealed container 10–30 minutes. It becomes stretchier and less tacky.
25 Creative Slime Ideas (Party-Themed and Display-Worthy)
Use the base recipe above, then customize with the add-ins listed for each idea. For party prep, make 2–3 colors and offer a “slime mix bar” so guests can personalize.
1) Galaxy Slime
- Add: Black + purple + navy coloring, fine silver glitter, star confetti
- Party use: Space party favors in clear jars
2) Mermaid Lagoon Slime
- Add: Teal + aqua coloring, iridescent glitter, pearl beads
- Variation: Layer two tones for a “sea swirl” look
3) Unicorn Swirl Slime
- Add: Pastel pink, lavender, mint; sprinkle confetti
- How-to: Make 3 mini batches, twist together once activated
4) Confetti Birthday Cake Slime
- Add: White slime + rainbow sprinkles (polymer slices), optional vanilla scent
- Decor idea: Label jars as “Cake Batter Slime” for party favors
5) Glitter Bomb Slime
- Add: 1/2 tsp fine glitter + 1/4 tsp chunky glitter
- Pro tip: Mix glitter into glue before activating to reduce fallout
6) Glow-in-the-Dark Slime
- Add: Glow pigment powder or glow paint (small amounts)
- Party use: Great for glow parties and sleepovers
7) Neon Rave Slime
- Add: Neon food coloring or neon pigment; blacklight-reactive glitter if available
8) Halloween “Witch’s Brew” Slime
- Add: Green coloring, black foam beads, plastic “bug” confetti
- Display: Put jars in a cauldron bowl on the snack table
9) Spooky “Blood Drip” Slime
- Add: Deep red slime + a touch of black for a darker tone
- Advanced: Layer clear slime on top for a glossy “drip” look
10) Peppermint Swirl Holiday Slime
- Add: Red + white swirls, peppermint scent (skin-safe), silver glitter
11) Winter Snow Globe Slime
- Add: Clear slime + iridescent glitter + tiny “snow” confetti
- Jar idea: Fill a clear favor jar and tie on a ribbon
12) Cloud Slime (Advanced Texture)
- Add: Prepared instant snow (start with 1 tbsp hydrated snow)
- Tip: Add snow slowly—too much makes it rippy instead of drizzly
13) Fluffy Slime (Beginner-Friendly Crowd Pleaser)
- Add: 2–3 cups shaving cream per 1/2 cup glue (start with 2 cups)
- Look: Pastels pop beautifully with fluffy texture
14) Butter Slime (Smooth + Clay-Like)
- Add: 1–2 tbsp soft clay or foam clay (knead in after activation)
- Party theme: “Bakery slime” station
15) Boba Tea Slime
- Add: Light brown slime + black beads (boba pearls)
- Container: Cup-style jar with a label like “DIY Boba Slime”
16) Popcorn Slime
- Add: Yellow-tinted slime + white foam beads
- Movie night: Cute favor for a cinema-themed party
17) Cotton Candy Slime
- Add: Pink + blue twist, optional cotton candy scent
18) Watermelon Picnic Slime
- Add: Pink slime with black “seed” beads; add a green layer for the rind
19) Lemonade Stand Slime
- Add: Clear slime tinted yellow + tiny foam “ice” beads
20) Ocean Wave Layered Slime
- Add: Make 3 blues (dark, medium, pale). Layer in a jar for a wave effect.
- Advanced: Add clear slime pockets for “sea glass” shine
21) “Fairy Dust” Slime
- Add: Clear slime + iridescent mica + star confetti
- Party use: Fairy party activity station
22) Metallic Chrome Slime
- Add: Silver mica powder (start with 1/8 tsp, increase as needed)
- Tip: Clear glue gives the best chrome-like effect
23) Jelly Cube Slime (Textured “Chunky”)
- Add: Clear slime + cut foam sponge cubes (very small, about 1/4 inch)
- Note: Use clean, new sponges for crafting only
24) Crunchy Snow Fizz Slime
- Add: Extra baking soda pinch + foam beads + a bit of instant snow
- Effect: Sizzly, crunchy texture (great for sensory stations)
25) Party Confetti “Number Age” Slime
- Add: Clear slime + number confetti matching the birthday age
- Favor idea: Put one mini charm or confetti number in each jar
How to Set Up a Slime Bar (Perfect for Parties)
- Make ahead: Pre-measure glue into cups (1/2 cup each) and set out add-ins in small bowls.
- Stations:
- Color station (gel colors, mica)
- Sparkle station (glitter, confetti)
- Texture station (foam beads, instant snow, clay)
- Packaging station (jars, labels, pens)
- Guest-friendly rule: Let guests add activator with a spoon a little at a time to prevent over-activating.
Pro Tips, Variations, and Troubleshooting
Pro Tips for Great Texture
- Always add activator slowly. You can add more, but you can’t easily remove it.
- Rest improves slime. A short rest in a sealed container makes it less sticky and more stretchy.
- Clear slime needs patience. If you use clear glue, let it sit 1–3 days to clear bubbles for a glassy look (advanced, but worth it for party display jars).
- Use gloves for bold colors. Especially with neon pigments and strong dyes.
Beginner-Friendly Adaptations
- Stick to white glue for more forgiving, opaque slime.
- Choose one add-in per batch (glitter OR beads) until you get the feel for texture.
- Make mini batches (2 oz glue) to test colors before making party-sized quantities.
Troubleshooting Quick Fixes
- Too sticky: Knead longer first. If still sticky, add a few drops of contact solution to your hands and knead again.
- Too stiff / rips easily: You likely over-activated. Work in 1/2 tsp warm water or a pea-sized amount of lotion, then rest 10 minutes.
- Won’t activate: Check your contact solution ingredients—look for boric acid and/or sodium borate. If missing, switch brands.
- Glitter falling out: Use finer glitter, and mix it into the glue before activator.
- Beads shedding: Add fewer beads and knead gently; over-kneading can loosen add-ins.
Common Crafting Mistakes to Avoid
- Dumping in activator all at once: This is the fastest way to get rubbery slime.
- Skipping measurements: Eyeballing is tempting, but parties need consistency—use measuring spoons.
- Using off-brand glue that isn’t PVA: If it doesn’t say school glue/PVA, activation can fail.
- Adding too many heavy add-ins: Excess beads, charms, or confetti can make slime break apart.
- Storing slime without an airtight container: It dries out quickly—use lidded jars for party favors.
- Not labeling favors: Add a simple label with the slime name and a “Keep sealed” reminder.
FAQ: Slime for DIY Parties and Handmade Favors
1) How long does homemade slime last?
Stored in an airtight container, most slime lasts 1–2 weeks, sometimes longer. If it starts to dry, knead in a few drops of warm water or a tiny amount of lotion.
2) Can I make slime ahead of a party?
Yes. For best results, make it 1–3 days ahead and store in sealed jars. Clear slime looks even better after a couple of days as bubbles settle.
3) What’s the best slime for party favors?
Clear glitter slime, galaxy slime, and confetti slime look amazing in jars and hold up well. Use 2–4 oz containers so favors feel generous but manageable.
4) Why is my slime sticky even after adding activator?
It may just need more kneading time. If it’s still sticky after 2 minutes of kneading, add activator in tiny increments (a few drops at a time) to your hands and knead again.
5) Can I make slime without contact lens solution?
You can use other activators (like a borax solution), but for many crafters, contact lens solution + baking soda is the simplest for DIY parties. If you switch activators, test a small batch first to avoid waste.
6) How do I keep slime from sticking to tables during a slime-making party?
Use disposable table covers, keep a “kneading zone” with parchment paper, and encourage guests to handle slime over their bowl until it fully forms. Airtight jars also help keep things tidy once slime is done.
Wrap-Up: Make Slime That Matches Your Party Theme
With one reliable base recipe and a handful of creative add-ins, you can create slime that looks like party décor, feels like a sensory treat, and works as a handmade party favor guests actually want to take home. Pick 3–5 ideas that match your theme, prep your slime bar, and let your colors and textures do the decorating for you.
Want more DIY crafts, party decorations, and handmade project ideas? Explore the latest creative guides on smartpartyprep.com and keep your party prep clever, colorful, and fun.
More Articles
 Does Hasbro Hate Third Party Transformers? The Truth Behind Licensing, Cease-and-Desists, and Why Fans Keep Building Anyway — A Deep Dive for Customizers, Collectors & Makers
 DIY Origami Decorations with Dollar Store Supplies
 Kids' Craft: Tie-Dye Shirts
 DIY Masks Using Cricut
 How to Enable Third Party Cookies on MacBook: A Step-by-Step Safari & Chrome Fix (2024 Verified — No More 'Blocked' Errors or Broken Logins)
 Seasonal Garlands Ideas
 DIY Pressed Flower Art Party Favors
 How to Allow Third Party Cookies on MacBook Air (2020–2024): A Step-by-Step Safari & Chrome Fix That Actually Works in 2024 — No Tech Degree Required
 How to Make a Party Backdrop That Looks Pro (Without Spending $200): 7 Foolproof DIY Methods Using Dollar Store Supplies, Reusable Frames & Zero Sewing
 12 Stunning Do It Yourself Party Centerpieces You Can Make in Under 30 Minutes (No Craft Experience Needed — Seriously)