Step-by-Step Invitations Tutorial
Handmade invitations do more than share the who/what/when/where—they set the mood for your celebration before guests even arrive. Whether you’re planning a birthday party, baby shower, bridal shower, graduation, or holiday get-together, a DIY invitation is a small party decoration in its own right: color, texture, theme, and personality all in one little envelope.
This project is especially fun because you can make it as simple or as fancy as you like. Beginners can create crisp, professional-looking invitations with a few basic tools and printable templates. More experienced crafters can layer cardstock, add vellum, emboss details, and build in interactive elements like pockets, pull-tabs, or mini RSVP cards.
Below you’ll find a practical, step-by-step tutorial for making a set of handmade party invitations that look polished, mail well, and match your party decor. You’ll also get pro tips, troubleshooting, and variations so you can customize for any theme.
Project Overview (Skill Level, Time & Finished Size)
- Skill level: Beginner-friendly (with optional intermediate/advanced upgrades)
- Time estimate:
- Design & test print: 30–60 minutes (one-time setup)
- Per 10 invitations (basic layered style): 45–75 minutes
- Per 10 invitations (with embellishments): 75–120 minutes
- Finished invitation size: 5 in x 7 in (A7) is classic and easy to find envelopes for
- Mailing note: Bulkier embellishments may require extra postage—always weigh a finished sample at the post office.
Choose Your Invitation Style
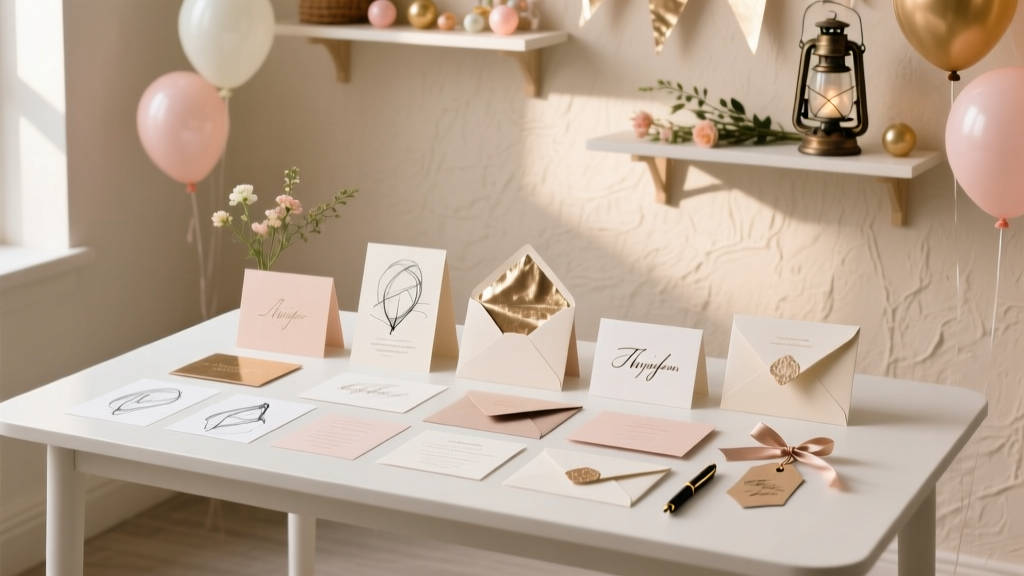
This tutorial focuses on a clean, versatile design that works for most party themes: a 5x7 layered invitation with an optional vellum belly band and a simple embellishment.
Recommended Style: Layered 5x7 Invite
- Top layer: Printed invitation panel (white or light cardstock)
- Backer layer: Colored cardstock (matches party decorations)
- Optional: Vellum wrap/belly band, small tag, wax seal sticker, or ribbon
Beginner Adaptation (Fastest Option)
- Single 5x7 card printed on 80–100 lb cardstock
- No layering—just trim and place in envelope
Advanced Variation (Wow Factor)
- Pocket invitation (holds RSVP + details card)
- Foil accents, heat embossing, die-cut edges, or interactive pull-tab
Materials & Tools (With Estimated Costs)
Costs vary by brand and what you already have on hand. These estimates are typical for craft stores or online shops.
Paper & Adhesives
- Cardstock for printed panels (white/light, 80–100 lb cover): $8–$15 per 50 sheets
- Cardstock for backer layer (solid color, 65–100 lb): $6–$12 per 25–50 sheets
- Vellum sheets (optional, 8.5 x 11 in): $6–$12 per 10–20 sheets
- Double-sided tape (strong, 1/4 in or 3/8 in): $4–$10
- Tape runner (quick adhesive option): $6–$12
- Glue dots (mini, for embellishments): $4–$8
Cutting & Measuring Tools
- Paper trimmer (guillotine or rotary): $12–$35
- Metal ruler (12 in) + craft knife (optional for precision): $8–$20
- Corner rounder punch (optional): $6–$15
- Scoring board and bone folder (optional for crisp folds): $10–$25
Printing & Finishing
- Home printer (inkjet or laser) or local print shop
- A7 envelopes (5.25 x 7.25 in): $6–$12 per 25
- Embellishments (pick 1–2 so invites stay mail-friendly):
- 1/8 in satin ribbon: $3–$6
- Wax seal stickers (flat): $8–$15 per 20–50
- Small paper flowers or confetti: $3–$10
- Alphabet or shape stickers: $4–$8
Recommended “Nice-to-Have” Tools
- Self-healing cutting mat (if using a craft knife): $10–$20
- Anti-static powder tool (if heat embossing): $6–$10
- Small brayer (for smoothing vellum/adhesive): $6–$12
Measurements & Cutting Guide (5x7 Layered Invitations)
These measurements create a neat border and a professional layered look.
- Printed invitation panel: 4.75 in x 6.75 in
- Colored backer layer: 5 in x 7 in
- Optional vellum belly band: 2 in x 11 in (trim to fit and overlap about 1/2 in)
- Optional mini tag: 1.5 in x 2.5 in (or a 2 in circle)
Step-by-Step Instructions: Make Handmade Party Invitations
Step 1: Plan Your Party Invitation Details
Before you cut a single sheet, decide your invitation wording. A clear invite is always more useful than an overly decorative one.
- Must-have info: event name, guest of honor (if relevant), date, start time, location/address, RSVP deadline, RSVP contact
- Helpful extras: parking notes, dress code, registry (if applicable), theme cue (ex: “wear pink!”), dietary request note
Quick wording tip: Keep the main card clean and readable; put long details on a separate details card if needed.
Step 2: Create or Edit Your Invitation Design
Use a simple design tool (like a template editor) and set your page to 5x7 in. Choose fonts that are easy to read and match your party theme (playful for kids’ parties, elegant serif for showers, bold sans for modern celebrations).
- Font sizing guideline:
- Title: 24–36 pt
- Main details: 12–16 pt
- Small notes: 10–12 pt
- Print settings: Use “Best” quality and select the correct paper type if your printer offers it.
- Color tip: If your party decorations are bright, keep the text mostly dark and crisp for contrast.
Step 3: Test Print (Don’t Skip This)
- Print one draft on regular printer paper.
- Check for:
- typos and spacing
- colors (too dark? too pale?)
- alignment and margins
- Hold it next to your envelope to confirm the size looks balanced.
Step 4: Print on Cardstock
- Load cardstock in your printer tray (start with 1–3 sheets to avoid jams).
- Print a single invitation panel first to confirm quality.
- Print the full batch.
Tool recommendation: If you’re printing many invitations, a laser printer can produce sharper text and handle cardstock well. Inkjet works beautifully too—just allow extra dry time.
Step 5: Cut the Printed Panels and Backers
- Trim printed panels to 4.75 in x 6.75 in using a paper trimmer.
- Cut colored cardstock backers to 5 in x 7 in.
- If you want rounded corners, punch the corners now (do the same corner style on both layers).
Speed tip: Cut assembly-line style: cut all backers first, then all printed panels.
Step 6: Layer and Adhere for a Professional Look
- Place the 5x7 backer face down.
- Apply adhesive to the back of the printed panel:
- Use double-sided tape along all four edges, about 1/8 in from the edge.
- Add a small strip or dot in the center to prevent bubbling.
- Center the printed panel on the backer, leaving an even border (about 1/8 in on all sides).
- Press firmly, especially at corners.
Clean finish tip: Tape runner is fast, but strong double-sided tape tends to hold better long-term, especially if you add a vellum band.
Step 7 (Optional): Add a Vellum Belly Band
- Cut vellum strips to 2 in x 11 in.
- Wrap around the invitation and mark where the ends overlap (aim for about 1/2 in overlap on the back).
- Trim if needed.
- Secure the overlap on the back with:
- double-sided tape (hidden under the overlap)
- or a thin line of glue (let dry fully)
Vellum pro tip: Vellum shows adhesive easily. Hide tape behind a tag, under a ribbon, or at the back overlap only.
Step 8 (Optional): Add a Simple Embellishment
Choose one focal detail so the invite stays flat enough to mail.
- Easy options:
- Mini tag tied with 1/8 in ribbon
- Flat wax seal sticker centered on the vellum band
- Small sticker icon (balloon, star, flower, pumpkin) matching your party theme
- Position the embellishment first (no adhesive) to check placement.
- Attach with glue dots or strong double-sided tape.
- Press firmly for 10–15 seconds for a secure bond.
Step 9: Stuff, Seal, and Do a Mail Test
- Insert invitation into an A7 envelope.
- If you’re including an RSVP or details card, keep papers stacked neatly and facing the same direction.
- Seal and weigh one finished invitation at the post office to confirm postage.
Party planning win: Make 1–2 extra invitations for keepsakes (and one for photos for your party decor planning binder).
Pro Tips for Crisp, Boutique-Looking DIY Invitations
- Use a border guide: Lightly mark the center of your backer with a pencil dot, then erase after adhering.
- Let ink dry: Give inkjet prints 10–20 minutes before stacking to avoid smudges.
- Keep colors consistent: Pull one shade from your party decorations (napkins, banner, tablecloth) and repeat it on the backer cardstock.
- Batch your steps: Print all, cut all, then assemble all—faster and fewer mistakes.
- Flat is your friend: For mail, choose flat embellishments over chunky ones (no bulky gems unless hand-delivering).
Creative Variations (Match Any Party Theme)
Kids’ Birthday Party Invitation
- Use bright backers (red, aqua, lime)
- Add a flat sticker (dinosaur, unicorn, soccer ball)
- Use a bold headline font and high-contrast text
Baby Shower or Bridal Shower Invitation
- Try vellum + a delicate ribbon wrap
- Add a small floral tag with guest-of-honor name
- Use pastel cardstock and a simple border
Holiday Party Invitation
- Use metallic cardstock backers (gold/silver) with a white panel
- Add a mini wreath sticker or a snowflake punch element (kept flat)
Advanced: Pocket Invitation Set
- Create a 5x7 pocket that holds:
- Main invite
- RSVP card (3.5 x 5 in)
- Details card (3.5 x 5 in)
- Best for weddings, milestone birthdays, or events with lots of info
Troubleshooting: Fix Common Invitation Problems
- Problem: Printer smears or streaks on cardstock
Fix: Use a lighter cardstock (80–90 lb), reduce print speed, or switch to “Best” quality. Let prints dry fully before trimming. - Problem: Panels look crooked on the backer
Fix: Use a T-square corner alignment method—line up the backer in the corner of your cutting mat and align the panel edges before pressing down. - Problem: Vellum shows tape
Fix: Place adhesive only where it’s hidden (under a seal/tag) or use the back overlap method only. - Problem: Invitations won’t fit the envelope easily
Fix: Confirm finished size is truly 5x7. If you added thick layers, consider A7 envelopes with a slightly wider flap or move to 5x7.25 envelopes. - Problem: Corners peel up over time
Fix: Use stronger double-sided tape on corners and burnish firmly with a bone folder.
Common Crafting Mistakes to Avoid
- Skipping the test print: One typo can ruin a full batch. Always test on plain paper first.
- Using flimsy paper: Printer paper feels thin and curls. Use 80–100 lb cardstock for a quality handmade invitation.
- Over-embellishing for mail: Puffy decorations can trigger extra postage or returned mail. Keep embellishments flat or hand-deliver.
- Rushing the cutting step: Slight trimming differences add up. Measure once, set your trimmer guide, and cut consistently.
- Mixing too many fonts: Two fonts (a headline + a body font) usually looks cleanest and most professional.
- Forgetting RSVP timing: Set an RSVP deadline 7–14 days before your event so you can finalize food and seating.
FAQ: DIY Party Invitations
What cardstock weight is best for handmade invitations?
For most DIY invitations, 80–100 lb cover cardstock is the sweet spot: sturdy, easy to cut, and prints well. If your printer struggles, try 80–90 lb or use a local print shop.
Can I make these invitations without a paper trimmer?
Yes. Use a metal ruler + craft knife on a self-healing mat for clean cuts. Scissors work in a pinch, but it’s harder to keep edges perfectly straight across a batch.
How many invitations should I make?
Count households, not individual guests (unless everyone receives a separate invite). Add 2–5 extras for keepsakes, last-minute additions, and “oops” moments during assembly.
How do I keep print colors consistent across all invites?
Use the same printer settings for every batch, print in one session if possible, and avoid switching between “Draft” and “Best.” If color accuracy is critical, consider printing at a copy shop.
What’s the easiest way to match invitations to party decorations?
Pick one main color from your party decor (tableware, balloons, banner) for the backer cardstock, then repeat that color in a small design element (border line, icon, or header text).
Do I need special postage for handmade invitations?
Sometimes. Layers and embellishments can increase weight or thickness. Assemble one complete invitation, put it in the envelope, and have it weighed to confirm correct postage.
Wrap-Up: Your Handmade Invitations, Your Party Style
Once you make your first set of DIY party invitations, it’s hard to go back—there’s something satisfying about creating a design that perfectly matches your theme, your colors, and the vibe you want guests to feel. Start with the simple layered version, then try a vellum wrap or a pocket-style upgrade when you’re ready.
Make a test invite, take your time with cutting and alignment, and enjoy the process—your guests will notice the care you put into every detail.
Want more party-ready DIY crafts and handmade decorations? Explore more creative project ideas, printables, and smart celebration tips on smartpartyprep.com.
More Articles
 Advanced Slime for Crafters
 How to Enable Third Party Cookies in 2024: A Step-by-Step Browser Guide (Chrome, Safari, Firefox, Edge) — Because Yes, Some Sites Still Need Them (and Here’s Exactly How to Do It Safely)
 How Do I Unblock Third Party Cookies? (2024 Step-by-Step Guide for Chrome, Safari, Firefox & Edge — No Tech Degree Required)
 Personalized Confetti Gifts
 Rustic Mason Jar Crafts Ideas
 Personalized Slime Gifts
 How to Enable 3rd Party Cookies on Safari in 2024: The Real Truth (Spoiler: You Can’t — But Here’s What Actually Works Instead)
 DIY Confetti in 30 Minutes
 DIY Centerpieces Party Favors
 How to Make a Partiful: The 7-Step No-Stress Guide That Turns Craft Panic Into Confident Creativity (Even If You’ve Never Glued Sequins Before)