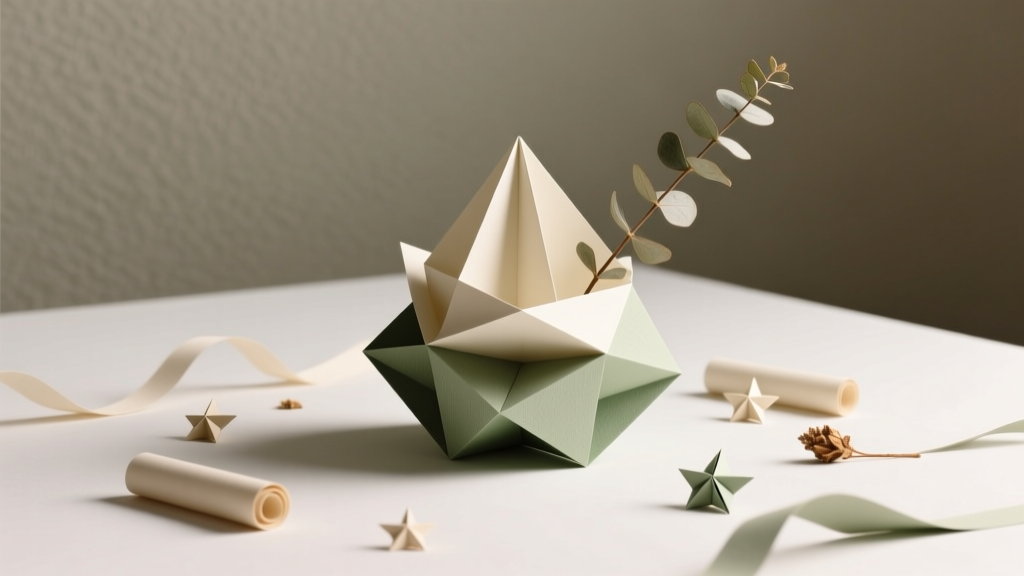
Paper Craft Centerpieces Ideas
Nothing pulls a party table together like a centerpiece—and paper craft centerpieces are one of the most satisfying DIY party decorations you can make. They’re affordable, customizable for any theme, and surprisingly sturdy when built with the right techniques. Whether you’re planning a birthday bash, baby shower, bridal shower, graduation, or holiday gathering, handmade paper decor lets you match colors perfectly and create that “wow, where did you buy that?” moment.
Even better: paper centerpieces are flexible. You can go bold and tall for a statement look, or keep it low and practical so guests can see each other across the table. This guide includes multiple paper centerpiece ideas, clear measurements, step-by-step instructions, pro tips, and simple upgrades—so beginners can succeed and experienced crafters can level up.
Skill level: Beginner to Intermediate (with advanced variations included)
Time estimate: 30–120 minutes per centerpiece (depending on style)
Best for: Parties, weddings, showers, holiday tables, dessert tables, buffet displays
Choosing the Right Paper Centerpiece Style
Before cutting anything, decide what you want your centerpiece to do:
- Create height: Great for buffet tables or large round tables.
- Stay low: Ideal for guest tables where conversation matters.
- Match a theme: Florals for spring, stars for graduation, snowflakes for winter, etc.
- Be reusable: Choose sturdier cardstock and removable tape dots instead of permanent glue.
Below are four crowd-pleasing paper craft centerpieces ideas you can mix and match—use one style throughout or combine styles for a coordinated look.
Materials List (With Product Types + Estimated Costs)
Costs vary by brand and where you shop, but these estimates help you budget a DIY party decor project.
Paper + Base Supplies
- Cardstock (65–110 lb) in party colors (12x12 or 8.5x11 sheets): $6–$18 per pack
- Patterned scrapbook paper (optional accents): $5–$12 per pad
- Tissue paper (for flowers/pom accents): $2–$6
- Foam core board or chipboard (for sturdy bases): $2–$8
- Wooden skewers or paper straws (stems/supports): $2–$6
- Small vases/jars or plastic cups (hidden base): $1–$10 each
- Floral foam or air-dry clay (to anchor stems): $4–$10
- Ribbons (3/8" and 1" widths): $3–$8
- Washi tape (optional): $3–$7
Adhesives
- Hot glue gun + glue sticks (high-temp for strength): $10–$25
- Tacky glue (paper-friendly, strong hold): $3–$6
- Double-sided tape (1/4" or 3/8"): $3–$8
- Glue dots (great for quick assembly): $4–$8
Tools (Recommended)
- Scissors (sharp craft scissors): $6–$20
- Craft knife + self-healing cutting mat: $12–$30
- Metal ruler (12"): $6–$12
- Bone folder or scoring tool (for crisp folds): $6–$12
- Circle punch (1"–2") or cutting machine (optional): $8–$40+
- Stapler (for rosettes): $5–$12
Idea #1: Paper Flower Bouquet Centerpiece (Classic + Customizable)
Look: A bouquet of oversized paper flowers in a vase.
Skill level: Beginner/Intermediate
Time: 60–90 minutes
Height: 12"–18" (adjustable)
Measurements + Cut List (Makes 1 Bouquet)
- Flowers: 5–7 large blooms, each with 6–8 petals
- Petal size (large bloom): about 2.5" wide x 4" tall
- Optional smaller blooms: 2" x 3" petals
- Centers: 1.5" circles (or fringe strips 1" x 6")
- Leaves: 6–10 leaves, about 1.5" x 4"
- Stems: skewers or paper straws cut to 10"–14"
Step-by-Step Instructions
- Cut petals and leaves. Use cardstock for crisp flowers. For softer, more “realistic” blooms, mix in lighter scrapbook paper for outer petals.
- Shape the petals. Curl the top edges by pulling them gently over a scissor blade. For deeper shaping, pinch the base of each petal into a tiny pleat and secure with a dot of glue.
- Build the flower center. Option A: Glue a 1.5" circle as a base. Option B: Cut a fringe strip (1" x 6"), roll tightly, and glue into a bud.
- Attach petals in layers. Glue 4 petals in a cross shape, then add 2–4 more petals between them. Add a second layer behind for a fuller look.
- Add leaves. Score a center vein line with a bone folder and gently bend for dimension. Glue leaves behind the flower head.
- Attach to stems. Hot glue the back of the flower to a skewer/straw. Reinforce with a small cardstock “patch” (about 1" square) over the stem connection.
- Assemble the bouquet. Place floral foam or air-dry clay in a vase/jar. Insert stems at different heights for a professional arrangement.
- Finish the base. Wrap the vase with ribbon or patterned paper and secure with double-sided tape.
Beginner-Friendly Adaptation
- Use pre-cut paper flower templates (trace and cut).
- Make 3 larger flowers instead of 7, then bulk up with tissue paper pom accents.
Advanced Variation
- Add gradient petals (ombre cardstock) and ink the edges with a stamp pad for depth.
- Use a wire stem wrapped with floral tape for flexible posing.
Idea #2: Layered Paper Rosette Topiary (Great for Birthdays + Showers)
Look: A “lollipop” topiary made from folded rosettes on sticks.
Skill level: Beginner
Time: 45–75 minutes
Height: 10"–16"
Measurements + Cut List
- Rosette strips: Cut cardstock strips 2" tall x 12" long. Use 2 strips per rosette for a fuller circle.
- Center circles: 1.5"–2" circles (glitter cardstock looks amazing).
- Base: small jar or cup + foam/clay
Step-by-Step Instructions
- Score and accordion-fold. Score along the 12" length every 1/2", then fold back and forth.
- Create a loop. Join the ends with hot glue or strong double-sided tape.
- Flatten into a rosette. Push the loop down evenly until it forms a circle. Add a glue “button” in the center to hold it.
- Reinforce the back. Glue a cardstock circle (2") on the back as a stabilizer.
- Decorate the front. Add the center circle, a number, name initial, or small paper cutout that matches your party theme.
- Mount on a stem. Glue rosettes onto paper straws or skewers. Vary heights by cutting stems to 8", 10", and 12".
- Arrange in a base. Insert into foam/clay inside the jar. Add shredded paper filler or tissue to hide mechanics.
Theme Ideas
- Kids’ party: rosettes with character colors + age number
- Baby shower: pastel rosettes + tiny paper pacifiers/stars
- Graduation: school colors + “2026” center circles
Idea #3: 3D Paper Lantern Cluster (Modern + Table-Friendly)
Look: A cluster of small paper lanterns (no flames) with optional LED tea lights.
Skill level: Beginner/Intermediate
Time: 30–60 minutes
Height: 6"–10"
Measurements + Cut List (Per Lantern)
- Lantern body: cardstock rectangle 8" wide x 10" tall
- Top/bottom rings: two strips 1" x 8"
- Handle strip (optional): 1/2" x 6"
Step-by-Step Instructions
- Make the lantern cuts. On the 8" x 10" rectangle, mark a 1" margin at the top. From the bottom edge up to that margin, cut vertical slits every 1/2" (stop at the 1" margin).
- Form a tube. Roll the rectangle into a cylinder and secure the side seam with double-sided tape for a clean look.
- Push the top/bottom. Gently press the cylinder from opposite sides so the slits bow outward into a lantern shape.
- Add rings. Glue a 1" x 8" strip around the top and bottom edge to hide slit ends and stabilize the shape.
- Add a handle. Attach the 1/2" x 6" strip to the top ring.
- Arrange as a cluster. Use 3–5 lanterns in different heights and colors. Place on a tray with confetti and add LED tea lights if desired.
Safety Note
Use LED tea lights only with paper lantern centerpieces.
Idea #4: Table Number Stand + Mini Paper Garland (Perfect for Weddings)
Look: A neat table number paired with a small garland wrapped around a vase or stand.
Skill level: Beginner
Time: 20–40 minutes per table
Height: 8"–12"
Measurements + Cut List
- Number card: 4" x 6" cardstock (or 5" x 7" for bigger tables)
- Stand: mini clipboard, acrylic sign holder, or a DIY chipboard base
- Garland shapes: 1" circles or hearts (about 20–30 pieces)
- String: 18"–24" baker’s twine
Step-by-Step Instructions
- Create the number card. Print numbers in a bold font, cut, and mount on contrasting cardstock for a layered look.
- Make the garland. Punch 1" shapes, then attach to twine with glue dots or tiny pieces of tape on the back.
- Style the display. Place the number in a stand and wrap the garland around a small vase, candle holder, or bud vase cluster.
Pro Tips for Professional-Looking Paper Craft Centerpieces
- Use heavier paper for structure. 80–110 lb cardstock holds shape best for rosettes and lanterns.
- Score before folding. A bone folder creates crisp folds and prevents cracking, especially on glitter cardstock.
- Build a hidden “weight.” Add glass stones, rice in a sealed bag, or extra clay inside your base so tall centerpieces don’t tip.
- Repeat 2–3 accent shapes. A consistent shape palette (flowers + leaves + circles) looks cohesive even with multiple colors.
- Work assembly-line style. Cut everything first, then shape, then glue. It saves time on batch party decorating.
Variations + Troubleshooting
Easy Variations
- Seasonal: swap flower shapes for snowflakes, pumpkins, stars, or hearts.
- Photo centerpiece: attach small photos to skewers and mix them into a bouquet.
- Glitter accents: use glitter cardstock for centers only (less mess, big impact).
Troubleshooting Quick Fixes
- Rosette won’t stay flat: Add a larger backing circle (2.5"–3") and use hot glue, not tape.
- Flowers look “flat”: Curl petal edges more and add a second layer of petals behind the first.
- Centerpiece keeps tipping: Shorten stems by 2" or add more weight to the base (clay + stones works well).
- Paper is warping: Use less wet glue (tacky glue sparingly) and switch to double-sided tape for seams.
Common Crafting Mistakes to Avoid
- Skipping a sturdy base: Even the prettiest DIY centerpiece fails if it topples. Always anchor stems in foam/clay and add weight.
- Using thin printer paper for structure pieces: Save printer paper for templates; use cardstock for the finished build.
- Over-gluing: Too much glue causes buckling and visible blobs. Apply small dots, press, and let set.
- Making everything the same height: Vary heights by 2"–4" for dimension and a more “designed” look.
- Forgetting transport plans: If you’re taking centerpieces to a venue, keep them under 16" tall and transport in a box with dividers.
FAQ: Paper Craft Centerpieces
1) What’s the best paper for DIY paper centerpieces?
Cardstock (65–110 lb) is the most reliable. Use 80–110 lb for rosettes and lanterns, and 65–80 lb for flower petals that you want to curl easily.
2) How do I make paper centerpieces look expensive?
Stick to a tight color palette, add one “lux” accent (metallic or glitter centers), and focus on clean edges—double-sided tape for seams and scored folds make a huge difference.
3) Can I make these ahead of time?
Yes. Most paper party decorations can be made 3–7 days in advance. Store them in a dry room, in boxes, with tissue paper between layers to prevent crushing.
4) How tall should a table centerpiece be for guest tables?
For dining tables, aim for 8"–12" (low profile) or go tall enough to sit above eye level (often 18"+). The “awkward zone” is usually 12"–16" where it blocks sight lines.
5) What adhesive is best for paper crafting?
Use double-sided tape for clean seams, tacky glue for general assembly, and hot glue for structural connections like stems and rosette backs.
6) How can I match my DIY centerpieces to my party theme?
Pick 2–3 main colors from your party supplies (plates/napkins/banner), then repeat them across petals, centers, and ribbons. Add one theme icon (stars, hearts, dinosaurs, florals) as a topper or rosette center.
Wrap-Up: Make Your Party Table Pop with Handmade Paper Decor
Paper craft centerpieces are one of those DIY projects that pay off fast: low cost, high impact, and completely customizable. Start with one style—like a flower bouquet or rosette topiary—then add lanterns or table number stands when you’re ready. A little measuring, clean folding, and a sturdy base is all it takes to create party decorations that look polished and personal.
Want more DIY crafts and party-ready handmade projects? Explore more creative ideas and step-by-step tutorials on smartpartyprep.com.
More Articles
 DIY Mugs for Home Decor
 Paper Craft Wall Art Ideas
 DIY Party Banners Using Cricut
 Seasonal Wall Art Ideas
 When the Party Is Over Chords: The Only Complete, Beginner-Friendly Guide You’ll Ever Need (No Theory Required — Just Play in 7 Minutes)
 DIY Resin Jewelry for Weddings
 30 Creative Backdrops Ideas (DIY-Friendly for Parties, Photos & Celebrations)
 Advanced Cake Toppers for Crafters
 Budget DIY Masks Under $5
 Rustic Mugs Ideas: DIY Projects for Cozy Parties, Weddings, and Giftable Decor