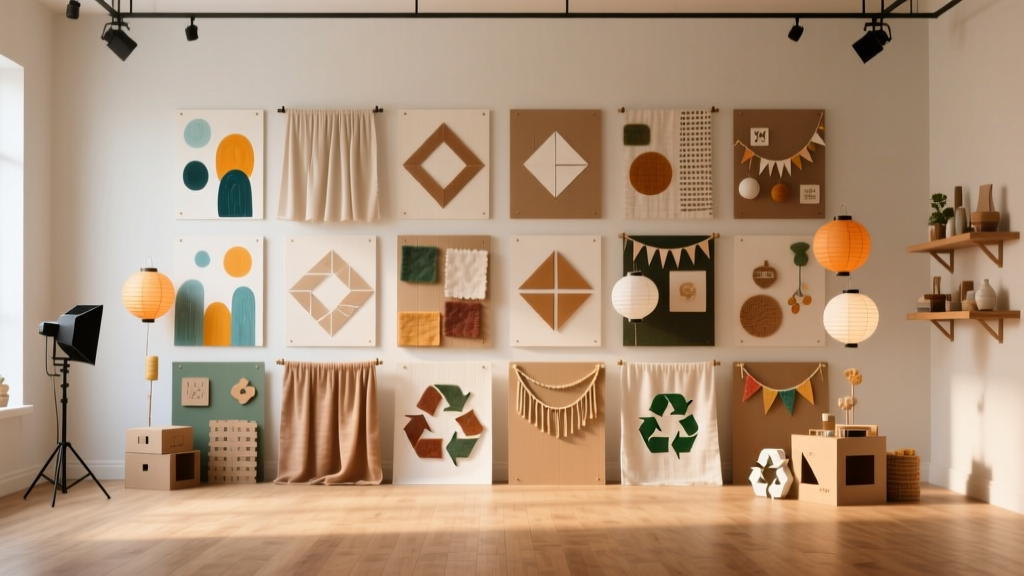
30 Creative Backdrops Ideas (DIY-Friendly for Parties, Photos & Celebrations)
A great backdrop does two jobs at once: it turns a plain wall into a wow-worthy party decoration, and it makes every photo look intentional. Whether you’re styling a birthday, baby shower, bridal shower, graduation, or holiday gathering, a handmade backdrop creates an instant “feature moment” that guests naturally gather around.
The best part? Most DIY backdrops are budget-friendly and beginner-friendly. You can build them with simple craft supplies (paper, streamers, fabric, balloons), plus a few sturdy tools to keep everything secure. If you love DIY crafts and party decorations, this is one of those projects that gives big results fast.
Below you’ll find 30 creative backdrop ideas, a practical materials list with estimated costs, step-by-step instructions for building a reliable base, plus pro tips, troubleshooting, and common mistakes to avoid. Pick one idea or combine a few for a custom handmade party backdrop that looks professionally styled.
Quick Planning Guide (So Your Backdrop Fits the Space)
- Skill level: Beginner to Advanced (each idea is labeled)
- Typical size: 6 ft W x 7 ft H for photos (two adults)
- Time estimate: 45 minutes to 4 hours, depending on complexity
- Best placement: Flat wall, or a freestanding stand 12–18 inches from the wall for depth
Recommended Backdrop Measurements
- Small “cake table” backdrop: 4 ft W x 5 ft H
- Standard photo spot: 6 ft W x 7 ft H
- Extra-wide group photos: 8 ft W x 8 ft H (or two 6x7 panels side-by-side)
Materials List (Product Types + Estimated Costs)
Choose supplies based on the style you want. Many DIY backdrops share the same “backbone” materials.
Backdrop Structure Options
- Adjustable backdrop stand (6.5–10 ft wide, 7–10 ft tall): $40–$120
- PVC pipe frame (1 in Schedule 40 PVC + elbows/tees): $20–$45
- Tension rod (for doorways or hallways): $15–$35
- 3M removable wall hooks (damage-free hanging): $8–$18
Backdrop Surface Materials
- Plastic tablecloths (solid color): $1–$5 each
- Fabric (muslin, cotton, velvet-look): $10–$40
- Butcher paper roll (36 in or 48 in wide): $12–$30
- Foam board (20x30 in sheets) or tri-fold boards: $3–$12 each
- Streamers (crepe): $1–$3 per roll
- Fringe curtain (foil/tinsel): $6–$18
Decor Add-Ons
- Balloons (assorted sizes 5 in/10 in/12 in/18 in): $10–$35
- Balloon garland strip + glue dots: $6–$12
- Paper flowers (DIY cardstock) or premade: $8–$40
- LED fairy lights (battery pack): $8–$20
- Artificial greenery (garlands, stems): $10–$35
- Photo props (frames, signs, cutouts): $5–$25
Tools You’ll Actually Use
- Scissors (sharp craft scissors) and utility knife (for foam board)
- Tape measure and level (helps everything look polished)
- Hot glue gun (high-temp) + extra glue sticks
- Painter’s tape and clear packing tape
- Staple gun (great for fabric on wood frames)
- Command strips (removable hanging)
Step-by-Step: Build a Reliable DIY Backdrop Base
Use this as your foundation, then pick one of the 30 designs below.
Option A: Backdrop Stand (Fastest, Most Reusable)
Skill level: Beginner
Time: 20–40 minutes
- Assemble the stand to about 6 ft wide x 7 ft tall (or your preferred size).
- Stabilize the legs: place sandbags, dumbbells, or a full gallon of water on each base leg.
- Hang your base layer:
- For fabric: use backdrop clips or large binder clips.
- For tablecloths: clip at the top, then tape the sides behind for a smooth look.
- Add decor (balloons, streamers, flowers) starting from top corners and working inward.
Option B: PVC Pipe Frame (Budget-Friendly + Custom Size)
Skill level: Beginner/Intermediate
Time: 45–90 minutes
- Cut PVC (example size 6 ft W x 7 ft H):
- 2 verticals: 7 ft
- 1 top bar: 6 ft
- 2 base feet: 18–24 in each
- Dry fit first with elbows and tees, then decide if you want it permanent (PVC cement) or reusable (no glue).
- Drape and clip your backdrop surface to the top bar.
- Weight the feet (sandbags or taped weights) before adding balloons or heavier decor.
30 Creative Backdrop Ideas (With Skill + Best Use)
1) Streamer Wall (Beginner)
Tape vertical crepe streamers (7 ft lengths) side-by-side for a full color wall. Great for birthdays and graduations.
2) Ombre Streamers (Beginner)
Arrange streamers from dark-to-light across the width for a soft, photo-friendly gradient.
3) Twisted Streamer Columns (Beginner)
Twist two colors together, then hang as repeated “columns” for a playful texture.
4) Fringe Curtain + Balloon Cluster (Beginner)
Use a foil fringe curtain as the base, add a balloon cluster on one side for instant sparkle.
5) Paper Fan Wall (Beginner)
Mix 8–16 in paper fans. Overlap slightly for depth; add a name banner across the center.
6) Tissue Pom-Pom Cloud (Beginner)
Hang tissue poms at different heights (use fishing line) for a floating look.
7) Butcher Paper “Seamless” Photo Backdrop (Beginner)
Roll down 6–8 ft of butcher paper and tape it to a wall or stand for clean portraits.
8) Crumpled Paper Texture Wall (Beginner)
Crumple large sheets, flatten slightly, and tape in tiles for a trendy textured background.
9) Painted Sponge-Dab Backdrop (Intermediate)
On paper or fabric, sponge-dab two tones for a soft, mottled studio look.
10) Splatter Art Backdrop (Intermediate)
Protect the floor, then splatter paint on butcher paper for energetic party photos.
11) Giant Paper Flowers (Intermediate)
Make 3–7 large blooms (12–20 in wide) and cluster them at one corner with leaves.
12) Floral Garland Frame (Beginner/Intermediate)
Drape faux greenery and flowers across the top bar and down one side (an asymmetrical “L”).
13) Hanging Greenery Strands (Intermediate)
Hang eucalyptus-style strands in rows for a garden vibe—perfect for bridal showers.
14) Curtain Drape Backdrop (Beginner)
Clip two sheer panels (each ~52 in wide) to a stand and tie back with ribbon.
15) Layered Fabric (Beginner)
Layer a solid fabric behind a sheer fabric for instant depth without extra crafting.
16) Macramé-Inspired Yarn Wall (Intermediate)
Attach long yarn strands to a dowel, trim into a V shape, and add beads for boho style.
17) Ribbon Wall (Beginner)
Cut 1–2 yard ribbons and tie them to a string across the top for movement in photos.
18) Tassel Garland Backdrop (Beginner)
Make tissue tassels and string them in rows; alternate sizes for a fuller look.
19) Confetti Dot Wall (Beginner)
Stick paper dots (1–2 in) across a solid base. Use removable adhesive for rentals.
20) Polaroid Photo Display (Beginner)
Clip printed photos to twine with mini clothespins. Add fairy lights for glow.
21) “Year” or “Name” Marquee Letters (Intermediate)
Cut foam board letters (24–36 in tall) and wrap with string lights for a focal point.
22) Chalkboard/Black Paper Message Wall (Beginner)
Use a black plastic tablecloth or paper roll; write messages with chalk markers.
23) Tissue Paper “Scallop” Layer Wall (Intermediate)
Fold tissue into half-circles and overlap in rows like fish scales—super photo-friendly.
24) Honeycomb Ball Cluster (Beginner)
Group honeycomb balls in 3 sizes; mount with removable strips and vary the heights.
25) Geometric Panel Backdrop (Advanced)
Create 3 foam-board panels (24x36 in) with taped geometric designs, then paint for a modern look.
26) Shimmer Wall (Beginner/Intermediate)
Use plastic sequins tiles (party shimmer panels) on a stand for high-impact sparkle.
27) Balloon Garland + Solid Base (Beginner/Intermediate)
Attach a 6–8 ft balloon garland to the side/top of a fabric base—classic party backdrop.
28) Organic Balloon “Cloud” (Intermediate)
Mix sizes (5/10/12/18 in), keep it asymmetrical, and add greenery for an upscale look.
29) Themed Cutout Scene (Intermediate)
Use foam board to cut shapes (clouds, stars, jungle leaves) and layer them for a storybook scene.
30) LED Starry Night Backdrop (Beginner/Intermediate)
Hang black fabric and weave warm-white fairy lights behind or across it for a magical glow.
Step-by-Step Instructions: Build a Balloon Garland Backdrop (Most Popular)
Skill level: Beginner/Intermediate
Time: 1.5–3 hours
Finished size: 6 ft W x 7 ft H with a 6–8 ft garland
What You’ll Need
- Backdrop stand or PVC frame
- Base layer: fabric or 2–3 plastic tablecloths (overlapped)
- Balloon assortment (approx. 80–120 balloons for a full 7–8 ft organic garland)
- Hand pump or electric balloon pump
- Balloon garland strip (8–16 ft)
- Glue dots
- Optional: faux greenery picks, paper flowers, bow, or mini sign
Instructions
- Set your base first: Assemble the frame to 6 ft W x 7 ft H. Clip on fabric so it’s smooth and wrinkle-minimized.
- Inflate balloons in batches: Use a pump. Aim for variety:
- 50% 10–12 in balloons
- 30% 5 in balloons (for gaps)
- 20% 12–18 in balloons (statement size)
- Attach balloons to the garland strip: Push balloon knots through holes, alternating sizes and colors as you go.
- Hang the garland: Tie the strip to the top corner of the stand, then drape diagonally or in a side “swoop.” Secure with zip ties, ribbon, or strong string.
- Fill gaps: Use glue dots to add 5 in balloons where it looks thin, especially near the edges.
- Add accents: Tuck greenery into balloon knots (no glue needed) or glue lightweight paper flowers onto the strip.
- Final check: Step back 6–8 feet, adjust shape, and confirm the stand is weighted.
Pro Tips, Variations & Troubleshooting
Pro Tips for a More “Professional” Look
- Use a consistent palette: 2 main colors + 1 accent + 1 neutral (white, cream, or metallic).
- Build depth: Layer a sheer fabric over a solid fabric, or add paper fans behind balloons.
- Hide mechanics: Place decor over clips and ties so the finish looks clean in photos.
- Light it intentionally: Add a soft lamp or ring light facing the backdrop for better photos.
Beginner-Friendly Adaptations
- Swap a stand for a wall-mounted setup using removable hooks and lightweight materials.
- Use plastic tablecloths instead of fabric (quick, cheap, and surprisingly smooth when taped tight).
- Choose a single focal element (one balloon cluster, one paper flower corner) rather than covering the entire wall.
Advanced Variations
- Make three-panel backdrops with foam board for a layered, staged look.
- Add dimension props (a faux window frame, arch panel, or hanging sign) for a styled photo booth backdrop.
- Create a color-blocked fabric drape using 3 panels (each ~52 in wide) clipped side-by-side.
Troubleshooting
- Backdrop is wrinkly: Pull fabric tighter and clip again; for tablecloths, tape the back edges downward to create tension.
- Balloons popping: Keep balloons away from direct sun/heat vents; underinflate slightly for flexibility.
- Stand tipping: Add more weight at the feet and keep heavy decor closer to the center line.
- Things won’t stick to the wall: Clean the surface first; use stronger removable hooks; switch to a freestanding frame.
Common Crafting Mistakes to Avoid
- Skipping measurements: A 4 ft wide backdrop often looks too narrow for photos. Aim for 6 ft wide for most parties.
- Overloading with heavy decor: Foam board letters and thick garlands need extra support—don’t rely on a single strip of tape.
- Using weak adhesives: Clear tape works for light paper, but balloons and fabric need clips, hooks, or stronger mounting methods.
- Not weighting the base: Even indoor backdrops can wobble when guests brush past.
- Building it too late: Give yourself buffer time; balloons and alignment always take longer than expected.
FAQ: DIY Party Backdrops
How far in advance can I make a balloon garland?
Ideally 12–24 hours ahead for the freshest look. You can go up to 48 hours if it’s indoors, away from heat and sunlight. Store it loosely (not crushed) and attach it closer to party time.
What’s the easiest backdrop for beginners?
A streamer wall or fringe curtain + balloon cluster. They’re fast, affordable, and forgiving if you’re still building your DIY skills.
Can I make a backdrop without a stand?
Yes. Use removable wall hooks, a tension rod, or hang from a curtain rod. Keep materials lightweight (streamers, paper fans, fabric) if you’re mounting directly to walls.
How do I make my backdrop look good in photos?
Use a consistent color palette, add one strong focal point (balloons, flowers, name sign), and place lighting facing the backdrop. If possible, keep guests 2–3 feet in front of it to reduce harsh shadows.
What’s a realistic budget for a handmade party backdrop?
Most DIY backdrops land around $25–$120 depending on whether you already own a stand and whether you’re using balloons, shimmer panels, or fabric.
Wrap-Up: Pick One Idea and Make It Yours
A creative DIY backdrop is one of the fastest ways to level up party decorations while flexing your handmade, crafty style. Start simple (streamers or fabric), then add one standout element (balloons, paper flowers, lights). You’ll be surprised how quickly a blank wall becomes the party’s favorite photo spot.
Try one of these 30 creative backdrop ideas for your next celebration, and adjust colors, textures, and scale to match your theme. When you’re ready for your next handmade project, explore more DIY craft ideas and party prep inspiration on smartpartyprep.com.
More Articles
 DIY Gift Boxes for Weddings
 How to Allow Third Party Cookies on a Mac in 2024: A Step-by-Step Safari & Chrome Guide (No Tech Degree Required)
 How to Enable Third Party Cookies in My Browser (2024 Guide): Step-by-Step Fixes for Chrome, Safari, Firefox & Edge — Because Yes, You *Can* Still Do It (Without Compromising Security)
 Kids' Craft: Origami Decorations
 Advanced Custom Stickers for Crafters
 Advanced Origami Decorations for Crafters
 Personalized Backdrops Gifts
 Personalized Tie-Dye Shirts Gifts
 Modern Custom Stickers Designs
 Budget DIY Coasters Under $50