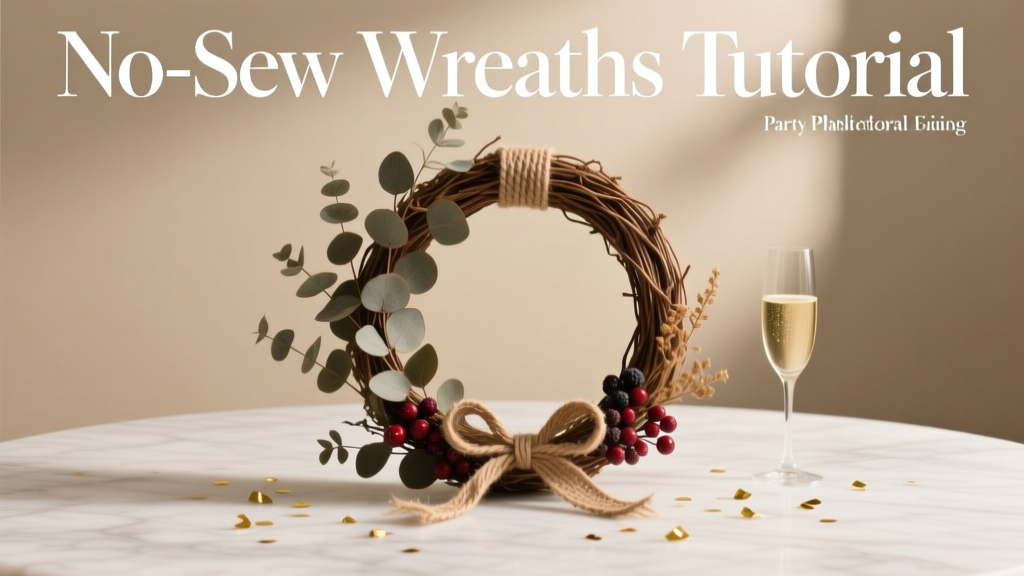
No-Sew Wreaths Tutorial
Want a handmade decoration that looks high-end, photographs beautifully, and instantly makes your party space feel “done”? A no-sew wreath is one of the most satisfying DIY crafts you can make in an afternoon—no sewing machine, no complicated patterns, and no special skills required. If you can wrap, twist, and tie, you can make a wreath that fits your theme perfectly.
No-sew wreaths are also incredibly practical for party decorating. They work as front-door greetings for guests, photo backdrop accents, dessert table decor, chair-back decor, or even as a statement centerpiece when laid flat with candles or florals. Best of all, you can customize them for birthdays, baby showers, bridal showers, holidays, graduation parties, and seasonal celebrations with simple swaps: ribbons, faux florals, ornaments, or signage.
This tutorial walks you through several beginner-friendly methods and gives you advanced variations if you want a fuller, more professional look. Grab your supplies, choose your style, and let’s make something festive.
Skill Level, Time, and Finished Size Options
- Skill level: Beginner (basic tying/wrapping). Intermediate/Advanced options included.
- Time estimate:
- Simple ribbon or mesh wreath: 30–60 minutes
- Full, layered party wreath with florals/sign: 60–120 minutes
- Typical finished size:
- Small: 10–12 inch wreath form (great for chairs, high chairs, gift tables)
- Standard: 14–16 inch wreath form (front door, wall decor)
- Large statement: 18–24 inch wreath form (photo backdrop, entryway)
Materials List (Product Types + Estimated Costs)
Wreath Base Options
- Wire wreath form (12–18 inch): $2–$6
- Grapevine wreath (14–18 inch): $6–$18
- Foam wreath form (12–16 inch): $4–$10
- Metal hoop (12–18 inch) for modern “half-wreath” styles: $3–$10
Decor Materials (Choose Your Look)
- Ribbon (1.5 inch and/or 2.5 inch wide wired ribbon): $3–$10 per roll
- Tulle (6 inch or 54 inch wide, cut into strips): $3–$8 per spool/yardage
- Deco mesh (10 inch wide, 10 yards): $8–$15
- Faux florals/greenery picks (2–6 picks): $2–$8 each
- Mini balloons (5 inch) for accent clusters (optional): $3–$8
- Ornaments, mini pennants, confetti picks (theme accents): $3–$12
- Wood or acrylic sign (optional, 6–10 inch): $5–$20
Fasteners (No-Sew Staples)
- Pipe cleaners/chenille stems (12 inch): $2–$6 per pack
- Floral wire (24–26 gauge): $3–$7
- Zip ties (4–8 inch): $3–$8
- Hot glue sticks (standard size): $4–$10
Tools (Recommended)
- Hot glue gun (high-temp for durability; low-temp for delicate ribbon): $8–$25
- Wire cutters (for floral wire and picks): $6–$15
- Sharp scissors or rotary cutter + mat (for clean ribbon/mesh cuts): $5–$30
- Ruler or measuring tape: $2–$8
- Optional: Floral tape ($3–$6), stapler (for ribbon tails), mini clothespins (for signage)
Estimated total cost: $15–$45 depending on base and accents. Many party crafters build a “wreath kit” once and reuse tools for future DIY party decorations.
Before You Start: Choose a No-Sew Wreath Style
Pick the method that matches your party vibe and how full you want the wreath to look.
- Ribbon Tie Wreath (Best for beginners): Clean, classic, and quick. Great for birthdays and showers.
- Tulle Scrunch Wreath (Soft + whimsical): Perfect for baby showers, princess themes, and pastel parties.
- Deco Mesh Pouf Wreath (Full + bold): Big impact for photo backdrops and holiday parties.
- Modern Hoop Half-Wreath (Minimal + trendy): Ideal for bridal showers, boho parties, graduation.
Step-by-Step: Ribbon Tie No-Sew Wreath (Beginner Favorite)
Finished look: Layered ribbon “petals” tied around a wire or grapevine form.
Best base: Wire wreath form (14–16 inch) or grapevine wreath (14–18 inch).
Measurements (for a 14–16 inch wreath)
- Ribbon width: 1.5 inch or 2.5 inch (wired ribbon is easiest to shape)
- Ribbon strip length: 10–12 inches each
- Quantity: 40–70 strips (depends on fullness and base type)
Instructions
- Plan your color palette. Choose 2–4 ribbons:
- 1 solid color (matches party theme)
- 1 pattern (polka dots, stripes, gingham)
- 1 metallic or glitter accent (optional)
- Cut ribbon strips. Cut 10–12 inch lengths. For speed and consistency, stack ribbon and cut multiple layers at once.
- Start tying at the top. Pick a “hanger point” and begin tying strips around the wreath form with a simple double knot.
- On a wire form: tie around one ring or around two rings for extra hold.
- On grapevine: tuck and tie around thicker vine sections.
- Alternate patterns. Rotate your ribbon choices to distribute colors evenly (example pattern: solid → pattern → metallic → solid).
- Fill the wreath evenly. Every 2–3 ties, fluff and rotate the wreath to check for gaps. Add extra strips where the base peeks through.
- Shape and fluff. If using wired ribbon, pinch and curve loops outward for a fuller, more “boutique” look.
- Add a focal bow or sign. Attach a bow with floral wire or zip ties. Add a small party sign (like “Happy Birthday” or baby’s name) using wire, hot glue, or mini clothespins.
Step-by-Step: Tulle Scrunch No-Sew Wreath (Soft + Party-Perfect)
Finished look: Cloud-like tulle volume, great for pastel party decorations and photo moments.
Best base: Wire wreath form (14–16 inch).
Measurements
- Tulle strip size: 3 inches wide x 18–22 inches long (or use 6 inch tulle and cut in half)
- Quantity: 50–80 strips
Instructions
- Cut tulle strips. Use a rotary cutter for crisp, fast cuts.
- Loop and tie. Fold a strip in half, place the fold under the wire, pull the ends through the loop (a lark’s head knot), then snug it down.
- Build density gradually. Work around the wreath, keeping spacing consistent. If it looks thin, add a second layer of strips between the first knots.
- Add accents. Hot glue small faux flowers, a mini banner, or a lightweight letter/number to match your party theme (first birthday, age milestone, baby name).
Step-by-Step: Deco Mesh Pouf No-Sew Wreath (Big Impact)
Finished look: Full and bold—ideal for outdoor parties, holiday events, and statement front-door decor.
Best base: Wire wreath form (preferably 16–18 inch).
Measurements
- Deco mesh: 10 inch wide, 10 yards (one roll makes a medium-full wreath; two rolls for extra fullness)
- Pouf size: 8–10 inches per loop
Instructions
- Prepare tie points. Pre-cut 8–12 pipe cleaners (6 inches each) and attach around the wreath form at equal spacing.
- Start your first pouf. Leave a 6-inch tail, then bunch mesh into a “pouf” and secure at the first pipe cleaner twist.
- Measure consistent loops. Make each pouf 8–10 inches, secure at each tie point, and continue around.
- Finish and secure. Tuck the final tail into the mesh and secure tightly with a pipe cleaner or zip tie.
- Add ribbon and picks. Cut 12-inch ribbon strips and tie them into the mesh. Add faux florals or themed picks with floral wire for a party-ready focal point.
Step-by-Step: Modern Hoop Half-Wreath (Minimal + Chic)
Finished look: A partial wreath with greenery and a statement bow/sign. Gorgeous for bridal showers and modern birthday parties.
Best base: 14–18 inch metal hoop.
Instructions
- Choose your “decor zone.” Aim for 1/3 to 1/2 of the hoop covered.
- Attach greenery. Bundle 2–4 stems and secure to the hoop with floral wire. Wrap tightly and trim wire ends.
- Layer focal florals. Add 1–3 larger blooms at the base of the greenery cluster. Secure with wire, then add a tiny dot of hot glue for stability.
- Add ribbon tails or a bow. Use a 2.5-inch wired ribbon bow (6–8 inch wide) for a polished look.
- Optional party sign. Hang a small “Cheers,” “Happy Birthday,” or custom name tag from the bottom of the hoop using satin ribbon.
Pro Tips for a Fuller, More Professional Look
- Use odd numbers for focal clusters: 3 blooms or 5 accents often looks more natural than 2 or 4.
- Mix textures: Pair satin ribbon + sheer ribbon, or mesh + wired ribbon, for depth.
- Hide mechanics: Twist pipe cleaners to the back and trim ends. Cover visible wire with ribbon or greenery.
- Work in layers: Base layer (tulle/mesh/ribbon), mid layer (ribbon tails), top layer (florals/sign).
- Test hang early: Hang the wreath on a hook mid-project so you can spot uneven weight or gaps.
- Outdoor durability: Choose UV-resistant faux greenery and use zip ties + wire (hot glue can soften in heat).
Party-Themed Variations (Beginner to Advanced)
Beginner-Friendly Adaptations
- Single-color ribbon wreath: Use one 2.5-inch wired ribbon for a clean, easy win.
- Letter-only accent: Add one large initial or age number at the center with two zip ties.
- Mini chair wreath: Use a 10–12 inch form and 25–35 ribbon strips for high chairs or guest-of-honor seating.
Advanced Variations
- Double-layer wreath: Create a base with tulle, then add a top layer of ribbon ties for extra dimension.
- Balloon accent cluster: Inflate 3–7 five-inch balloons, tie into a mini garland cluster, then wire it to one side of the wreath (best indoors).
- LED sparkle wreath: Wrap micro-LED fairy lights around the base and hide the battery pack behind a bow or greenery.
- Custom name plaque: Add a painted wood round (6–10 inches) with the guest of honor’s name for a personalized party decoration.
Troubleshooting: Quick Fixes for Common Issues
- My wreath looks patchy. Add 10–15 more ties in the sparse zones, then fluff outward. Patchiness is usually spacing, not materials.
- Ribbons won’t stay facing forward. Use wired ribbon or add a tiny dot of hot glue at the knot (especially on grapevine bases).
- The wreath feels lopsided when hanging. Move heavy items (signs, floral clusters) closer to the top center or counterbalance with a smaller cluster opposite.
- Hot glue is stringy and messy. Use a higher-quality glue stick, let the glue cool for 1–2 seconds before pressing, and keep a scrap of cardboard nearby to “wipe” strings.
- Mesh frays at the edges. Use a wood-burning tool or lighter to gently seal the cut edge (adult use only, ventilated area), or use “poly mesh” that frays less.
Common Crafting Mistakes to Avoid
- Overcrowding the focal point. One strong bow or sign + a floral cluster is usually enough. Too many focal items compete.
- Not checking scale. A tiny bow on a 24-inch wreath looks lost. Aim for a bow that’s roughly 1/3 the wreath width for balance.
- Using only hot glue for heavy items. For signs, thick stems, or ornaments, use wire or zip ties first, then hot glue as backup.
- Skipping a hanging loop. Add a ribbon loop or use the wire frame itself for easy hanging before you decorate over the top.
- Cutting everything before testing. Make 5–10 ties first to confirm length and fullness, then batch cut.
- Forgetting where it will hang. Outdoor doors need sturdier fastening; indoor backdrops can use lighter materials and removable hooks.
FAQ: No-Sew Wreaths for DIY Party Decorations
1) What’s the easiest no-sew wreath for a total beginner?
A ribbon tie wreath on a wire form is the easiest: cut 10–12 inch strips and double-knot them around the frame. It’s forgiving, fast, and easy to adjust.
2) How much ribbon do I need for a 16-inch wreath?
Plan for 50–70 strips at 10–12 inches each. That’s roughly 15–25 yards total depending on how full you want it and how many ribbon styles you’re mixing.
3) Can I make a no-sew wreath without a glue gun?
Yes. Use pipe cleaners, floral wire, and zip ties for nearly everything. A glue gun helps with tiny accents, but it’s not required for the base methods.
4) How do I match my wreath to my party theme?
Use your party color palette (2–4 colors), then add one theme cue: a small sign (name/age), a few character-inspired colors, or a coordinated ribbon print (stars for graduation, gingham for picnic parties, metallic for New Year’s).
5) Will a no-sew wreath hold up outdoors?
It can. Choose a wire or grapevine base, secure accents with wire/zip ties, and avoid delicate paper items. Heat can soften hot glue, so mechanical fasteners matter most for outdoor use.
6) How do I store a wreath so it doesn’t get crushed?
Use a wreath storage bag or a large plastic bin. If you’re short on space, hang it inside a closet using a sturdy hook, and keep it away from heavy items that can flatten bows or florals.
Wrap-Up: Your Party-Ready Handmade Wreath
A no-sew wreath is one of those DIY craft projects that pays off instantly—quick to make, easy to personalize, and perfect for party decorations you can reuse year after year. Start simple with ribbon ties or tulle, then level up with mesh, florals, lights, and custom signage as your confidence grows.
If you make one, take a photo before the party starts (decor always looks the crispest then), and keep your leftover supplies—you’ll be amazed how quickly they turn into matching centerpieces, chair decor, and gift table accents.
Want more handmade party decor ideas? Explore more creative DIY crafts and celebration-ready projects on smartpartyprep.com.
More Articles
 Seasonal T-Shirts Ideas
 Budget DIY Photo Booth Props Under $25
 Advanced Painted Canvas for Crafters
 Does Hasbro Hate Third Party Transformers? The Truth Behind Licensing, Cease-and-Desists, and Why Fans Keep Building Anyway — A Deep Dive for Customizers, Collectors & Makers
 DIY Dream Catchers Party Favors
 Easy Tie-Dye Shirts for Beginners
 12 Do It Yourself Party Decorations That Actually Look Pro—No Glue Gun Panic, No Last-Minute Scramble, Just Joyful, Instagram-Ready Results in Under 90 Minutes
 Advanced Cake Toppers for Crafters
 Budget DIY Place Cards Under $50
 Seasonal Invitations Ideas