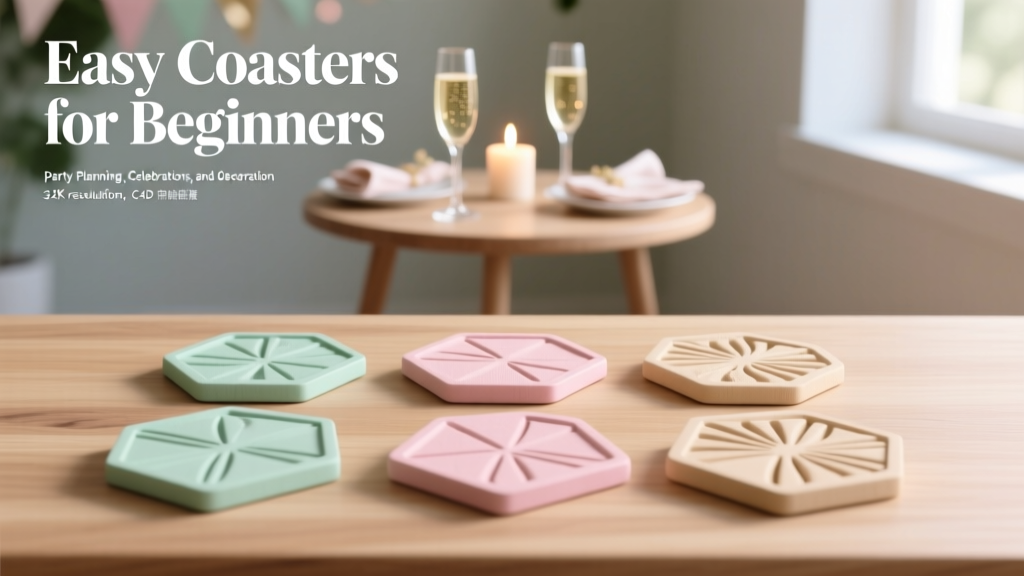
Easy Coasters for Beginners
If you love hosting (or just love a pretty coffee table), DIY coasters are one of those feel-good projects that are both quick and genuinely useful. They protect surfaces from drink rings, add color to your party setup, and give guests a handmade detail that looks thoughtful without being fussy.
Even better: coasters are beginner-friendly because they’re small. You can try a new technique without committing to a giant craft project, and you can make a matching set for a themed party in a single afternoon. Whether you’re planning a birthday, bridal shower, game night, or holiday gathering, handmade coasters fit right into your party decorations—functional decor is always a win.
This guide walks you through easy coaster ideas with clear steps, budget-friendly materials, and party-ready variations. Choose one style or mix a few for a playful mismatched set.
Project Overview (Skill Level & Time)
- Skill level: Beginner (with optional advanced upgrades)
- Time estimate:
- Simple sets: 45–90 minutes active time
- Drying/curing time: 1–24 hours depending on sealant/paint
- Standard coaster size: 4 inches (10 cm) square or 4 inches (10 cm) round
- How many to make: 6–8 coasters = great starter set for parties
Materials & Tools (With Estimated Costs)
Pick one coaster style below and gather the matching materials. Costs vary by brand and where you shop, but these estimates help you budget.
Base Options (Choose One)
- Cork coaster blanks (4" rounds/squares, pack of 6–12): $8–$18
- White ceramic tiles (4" x 4" with smooth surface): $0.30–$1 each (often sold individually)
- Unfinished wood circles/squares (3.5"–4", pack of 6–12): $6–$15
- Felt sheets (9" x 12", 8–12 pack): $6–$12 (best for soft coasters and layering)
Decor Supplies (Mix & Match)
- Acrylic craft paint (2 oz bottles): $1–$3 each
- Paint pens (oil-based or acrylic, fine tip): $8–$18 set
- Permanent vinyl (for Cricut/Silhouette): $10–$15 roll
- Washi tape (patterned): $3–$10
- Mod Podge (matte or gloss, 8 oz): $8–$12
- Paper napkins (printed, for decoupage): $3–$6
- Alcohol inks (optional, for tiles): $10–$25 set
Sealants & Protection (Recommended)
- Clear acrylic spray sealer (matte/satin/gloss): $6–$12
- Water-based polyurethane (brush-on, clear): $10–$18
- Self-adhesive cork sheet (for backing tiles/wood): $6–$12
- Felt pads (small circles/squares): $4–$8
Tools
- Scissors (sharp craft scissors): $8–$15
- Craft knife + cutting mat (for clean edges): $10–$20
- Foam brush or flat paintbrush (1" width): $2–$6
- Ruler and pencil
- Painter’s tape (1/2" or 1"): $4–$8
- Optional: Cricut/Silhouette cutting machine for vinyl details
Easy Coaster Ideas: Choose Your Favorite Style
All of these techniques work beautifully as DIY party decorations: set them at a drink station, stack them with a ribbon, or use them as place “extras” at each setting.
Style 1: Painted Geometric Cork Coasters (Fast + Forgiving)
Best for: birthday parties, game night, colorful themes
Active time: 45–60 minutes for 6 coasters
Dry time: 1–2 hours (paint) + 1 hour (sealer)
Step-by-Step
- Plan your pattern. Use a ruler to lightly sketch a simple design: diagonal color block, triangles, or stripes. Keep it bold—simple shapes look clean and modern.
- Mask with painter’s tape. Press tape down firmly, especially along edges, so paint doesn’t bleed. For triangles, overlap tape and trim with a craft knife on a cutting mat.
- Paint thin coats. Apply acrylic paint with a foam brush. Two thin coats look smoother than one thick coat. Let each coat dry 10–15 minutes.
- Peel tape at the right time. Remove tape while paint is mostly dry but not fully cured (about 10–20 minutes after the last coat). Pull back slowly at a low angle.
- Seal for durability. Spray with clear acrylic sealer in 2–3 light passes (follow the can directions). Let dry completely.
- Add backing if needed. Cork coasters usually don’t need backing, but you can add felt pads if you want extra table protection.
Beginner-Friendly Adaptation
- Skip measuring—use a single diagonal tape line and paint two colors.
- Use one accent color + white for a clean party palette.
Advanced Variation
- Add metallic paint pen lines (gold/silver) along color borders after sealing, then seal once more lightly.
- Create an ombré fade by blending two wet paint colors with a soft brush.
Style 2: Decoupage Tile Coasters (Party-Pretty Prints)
Best for: bridal showers, baby showers, holiday parties
Active time: 60–90 minutes for 4–6 coasters
Dry time: 2–24 hours depending on sealant
Step-by-Step
- Prep the tile. Wipe the tile clean and dry. If it’s glossy, you can lightly scuff with fine sandpaper (220 grit) for better grip (optional).
- Trim your paper. Cut napkin/paper slightly larger than the tile (about 4.25" x 4.25") so you can wrap or trim flush later.
- Use only the printed napkin layer. Separate the thin printed top layer from the white backing layers for a smoother finish.
- Apply Mod Podge. Brush a thin, even coat onto the tile.
- Lay the napkin carefully. Place it gently and smooth from the center outward. Use a piece of plastic wrap or a soft dry brush to press out wrinkles without tearing.
- Seal the top. Brush another thin layer of Mod Podge over the napkin. Let dry 20–30 minutes and add a second coat.
- Trim the edges. Once dry, trim excess with a craft knife for crisp edges.
- Protect from moisture. For real drink use, add a more durable topcoat: 2–3 coats of water-based polyurethane (let dry between coats per label).
- Add a non-slip backing. Stick cork sheet or felt to the bottom. Cut to 4" x 4" to match and press firmly.
Party Styling Tip
- Match napkin prints to your party theme—florals for garden parties, stars for New Year’s, plaid for fall gatherings.
Style 3: No-Sew Felt Coasters (Soft, Cute, Super Safe for Tables)
Best for: kids’ parties, casual gatherings, boho themes
Active time: 30–60 minutes for 8 coasters
Dry time: none (unless gluing layers)
Step-by-Step
- Choose a shape. Cut 4" circles or 4" squares. Use a bowl or round template for circles.
- Cut two layers per coaster. Double-layer coasters feel thicker and protect better.
- Create simple decor. Cut small shapes (hearts, stars, citrus slices) from contrasting felt. Keep the largest embellishment under 2.5" wide so drinks sit flat.
- Attach layers.
- Beginner option: Use fabric glue or tacky glue around the edge and a few dots in the center.
- Cleaner finish: Use iron-on fusible web between layers (follow package instructions).
- Let glue cure. If gluing, stack with a book on top for 15–30 minutes for a flatter finish.
Advanced Variation
- Add hand stitching with embroidery floss (blanket stitch around edges) for a cozy handmade look.
- Create layered scallops: cut a 4" base and a 3.5" scalloped top layer.
Style 4: Vinyl Quote or Monogram Wood Coasters (Perfect for Hosting Gifts)
Best for: housewarming parties, cocktail nights, personalized party decor
Active time: 60–90 minutes
Dry time: 2–4 hours for sealant
Step-by-Step
- Sand the wood lightly. Use 220 grit sandpaper for a smooth surface and wipe away dust.
- Paint or stain (optional). For high contrast, paint the coaster white or a light neutral. Let dry 30–60 minutes.
- Cut your vinyl. Keep designs simple: initials, a short word (CHEERS), or small icons (martini glass, lemon slice).
- Apply vinyl. Center it using a ruler: measure and mark the midpoint lightly with pencil, then line up your design.
- Seal the top. Apply 2–3 thin coats of water-based polyurethane. Let each coat dry and lightly sand between coats for a super smooth finish (optional but nice).
- Add felt pads. Place one pad near each corner (or 3 pads in a triangle) so the coaster sits stable.
Pro Tips for Great-Looking, Party-Ready Coasters
- Stick to a party palette. Choose 2–3 colors that match your party decorations (think: blush + gold + cream, or teal + lime + white).
- Batch your steps. Paint all first coats, then all second coats, then seal everything. It’s faster and more consistent.
- Keep bottoms clean. Don’t let paint or sealer drip onto the underside—your table will thank you.
- Choose the right sealer for the job.
- For light use: acrylic spray sealer works well.
- For frequent drink use: water-based polyurethane is tougher.
- Test with a cold glass. Once fully cured, place an iced drink on one coaster for 10 minutes to see if it sticks or leaves marks.
Troubleshooting (Quick Fixes)
- Paint bled under tape: Press tape edges down harder next time. For now, clean up edges with a small flat brush and matching paint, or cover the line with a thin paint-pen border.
- Decoupage wrinkles/tears: Use plastic wrap to smooth gently. If it tears, patch with a small matching piece—busy patterns hide seams well.
- Coaster feels sticky after sealing: It may need more curing time. Let it sit 24–48 hours in a dry area. Avoid stacking until fully cured.
- Vinyl lifting at edges: Burnish firmly with a scraper or old gift card before sealing. Seal with thin coats rather than one heavy coat.
Common Crafting Mistakes to Avoid
- Skipping a protective topcoat. Many paints and decoupage finishes aren’t water-resistant on their own—seal for real drink use.
- Rushing dry times. Coasters get handled and stacked a lot. If the finish isn’t cured, they’ll stick together or scuff.
- Making designs too raised. Thick embellishments can cause cups to wobble. Keep the top surface mostly flat.
- Using too much glue/Mod Podge at once. Thick layers dry cloudy and can wrinkle paper. Thin, even coats look best.
- Forgetting the backing. Tiles especially need cork or felt underneath to prevent scratches and sliding.
Fun Party Variations (Theme Ideas)
- Tropical party: painted palm leaves on cork + bright green/yellow palette
- Birthday party: confetti-style dots with paint pens on wood circles
- Bridal shower: floral napkin decoupage tiles with a thin gold border
- Holiday gathering: plaid paper decoupage + satin sealer for a cozy finish
- Cocktail night: black + white geometric cork coasters with metallic accents
FAQ: Easy Coasters for Beginners
1) What’s the easiest coaster material for total beginners?
Cork blanks are the simplest: they’re lightweight, already the right thickness, and forgiving if your paint lines aren’t perfect. Felt is also easy because there’s no drying time if you skip glue or keep it minimal.
2) How do I make coasters waterproof?
Use a durable clear topcoat. Water-based polyurethane (2–3 thin coats) is a great beginner choice for protection. Let it fully cure (often 24–72 hours depending on brand and humidity) before using with cold drinks.
3) Can I use Mod Podge alone as a sealer?
Mod Podge is great for crafting, but for coasters that will see condensation, add a tougher topcoat over it (like water-based polyurethane or a clear acrylic sealer) for better moisture resistance.
4) What size should I make coasters?
Go with 4 inches round or square for most cups and glasses. If you regularly use large mugs or stemless wine glasses, consider 4.25–4.5 inches.
5) How many coasters do I need for a party?
Aim for one coaster per guest plus 2–4 extras for the drink station. For an 8-person gathering, 10–12 coasters keeps things easy.
6) How do I keep handmade coasters from sticking together when stacked?
Make sure the topcoat is fully cured before stacking. If you’re storing them, place a small piece of parchment paper between coasters, especially in humid climates.
Wrap-Up: Your Party Tables Just Got a Handmade Upgrade
DIY coasters are a perfect beginner craft: small, affordable, and instantly useful. Make a set that matches your party theme, try a new technique on just one coaster first, then keep going once you find your groove. By the time guests arrive, you’ll have party-ready handmade decor that looks intentional and welcoming.
Want more beginner-friendly DIY crafts, party decorations, and handmade projects? Explore more creative ideas on smartpartyprep.com and keep making your celebrations feel extra special—one fun project at a time.
More Articles
 Rustic Photo Booth Props Ideas
 DIY Vision Boards Using Cricut
 Modern Table Runners Designs
 Paper Craft Dream Catchers Ideas
 30 Creative Party Banner Ideas
 How to Enable Third Party Cookies on iPhone in 2024: The Real Truth (Spoiler: You Can’t — But Here’s What Actually Works Instead)
 Step-by-Step Slime Tutorial
 DIY Tote Bags for Baby Showers
 Seasonal Gift Boxes Ideas
 DIY Tie-Dye Shirts for Home Decor