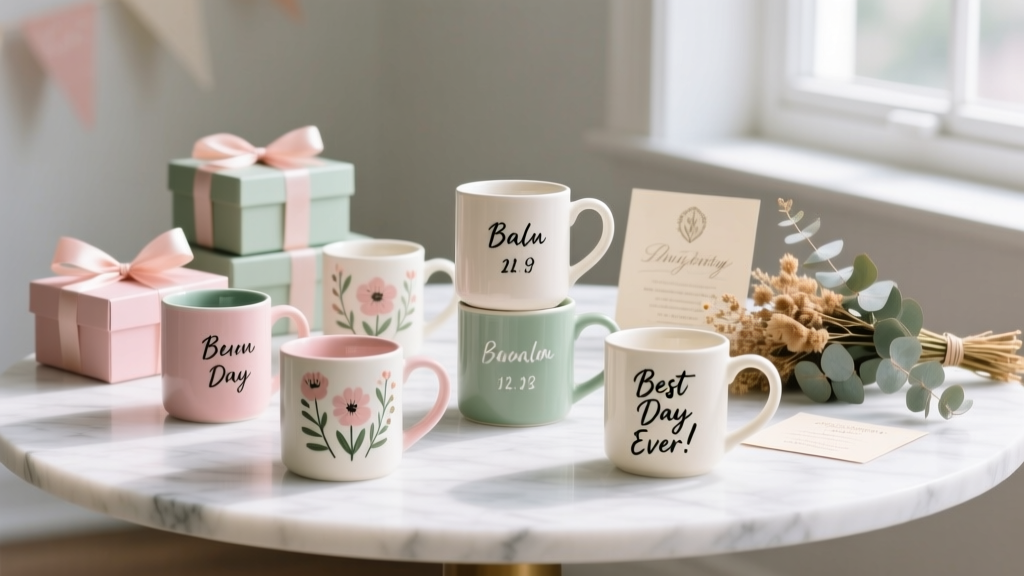
Personalized Mugs Gifts (DIY Party Favors & Handmade Keepsakes)
Personalized mugs are one of those DIY crafts that feel instantly special—because they’re practical, personal, and used every single day. Whether you’re making a batch for a birthday brunch, a bridal shower, a teacher appreciation table, or a holiday cookie exchange, a custom mug turns a simple drink into a memory.
They’re also a dream project for party planners: you can match colors to your theme, add names for place settings, and even create “sip stations” where guests decorate their own mugs as an activity. Best of all, you can make them beginner-friendly with stickers and paint pens, or level up with vinyl and layered designs.
This guide walks you through multiple methods so you can pick what fits your tools, timeline, and skill level. You’ll get materials with estimated costs, step-by-step instructions, pro tips, troubleshooting, and fun variations for party-related DIY decorations and handmade gifts.
Project Overview: Skill Level, Time, and Best Uses
- Skill level: Beginner to Advanced (choose your method)
- Time estimate (per mug):
- Paint pen / sticker method: 20–30 minutes + 24 hours cure time
- Vinyl + paint fill: 30–45 minutes + cure time
- Sublimation: 10–15 minutes + press time (requires equipment)
- Best for: Party favors, bridal shower gifts, baby shower keepsakes, birthday place cards, teacher gifts, holiday handmade presents, DIY drink bar decor
Materials List (with Product Types & Estimated Costs)
Base Supplies (for any method)
- Plain ceramic mugs (11–15 oz, white or solid color)
- Estimated cost: $1–$4 each (bulk packs are cheapest)
- Tip: Choose smooth, glossy mugs for crisp designs.
- Rubbing alcohol (70% or 91%) + lint-free cloth
- Estimated cost: $2–$6
- Painters tape (0.94 in / 24 mm wide is versatile)
- Estimated cost: $4–$8
- Disposable gloves (optional but helpful for avoiding fingerprints)
- Estimated cost: $5–$10
Method A: Beginner-Friendly Paint Pens (No Special Machines)
- Oil-based paint markers (fine tip 1–2 mm + medium tip 2–4 mm)
- Estimated cost: $10–$25 per set
- Look for: “oil-based,” “porcelain,” or “multi-surface” markers.
- Stencils or alphabet stickers (optional)
- Estimated cost: $5–$12
Method B: Vinyl Stencil + Paint Fill (Crisp, Professional Look)
- Permanent adhesive vinyl (for stencils) or stencil vinyl
- Estimated cost: $8–$15 per roll
- Craft cutting machine (optional; scissors can work for simple shapes)
- Weeding tool (or tweezers)
- Estimated cost: $3–$8
- Porcelain paint or multi-surface enamel paint + small brush/sponge pouncer
- Estimated cost: $6–$15
- Transfer tape (for applying vinyl designs)
- Estimated cost: $6–$12
Method C: Sublimation (Advanced, Ultra-Durable)
- Sublimation-ready mug (poly-coated)
- Estimated cost: $2–$6 each
- Sublimation printer + sublimation ink and sublimation paper
- Mug heat press or convection oven + mug wraps
- Estimated cost: press $120–$300+; wraps $15–$30
- Heat-resistant tape
- Estimated cost: $6–$10
Tool Recommendations
- Soft measuring tape or ruler (for placement): $2–$6
- Low-tack masking tape for alignment: $4–$8
- Microfiber cloth for cleaning: $3–$8
- Optional: turntable (lazy Susan) for smooth drawing: $10–$20
Design Planning: Measurements That Make Mugs Look “Store-Bought”
Before you paint or press anything, plan your layout. A few quick measurements make your personalized mug gifts look polished—especially when making sets for party favors or a themed table.
- Standard mug printable/design area: about 3.25–3.75 in tall by 7.5–8.5 in wide (varies by mug shape)
- Handle spacing: keep main text at least 0.5 in away from the handle edges
- Name size for readability: letters around 0.6–1 in tall work well
Party-ready idea: Make each mug a place card—add the guest’s name on one side and the party date or a short message (like “Sip & Celebrate”) on the other.
Step-by-Step: Method A (Paint Pen Personalized Mugs)
Best for: Quick DIY gifts, kid-friendly crafting stations (with supervision), casual party favors
Time: 20–30 minutes active + curing time
Skill level: Beginner
1) Clean the Mug
- Wash the mug with soap and water; dry completely.
- Wipe the design area with rubbing alcohol using a lint-free cloth.
- Avoid touching the cleaned area with your fingers afterward (gloves help).
2) Mark Placement (Optional but Worth It)
- Place a small piece of painters tape as a vertical guide line where you want the name centered.
- If you’re adding a border, tape off lines about 0.25 in from the rim or base.
3) Add Your Design
- Shake paint markers as directed and prime on scrap paper.
- Write the name in slow, steady strokes. For block letters, sketch lightly first with a dry-erase marker (test on the bottom).
- Let the first layer dry for 5–10 minutes, then add a second coat for bold color.
4) Cure for Durability
Follow your marker’s label directions. Many oil-based paint pens air-cure best.
- Air cure: Let the mug sit untouched for 24–72 hours.
- If your paint brand allows baking: Place the mug in a cool oven, set to
Step-by-Step: Method B (Vinyl Stencil + Paint Fill)
Best for: Crisp lettering, themed party sets, “professional” looking handmade mugs
Time: 30–45 minutes active + curing time
Skill level: Intermediate (easy once you do one)
1) Create and Cut Your Stencil
- Design your text or graphic sized around 2.5–3.5 in tall.
- Cut the design from permanent vinyl or stencil vinyl.
- Weed out the parts you want to paint (the “holes” in letters like A, O, R are key—save and place them).
2) Apply the Vinyl to the Mug
- Clean the mug with alcohol and let it dry.
- Use transfer tape to position the stencil about 0.5–1 in away from the handle area.
- Burnish firmly with a scraper or an old gift card, especially on curves and edges.
3) Paint in Thin Layers
- Use a sponge pouncer or flat brush to dab paint lightly (avoid heavy strokes).
- Apply 2–3 thin coats with 5–10 minutes between coats.
- Peel the vinyl stencil off while the paint is still slightly tacky for clean edges.
4) Cure the Paint
- Air cure according to the paint label (often 21 days for full hardness, but gentle use may be possible sooner).
- If bake-safe: bake at the paint’s recommended temperature/time and cool gradually.
Step-by-Step: Method C (Sublimation Personalized Mugs)
Best for: Very durable, full-color designs, photo mugs, batch party favors
Time: 10–15 minutes prep + press time
Skill level: Advanced (equipment-based)
- Use a sublimation-ready mug and clean it with alcohol.
- Print your design mirrored on sublimation paper.
- Trim paper leaving about 0.25 in margin; wrap tightly on the mug.
- Tape with heat-resistant tape so it doesn’t shift.
- Press using your mug press settings (vary by press; many run around 350–400°F for 180–300 seconds).
- Remove carefully (hot!) and let cool before peeling paper.
Pro Tips for Party-Perfect Results
- Batch workflow: Clean all mugs first, then design all, then cure all. It saves time when making party favors.
- Consistency trick: Use the same font size and placement for each guest’s name. A simple paper template (3 in x 3 in) helps align.
- Color matching: Match paint pen colors to your party palette (sage, blush, navy, gold). Metallic markers look amazing on white mugs.
- Handle detail: Add a tiny heart or star near the handle on every mug for a cohesive “set” look.
- Make it gift-ready: Fill each mug with cocoa packets, tea bags, mini marshmallows, or wrapped candies and tie on a tag.
Creative Variations (Beginner to Advanced)
Beginner Variations
- Sticker resist: Stick a name decal on the mug, paint around it with a sponge, then peel sticker for negative-space lettering.
- Simple icon + name: Add a small balloon, bow, or confetti dots next to the name—fast and festive.
- Monogram circle: Tape a 2.5 in circle guide and add a large initial in the center.
Intermediate Variations
- Two-sided mug: Name on one side, party phrase on the other (“Let’s Celebrate,” “Bride Tribe,” “Birthday Crew”).
- Painted rim: Tape 0.25 in below the rim and paint a thin band in your theme color.
- Gold highlight: Outline letters with a metallic marker once the base color dries.
Advanced Variations
- Layered vinyl stencil: Create multi-color designs by painting one layer, curing briefly, then applying the next stencil layer.
- Full wrap designs: Repeat a pattern (stars, dots, florals) around the mug for a boutique feel.
- Photo + name (sublimation): Great for milestone birthdays or family reunion party favors.
Troubleshooting: Fixes for Common Issues
- Paint pen looks streaky: Apply a second coat after 10 minutes. Don’t overwork wet paint.
- Paint bleeds under vinyl: Burnish edges harder and use thin dabbing coats (not brush strokes). A quick “seal” coat of clear or base color around stencil edges can help.
- Lettering smudged: Let it dry fully, then carefully scrape small mistakes with a craft knife or cotton swab dipped in alcohol (test gently).
- Vinyl won’t stick to mug curve: Warm vinyl slightly with a hair dryer for 5–10 seconds and burnish again.
- Sublimation looks faded: Ensure you’re using sublimation ink/paper and a sublimation-coated mug; increase press time slightly or check pressure.
Common Crafting Mistakes to Avoid
- Skipping the alcohol wipe: Oils and dust cause peeling, beading, and blurry lines.
- Placing designs too close to the handle: Names become hard to see in photos and awkward to hold. Keep at least 0.5 in clearance.
- Using thick paint layers: Thick coats crack, smear, or seep under stencils.
- Rushing cure time: A mug can look dry but still be soft underneath. Plan ahead for your party date.
- Dishwasher too soon: Even “durable” finishes need time. Hand-wash for the first couple weeks if possible.
FAQ: Personalized Mug Gifts
1) Are DIY personalized mugs dishwasher-safe?
It depends on the method and products used. Sublimation on a coated mug is typically the most durable. Paint pens and painted designs can last well, but for longest life, hand-wash and avoid soaking. Always follow your paint/marker label for cure time and care.
2) What’s the easiest method for a mug decorating party activity?
Oil-based paint markers with simple stencils are the easiest. Set up a table with name ideas, alphabet stencils, paper towels, and a drying station. Keep designs simple so guests finish in 20–30 minutes.
3) How do I center names neatly on each mug?
Measure a design area about 3 in wide and place a small vertical tape line at the center. You can also wrap a strip of paper around the mug, mark the midpoint between handle edges, and use that as your center guide.
4) Can I use regular permanent markers (like Sharpies) instead of paint pens?
They can work for temporary decor, but they’re less reliable for long-term use and can fade or wash off. For handmade gifts meant to last, choose oil-based paint markers, porcelain paint, or sublimation.
5) What party themes work especially well with personalized mugs?
Bridal showers (“Bride Tribe” mugs), baby showers (guest names + baby predictions), winter parties (hot cocoa bar mugs), and milestone birthdays (year + name). They also make great DIY party decorations when displayed on a drink station shelf.
6) How far ahead should I make mugs for an event?
Aim for 1–2 weeks ahead if you’re painting, so you have plenty of cure time and room for do-overs. For sublimation, you can do them closer to the party (even 1–2 days before) as long as your process is dialed in.
Wrap-Up: Make a Set, Make a Memory
Personalized mug gifts check every box: they’re useful, affordable in bulk, and full of personality. Make one as a thoughtful handmade present, or create a whole matching set as DIY party favors and party table decor. Start simple with paint pens, then try vinyl stencils when you’re ready for that crisp, boutique finish.
If you make a batch, line them up for a quick photo—custom mugs look amazing as part of a hot cocoa bar, coffee station, or dessert table display. Keep your first set easy, and you’ll be surprised how fast your designs improve.
Thanks for crafting along—explore more DIY crafts, party decorations, and handmade project ideas at smartpartyprep.com.
More Articles
 10 Creative Custom Stickers Ideas
 How to Make T-Shirts at Home
 Easy Tote Bags for Beginners
 DIY Resin Jewelry for Weddings
 Paper Craft Wall Art Ideas
 Is Primal Queen Third Party Tested? The Truth About Lab Verification, What ‘Certified’ Really Means, and How to Spot Genuinely Transparent Brands (Not Just Marketing Claims)
 Seasonal Painted Rocks Ideas
 How to Make Confetti at Home
 Budget DIY Origami Decorations Under $15
 DIY Thank You Cards Party Favors