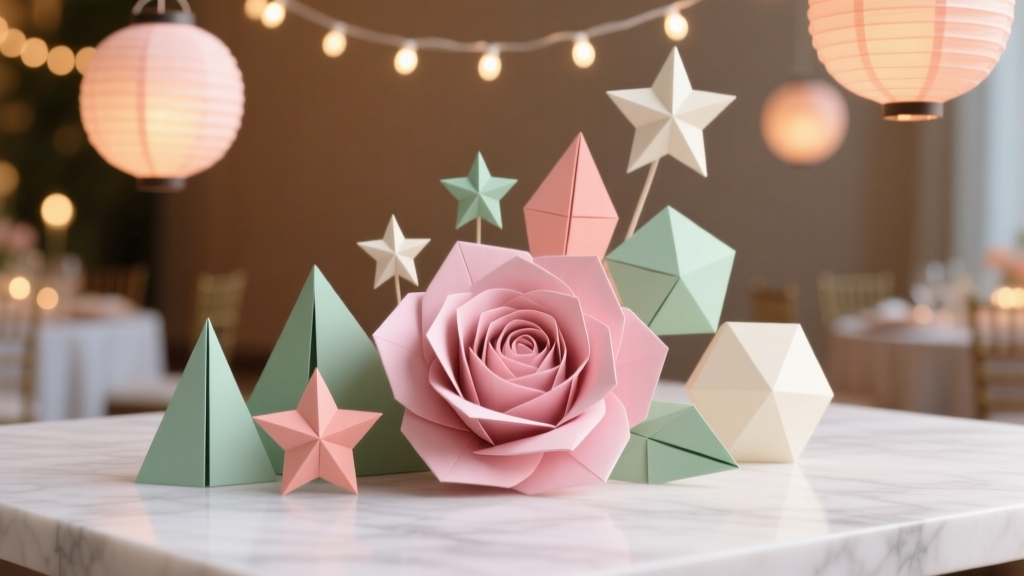
No-Sew Origami Decorations Tutorial
If you love party decorating but don’t love hauling out a sewing kit (or dealing with hot glue strings everywhere), no-sew origami decorations are about to become your new favorite DIY. With nothing more than paper, a few basic tools, and simple folds, you can create handmade party decorations that look polished, modern, and totally custom.
Origami party decor is also wonderfully flexible: make a few pieces for a cute centerpiece, or go big with a full backdrop of paper fans, hanging cranes, and geometric garlands. It’s budget-friendly, easy to personalize to your theme colors, and light enough to hang almost anywhere—perfect for birthdays, baby showers, bridal showers, graduation parties, and even holiday gatherings.
This tutorial walks you step-by-step through several beginner-friendly origami decorations (plus advanced variations), with measurements, time estimates, pro tips, and troubleshooting so your folds come out crisp and your decor hangs beautifully.
Project Overview: What You’ll Make
- Origami Paper Fans (great for backdrops and walls)
- Origami Star Garland (sweet, whimsical, and fast)
- Hanging Origami Cranes or Butterflies (statement decor for ceilings and entryways)
- Geometric Place Cards / Mini Table Accents (small but high-impact)
Skill Level & Time Estimates
- Skill level: Beginner to Intermediate (advanced options included)
- Time:
- Paper fan: 10–15 minutes each (after your first one)
- Star garland: 30–45 minutes for a 6–8 ft strand
- Crane/butterfly: 5–12 minutes each (depending on model)
- Place card accents: 2–5 minutes each
Materials & Tools (With Estimated Costs)
You can make no-sew origami decorations with inexpensive supplies. Prices vary by brand and store, but these ranges are realistic for most craft stores or online.
Paper (Choose 1–3 Types)
- Origami paper (6 in x 6 in or 10 in x 10 in packs) – best for cranes/stars; thin and crisp. $6–$12 per pack
- Cardstock (8.5 in x 11 in, 65–80 lb) – best for fans and sturdy decor. $8–$15 per 50–100 sheets
- Scrapbook paper (12 in x 12 in, single-sided or double-sided) – great for statement fans and garlands. $0.50–$1.50 per sheet or $10–$25 per pad
- Tissue paper (20 in x 26 in sheets) – for oversized, airy fans (more delicate). $4–$10 per bundle
Adhesives & Hanging Supplies (No Sewing Needed)
- Double-sided tape (craft or photo-safe) – clean finish for fans and closures. $4–$10
- Glue dots (mini or standard) – quick and tidy for securing folds. $5–$9
- Clear tape – helpful for temporary holds. $2–$5
- String or baker’s twine – for garlands and hanging decor. $3–$8
- Fishing line – nearly invisible hanging line for cranes/butterflies. $3–$7
- Removable adhesive hooks or poster putty – renter-friendly hanging. $4–$12
Tools (Recommended)
- Paper trimmer (for clean, fast cuts) or scissors. $10–$25 (trimmer)
- Ruler (12 in) + pencil (for marking). $2–$6
- Bone folder (or an old gift card) for sharp creases. $4–$10
- Hole punch (single-hole) for garlands and hanging points. $6–$12
- Binder clips or clothespins to hold folds while tape sets. $3–$8
How to Prep Your Paper for Party-Perfect Results
Best Paper Sizes for Each Decoration
- Fans: 8.5 in x 11 in (easy), 12 in x 12 in (bold), or 20 in x 26 in tissue (oversized)
- Stars: strips cut to 1 in x 10 in (small) or 1.5 in x 12 in (medium)
- Cranes/butterflies: 6 in x 6 in (beginner-friendly) or 10 in x 10 in (dramatic)
- Place cards: 4 in x 4 in squares or 3 in x 6 in rectangles (folded into tents)
Quick Cutting Guide (Straightforward Measurements)
- To make 6 in x 6 in squares from 12 in x 12 in paper: cut in half both directions.
- To make 10 in x 10 in squares from 12 in x 12 in paper: trim 2 in off one side, then cut the excess to create a square.
- For star strips: cut 1 in x 10 in strips from cardstock or scrapbook paper using a trimmer for speed.
Decoration #1: No-Sew Origami Paper Fans (Backdrop Favorite)
Why you’ll love these: Paper fans fill wall space quickly and instantly look party-ready. Make them in mixed sizes for a layered “photo moment” backdrop.
What You’ll Need
- 1 sheet of paper (8.5 in x 11 in cardstock or 12 in x 12 in scrapbook paper)
- Double-sided tape or glue dots
- Ruler (optional), bone folder (recommended)
- String + hole punch (optional for hanging)
Step-by-Step: Accordion Fold Fan
- Start with your paper oriented landscape. If using 8.5 in x 11 in, place the 11 in side horizontally.
- Accordion fold in 1-inch sections.
- Fold up 1 inch, crease firmly with a bone folder.
- Flip the paper over and fold back 1 inch.
- Repeat until the entire sheet is folded like a spring.
- Compress and find the midpoint. Pinch the folded stack in half (like closing a book) and crease the center gently.
- Secure the center (no sewing).
- Wrap a small strip of paper around the center and tape it, or
- Use a small piece of double-sided tape on the center folds to hold them together.
- Form a semicircle. Fan out one side so it opens into a half-circle shape.
- Seal the ends to make a full circle fan.
- Bring the two outer ends together.
- Use double-sided tape or glue dots to secure end-to-end.
- Hold for 15–30 seconds (binder clips help here).
- Add a hanging point (optional). Hole punch near the top edge and thread string, or attach a removable hook to the wall and tape the fan lightly in place.
Beginner-Friendly Adaptation
- Make a half-fan instead of a full circle: skip sealing the ends and tape the flat back to a wall or backdrop board.
Advanced Variation
- Layered rosette: Make two fans (one 12 in and one 8.5 in) and attach the smaller on top using glue dots for a 3D look.
- Scalloped edge: Before folding, trim one long side with decorative scissors for a lace-like edge.
Decoration #2: Origami Lucky Star Garland (Cute, Fast, Crowd-Pleasing)
These tiny stars add charm to dessert tables, gift areas, and balloon garlands. They’re also a great “craft night” project—make a bowl of stars while watching a movie.
What You’ll Need
- Paper strips: 1 in x 10 in (small) or 1.5 in x 12 in (medium)
- String/twine or fishing line
- Tape or a tiny dot of glue (optional)
- Hole punch or needle tool (optional; see method below)
Step-by-Step: Fold Lucky Origami Stars
- Tie a knot near one end. Make a simple overhand knot about 1 inch from the end, then gently pull it tight so it forms a flat pentagon.
- Flatten and shape the pentagon. Press the knot so the edges look crisp and even.
- Wrap the long tail around the pentagon. Keep wrapping neatly along the edges until you have a short tail left.
- Tuck the tail in. Slide the remaining end into a pocket of the wrap to secure (no glue needed if your paper isn’t slippery).
- Puff the star. Pinch the middle of each side inward (five pinches total) to pop the star into a 3D shape.
Turn Stars into a Garland (Two Easy Methods)
- Method A: Tape-and-string (fastest)
- Lay your string flat.
- Use tiny rolled tape or micro glue dots to attach stars every 3–6 inches.
- Method B: Hidden fishing line (cleanest look)
- Before puffing the star, slide fishing line into the center wrap area, then puff.
- The star “grips” the line and looks like it’s floating.
Decoration #3: Hanging Origami Cranes or Butterflies (Statement Ceiling Decor)
Hanging origami instantly adds “wow” to a party space—especially above gift tables, near a dessert bar, or clustered in a doorway. Use solid colors for modern themes or patterned paper for playful celebrations.
What You’ll Need
- Square origami paper: 6 in x 6 in (beginner) or 10 in x 10 in (dramatic)
- Fishing line or thread
- Clear tape or micro glue dot
- Removable hooks for hanging
Step-by-Step: Quick Hanging Setup (Works for Cranes or Butterflies)
- Fold your crane/butterfly following your preferred pattern. (If you’re new, start with a simple origami butterfly—fewer precision steps than a crane.)
- Create an attachment point.
- Add a tiny loop of tape on the top/back of the model, or
- Gently tuck fishing line into an internal fold and secure with a micro glue dot.
- Vary the hanging lengths. Cut lines to 12 in, 18 in, 24 in, and 30 in so the decor looks layered and intentional.
- Hang in clusters. Use 3–7 pieces per cluster above a table or in a corner, spacing them about 6–10 inches apart.
Advanced Variation
- Ombre ceiling mobile: Use 3–5 shades of one color and arrange from light to dark.
- Double-layer butterfly: Make two butterflies (one smaller), then attach the smaller on top with a glue dot for a 3D wing effect.
Decoration #4: Origami Place Cards & Mini Table Accents
These are perfect if you want handmade party details without committing to a massive build. They also pair beautifully with DIY party decorations like balloon arches and paper flower centerpieces.
Easy Place Card “Tent” with a Folded Accent
- Cut cardstock to 3 in x 6 in.
- Fold in half to 3 in x 3 in tent shape and crease firmly.
- Add a mini origami heart/star (small paper, around 2 in x 2 in square) and attach with a glue dot.
Pro Tips for Crisp Folds and Professional-Looking Results
- Score and crease for sharp lines. A bone folder (or gift card) makes a huge difference on fans and place cards.
- Match paper weight to the project.
- Thin origami paper: best for intricate folds (cranes, stars).
- Cardstock: best for fans, place cards, and anything that needs structure.
- Work on a hard, flat surface. Soft surfaces (like couches) make wobbly creases.
- Batch your steps. For garlands, cut all strips first, then knot all stars, then puff all stars, then assemble.
- Use removable adhesives for party setups. Poster putty and removable hooks protect walls and make cleanup easy.
Troubleshooting: Fix Common Origami Decoration Problems
- My fan won’t stay closed in a circle.
- Use stronger double-sided tape (foam-free) or two glue dots stacked.
- Make sure the end panels are clean and dust-free before taping.
- Clamp with binder clips for 1–2 minutes to set.
- My stars look lumpy instead of puffy.
- Start with a flatter pentagon when you tie the knot.
- Puff by pinching the centers gently—don’t crush the points.
- My crane/butterfly keeps unfolding.
- Your paper may be too thick; switch to lighter origami paper.
- Add one tiny glue dot inside a key fold (hidden) to lock it.
- My garland tangles.
- Use stiffer twine instead of thin thread, or space pieces farther apart.
- Store by wrapping around a piece of cardboard (like a ribbon spool).
Common Crafting Mistakes to Avoid
- Skipping the crease. Light folds lead to messy shapes—press firmly every time.
- Using random paper sizes for a “set.” For coordinated DIY party decorations, pick 2–3 consistent sizes (like 12 in fans + 8.5 in fans).
- Overloading with heavy tape. Too much tape can wrinkle paper; use small, well-placed pieces.
- Hanging everything at the same height. Vary heights and sizes for a styled, layered party look.
- Waiting until party day to assemble. Fold pieces ahead of time, then hang the day-of for the freshest look.
FAQ: No-Sew Origami Party Decorations
What’s the best paper for origami party decorations?
For cranes, stars, and butterflies, choose thin origami paper (it folds cleanly). For backdrop fans and place cards, cardstock or scrapbook paper holds its shape better and looks more “decor-ready.”
How many paper fans do I need for a backdrop?
For a simple wall cluster behind a cake or gift table, plan on 8–12 fans mixed in size (for example: 4 large 12-inch, 4 medium 8.5x11, and 2–4 small accents).
Can kids help with these DIY decorations?
Yes. Kids can help with accordion folding fans, puffing lucky stars, and placing glue dots. Save intricate crane folds for teens or adults, or choose an easier butterfly pattern for younger crafters.
How far in advance can I make origami decorations?
You can fold them 1–2 weeks ahead. Store fans flat (compressed), store cranes in a box with tissue paper, and wrap garlands around cardboard to prevent tangles.
How do I hang origami decorations without damaging walls?
Use removable hooks, poster putty, or painter’s tape tabs. For ceilings, removable hooks plus fishing line makes hanging decor look like it’s floating.
How do I keep paper decorations from drooping?
Use the right paper weight (cardstock for structure), reinforce key points with glue dots, and avoid humid areas. If you’re decorating outdoors, bring extras and consider heavier cardstock for anything that needs to stay crisp.
Wrap-Up: Your Party Space, Upgraded—No Sewing Required
No-sew origami decorations are one of those DIY crafts that feel instantly rewarding: a few folds turn into real, usable party decor that looks thoughtful and personalized. Start small with a star garland or a couple of fans, then build a full coordinated setup once you see how quickly it comes together.
Try one decoration style this week, pick colors that match your theme, and don’t worry about perfection—clean creases and consistent sizes are what make these handmade projects shine. For more DIY party decorations, creative backdrops, and smart crafting prep tips, explore more ideas on smartpartyprep.com.
More Articles
 Easy Tote Bags for Beginners
 Seasonal Garlands Ideas
 DIY Greeting Cards in 1 Hour
 Advanced Cake Toppers for Crafters
 How to Hang Party Streamers Without Tape Marks, Sagging, or Last-Minute Panic: 7 Foolproof Methods (Tested on 37 Parties)
 Rustic Dream Catchers Ideas
 How to Enable Third Party Cookies on Mac in 2024: A Step-by-Step Safari & Chrome Guide (Plus Why You Might Not Want To)
 DIY Friendship Bracelets Using Cricut
 Seasonal Resin Jewelry Ideas
 How to Unblock 3rd Party Cookies on Mac: A Step-by-Step Safari & Chrome Guide (No Tech Degree Required — Just 90 Seconds & Your Settings App)