Paper Craft Party Banners Ideas
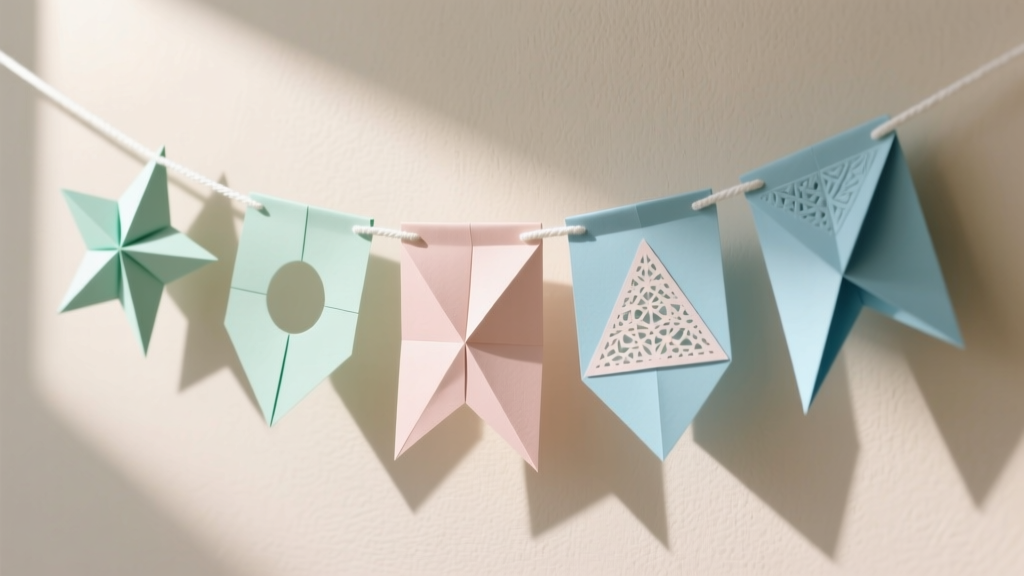
Nothing transforms a plain wall into a party backdrop faster than a handmade banner. Paper craft party banners are cheerful, customizable, and surprisingly budget-friendly—plus they’re one of those DIY party decorations that look impressive even if you’re a beginner. Whether you’re decorating for a birthday, baby shower, graduation, holiday, or “just because” get-together, a paper banner instantly sets the theme and makes the space feel styled on purpose.
The best part: you can make party banners with tools you probably already own (scissors, tape, a ruler), and you can scale them up or down depending on your timeline. Need something quick for tonight? Try a simple triangle pennant garland. Want a wow-factor photo moment? Make a layered rosette banner with metallic accents. You’ll find several paper banner ideas below—each with step-by-step guidance, measurements, and pro tips to help you get clean, party-ready results.
Choose one style or mix a couple together (a “HAPPY BIRTHDAY” letter banner plus a tassel garland looks amazing). Let’s craft!
Quick Planning: Pick Your Banner Style
Skill Levels (Choose What Fits Your Time)
- Beginner (30–60 minutes): Triangle pennants, simple circle garlands, mini flags
- Intermediate (60–120 minutes): Letter banners with layers, fringe/tassel garlands
- Advanced (2–3 hours): Rosette fans with lettering, multi-layer mixed-media banners
Standard Banner Sizing (Works for Most Parties)
- Banner length: 6–8 ft for a mantel or dessert table; 10–12 ft for a photo wall
- Spacing between pieces: 1–2 in looks full; 2–3 in looks airy
- String height clearance: Hang 6–12 in above the table to keep it in photos
Materials & Tools List (With Estimated Costs)
Paper & Adhesives
- Cardstock (8.5 x 11 in, 65–110 lb): base pennants, letters ($6–$12 per 50–100 sheets)
- Patterned scrapbook paper (12 x 12 in): accents, layers ($5–$15 per pad)
- Tissue paper: tassels/fringe ($2–$6 per pack)
- Glue stick: quick, clean paper bonding ($1–$4)
- Double-sided tape (tape runner optional): strong and neat ($3–$10)
- Hot glue gun + glue sticks: best for ribbon knots, heavier pieces ($8–$20)
Hanging Supplies
- Baker’s twine or cotton string: classic look ($3–$8)
- Satin ribbon (3/8 in to 5/8 in wide): dressy banners ($4–$10)
- Mini clothespins or paper clips: removable pieces ($3–$7)
- Removable wall hooks or painter’s tape: damage-free hanging ($4–$10)
Tools (Recommended)
- Scissors: one for paper, one for ribbon/twine
- Paper trimmer: faster straight cuts (optional but helpful) ($12–$30)
- Hole punch: standard 1/4 in circle punch ($6–$12)
- Ruler + pencil: accurate measuring
- Craft knife + cutting mat: sharp corners and detailed cuts (intermediate/advanced)
- Corner rounder punch (optional): polished look ($6–$15)
Typical total cost: $10–$25 if you have basic tools already; $25–$60 if you’re building a small crafting kit.
Banner Idea #1: Classic Triangle Pennant Banner (Fast + Foolproof)
Skill level: Beginner
Time estimate: 45–75 minutes for 10–12 pennants
Great for: birthdays, sports parties, outdoor BBQs, classroom celebrations
Measurements (Use These as a Template)
- Standard pennant size: 5 in wide x 7 in tall (nice for 6–10 ft banners)
- Mini pennant size: 3.5 in wide x 5 in tall (great for high chairs or small tables)
Step-by-Step Instructions
- Create a template: On cardstock, draw a 5 x 7 in rectangle. Mark the bottom center (2.5 in). Draw lines from top corners to the bottom center to form a triangle. Cut it out.
- Trace and cut pennants: Trace template onto cardstock or patterned paper. Cut 10–12 pennants for a 6–8 ft banner.
- Reinforce the top edge: Fold the top 1/2 in of each pennant to the back (this prevents tearing at the holes). Glue or tape the fold down.
- Punch holes: Punch two holes, each about 3/8 in from the top edge and 1/2 in from the sides.
- String the banner: Cut 8–10 ft of twine/ribbon. Thread pennants on, leaving 6–8 in of extra string on both ends for tying. Space pennants 1–2 in apart.
- Hang and adjust: Use removable hooks or painter’s tape. Step back, check spacing, and slide pennants as needed.
Easy Variation Ideas
- Layered look: Cut a smaller triangle (4 x 6 in) and glue centered on top.
- Scalloped edge: Use decorative scissors or a small semi-circle punch along the sides.
- Metallic pop: Add a strip of gold foil tape across the top fold.
Banner Idea #2: DIY Letter Banner (Happy Birthday, Baby, Congrats)
Skill level: Beginner to Intermediate
Time estimate: 60–120 minutes (depends on phrase length)
Great for: personalized party decorations and photo backdrops
Measurements & Layout
- Letter panel size: 5.5 in wide x 7 in tall (fits a bold letter nicely)
- Letter height: 3.75–4.5 in tall for readability from a distance
- Spacing: 1 in between panels; 2–3 in gap between words
Step-by-Step Instructions
- Pick your phrase: Example: “HAPPY BIRTHDAY” (13 letters + 1 space). Plan one panel per letter.
- Cut panels: Cut rectangles (5.5 x 7 in) or cut flag shapes (cut a 1 in V-notch at the bottom center).
- Make or print letters:
- Beginner: Print letters in a bold font, cut them out as templates, and trace onto contrasting cardstock.
- Advanced: Use a craft knife for crisp edges or a cutting machine if you have one.
- Center letters: Lightly mark a centerline on each panel. Glue letters down using a glue stick or tape runner.
- Add holes or tabs:
- Hole method: Punch two holes at the top (like the pennant banner).
- Tab method: Fold 1/2 in at the top back and tape to the string for a seamless look.
- String and test-hang: Lay panels on the floor in order. Thread onto twine. Hang and adjust spacing so words sit evenly.
Design Upgrades
- Shadow layer: Cut each letter twice (one slightly offset behind) for a drop-shadow effect.
- Confetti sprinkle: Punch tiny circles from leftover paper and glue around the corners.
- Theme icons: Add a small paper cupcake, star, dinosaur, or heart between words.
Banner Idea #3: Paper Tassel & Fringe Garland (High Impact, Light Weight)
Skill level: Intermediate
Time estimate: 60–90 minutes for 12 tassels
Great for: dessert tables, balloon backdrops, boho and modern party themes
Measurements
- Tissue sheet size: 20 x 26 in (standard tissue paper)
- Cut size per tassel: 10 x 13 in (one sheet makes 2 tassels)
- Fringe depth: 3.5–4.5 in (don’t cut all the way through)
Step-by-Step Instructions
- Cut tissue pieces: Cut tissue into 10 x 13 in rectangles.
- Layer for fullness: Stack 2 rectangles for each tassel (optional but looks lush).
- Fringe it: Fold in half lengthwise. Cut fringe from the open edge toward the fold, stopping about 1 in before the fold line.
- Roll to form tassel: Unfold. Roll tightly from the uncut top edge downward, then twist the uncut section to form a hanger loop.
- Secure: Wrap with a small piece of clear tape or a dot of hot glue to hold the twist.
- Add to string: Tie or loop tassels onto twine. Alternate colors for a party-perfect rhythm.
Pro Tip
If tissue tears while rolling, use less pressure and make fringe cuts slightly wider (about 1/4–3/8 in).
Banner Idea #4: Paper Rosette Fan Banner (Statement Piece)
Skill level: Advanced (or patient intermediate)
Time estimate: 2–3 hours for 5–7 rosettes
Great for: photo backdrops, first birthdays, bridal showers, holidays
Measurements
- Paper size: 12 x 12 in scrapbook paper (or two 6 x 12 in strips)
- Accordion fold width: 1/2 in (smaller folds look more detailed)
- Rosette diameter: about 8–10 in from 12 x 12 in paper
Step-by-Step Instructions
- Accordion fold: Fold the paper back and forth in 1/2 in increments like a fan. Crease firmly with a ruler edge.
- Create two halves: Fold the accordion in half, then glue the two inner ends together to form a half-circle fan.
- Complete the rosette: Make a second half, then glue the open ends together to create a full rosette.
- Reinforce the center: Cut a cardstock circle (2.5–3 in diameter). Hot glue to the center front and back for strength.
- Decorate: Add a smaller circle topper with a number (“ONE”), a name, or an icon.
- Attach to banner line: Glue rosettes onto a ribbon length or clip them with mini clothespins for easy repositioning.
Pro Tips for Clean, Party-Ready Results
- Choose the right paper weight: Use cardstock for pennants and letters. Use scrapbook paper for layers and rosettes. Tissue is best for tassels.
- Pre-plan your color palette: Aim for 2–3 main colors + 1 metallic/neutral (gold, silver, white, kraft).
- Make a “banner kit” tray: Keep holes punched, string cut, and adhesives ready so you’re not searching mid-project.
- Use a template for speed: One sturdy cardstock template saves time and keeps everything consistent.
- Test your hanging method first: Painter’s tape works on many walls, but removable hooks are more secure for heavier banners.
Beginner-Friendly Adaptations
- No hole punch? Fold the top edge over the string and tape it down (tab method).
- No paper trimmer? Use a ruler and mark cutting lines, then cut slowly with scissors.
- Short on time? Make a single-word banner (“YAY!” or “PARTY”) and pair it with a tassel garland.
Advanced Variations (If You Want Extra Wow)
- 3D layered letters: Foam tape behind letters adds dimension and shadow.
- Interactive banner: Make pockets behind pennants to tuck in trivia cards, dares, or raffle tickets.
- Mixed textures: Combine vellum, glitter cardstock, and kraft paper for a boutique look.
- Double-sided banners: Great for hanging across a room—just glue two pennants back-to-back with the string sandwiched inside.
Troubleshooting: Fix Common Banner Problems
- Pennants flip backward on the string: Use two holes (not one), and keep holes level. Add a tiny piece of tape behind the string on each pennant to “lock” it in place.
- Letters look crooked: Draw a faint centerline and baseline on each panel before gluing. Use a ruler to align.
- Paper tearing at holes: Reinforce the top with a 1/2 in folded hem or add small hole reinforcers (or a tiny square of tape) before punching.
- Banner sagging in the middle: Use stronger twine/ribbon and hang with a slightly tighter line. For long spans, add a center hook.
- Rosette won’t stay closed: Use hot glue at the joining points and reinforce with center circles on both sides.
Common Crafting Mistakes to Avoid
- Skipping measurement consistency: Even small size differences show up once it’s hanging. Make a template and stick to it.
- Using only printer paper for everything: It’s too floppy for crisp pennants and letters. Cardstock makes your DIY party banner look polished.
- Over-gluing tissue paper: Too much adhesive can wrinkle or tear. Tape dots or minimal glue work best.
- Hanging without a dry-run: Lay the banner on the floor in order first to confirm spacing, spelling, and color balance.
- Forgetting extra tie length: Always leave 6–10 in of bare string on each end for easy mounting.
FAQ: Paper Craft Party Banners
What’s the best paper for DIY party banners?
Cardstock (65–110 lb) is the best all-around choice for pennants and letter panels. Use scrapbook paper for decorative layers, and tissue paper for tassels.
How long should my banner be for a dessert table?
For most dessert tables, 6–8 ft looks balanced. If your table is 4–6 ft wide, aim for a banner that extends slightly wider than the table so it frames the setup.
How do I make a banner look professional and not “homemade”?
Use consistent measurements, a limited color palette, and clean cuts. Small upgrades like layered shapes, corner rounding, and foam tape add a boutique finish.
Can I make these banners ahead of time?
Yes. Make them 1–7 days in advance. Store flat in a large envelope or pizza box-style container. Keep tissue tassels loosely packed to avoid crushing.
What’s the easiest way to hang banners without damaging walls?
Try removable adhesive hooks for heavier banners and painter’s tape for lightweight garlands. If you’re hanging on brick or textured surfaces, use hooks or tie to existing fixtures.
How do I keep my banner from tangling during storage?
Wrap the string around a piece of cardboard like a ribbon spool, or remove the pieces and store them stacked, then re-string later.
Wrap-Up: Your Party, Your Paper, Your Style
Paper craft party banners are one of the most satisfying handmade decorations because they’re quick to personalize and big on visual impact. Start with a simple pennant banner, add a letter phrase for your guest of honor, or go bold with tassels and rosettes for a photo-ready backdrop. Your space will feel festive, thoughtful, and uniquely yours—without a pricey party decor bill.
Keep your scraps (they’re perfect for confetti and mini accents), take a photo of your finished banner, and try a new style for the next celebration. For more DIY crafts, party decorations, and handmade project ideas, explore more inspiration on smartpartyprep.com.
More Articles
 Seasonal Photo Frames Ideas
 How to Turn On 3rd Party Cookies in 2024: A Step-by-Step Guide for Chrome, Safari, Firefox & Edge (Without Breaking Your Privacy or Site Functionality)
 Budget DIY Painted Rocks Under $10
 Upcycled Clay Ornaments from Recycled Materials
 Easy Tote Bags for Beginners
 No-Sew Masks Tutorial
 DIY Tie-Dye Shirts for Holidays
 How Do You Make a Party Hat in Under 12 Minutes? 5 Foolproof Methods (No Glue Gun Needed) + Printable Templates & Pro Tips to Avoid Lopsided Crowns
 DIY Masks Party Favors
 DIY Greeting Cards in 5 Minutes