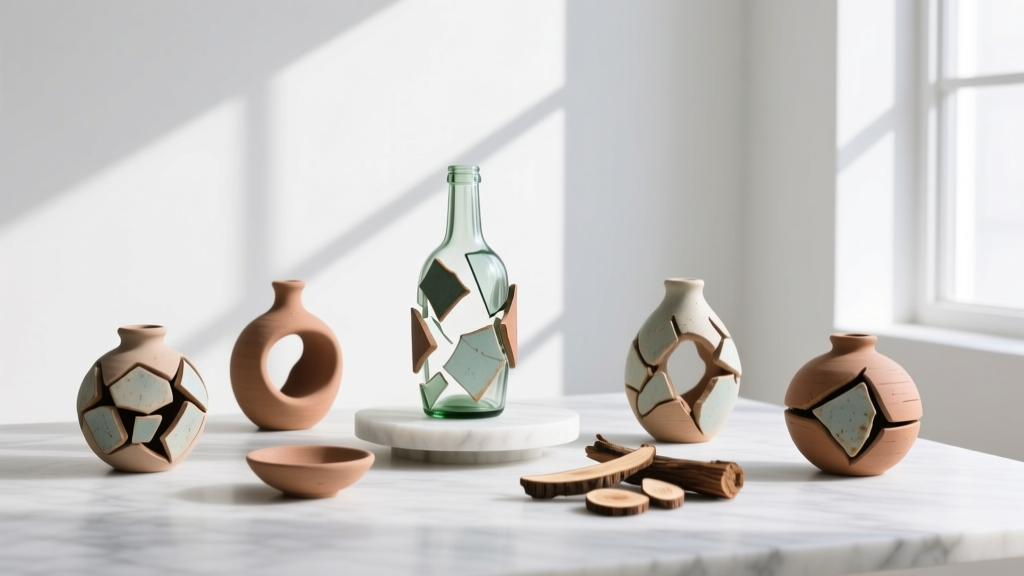
Upcycled Clay Ornaments from Recycled Materials
There’s something extra satisfying about turning “almost trash” into party-worthy decorations. Upcycled clay ornaments let you transform everyday recycled materials—cardboard, bottle caps, scrap paper, old fabric, even broken jewelry—into charming, handmade ornaments that look intentional, stylish, and full of personality.
This project is fun because it’s forgiving: air-dry clay is easy to shape, easy to stamp, and perfect for experimenting with textures. It’s also useful for entertaining—make a set for a birthday backdrop, wedding favors, holiday place cards, gift tags, or a DIY ornament bar at a party where guests create their own keepsakes.
Best of all, you can customize everything: colors to match your party theme, stamped initials for guests, tiny shapes for a baby shower, or glam metallic highlights for New Year’s. You’ll end up with handmade decorations that feel personal—and you’ll feel great about using recycled materials in your DIY crafts.
Project Overview (Skill Level, Time, and What You’ll Make)
- Skill level: Beginner-friendly (with advanced options included)
- Active time: 45–90 minutes (depending on quantity and detail)
- Drying time: 24–48 hours for air-dry clay (or per package instructions)
- Yield: About 12–20 ornaments from 1 lb (450 g) of clay (2–3 inch sizes)
- Best uses: Party decorations, handmade gift tags, favors, place cards, garlands, mini wall hangings
Materials & Tools (with Estimated Costs)
Main Materials
- Air-dry clay (1–2 lb / 450–900 g) – $8–$18
Product types: lightweight air-dry clay (softer, easier for beginners) or classic air-dry clay (firmer, holds crisp stamps). - Recycled materials for texture and design – free
Great options: corrugated cardboard, bubble wrap, lace scraps, mesh produce bags, bottle caps, old keys, jar lids, scrapbooking paper, worn-out rubber stamps, broken costume jewelry, buttons, twine offcuts. - String for hanging – $3–$8
Product types: jute twine, baker’s twine, satin ribbon (1/8–1/4 inch), or cotton cord. - Acrylic craft paint (2–4 oz bottles) – $1–$3 each
Party-friendly picks: white, black, metallic gold, metallic silver, and one theme color (blush, sage, navy, etc.). - Sealer (optional but recommended) – $6–$12
Product types: water-based matte or gloss varnish, Mod Podge, or acrylic spray sealer (use spray outdoors).
Tools (Budget-Friendly Recommendations)
- Rolling tool: acrylic rolling pin or a smooth glass jar – $0–$12
- Clay thickness guides: two paint stir sticks, two pencils, or two wooden dowels – $0–$5
- Cutters: cookie cutters (2–3 inches) or a craft knife – $2–$10
- Hole maker: drinking straw, skewer, or leather hole punch – $0–$15
- Sanding: fine-grit sandpaper (220–400 grit) – $3–$6
- Work surface: silicone mat, parchment paper, or a smooth placemat – $2–$12
Optional Add-Ons for Extra Wow
- Gold leaf flakes – $6–$10
- Alcohol ink or watercolor – $5–$15
- Letter stamps (for names/initials) – $8–$18
- Fine paintbrush set – $5–$12
Prep: Clean, Sort, and Plan Your Party Theme
Before you touch the clay, do a quick “recycled texture audit.” Gather items that can safely press into clay and won’t crumble or leave sticky residue.
- Quick-clean items: jar lids, bottle caps, keys, lace, mesh bags (wash and dry)
- Use with caution: paper with heavy ink, glittery paper that sheds, anything oily
- Theme planning tip: choose 1 main shape (circle, arch, star) and 1–2 texture patterns to keep the set cohesive for party decor.
Step-by-Step: Upcycled Clay Ornaments
Step 1: Condition and Roll the Clay (Target Thickness)
- Cover your table with parchment paper or a silicone mat.
- Knead a palm-sized piece of clay for 30–60 seconds until it feels smoother and less crack-prone.
- Place two thickness guides on either side of the clay (paint stir sticks or pencils work great).
- Roll the clay to an even thickness of 1/8 inch (3–4 mm) for lightweight ornaments or 3/16 inch (4–5 mm) for sturdier pieces.
Party decor note: If you’re making ornaments as favor tags or place cards, 1/8 inch keeps them lighter and easier to hang on gift bags.
Step 2: Add Texture with Recycled Materials
- Press your chosen recycled texture into the rolled clay using firm, even pressure.
- Lift straight up to avoid smearing the pattern.
- Try “layered texture” by pressing a lace scrap lightly first, then pressing a bottle cap edge along one side as a border.
- Great texture presses: lace, mesh produce bags, corrugated cardboard, bubble wrap
- Great detail stamps: old keys, coin edges, jar lid ridges, small charms
Step 3: Cut Shapes (Keep Sizes Consistent)
- Use a 2–3 inch cookie cutter for ornaments that read well on a party backdrop or garland.
- Press straight down for clean edges.
- Remove excess clay carefully, then slide a thin tool under each ornament to lift it.
Beginner-friendly option: circles are the easiest. Use a jar lid or drinking glass as a cutter.
Step 4: Add Hanging Holes and Optional Name Stamps
- Use a straw to punch a hole 1/4 inch (6 mm) from the top edge.
- For ribbon, make the hole slightly larger; for twine, a standard straw hole is perfect.
- If adding initials or names, press letter stamps gently and evenly. If stamping a full name, keep letters 1/8 inch (3 mm) away from the edge to reduce cracking.
Tip: If you’re making place cards, stamp first names and use these as napkin tie-ons or favor bag tags.
Step 5: Dry Flat (Prevent Warping)
- Move ornaments to a flat surface lined with dry parchment.
- Let dry 24 hours, then flip and dry another 12–24 hours.
- If edges begin to curl, gently press them flat while the clay is still slightly damp.
Drying shortcut: Avoid high heat unless your clay brand explicitly allows it. Fast drying can cause cracks.
Step 6: Sand, Paint, and Seal (Party-Ready Finish)
- When fully dry, sand edges lightly with 220–400 grit sandpaper.
- Paint a base coat (white makes colors pop). Let dry 15–30 minutes.
- Highlight raised texture with a “dry brush” technique: dip a brush in metallic paint, wipe most off on paper, then lightly skim the surface.
- Seal with a thin coat of varnish/Mod Podge and let dry per instructions.
Best party decor look: matte seal + metallic accents feels modern and photographs beautifully.
Step 7: Add Ribbon, Twine, or Garland Assembly
- Thread ribbon or twine through the hole and tie a knot or bow.
- To make a garland, string ornaments on a longer cord (typically 5–7 feet) and space them 4–6 inches apart.
- Hang on a dessert table, photo backdrop stand, or along a banister for instant party decoration.
Pro Tips for Crisp Results
- Even thickness = fewer cracks. Use thickness guides every time, especially if you’re making a full set.
- Stamp before cutting (optional). For repeated patterns, stamping on a large sheet then cutting shapes is faster and more consistent.
- Clean textures between presses. A dry toothbrush removes clay bits from lace or mesh so the next stamp stays crisp.
- Make hang holes stronger. Keep at least 1/4 inch of clay above the hole. Too close to the edge can snap.
- Paint in layers. Two thin coats look smoother than one thick coat.
Creative Variations (Beginner to Advanced)
Beginner-Friendly Adaptations
- Monochrome set: white paint + black stamped letters for modern party decor.
- Simple texture: bubble wrap press + circle cutouts + twine.
- Confetti look (no mess): paint random dots with a pencil eraser dipped in acrylic.
Advanced Variations
- Faux ceramic glaze effect: paint a solid base, then add gloss varnish only in recessed areas for a dimensional shine.
- Embedded “found object” charm: press a small broken jewelry piece into the clay (half embedded), then seal well after painting.
- Marbled clay look: twist two clay colors together gently, roll once or twice (don’t overmix), then cut shapes.
- Raised borders: roll thin “snakes” of clay (about 1/8 inch thick) and attach with a tiny bit of water, then texture inside the frame.
Troubleshooting: Fixes for Common Issues
- Cracking while drying:
- Cause: clay too dry, rolled too thin, or dried too quickly.
- Fix: smooth tiny cracks with a damp fingertip; for bigger cracks, make “clay slip” (clay + water paste) and fill, then smooth.
- Warping/curling edges:
- Cause: uneven thickness or drying on an absorbent surface.
- Fix: dry on parchment; flip halfway through; press gently flat while still slightly damp.
- Stamps look blurry:
- Cause: shifting the texture tool during lifting.
- Fix: press straight down and lift straight up; practice on a scrap piece first.
- Paint looks streaky:
- Cause: thick paint or not enough drying time between coats.
- Fix: thin paint with a tiny drop of water; do 2–3 thin coats.
Common Crafting Mistakes to Avoid
- Skipping thickness guides: uneven ornaments crack, warp, and feel inconsistent as a set.
- Placing the hang hole too close to the edge: it can snap when tied onto gift bags or hung on a garland.
- Over-handling cut shapes: too much moving and stretching distorts edges—lift with a flat tool instead.
- Drying on cardboard or paper towels: they pull moisture unevenly and encourage curling.
- Sealing too soon: if the clay isn’t fully dry, trapped moisture can cause bubbles or soft spots.
- Using oily or sticky recycled items: residue can prevent clean stamps and paint adhesion.
FAQ: Upcycled Clay Ornaments
1) What recycled materials work best for stamping texture into clay?
Lace scraps, bubble wrap, corrugated cardboard, mesh produce bags, jar lid ridges, and bottle caps are reliable. Avoid anything with loose glitter or greasy residue.
2) Can I use polymer clay instead of air-dry clay?
Yes—polymer clay gives very crisp detail and durability, but it needs baking (follow the brand’s temperature and time exactly). For quick DIY party decorations and crafting with kids, air-dry clay is usually easier.
3) How do I keep ornaments from breaking at the hole?
Keep at least 1/4 inch (6 mm) of clay above the hole, don’t roll thinner than 1/8 inch (3–4 mm), and seal both sides. For heavy ornaments, use ribbon instead of thin string to reduce stress.
4) Can these be used outdoors for a party?
They can handle a short outdoor event if sealed well, but air-dry clay isn’t fully waterproof. For outdoor parties, hang them under cover (porch, tent, canopy) and bring them inside after.
5) What’s the best way to make these as party favors?
Stamp guest initials or a short word (like “CHEERS” or the event date), paint to match your theme, and tie each ornament to a treat bag or small favor box. A 2-inch ornament size feels special but not bulky.
6) How far ahead should I make clay ornaments for a party?
Plan for 2–4 days ahead: one day to make them, 1–2 days to dry, and a final day for painting/sealing and assembling garlands or favor tags.
Wrap-Up: Turn Recycled Bits into Party-Perfect Handmade Decor
Upcycled clay ornaments are one of those DIY crafts that checks every box: budget-friendly, creative, beginner-accessible, and seriously cute as party decorations. Once you make a batch, you’ll start seeing texture tools everywhere—cardboard edges, fabric scraps, jar lids—and each one becomes a chance to create something unique.
Pick a party theme color palette, gather a few recycled materials, and make a set this weekend. Your future self (and your party guests) will love the handmade details.
Want more easy DIY party decor and handmade project ideas? Explore more creative tutorials and smart celebration tips on smartpartyprep.com.
More Articles
 How to Make Slumber Party Tents That Actually Stay Up (No Glue Guns, No Tears): 7 Foolproof Methods Using Stuff You Already Own — From Cardboard Castles to Fairy-Light Canopies
 DIY Custom Stickers Party Favors
 Is Primal Queen Third Party Tested? The Truth About Lab Verification, What ‘Certified’ Really Means, and How to Spot Genuinely Transparent Brands (Not Just Marketing Claims)
 Step-by-Step Wreaths Tutorial
 How Do I Make a Party Hat in Under 12 Minutes? (No Glue Gun, No Scissors Required — Just Paper, Tape & 3 Clever Hacks That 92% of First-Timers Miss)
 How to Allow Third Party Cookies on iPad in 2024: A Step-by-Step Guide That Actually Works (No More 'Blocked' Messages or Broken Logins)
 How to Make a Party Backdrop That Looks Pro (Without Spending $200): 7 Foolproof DIY Methods Using Dollar Store Supplies, Reusable Frames & Zero Sewing
 25 Creative Invitation Ideas (That You Can Make at Home)
 How to Record Xbox Party Chat in 2024: The Only Step-by-Step Guide That Actually Works (No Capture Card Required)
 Kids' Craft: Vision Boards