Kids' Craft: Vision Boards
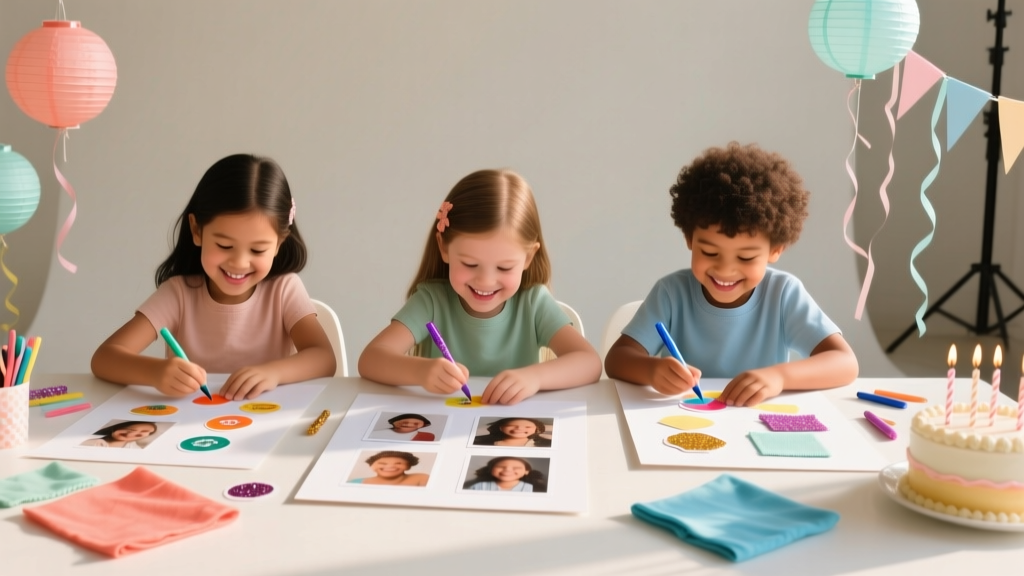
Vision boards aren’t just for grown-ups—they’re one of the most colorful, confidence-boosting kids’ craft projects you can make at home or at a party. Kids get to cut, paste, doodle, and decorate while thinking about what they love, what they want to learn, and what they’re excited to try. It’s creative, personal, and surprisingly calming—especially when you turn it into a fun “craft table” activity with music and snacks.
Even better? Vision boards double as handmade decorations. Set them up as a party activity for birthdays, sleepovers, New Year’s celebrations, or back-to-school gatherings, and you’ll end up with a lineup of mini “art posters” kids are proud to hang in their rooms. If you enjoy DIY crafts that feel meaningful and look great on the wall, this one checks every box.
This guide walks you through a kid-friendly, step-by-step approach (with easy adaptations for beginners and fun upgrades for advanced crafters). You’ll also get party-ready tips—because clean-up, time limits, and group crafting are part of the real-world fun.
Project Overview: Skill Level, Time, and Best Ages
- Skill level: Beginner (easy), with optional advanced variations
- Estimated time:
- Prep: 10–20 minutes
- Crafting: 30–60 minutes per board
- Dry time (glue): 15–30 minutes (or send home in a folder to finish drying)
- Recommended ages: 5+ with supervision; ages 8–12 typically work independently
- Great for: Birthday parties, classroom crafts, sleepovers, tween hangouts, New Year’s parties, back-to-school events
Materials List (with Estimated Costs)
Base Options (Choose One)
- Foam board (20 in x 30 in): $2–$6 each (sturdy, lightweight, great for hanging)
- Poster board (22 in x 28 in): $1–$3 each (budget-friendly, easy to cut)
- Cardstock + clipboard (12 in x 18 in cardstock): $0.50–$1.50 per sheet; clipboard $2–$8 (portable “vision board”)
- Cork board (12 in x 18 in): $8–$20 (reusable with push pins—best for older kids)
Images & Words
- Old magazines (variety: sports, animals, travel, food): free–$10
- Printable images (home printer): $1–$3 per board for ink/paper
- Stickers (motivational, stars, letters): $2–$8 per pack
- Scrapbook paper (12 in x 12 in): $0.50–$1 per sheet (great as background)
Adhesives (Pick What Fits Your Group)
- Glue sticks: $1–$3 each (cleanest for parties)
- School glue: $1–$2 (stronger but can wrinkle paper if overused)
- Double-sided tape or tape runner: $3–$10 (fast and low-mess)
Tools
- Kid-safe scissors: $2–$6
- Adult scissors (for thick foam board): $5–$12
- Ruler (12 in): $1–$5
- Pencil and eraser: $1–$3
- Fine-tip markers + bold markers: $5–$15
Optional Decorations (Party-Perfect Extras)
- Washi tape: $3–$10
- Ribbon (3/8 in to 1 in wide): $2–$6
- Glitter glue: $2–$5 (less mess than loose glitter)
- Self-adhesive gems: $3–$8
- Letter stamps + ink pad: $8–$20
Tool Recommendation for Party Setups
- One tabletop supply caddy per 4 kids (or a muffin tin for small items like stickers and gems)
- Plastic tablecloth (wipeable): $1–$5
- Wet wipes + paper towels (seriously helpful)
How to Make a Kids’ Vision Board (Step-by-Step)
Step 1: Choose Your Board Size and Layout
For kids, a medium size is easier to fill without feeling overwhelming.
- Best all-around size: 12 in x 18 in
- Classic big board: 20 in x 30 in (great for older kids or a group “family vision board”)
Easy layout ideas:
- Collage style: images anywhere, overlapping allowed
- 4-section grid: “Learn,” “Try,” “Friends/Family,” “Fun”
- Center title + border: big name in the middle, pictures around the edges
Measurement tip: To make a neat grid on a 12 in x 18 in board, lightly mark a vertical line at 9 inches and a horizontal line at 6 inches to create four even rectangles (each about 9 in x 6 in).
Step 2: Add a Background (Optional, but Makes It Look Finished)
If you want a polished, “handmade party decoration” look, cover the board first.
- Scrapbook paper background: Use two 12 in x 12 in sheets; trim to fit and overlap in the center.
- Painted background: Use washable paint in a light color (allow extra dry time).
- Washi tape frame: Create a border about 1/2 inch from the edge.
Step 3: Pick a Theme Kids Can Understand
Vision boards work best when the “vision” feels positive and doable. Encourage kids to choose 1–2 themes.
- Birthday year board: “Things I want to do this year”
- Back-to-school board: “Goals + confidence”
- Party theme board: unicorns, space, sports, beach, Taylor-inspired colors (keep it kid-appropriate)
- Kindness board: “Ways I can help” + “How I want to be treated”
Step 4: Collect Images and Words
Set a timer for 10–15 minutes and let kids flip through magazines or pre-printed sheets.
- Look for pictures: hobbies, foods, animals, places, sports, music, art supplies
- Look for words: “brave,” “try,” “create,” “read,” “team,” “practice,” “fun”
- Add personal items: a photo, ticket stub, or drawing
Beginner-friendly option: Pre-cut a basket of images for younger kids so they can focus on arranging and gluing.
Step 5: Arrange Before You Glue
This is the secret to a board that looks intentional. Have kids place everything first—no glue yet.
- Start with 1–2 “anchor” images (largest pictures)
- Add smaller images around them
- Leave a spot for a title: “My Dream Year,” “Goals,” or their name
Tool tip: Use a ruler to keep titles straight and borders even.
Step 6: Glue Everything Down (Clean and Strong)
Use glue sticks for thin paper and double-sided tape for thicker items. Remind kids: a little glue goes a long way.
- Glue the largest pieces first.
- Work outward with smaller pieces.
- Press each piece for 5–10 seconds to help it bond.
- If paper curls, smooth from the center outward.
Party-friendly rule: Keep glue in the middle of the table and have kids bring their board to the glue station to reduce spills.
Step 7: Add Hand-Lettering and Decorative Details
This is where the board becomes truly personal. Encourage kids to add:
- Name and date (“2026 Vision Board”)
- 3 mini affirmations (“I can learn hard things.” “I am a good friend.” “I keep trying.”)
- Doodles around images (stars, hearts, lightning bolts, flowers)
- Stickers or gems as accents (not covering key words)
Step 8: Finishing and Display Ideas
- Hang with removable strips (foam board works great)
- Punch two holes about 1 inch from the top edge and tie a ribbon hanger (adult help)
- Clip to a string with mini clothespins for a party-style display wall
- Slide into a large folder to take home without bending (perfect for parties)
Pro Tips for a Party-Ready Vision Board Craft
- Prep a “choice bar”: Sort images into trays labeled “Animals,” “Sports,” “Travel,” “Food,” “Words.” Kids decide faster.
- Limit loose glitter: Use glitter glue or glitter washi tape for sparkle without the mess.
- Use a color palette: Pick 2–3 colors that match your party decorations (pastels, rainbow, black/gold, etc.). Boards instantly look cohesive.
- Keep scissors sharp: Dull scissors frustrate kids and cause tearing. Have a couple of “good pairs” available.
- Group management: For 8–12 kids, plan for 2 glue stations and 2 image stations to avoid crowding.
Fun Variations (Beginner to Advanced)
Beginner-Friendly Adaptations
- Sticker-only board: Use themed sticker sheets and big letter stickers (minimal cutting).
- Template board: Lightly draw 6–8 boxes for kids to fill with one image each.
- Picture + caption: Kids glue 5 pictures and write one sentence under each (“I want to learn to swim.”).
Advanced Variations for Older Kids and Tweens
- 3D embellishments: Add foam tape behind some images for a “pop-up” effect.
- Mini bunting banner: Cut triangles 2 in wide x 2.5 in tall, string across the top with baker’s twine.
- Interactive flap board: Create lift-up flaps with washi tape hinges and write goals underneath.
- Photo-transfer style: Print photos in black and white and color-tint them with markers for a cohesive look.
Troubleshooting: Quick Fixes That Save the Day
- Paper is wrinkling: Switch to glue stick or tape runner; use less adhesive; smooth from center outward.
- Pieces won’t stick: Magazines sometimes have slick pages—use double-sided tape, or lightly sand the back with an eraser before gluing.
- Board is bending: Too much liquid glue. Press under a few books with wax paper on top for 10 minutes.
- Kids feel “stuck” creatively: Offer prompt cards: “Something you want to learn,” “A place you want to visit,” “A way to be kind.”
- Mess is spreading: Use a “one item at a time” rule for gems/stickers and keep lids on markers between turns.
Common Crafting Mistakes to Avoid
- Starting with glue immediately: Always arrange first. A 2-minute layout check prevents frustration later.
- Overloading with too many tiny pieces: Kids end up with clutter. Aim for 7–15 items depending on board size.
- Using runny glue for everything: Liquid glue can warp boards and cause slips. Save it for heavier items only.
- Not planning drying/transport: For parties, have folders or bakery boxes ready so boards don’t smear on the way home.
- Accidentally comparing boards: Keep the vibe positive. Every vision board is supposed to look different.
FAQ: Kids’ Vision Boards
1) What should kids put on a vision board?
Kids can include hobbies, places they want to visit, skills they want to learn, favorite books, sports, friendships, acts of kindness, and “feelings goals” like calm, brave, or confident. A mix of pictures and a few simple words works great.
2) Is this a good birthday party craft?
Yes—vision boards are a fantastic DIY party activity because they keep kids engaged and create a take-home item that also works as handmade party decor during the event. Set up an image station, glue station, and decorating station for smooth flow.
3) What’s the least messy adhesive for a group craft?
Glue sticks and a tape runner are the cleanest options. If you’re crafting with younger kids, skip liquid glue unless an adult is helping.
4) How do I make this craft easier for younger kids?
Use smaller boards (8.5 in x 11 in cardstock), provide pre-cut images, and focus on stickers plus simple captions. You can also outline boxes for where pictures go.
5) Can vision boards be reused or updated?
Absolutely. If you use a cork board with push pins (best for older kids), they can swap items anytime. For foam/poster boards, kids can make a “new season” board every few months.
6) How do I turn vision boards into party decorations?
Clip finished boards to a string with mini clothespins, lean them on a mantel or dessert table, or create a “gallery wall” behind the craft table. Match washi tape and sticker colors to your party theme for a cohesive look.
Wrap-Up: Make It, Display It, Celebrate It
A kids’ vision board is the kind of DIY craft that feels like pure fun while quietly building confidence and creativity. Whether you’re hosting a party, planning a rainy-day project, or looking for meaningful handmade decorations, this is a craft kids actually want to keep.
Gather your supplies, set out a few inspiring images, and let each kid’s personality shine on the page. When the boards go up on the wall (or come home in a folder), you’ll see the best part: they’re not just crafts—they’re reminders of what kids care about.
Want more party-ready DIY crafts and creative handmade project ideas? Visit smartpartyprep.com for more easy, fun inspiration you can make and share.
More Articles
 Upcycled Custom Stickers from Recycled Materials
 DIY Thank You Cards Party Favors
 How to Make Party in Infinity Craft: 7 Foolproof Steps (No Modding Skills Needed) + Free Blueprint Pack for Instant Build-Ready Celebrations
 How to Update Settings to Allow 3rd Party Cookies in 2024: A Step-by-Step Fix for Chrome, Safari, Edge & Firefox (No Tech Degree Required)
 Kids' Craft: Beaded Bracelets
 Personalized Centerpieces Gifts
 Budget DIY Dream Catchers Under $20
 Rustic Cake Toppers Ideas
 Advanced Scrapbook Pages for Crafters
 No-Sew Beaded Bracelets Tutorial