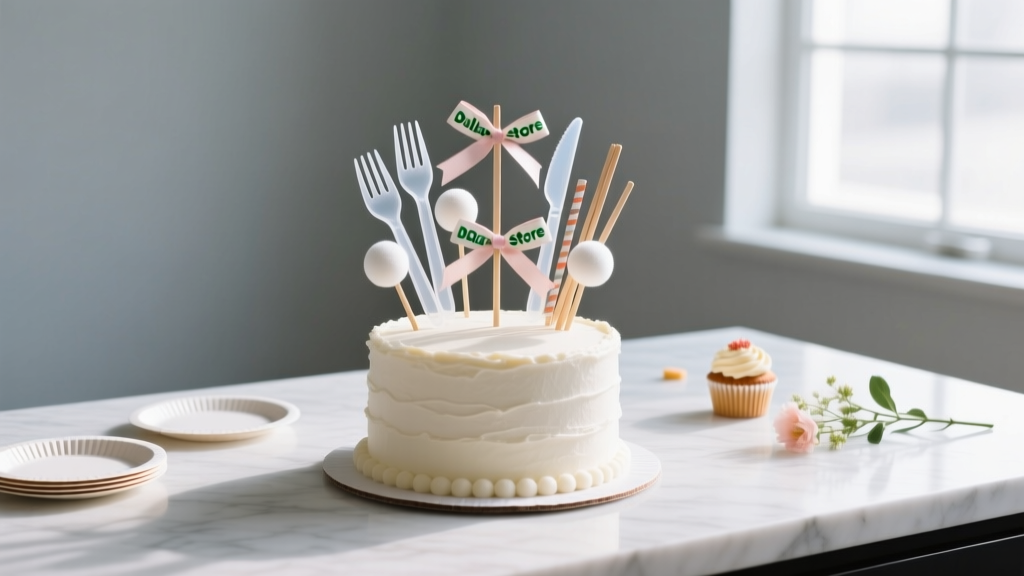
DIY Cake Toppers with Dollar Store Supplies
There’s something extra satisfying about setting a cake on the table and seeing everyone’s eyes go straight to the topper. It’s the tiny detail that makes a dessert feel personalized—like it was made just for that birthday, baby shower, graduation, or “just because” celebration. The best part? You don’t need fancy machines or expensive craft-store runs to make gorgeous DIY cake toppers.
With a quick trip to the dollar store, you can stock up on a few versatile basics—cardstock, skewers, stickers, faux florals, and ribbon—and create party decorations that look boutique-level. These handmade cake toppers are also a great last-minute solution when you forgot to order something custom, or when you want the colors to match your party theme perfectly.
This guide walks you through several easy, beginner-friendly cake topper styles, plus advanced variations if you love detailed crafting. Pick one topper idea or mix and match techniques to build your own signature look.
Project Overview (Skill Level + Time)
- Skill level: Beginner to Intermediate (advanced variations included)
- Time needed:
- Simple topper: 15–30 minutes
- Layered/shaker topper: 45–75 minutes
- Floral topper: 20–40 minutes
- Dry time: 10–20 minutes for glue (longer if using hot glue on heavier elements)
- Best for: Birthdays, weddings, baby showers, graduation parties, themed parties, anniversaries
Dollar Store Materials List (with Estimated Costs)
Prices vary by store, but these are typical “Dollar Tree / dollar store” ranges. Many items make multiple toppers, so your cost per topper can be as low as $0.50–$2.00.
Core Supplies (Most Toppers)
- Cardstock paper (8.5" x 11" packs or single sheets) – $1.25–$3.00
- Wooden skewers (8"–12") or craft sticks – $1.25
- Double-sided tape or glue dots – $1.25–$2.50
- Hot glue gun + glue sticks (optional but helpful) – $3.00–$8.00
- Scissors (or precision scissors) – $1.25–$4.00
- Clear tape (for quick reinforcement) – $1.25
Decorative Add-Ons (Pick Your Style)
- Foam letter stickers or vinyl letter stickers – $1.25
- Glitter paper or glitter foam sheets – $1.25–$2.50
- Mini party banners / cake bunting kits (if available) – $1.25
- Faux flowers (small blooms) – $1.25–$3.00
- Ribbon (3/8" or 5/8" works great) – $1.25
- Confetti or sequins (for shaker toppers) – $1.25
- Clear plastic sheets (often sold as report covers) – $1.25
- Small party picks (themed packs) – $1.25
Tool Recommendations (Worth Having)
- Craft knife + cutting mat (for clean windows and detailed cuts)
- Hole punch (for garlands or mini bunting)
- Ruler (12") for straight lines and spacing
- Mini clothespins (helpful “clamps” while glue sets)
Before You Start: Sizing + Food-Safe Tips
Suggested Cake Topper Measurements
- 6" round cake: topper width 4"–5"
- 8" round cake: topper width 5"–6.5"
- Sheet cake (9" x 13"): topper width 6"–8"
- Pick height (stick portion): 3"–5" inserted into cake
Keep It Food-Friendly
- Wrap the part of the skewer that goes into the cake with clear tape or a straw for a cleaner barrier.
- Don’t push bare paper directly into frosting if you can avoid it—use a skewer/stick.
- If the topper will touch the cake surface, consider backing it with clear plastic (cut from a report cover) or a second layer of cardstock.
DIY Cake Topper #1: Classic Name or Phrase Topper (Fast + Custom)
This is the go-to DIY cake topper for birthdays and milestone parties. It looks polished and photographs beautifully.
What You’ll Need
- Cardstock (solid color or patterned)
- Foam/vinyl letter stickers OR printed letters
- 2 wooden skewers (8"–12")
- Double-sided tape or glue dots (hot glue optional)
- Scissors
Step-by-Step Instructions
- Plan your wording. Keep it short for the cleanest look: “HAPPY BIRTHDAY,” “ONE,” “BABY,” “MR & MRS,” “GRAD.”
- Cut a topper base. For an 8" cake, cut a rectangle or arch shape around 6" wide x 3" tall. Rounded corners make it look more professional.
- Add letters.
- If using stickers, measure and center your phrase first (light pencil marks help).
- If printing, print letters in a bold font, trim, and attach with double-sided tape.
- Reinforce the back (recommended). Cut a second piece of cardstock the same size and sandwich the skewers between layers. This prevents wobbling.
- Attach skewers. Position skewers 2.5"–4" apart, with at least 1.5" of skewer glued behind the topper. Use hot glue for a strong hold, or layers of double-sided tape plus clear tape for extra security.
- Let it set. Wait 10 minutes before inserting into the cake.
Quick Style Upgrade
- Add a 1/8" border by cutting a second base slightly larger in a contrasting color.
- Use glitter foam for the base and matte letters on top for a modern finish.
DIY Cake Topper #2: Layered Silhouette Topper (High-End Look)
Layered toppers are perfect when you want “store-bought” impact using simple dollar store craft supplies.
What You’ll Need
- 2–3 colors of cardstock (or cardstock + glitter foam)
- Printable template (optional) or hand-drawn shape
- Foam tape squares (or stack small pieces of cardstock)
- 2 skewers
- Scissors or craft knife
Step-by-Step Instructions
- Choose a shape. Great options: stars, hearts, crown, dinosaur, butterfly, teddy bear, graduation cap.
- Make a template. Draw a shape about 5" wide x 4" tall (for an 8" cake). Cut it out and trace it onto cardstock.
- Cut 2–3 layers.
- Bottom layer: solid color
- Middle layer: contrasting color (slightly smaller)
- Top layer: name/number (smallest)
- Build dimension. Use foam tape squares between layers, especially behind the top detail.
- Attach skewers. Sandwich skewers behind the bottom layer using hot glue, then cover with an extra cardstock piece if you want a super clean back.
DIY Cake Topper #3: Shaker Cake Topper (Confetti Window)
If you love sparkle and movement, a shaker topper is a party decoration that always gets compliments. It’s a little more detailed, but still totally doable with dollar store supplies.
What You’ll Need
- Cardstock (2 pieces for front/back)
- Clear plastic sheet (from a report cover)
- Confetti or sequins
- Foam tape (to create the “wall”)
- 2 skewers
- Scissors/craft knife, ruler
Step-by-Step Instructions
- Create a frame. Cut a rectangle about 6" x 3.5". Cut an inner window leaving a 1/2" border around the edges.
- Add the clear window. Tape or glue the plastic sheet behind the frame, covering the window completely.
- Build the shaker wall. Line the back of the frame with foam tape along all edges. Make sure there are no gaps.
- Add confetti. Sprinkle in a small amount (about 1/2 teaspoon). Less is better—too much stops it from shaking.
- Seal the back. Place a matching cardstock rectangle on top and press firmly all the way around.
- Attach skewers. Glue skewers to the back and reinforce with tape.
DIY Cake Topper #4: Floral Spray Topper (Elegant + Fast)
For bridal showers, weddings, anniversaries, and “grown-up” birthdays, faux florals instantly elevate a cake.
What You’ll Need
- Small faux flower stems (choose 2–4 blooms)
- Floral tape or clear tape
- 1–2 wooden skewers
- Ribbon (optional)
- Wire cutters (or strong scissors)
Step-by-Step Instructions
- Trim blooms. Cut flowers down to 4"–6" stems. Remove extra leaves for a cleaner look.
- Create a mini bouquet. Arrange in a fan shape about 4"–5" wide.
- Secure the stems. Wrap with floral tape or clear tape tightly.
- Add a skewer support. Tape a skewer along the wrapped stem bundle for stability.
- Finish with ribbon. Tie a small bow about 1" above where the skewer enters the cake.
Pro Tips for Clean, Professional Results
- Double-layer your topper. Sandwiching skewers between two cardstock layers prevents bending and hides glue.
- Use the “odd number” rule for flowers. 3 blooms often looks more natural than 2 or 4.
- Keep weight balanced. If your topper is wider than 6.5", use two skewers and position them closer to the edges.
- Match party colors. Bring a napkin or invitation to the store and match cardstock/ribbon for cohesive party decorations.
- Make it photo-friendly. Use bold fonts, simple shapes, and high contrast (gold on white, black on pastel, etc.).
Fun Variations (Beginner-Friendly and Advanced)
Beginner-Friendly Adaptations
- Themed party picks upgrade: Buy a pack of themed cupcake picks and attach them to a cardstock banner for a quick custom look.
- Number topper: Cut a large “1”–“9” about 4.5" tall, back it with a second layer, and add mini stars.
- Mini bunting topper: Cut 6–8 triangles 1" wide x 1.25" tall, string on thread, and tie between two skewers.
Advanced Variations
- 3D rolled paper flowers: Cut spiral flowers from cardstock and glue onto a topper base.
- Ombre glitter effect: Use glue and fine glitter (or glitter paper strips) concentrated at the bottom fading upward.
- Layered shadowbox letters: Use foam tape behind each letter so it “floats” above the base.
Troubleshooting: Fixes for Common Issues
- Topper keeps leaning forward:
- Push skewers deeper (aim for 4"–5" in cake for tall toppers)
- Switch to thicker skewers or add a third support stick
- Reduce heavy decorations on the top edge
- Cardstock is curling:
- Use less wet glue; switch to glue dots or double-sided tape
- Press under a book for 5–10 minutes
- Double-layer with another cardstock piece
- Shaker topper leaks confetti:
- Add foam tape to any gaps, especially corners
- Press and seal all edges firmly before attaching skewers
- Letters look crooked:
- Draw a light pencil guideline across the base
- Place the center letter first, then work outward
Common Crafting Mistakes to Avoid
- Making the topper too big for the cake. A topper wider than the cake can look awkward and tip easily. Stay within 70–85% of cake width.
- Using only one thin layer of paper. Single-layer cardstock bends—especially in humid kitchens. Double-layer for sturdiness.
- Overloading with heavy decorations. Too many gems, thick foam shapes, or large flowers can pull the topper forward.
- Skipping a clean stick finish. Tape-wrapping the part that enters the cake keeps things neat and more food-friendly.
- Hot gluing directly onto delicate glitter paper. It can melt or warp. Use glue dots for glitter paper, or hot glue on the non-glitter side.
FAQ: DIY Cake Toppers with Dollar Store Supplies
1) Can I make DIY cake toppers the night before?
Yes. Make them the night before and store flat in a dry spot. If you used hot glue, give it 20–30 minutes to fully set before stacking or packing.
2) What’s the best adhesive for cake toppers?
For cardstock-to-cardstock, double-sided tape and glue dots are clean and fast. For skewers and heavier items (flowers, foam shapes), hot glue is the most secure.
3) How do I keep the topper from wobbling in the cake?
Use two skewers spaced 2.5"–4" apart, and insert them at least 3"–5" into the cake. For tall toppers, add a third support in the center.
4) Can I use these toppers for cupcakes too?
Absolutely. Scale the design down to about 2"–2.5" wide and use shorter picks. You can even make a matching set of cupcake toppers and a larger cake topper for a coordinated dessert table.
5) What if my dollar store doesn’t have specific supplies like foam tape?
You can substitute by stacking small pieces of cardstock with double-sided tape to create dimension, or use rolled strips of cardstock as spacers for shaker walls.
6) Are DIY cake toppers safe for outdoor parties?
They can be, but wind and humidity are the enemies. Use thicker cardstock, double-layer everything, and avoid lightweight toppers that catch wind (like large bunted flags). Transport in a flat container so they don’t bend.
Make Your Party Extra Personal
DIY cake toppers are one of the easiest handmade projects to customize for any theme—boho, princess, sports, jungle, retro, minimalist, you name it. With a few dollar store basics and a little creativity, you’ll have a cake decoration that looks thoughtful, coordinates with your party décor, and feels truly one-of-a-kind.
Try one style for your next celebration, then save your leftover supplies for matching cupcake toppers, party banners, and centerpieces. For more budget-friendly DIY crafts, party decorations, and handmade project ideas, explore more tutorials on smartpartyprep.com.
More Articles
 Seasonal Origami Decorations Ideas
 Personalized Confetti Gifts
 Does Hasbro Hate Third Party Transformers? The Truth Behind Licensing, Cease-and-Desists, and Why Fans Keep Building Anyway — A Deep Dive for Customizers, Collectors & Makers
 DIY Resin Jewelry for Weddings
 How to Turn On 3rd Party Cookies in 2024: A Step-by-Step Guide for Chrome, Safari, Firefox & Edge (Without Breaking Your Privacy or Site Functionality)
 How to Accept 3rd Party Cookies on Mac in 2024: A Step-by-Step Safari & Chrome Guide (No Tech Degree Required)
 How to Enable Third Party Cookies on iPhone in 2024: The Real Truth (Spoiler: You Can’t — But Here’s What Actually Works Instead)
 Personalized Favor Bags Gifts
 Upcycled Thank You Cards from Recycled Materials
 Easy Photo Booth Props for Beginners