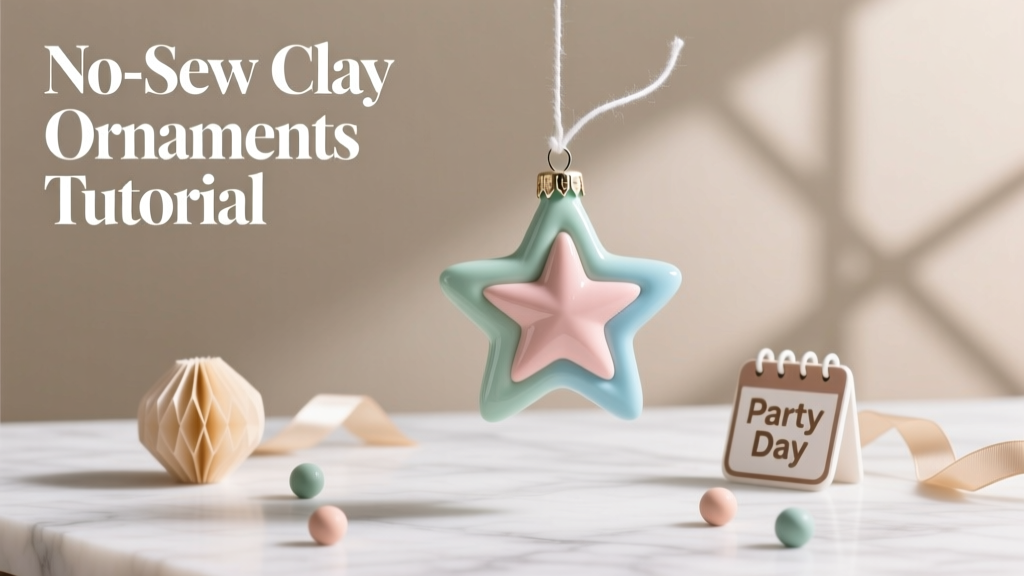
No-Sew Clay Ornaments Tutorial
Handmade ornaments have a special kind of magic: they look charming on a tree, dress up a party backdrop, and instantly make a space feel personal. The best part? You don’t need a sewing kit, fancy tools, or years of crafting experience to make them. With a little clay and a few everyday supplies, you can create custom decorations that match your party theme, holiday color palette, or gift wrapping style.
This no-sew clay ornaments tutorial is perfect for DIY enthusiasts who love practical projects with big visual payoff. Make a batch for a winter birthday, a holiday cookie exchange, a New Year’s party centerpiece, or even as place cards for a dinner party. They’re also a thoughtful handmade project for gifting—especially when you add names, dates, or short messages.
Whether you’re crafting solo with a cozy playlist or hosting a “decorate your own ornament” craft station at your party, these ornaments are designed to be beginner-friendly, low-mess, and easy to customize.
Project Overview (Skill Level, Time, and What You’ll Make)
- Skill level: Beginner (easy), with optional advanced variations
- Estimated time:
- Prep + shaping: 30–60 minutes (depending on batch size)
- Drying/curing: 24–72 hours (air-dry clay) OR 15–30 minutes (oven-bake clay, depending on brand/thickness)
- Painting + sealing: 30–90 minutes (plus dry time)
- Batch size: 10–16 ornaments from a 1 lb block (varies by thickness and size)
- Finished ornament size: Recommended 3–4 inches wide, about 1/8–1/4 inch thick
Materials and Estimated Costs
Below is a practical supply list with product types that work well for DIY party decorations and handmade ornaments. Costs are estimates and vary by brand and location.
Clay Options
- Air-dry clay (recommended for beginners): 1–2 lb package. Great for easy, no-oven crafting.
- Estimated cost: $8–$18
- Notes: Shrinks slightly and needs patience for drying.
- Oven-bake polymer clay (advanced, durable details): 1–2 blocks (2 oz each) or a larger pack.
- Estimated cost: $3–$15+
- Notes: Holds crisp details; requires baking (follow package directions).
Must-Have Tools
- Rolling pin: Acrylic rolling pin or a smooth kitchen rolling pin ($6–$15)
- Thickness guides: Two paint stir sticks, two pencils, or two 1/8-inch craft sticks (free–$3)
- Clay cutters: Cookie cutters (stars, circles, trees, hearts) ($4–$12)
- Hole-making tool: Drinking straw, skewer, or 1/4-inch straw for ribbon holes (free–$2)
- Smooth surface: Silicone baking mat, parchment paper, or ceramic tile ($3–$10)
- Sanding sponge or fine sandpaper: 220–400 grit ($3–$8)
Decorating Supplies
- Acrylic craft paint: Metallic gold/silver, white, black, and 1–2 theme colors ($1–$2 per bottle)
- Paint brushes: One flat brush (1/2 inch) + one detail brush ($5–$10 set)
- Paint pen (optional): For names and fine lines ($3–$6)
- Glitter (optional): Fine glitter for party sparkle ($3–$6)
- Sealer: Water-based matte or gloss sealer/spray (choose one) ($6–$12)
Hanging and Finishing
- Ribbon, twine, or velvet cord: 1/8–1/4 inch wide ribbon looks polished ($3–$10)
- Jump rings or ornament hooks (optional): Helpful for heavier ornaments ($3–$8)
Party-Friendly Add-Ons (Optional)
- Letter stamps: For names or dates ($8–$20)
- Texture tools: Lace scrap, leaf, rubber stamp, or textured rolling pin ($0–$20)
Step-by-Step: No-Sew Clay Ornaments
Step 1: Prep Your Work Area
- Cover your surface with a silicone mat or parchment paper.
- Set out a small dish of water (for smoothing air-dry clay) and a dry cloth/paper towels.
- Decide your ornament sizes:
- Party backdrop ornaments: 4 inches (reads well from a distance)
- Gift topper ornaments: 2.5–3 inches
- Place card ornaments: 3 inches with a flat area for names
Step 2: Condition and Roll the Clay
- Knead the clay for 1–2 minutes until pliable (especially important for polymer clay).
- Place thickness guides on either side of the clay:
- Recommended thickness: 1/8 inch for lighter ornaments, 1/4 inch for sturdier ornaments.
- Roll evenly with a rolling pin, keeping pressure consistent.
Step 3: Cut Out Your Ornament Shapes
- Press cookie cutters firmly straight down to avoid ragged edges.
- Lift the excess clay away first, then gently remove the cut shapes.
- If edges look rough, smooth them with a slightly damp fingertip (air-dry) or a gentle rub (polymer clay).
Step 4: Add the Hanging Hole
- Use a straw to punch a hole near the top:
- Placement: About 1/4 inch from the top edge
- Hole size: 1/8–1/4 inch (choose based on ribbon thickness)
- Twist the straw slightly as you lift to remove a clean plug.
- For heavier ornaments, consider two holes for a tied “loop” hanger.
Step 5: Add Texture or Details (Optional but So Fun)
- Texture press: Press lace, a leaf, or a textured stamp into the surface for instant pattern.
- Name stamping: Press letter stamps evenly (practice spacing on a scrap first).
- Embossed lines: Use the dull side of a butter knife or a clay tool to draw stripes, snowflakes, or confetti shapes.
Step 6: Dry or Bake the Ornaments
If Using Air-Dry Clay
- Place ornaments on parchment and let dry flat for 24 hours.
- Flip carefully and dry another 24–48 hours, depending on thickness and humidity.
- To help prevent curling, dry on a flat, breathable surface and keep thickness consistent.
If Using Polymer Clay
- Transfer shapes to a baking sheet lined with parchment.
- Bake according to package directions (commonly 275°F for 15–30 minutes, depending on thickness).
- Cool completely before painting or sealing.
Step 7: Smooth and Sand (For a Polished Finish)
- Once fully dry/cured, lightly sand edges and flat areas with 220–400 grit sandpaper.
- Wipe dust with a dry cloth (or a slightly damp cloth for air-dry clay, then allow to dry again).
Step 8: Paint, Decorate, and Add Party-Perfect Style
Choose a look that matches your party decorations—metallics for glam, pastel for baby showers, bold brights for birthdays, or classic red/green for holiday gatherings.
- Base coat: Paint one side with acrylic paint. Let dry 10–20 minutes, then paint the other side.
- Design ideas:
- Confetti dots (use the end of a pencil eraser as a dot stamp)
- Modern color-blocking (masking tape helps crisp lines)
- Monograms or names (use a paint pen after base coat dries)
- Metallic edge paint (flat brush + steady hand)
- Optional sparkle: Add glitter to wet paint or brush on glue, then sprinkle glitter and tap off excess.
Step 9: Seal and String
- Seal with a water-based matte sealer for a modern look or gloss for shiny party flair.
- Let dry fully (follow sealer instructions—often 1–2 hours for handling, 24 hours for full cure).
- Thread ribbon or twine through the hole:
- Ribbon length: 10–12 inches per ornament for a nice loop and bow
- For a clean finish, tie a knot, then a bow, or use an ornament hook.
Pro Tips for Great Results
- Keep thickness consistent: Uneven clay is the #1 cause of warping and cracks.
- Make clean holes: Punch the hole before drying/baking and keep it at least 1/4 inch from the edge.
- Batch by theme: Create 3–4 coordinating designs so your DIY party decorations look intentional.
- Test paint + sealer: Some sealers can slightly deepen colors. Try on a scrap piece first.
- Use a tile for super smooth drying: A ceramic tile helps ornaments dry flatter (especially for air-dry).
Fun Variations (Beginner-Friendly to Advanced)
Beginner Variations
- One-color minimal ornaments: Paint a single matte color, then add a name with a paint pen.
- Stamped texture only: Skip painting; seal the natural clay for a neutral, farmhouse look.
- Confetti party ornaments: Bright dots + metallic accents for birthday party decor.
Advanced Variations
- Two-layer stacked ornaments: Cut a smaller shape and glue it on top after drying (use strong craft glue).
- Raised details with clay “frosting”: Roll thin coils and add borders, swirls, or scallops (best with polymer clay).
- Photo transfer look: Use printed tissue or decoupage techniques (seal well; test first).
- Gold leaf accents: Apply adhesive size and gold leaf for an upscale handmade decoration vibe.
Troubleshooting: Quick Fixes for Common Issues
- Ornament is curling/warping (air-dry):
- Cause: Uneven thickness or drying too fast on one side.
- Fix: Flip every few hours early in the drying process; dry on a flat surface; use thickness guides.
- Cracks appeared while drying:
- Cause: Clay too dry, rolled too thin, or dried too quickly.
- Fix: Fill hairline cracks with a little fresh clay or lightweight spackle, sand smooth, repaint.
- Hole tore or looks rough:
- Cause: Hole too close to edge or clay too thin.
- Fix: Enlarge hole slightly and add a jump ring; for future ornaments, keep 1/4 inch margin.
- Paint looks streaky:
- Cause: Thin paint or porous clay surface.
- Fix: Apply two thin coats; use a white base coat for bright colors.
- Sealer feels sticky:
- Cause: Too thick a coat or humid drying conditions.
- Fix: Let cure longer; apply thinner coats next time; use a water-based sealer compatible with your clay type.
Common Crafting Mistakes to Avoid
- Skipping thickness guides: Freehand rolling often leads to weak spots and warping.
- Making ornaments too thin: Anything under 1/8 inch can snap easily, especially in larger shapes.
- Placing the hanging hole too close to the edge: It can crack when you tie ribbon or hang it.
- Painting before the clay is fully dry: Trapped moisture can cause bubbles, cracking, or peeling paint.
- Overloading with heavy embellishments: Large gems can pull off; if you want bling, seal well and use strong glue.
- Not sealing party ornaments: Sealer helps prevent fingerprints, scuffs, and paint transfer—especially if guests handle them.
FAQ: No-Sew Clay Ornaments
1) What clay is best for beginners making DIY ornaments?
Air-dry clay is the easiest beginner option because you don’t need an oven. If you want sharper details and extra durability, polymer clay is a great upgrade—just follow baking instructions carefully.
2) How do I keep air-dry clay ornaments from warping?
Roll evenly (use thickness guides), dry on a flat surface, and flip the ornaments after the first 12–24 hours. Avoid placing them near heaters or direct sun, which can dry one side too fast.
3) Can I make these as party favors or a craft station?
Yes—this is a fantastic party craft idea. Pre-roll and pre-cut shapes for guests, then let them stamp names, add texture, and paint. For quick events, use polymer clay in advance and offer decorating only, or use air-dry clay and plan a “take home to dry” setup.
4) What size hole should I make for ribbon?
For most 1/8–1/4 inch ribbons, a hole made with a standard drinking straw works well. If you’re using thicker twine or velvet cord, test and enlarge slightly with a skewer before the clay dries.
5) Do I have to seal clay ornaments?
Sealing is strongly recommended for handmade decorations that will be handled, stored, or used as party decor. A water-based matte or gloss sealer helps protect paint and makes the ornaments last longer.
6) How should I store finished ornaments?
Store them flat in a sturdy box with tissue paper between layers. If you used air-dry clay, keep them away from damp areas to prevent softening over time.
Make a Batch and Make It Yours
These no-sew clay ornaments are one of those DIY crafts that feel both relaxing and rewarding—you start with a simple slab of clay and end with custom party decorations you can actually use. Try a small set first, then build a themed collection for holidays, birthdays, bridal showers, or a cozy winter gathering.
If you make a batch, switch up your shapes, colors, and textures until they feel like “you.” That’s the joy of handmade projects: no two ornaments have to match perfectly, and they’ll still look amazing together.
Want more party-ready DIY craft ideas and handmade decoration tutorials? Browse more creative projects on smartpartyprep.com and keep the inspiration going.
More Articles
 Seasonal Paper Flowers Ideas
 How to Make Confetti at Home
 DIY Greeting Cards Party Favors
 DIY Party Banners Using Cricut
 DIY Dream Catchers Party Favors
 How to Make a Party Hat Out of Paper in Under 12 Minutes (No Glue Gun, No Scissors Required — Just Printer Paper & Tape)
 Upcycled Wall Art from Recycled Materials
 How to Do a 3rd Party Removal Spell: A Step-by-Step, Ethically Grounded Ritual (No Ouija Boards, No Curses, Just Clarity & Consent)
 DIY Thank You Cards Party Favors
 How to Enable Third Party Cookies on Mac: A Step-by-Step Safari & Chrome Fix (2024 Verified — No More 'Blocked' Errors or Broken Logins)