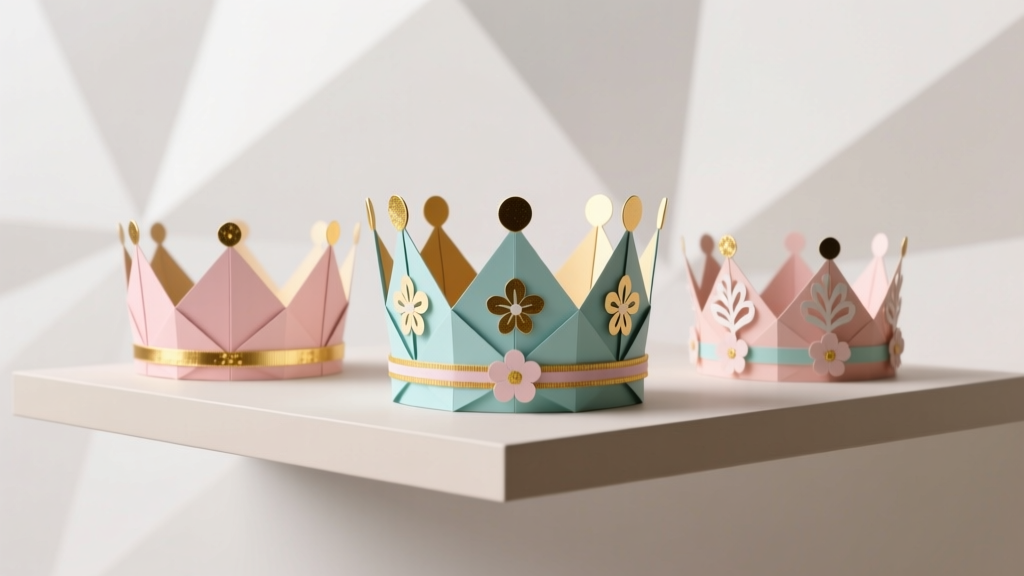
Paper Craft Crowns Ideas
Paper craft crowns are one of those magical DIY party decorations that feel fancy, but come together with simple supplies and a little creativity. Whether you’re planning a birthday party, princess-themed playdate, baby shower, New Year’s celebration, or a classroom event, handmade crowns add instant “wow” to the table—without the price tag of store-bought accessories.
They’re also wonderfully flexible: you can make them kid-friendly and quick (think crayons + stickers), or elevate them into photo-ready statement pieces with metallic cardstock, faux florals, and layered details. Best of all, paper crowns are easy to customize for party themes, color palettes, and even guest names—making them a fun craft activity and a take-home favor in one.
This guide is packed with paper craft crown ideas, practical measurements, step-by-step instructions, and troubleshooting help so you can confidently create crowns that fit well, look great, and survive a full party day of dancing, cake, and photos.
Skill Level, Time & What You’ll Make
- Skill level: Beginner to Advanced (options included)
- Time estimate per crown:
- Quick kids’ crown: 10–15 minutes
- Polished party crown: 20–35 minutes
- Elaborate statement crown: 45–60 minutes
- Best uses: DIY party decorations, photo booth props, birthday accessories, party favors, themed party crafts
Materials List (With Specific Types & Estimated Costs)
You can keep this project budget-friendly or go deluxe. Here are reliable materials that work well for sturdy, comfortable crowns.
Paper & Structure
- Cardstock (8.5 x 11 in, 65–110 lb) — best all-around for crowns; choose solid colors or white for decorating. Estimated cost: $6–$12 per 50–100 sheets.
- Metallic or glitter cardstock — great for “royal” shine (use glitter cardstock that doesn’t shed if possible). Estimated cost: $8–$15 per 20–50 sheets.
- Scrapbook paper (12 x 12 in) — ideal for patterns and themed party colors. Estimated cost: $0.50–$1.50 per sheet or $10–$20 per pad.
- Optional reinforcement: thin chipboard strips (cereal box cardboard) or 1/2 in wide cardstock band. Estimated cost: free–$5.
Adhesives
- Double-sided tape (strong) — clean, fast, holds well. Estimated cost: $4–$8.
- Glue stick — good for lightweight decorations (not the main seam). Estimated cost: $1–$3.
- Tacky glue — strong hold; allow drying time. Estimated cost: $3–$6.
- Low-temp hot glue gun + glue sticks — best for gems, trims, faux flowers. Estimated cost: $10–$20 for gun, $3–$6 for sticks.
Decorations (Pick Your Theme)
- Self-adhesive rhinestones or gem stickers — easiest for kids. Estimated cost: $3–$10.
- Sequins, confetti, or paper shapes — fun for party sparkle. Estimated cost: $2–$6.
- Ribbon (3/8 in to 1 in wide) — for ties or trim. Estimated cost: $2–$8.
- Pom-poms — adorable for kids’ crowns. Estimated cost: $3–$8.
- Faux flowers/greenery — for boho or garden party crowns. Estimated cost: $5–$15.
- Foam stickers/letter stickers — perfect for names. Estimated cost: $2–$8.
Tools (Recommended)
- Scissors (sharp craft scissors) — $5–$15
- Paper trimmer — helps make straight, clean bands — $15–$35
- Ruler (at least 12 in) — $2–$8
- Pencil + eraser — $1–$3
- Hole punch (optional for ribbon ties) — $5–$12
- Corner rounder punch (optional for comfort) — $6–$15
Before You Start: Crown Sizing & Measurements
A crown looks best when it sits comfortably and doesn’t pinch. Use these head circumference guidelines, then build an adjustable band.
- Toddler: 18–19.5 in (46–50 cm)
- Child: 19.5–21 in (50–53 cm)
- Teen/Adult: 21–23 in (53–58 cm)
Easy adjustable band method: Make the crown band in two overlapping pieces so you can widen or tighten it.
- Cut two strips of cardstock: 2 in tall by 12 in long each.
- Overlap them by 2–4 inches depending on the head size.
- Secure with strong double-sided tape or staples (then cover staples with a decorative strip).
5 Paper Craft Crown Ideas (With Step-by-Step Instructions)
1) Classic Pointed “Royal” Crown (Great All-Around Party Crown)
Best for: birthdays, kings/queens, fairy tales, photo booth props
Skill level: Beginner
Time: 20–30 minutes
Cut Measurements
- Band: two strips 2 in x 12 in cardstock (or one long strip if you have 12 x 12 paper)
- Crown top: one strip 4.5 in tall x 12 in long cardstock
Steps
- Make the band: Overlap the two 2 in x 12 in strips to fit the wearer’s head. Tape firmly. Set aside.
- Create the points: On the 4.5 in x 12 in strip, mark points across the top edge. A simple pattern is 5 points:
- Measure 12 in length and mark every 2.4 in (12 ÷ 5).
- At each mark, draw a triangle point rising to the top edge.
- Cut the crown top: Cut along your triangle lines with scissors.
- Attach crown top to band: Tape or glue the bottom edge of the pointed strip onto the band, aligning edges. For extra strength, use a thin bead of tacky glue and hold for 30–60 seconds.
- Decorate: Add gem stickers at the base of each point, plus a centerpiece gem in front.
2) Scalloped “Princess” Crown (Soft, Elegant Look)
Best for: princess themes, tea parties, baby showers
Skill level: Beginner–Intermediate
Time: 25–35 minutes
Cut Measurements
- Band: two strips 2 in x 12 in
- Crown top: one strip 4 in x 12 in
Steps
- Make and size the band using the adjustable overlap method.
- Draw scallops: Along the top edge of the 4 in tall strip, trace connected half-circles. A simple way:
- Use a round object (like a small cup) to trace scallops that are about 2 in wide.
- Cut the scallops carefully. If you have a corner rounder punch, round any sharp corners for comfort.
- Layer for a luxe look (optional): Cut a second scalloped strip from metallic paper that is 1/4 in shorter in height and glue it on top as a highlight.
- Attach to the band with strong tape or tacky glue.
- Add details: Stick pearls or rhinestones along each scallop peak.
3) Name + Number Birthday Crown (Perfect for Party Photos)
Best for: milestone birthdays, first birthdays, themed parties
Skill level: Beginner
Time: 15–25 minutes
Cut Measurements
- Band: 2.25 in tall (slightly taller looks more “birthday”) x adjustable length (two 12 in strips)
- Front badge circle: 3.5 in diameter (cut 1–2 circles for layering)
Steps
- Build the band and size it first.
- Create a badge: Cut a 3.5 in circle (and an optional second circle in a contrasting color at 3.75 in for a border).
- Add the number: Use sticker numbers or cut a number from cardstock (roughly 2–2.5 in tall).
- Add the name: Letter stickers work best. Keep the name line under 3 in wide to fit the badge.
- Attach badge to crown: Use foam tape for a 3D look or strong double-sided tape for flatter comfort.
- Finish with party flair: Add mini stars, confetti shapes, or a small ribbon bow on one side.
4) Floral Paper Crown (Boho/Garden Party Favorite)
Best for: bridal showers, garden parties, spring birthdays, photo backdrops
Skill level: Intermediate
Time: 35–60 minutes
Cut Measurements
- Band: 1.75–2 in tall x adjustable length
- Optional leaf garland strip: 1 in x 12 in (cut leaf fringe into it)
Steps
- Create a sturdy band: Use heavier cardstock (100–110 lb) or reinforce the inside with a second band strip.
- Plan flower placement: Dry-fit faux flowers across the front half of the crown so it doesn’t feel heavy at the back.
- Attach greenery first: Hot glue faux leaves or a paper leaf fringe strip along the front.
- Glue flowers in layers: Start with larger blooms, then fill gaps with smaller flowers. Keep the tallest flowers centered for balance.
- Comfort check: Make sure glue doesn’t form hard bumps on the inside. Cover any rough spots with a thin cardstock strip or ribbon.
5) Animal or Dinosaur Spikes Crown (Kid Party Hit)
Best for: dinosaur parties, jungle themes, costume parties
Skill level: Beginner–Intermediate
Time: 20–35 minutes
Cut Measurements
- Band: 2 in tall x adjustable length
- Spikes: cut 8–12 triangles, each about 2 in tall x 1.5 in wide
Steps
- Assemble the band and size it.
- Cut spikes from contrasting cardstock (green spikes on a brown band look great for dinos).
- Attach spikes: Glue or tape spikes along the top edge, spacing about 1/2 in apart.
- Add scales or spots: Use dot stickers, cut paper circles, or marker patterns.
- Optional eye details: Glue two paper circles and draw pupils for a fun character look.
Pro Tips for Sturdy, Comfortable Paper Crowns
- Use strong tape for the main seam: Glue sticks are great for decorating but often pop open at the seam.
- Round the band corners: Trim the two ends into gentle curves so they don’t poke behind ears.
- Reinforce for energetic parties: Add a second inner band strip (same size) glued inside for a thicker “headband” feel.
- Make it adjustable for groups: Create a “tab” system by cutting 1 in slits every 1/2 in on one end and a matching tab on the other end.
- Keep heavy embellishments on the front half: It helps the crown sit straight and avoids tipping backward.
Beginner-Friendly Adaptations & Advanced Variations
Beginner Options
- Sticker-only decorating: Pre-cut the crown shapes and let kids add foam stickers, gem stickers, and crayons.
- Pre-tape the band seam: Adults can size and secure the band first; kids decorate afterward.
- Use printable templates: Draw one crown shape, trace it for multiples, and keep your party prep fast.
Advanced Variations
- Layered crown silhouette: Cut a pointed crown in metallic cardstock and mount it on a slightly taller base crown in a solid color (offset by 1/8–1/4 in for a shadow effect).
- 3D cutouts: Add raised shapes with foam tape (stars, hearts, themed icons).
- Paper quilling accents: Use tight coils as “jewels” for a handmade boutique look.
- Translucent vellum windows: Cut window shapes and tape vellum behind for a modern lantern-style crown.
Troubleshooting: Fix Common Crown Problems Fast
- Crown keeps slipping down: Tighten the band by 1/2 in. Add a small piece of double-sided tape inside the band at the forehead (it grips hair gently).
- Crown pops open at the seam: Switch to strong double-sided tape or add a 1 in x 3 in cardstock “patch” across the seam on the inside.
- Crown feels scratchy: Cover the inner seam with a strip of ribbon or smooth cardstock.
- Points flop over: Use heavier cardstock (100–110 lb) or glue a second layer behind the points.
- Glitter shedding everywhere: Use no-shed glitter cardstock or seal lightly with a clear craft sealer outdoors (test first).
Common Crafting Mistakes to Avoid
- Skipping a quick head measurement: Even a pretty crown won’t get worn if it’s too tight or too loose.
- Using weak adhesive on the main join: Save glue sticks for decorations; use strong tape or tacky glue for structure.
- Making the band too thin: Bands under 1.5 in often crease and roll. Aim for 1.75–2.25 in tall for stability.
- Adding bulky decorations at the back: It can tip the crown and poke when sitting against a chair.
- Not letting glue dry before wearing: Tacky glue needs a few minutes; otherwise pieces slide and look messy.
FAQ: Paper Craft Crowns
How do I make paper crowns that actually last through a party?
Use medium-to-heavy cardstock (65–110 lb), reinforce the band with a second inner strip, and secure the seam with strong double-sided tape. Keep heavy embellishments toward the front and avoid overloading the points.
What’s the best paper for a crown—cardstock or construction paper?
Cardstock is best for DIY party crowns because it holds shape and resists creasing. Construction paper works for quick kids’ crafts, but it’s more likely to droop or tear, especially with lots of decorations.
How do I size crowns for a group without measuring everyone?
Make adjustable bands: cut two 2 in x 12 in strips and overlap them by 2–4 in. For kids’ parties, aim for a finished size around 20 in and adjust as needed.
Can I prep paper crowns ahead of time?
Yes. Assemble the crown bases 1–7 days ahead and store them flat in a box. Add 3D decorations (flowers, tall toppers) the day before or the morning of the party to prevent crushing.
What’s a no-mess option for crafting with kids?
Use pre-cut crown bases, sticker gems, foam stickers, and crayons/markers. Skip loose glitter and liquid glue; use double-sided tape tabs if you need to attach larger pieces.
Wrap-Up: Make Your Party Feel Extra with Handmade Crowns
Paper craft crowns are a cheerful way to turn any celebration into an experience—guests feel included, kids love choosing their own decorations, and your party photos get that playful, polished touch. Start with a simple band-and-points design, then try scallops, name badges, floral toppers, or fun animal spikes once you’ve got the basics down.
Keep a small “crown bar” at your party with pre-cut shapes, gem stickers, and markers, and you’ll have an activity that doubles as a handmade party favor.
Want more DIY crafts, party decorations, and creative handmade projects? Explore more ideas on smartpartyprep.com and keep the celebration personal, colorful, and fun.
More Articles
 How to Make a Hat for a Tea Party in Under 90 Minutes (No Sewing Machine Needed!) — 5 Foolproof Styles That Impress Guests & Boost Your Confidence
 How to Make Confetti at Home
 Advanced Invitations for Crafters
 12 Stunning Do It Yourself Western Party Decorations You Can Make in Under 2 Hours (No Craft Store Run Needed — Just Dollar Store & Recycled Supplies!)
 DIY Mugs for Home Decor
 Seasonal Origami Decorations Ideas
 Budget DIY Memory Books Under $15
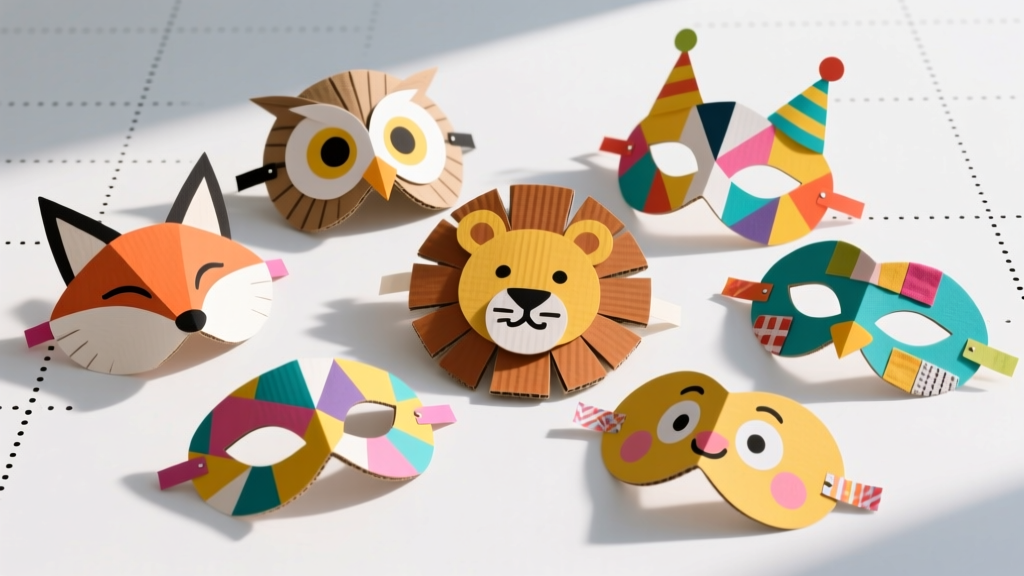 Budget DIY Masks Under $5
 No-Sew Friendship Bracelets Tutorial
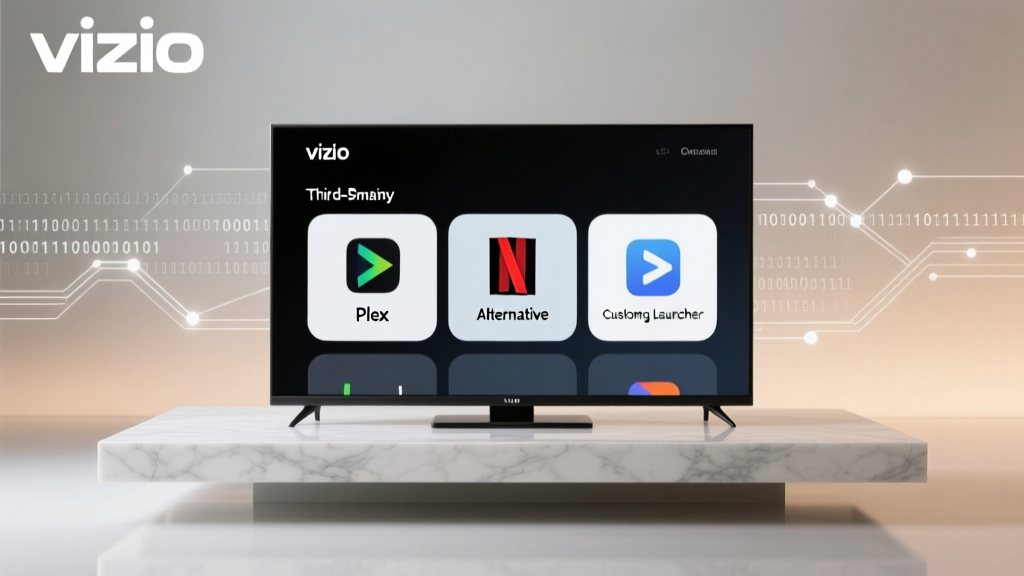 How to Install 3rd Party Apps on Vizio Smart TV (Without Jailbreaking): A Step-by-Step Guide That Actually Works in 2024 — No Developer Mode Myths, No App Store Limits, Just Real Methods That Unlock Netflix Alternatives, Plex, and More