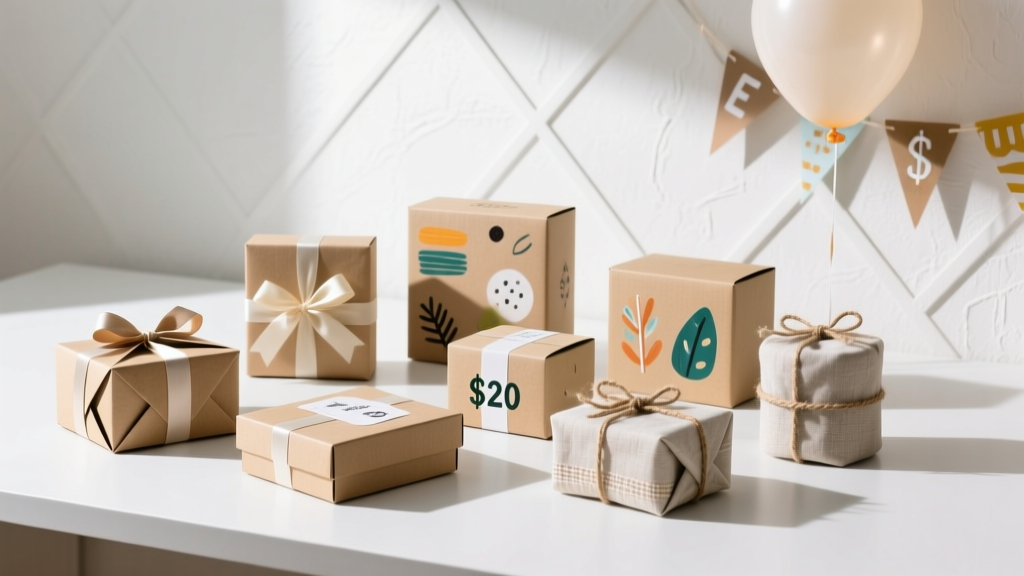
Budget DIY Gift Boxes Under $20
Handmade gift boxes are one of those party-ready DIY crafts that feel extra special without requiring fancy tools or expensive supplies. Whether you’re prepping favors for a birthday, packaging holiday treats, or assembling bridal shower goodies, a cute DIY gift box turns a simple item into a memorable moment.
What makes this project especially fun is the mix-and-match creativity: you can keep it minimal with clean lines and a crisp ribbon, or go bold with patterned paper, tags, and party-themed embellishments. Best of all, you can make several gift boxes on a budget—often under $20 total—using supplies you can find at craft stores, dollar stores, or online.
This guide walks you through multiple budget-friendly styles, from sturdy cardstock boxes to upcycled party favor boxes. You’ll get exact measurements, beginner-friendly steps, and upgrades for advanced crafters—plus troubleshooting tips so your boxes look polished and party-ready.
Project Overview: Skill Level, Time, and What You’ll Make
- Skill level: Beginner to Intermediate (advanced variations included)
- Time estimate:
- 1 box: 10–20 minutes after your first practice
- Batch of 6: 60–90 minutes (faster with assembly-line steps)
- Finished size options:
- Small favor box (approx.): 3" x 3" x 2"
- Medium treat box (approx.): 4" x 4" x 3"
- Best for: party favors, candy boxes, mini gifts, cookie packaging (with liner), bridal shower favors, baby shower treats, teacher gifts
Materials List (Budget-Friendly) + Estimated Costs
You can keep this entire DIY gift box project under $20 by choosing 1–2 decorative elements and sticking with basic tools. Costs vary by location, but these estimates reflect typical budget craft shopping.
Core Supplies (Pick 1 box style to start)
- 12" x 12" cardstock (65–80 lb) or lightweight poster board for sturdier boxes:
- 6–12 sheets: $4–$8
- Patterned scrapbook paper (optional for wrapping or layering):
- 6–12 sheets: $3–$6
- Double-sided tape (strong craft tape) or tape runner:
- 1 roll: $3–$6
- Liquid glue (fast-grab craft glue) for edges/embellishments:
- 1 bottle: $2–$4
- Ribbon or twine (1/8" to 3/8" ribbon works best for small boxes):
- 1 spool: $2–$5
Tools (Use what you have)
- Scissors or craft knife (precision cuts): $0–$6
- Metal ruler (helps with straight cuts and scoring): $0–$5
- Cutting mat (optional but helpful): $0–$10
- Bone folder (or use the back of a butter knife for scoring): $0–$8
- Hole punch (single-hole): $1–$6
Optional “Wow” Add-Ons (Choose 1–2 to stay under budget)
- Kraft tags or tag cardstock + string: $2–$5
- Alphabet stickers or small label stickers: $2–$6
- Washi tape (great for quick decorating): $2–$5
- Mini clothespins (for tags): $2–$4
- Tissue paper (for stuffing): $1–$3
Budget example: cardstock ($6) + tape ($4) + ribbon ($3) + glue ($2) = $15 and enough supplies for multiple DIY gift boxes.
DIY Gift Box #1: Classic Square Lidded Box (Sturdy + Party-Perfect)
This is a go-to handmade project for party favors because it stacks nicely, looks clean, and works for candy, small gifts, jewelry, or mini bath items.
Measurements (Makes a 4" x 4" x 2" box)
- Box base: cut cardstock to 8" x 8"
- Lid: cut cardstock to 8 1/8" x 8 1/8" (the extra 1/8" helps the lid fit)
Tool recommendation: A bone folder and metal ruler will make your folds crisp and professional-looking.
Step-by-Step: Build the Base
- Score the 8" x 8" piece at 2" from each edge. You’ll create a grid with a 4" square in the center.
- Cut the corner squares out: remove the four 2" x 2" corner sections (you’ll have flaps on each side).
- Fold on all score lines using your bone folder (or a ruler edge) to get sharp creases.
- Assemble the box: apply double-sided tape to the outside edges of the side flaps, then fold up and press firmly to form the walls.
- Reinforce: run a thin line of liquid glue inside the corners if you want extra strength.
Step-by-Step: Build the Lid
- Score the 8 1/8" x 8 1/8" piece at 2" from each edge.
- Cut corners: remove the four corner squares like you did for the base.
- Fold and tape: fold up the sides, tape the flaps, and press firmly.
- Test fit: gently place the lid on the base. If it’s tight, lightly “work” the lid by sliding it on and off a few times.
Quick Decoration Ideas (Under $5)
- Wrap a 3/8" ribbon around the box and tie a bow on top.
- Add a 2" x 3" tag (hole-punched) and tie it under the bow.
- Use washi tape as a border around the lid for a party-themed pop of color.
DIY Gift Box #2: Pillow Box (Fastest Option for Party Favors)
Pillow boxes are perfect for parties: they’re lightweight, quick to make, and great for candy, small toys, stickers, or gift cards. They also look adorable lined up on a dessert table or favor station.
Measurements (Makes a medium pillow box)
- Cut cardstock to 8" x 5"
Step-by-Step Instructions
- Score the long sides: along the 8" length, score at 1/2" from one long edge (this becomes the glue tab).
- Curve the box shape: gently curl the paper by pulling it over the edge of a table or rolling it around a clean bottle. This helps the pillow shape form without harsh creases.
- Glue the seam: apply double-sided tape to the 1/2" tab and attach to the opposite edge to form a tube.
- Create the pillow ends: pinch one end flat, then press the curved edges inward to form the pillow closure. Repeat on the other side after filling.
- Fill and close: add candy or small favors, then close the second end.
Party Styling Ideas
- Punch two holes near one end and tie with twine for a rustic party theme.
- Add a small sticker label: “Thank you,” “Happy Birthday,” or the guest’s name for place-setting favor boxes.
DIY Gift Box #3: Upcycled Cereal Box Gift Box (Most Sturdy for the Cost)
If you need multiple boxes for a party on a tight budget, upcycling is your best friend. Cereal boxes (and similar food boxes) make surprisingly sturdy DIY gift boxes once wrapped in pretty paper.
What You’ll Need
- 1 empty cereal box (or cracker box)
- Scrapbook paper or wrapping paper
- Double-sided tape + scissors/craft knife
Step-by-Step Instructions
- Decide your box height: a great favor size is 3"–4" tall. Mark a straight line around the cereal box.
- Cut the box: use a craft knife and ruler for clean edges. (Scissors work too—go slowly.)
- Create a lid: cut a second section slightly taller (about 1/4" taller than the base) so it can slide over. If using one cereal box, you can create the lid from another food box or stiff cardstock.
- Wrap the base and lid: tape wrapping paper around each piece like you’re covering a book:
- Leave a 1/2" overlap seam
- Fold edges neatly inside for a finished look
- Add a ribbon band: wrap ribbon around the lid and secure with a tape dot inside.
Pro Tips for Crisp Folds, Clean Corners, and Strong Boxes
- Score before you fold: scoring prevents cracked cardstock and keeps edges sharp.
- Use strong tape for construction: double-sided tape holds better than glue alone for the main seams.
- Press and hold: after taping a corner, press firmly for 10–15 seconds to set it.
- Batch your steps: for party prep, cut all pieces first, then score all, then fold all, then assemble all.
- Make boxes match your party décor: repeat one element across all boxes (same ribbon, same tag style, or same color palette) for a cohesive party decorations look.
Variations: Beginner-Friendly Adaptations and Advanced Upgrades
Beginner-Friendly
- No bone folder? Use the back of a spoon or a butter knife (gently) for scoring.
- Skip the lid: make a simple open-top box and cover with tissue paper and ribbon.
- Use sticker décor: one label + one ribbon can look extremely polished.
Advanced Variations
- Magnetic closure: add small adhesive magnets to a flap-style box for a premium handmade gift box feel.
- Window box: cut a 2" x 2" square window in the lid and tape clear acetate behind it.
- Layered lid top: cut a decorative panel 1/4" smaller than the lid and mount with foam tape for a raised effect.
- Custom sizing: use the formula: paper size = (box width + 2 x box height) by (box depth + 2 x box height) for the base template.
Troubleshooting: Fix Common Box Problems
- Lid won’t fit:
- Make the lid piece 1/8" to 1/4" larger than the base piece.
- Use slightly lighter cardstock for the lid.
- Corners pop open:
- Switch to stronger double-sided tape.
- Add a tiny dot of liquid glue inside the corner and press for 20 seconds.
- Cardstock cracks on folds:
- Score more deeply (not tearing, just a firm score line).
- Use a slightly heavier cardstock or fold more slowly.
- Box looks crooked:
- Double-check your measurements and keep the ruler firmly in place when scoring.
- Cut with a craft knife and metal ruler for straighter edges.
Common Crafting Mistakes to Avoid
- Eyeballing measurements: even 1/8" off can make lids tight or corners misalign—measure and mark clearly.
- Using school glue for structure: it can warp paper and take longer to set. Use strong double-sided tape for assembly.
- Skipping test folds: practice one box first before cutting a whole batch for party favors.
- Over-decorating bulky items on the lid: tall embellishments can prevent stacking and crush easily during transport.
- Not reinforcing heavy contents: if you’re adding candles, mini jars, or heavier favors, use poster board or a cereal-box base for strength.
FAQ: Budget DIY Gift Boxes Under $20
1) How many gift boxes can I make with $20?
It depends on size and materials, but a typical $15–$20 supply run (cardstock + tape + ribbon) often makes 6–12 boxes. Pillow boxes usually yield more per sheet and are the most budget-friendly for party favors.
2) What’s the best cardstock weight for sturdy gift boxes?
For most DIY gift boxes, 65–80 lb cardstock works well. For heavier items or larger boxes, use lightweight poster board or reinforce with an upcycled cereal box.
3) Can I make these boxes without a cutting machine?
Yes—these handmade projects are designed for scissors and a ruler. A craft knife improves precision, but it’s not required.
4) How do I make my boxes look more professional?
Focus on clean folds and consistent décor. Crisp scoring, straight cuts, and a single repeated design element (like matching ribbon and tags) can make budget DIY crafts look boutique-quality.
5) Are these boxes food-safe for cookies or candies?
For unwrapped food, add a liner such as a food-safe treat bag, parchment paper, or a cupcake liner inside. For wrapped candy, the cardstock box alone is usually fine.
6) What’s the easiest box style for kids’ parties?
Pillow boxes are the simplest and fastest. They’re also easy for kids to help decorate with stickers, stamps, or washi tape—great for party prep crafting sessions.
Wrap-Up: Make Party-Ready Gift Boxes Without Blowing Your Budget
With a few sheets of cardstock, strong tape, and a simple ribbon, you can create budget DIY gift boxes that look thoughtful, coordinated, and celebration-ready. Try one style first, then batch-make a set for your next birthday party, baby shower, or holiday gathering—your future self will love having party favors and handmade decorations already checked off the list.
Want more DIY crafts, party decorations, and creative handmade projects? Explore more ideas and tutorials at smartpartyprep.com.
More Articles
 Easy Tie-Dye Shirts for Beginners
 DIY Crowns in An Afternoon
 Modern Custom Stickers Designs
 How to Update Settings to Allow 3rd Party Cookies in 2024: A Step-by-Step Fix for Chrome, Safari, Edge & Firefox (No Tech Degree Required)
 How to Make Party Hats for Stuffed Animals in Under 15 Minutes (No Sewing Required!) — 7 Adorable, Budget-Friendly Designs That Actually Stay On
 12 Stunning Do It Yourself Western Party Decorations You Can Make in Under 2 Hours (No Craft Store Run Needed — Just Dollar Store & Recycled Supplies!)
 How to Unblock Third Party Cookies on MacBook Air (2020–2024): A Step-by-Step Safari & Chrome Fix That Actually Works in 2024 — No Tech Degree Required
 DIY Vision Boards in 10 Minutes
 No-Sew Beaded Bracelets Tutorial
 How to Unblock 3rd Party Session Cookies on Mac: A Step-by-Step Safari & Chrome Fix That Actually Works (No Extensions Needed)