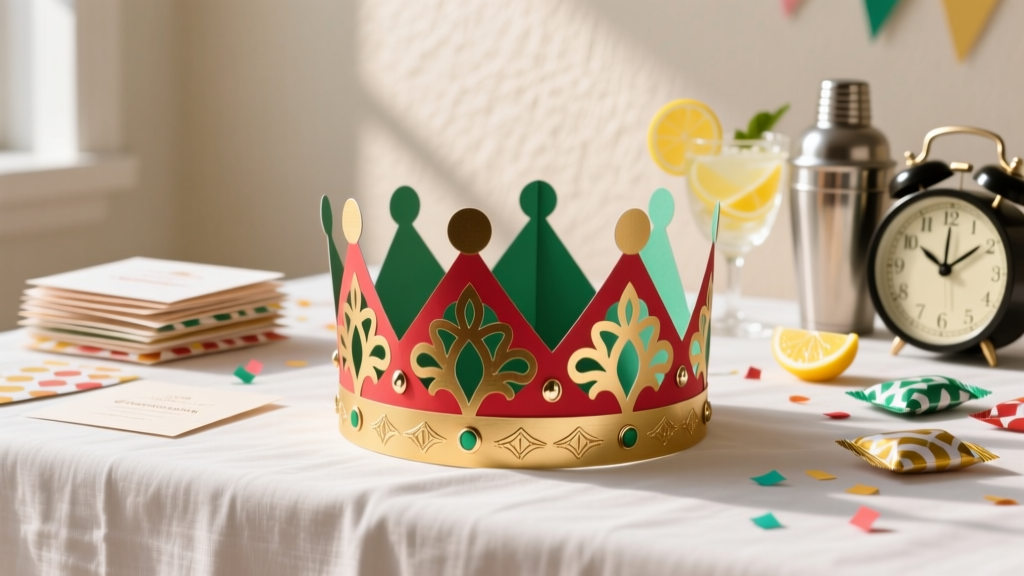
DIY Crowns in An Afternoon
Every party needs a little “main character” energy—and nothing delivers that faster than a crown you made yourself. Whether you’re planning a birthday bash, a baby shower, a bridal party, a Renaissance-themed dinner, or a cozy kids’ craft table, DIY crowns are the kind of handmade project that feels special without requiring a whole weekend (or a craft room full of supplies).
The best part: you can make a whole set of crowns in an afternoon. Create one statement piece for a guest of honor, or batch-make a dozen lightweight crowns for party favors. This project is also wonderfully flexible—go glittery and bold, soft and floral, or minimalist and modern. You’ll end up with a party decoration that doubles as a photo prop and a keepsake.
This guide walks you through multiple crown styles with clear measurements, practical steps, and troubleshooting tips, so you can confidently craft crowns for kids, teens, and adults—no “perfect craft skills” required.
Project Overview: Skill Level, Time, and What You’ll Make
- Skill level: Beginner (basic cutting + gluing). Advanced options included.
- Total time: 45–120 minutes depending on style and drying time.
- Active crafting time: 30–60 minutes per crown (faster if batch-making).
- Great for: DIY party decorations, handmade party favors, costume accessories, photo booth props.
Materials & Tools (With Specific Types + Estimated Costs)
Pick one crown base style (paper/cardstock, foam, or felt) and then customize with decorations. Costs vary by region, but these estimates help you plan.
Base Materials (Choose One)
- Heavy cardstock (80–110 lb / 216–300 gsm): 12x12 inch sheets or letter size. $6–$12 per pack
- Glitter cardstock (optional): great for statement crowns. $8–$15 per pack
- EVA craft foam sheets (2mm): flexible, comfy for kids. $6–$10 per 20–30 sheets
- Felt sheets (stiffened felt or regular felt): soft crowns, great for toddlers. $6–$12 per pack
Adhesives (Choose What Fits Your Materials)
- Hot glue gun + glue sticks: fastest, strong hold. $10–$20
- Tacky glue (thick PVA): great for paper-to-paper; slower dry. $3–$6
- Double-sided tape (strong/“permanent”): clean and quick for cardstock crowns. $4–$8
- Fabric glue: best for felt and ribbon. $4–$8
Decorations (Mix and Match)
- 1/2 inch (12mm) satin ribbon for ties: $3–$6
- Elastic cord (1/8 inch / 3mm) for stretch fit: $4–$8
- Adhesive rhinestone strips or gem stickers: $5–$12
- Sequins, glitter, metallic markers: $3–$10
- Artificial florals/greenery (small blooms): $6–$15
- Feathers (small pack): $4–$8
- Mini pom-poms: $3–$6
Tools (Recommended)
- Scissors (8 inch craft scissors)
- Craft knife + cutting mat for crisp points (optional but helpful)
- Ruler (12 inch / 30 cm)
- Pencil for tracing
- Hole punch (single-hole) for ribbon ties
- Stapler (backup fastener for cardstock)
- Measuring tape (soft tape for head circumference)
Before You Start: Quick Measuring Guide (So Crowns Actually Fit)
Use a soft measuring tape around the head where the crown will sit (usually across the forehead and above the ears). If you don’t have one, use a string and measure it against a ruler.
- Toddler (1–3 yrs): 18–19 in (46–48 cm)
- Child (4–10 yrs): 19–21 in (48–53 cm)
- Teen/Adult: 21–23 in (53–58 cm)
Add overlap: For a paper/foam wrap crown, add 1 inch (2.5 cm) for overlap or closure. For ribbon-tie crowns, you can size slightly smaller and let the ribbons adjust.
Crown Style #1: Classic Pointed Cardstock Crown (Fastest Party Favorite)
Best for
- Birthday parties, kids’ party crafts, classroom celebrations
- Batch-making DIY party favors
Time Estimate
- Per crown: 20–35 minutes
- Dry time: none if using tape/hot glue
Step-by-Step Instructions
- Cut your base strip. Cut a strip of cardstock that’s 3.5 inches (9 cm) tall. Length depends on head size:
- Child: 22 inches (56 cm)
- Adult: 24 inches (61 cm)
- Mark your points. Along the top edge, mark points every 2 inches (5 cm). For taller “royal” points, mark a peak height of 2.5–3 inches (6–7.5 cm) above the top edge.
- Cut the crown points. Connect your marks into triangles and cut with scissors. For crisp edges, use a craft knife and ruler on a cutting mat.
- Test the fit. Wrap around the head and adjust length. Aim for comfortable, not tight.
- Close the crown. Use one of these:
- Double-sided tape: cleanest finish
- Hot glue: strongest hold (press 10–15 seconds)
- Staple: quickest, then cover with a sticker or gem strip
- Decorate. Add gem stickers, glitter accents, or metallic marker details. For a balanced look, decorate every other point or add one bold center jewel.
Beginner-Friendly Upgrade
- Add a 1/2 inch (12mm) ribbon band along the bottom edge to cover seams and make it feel “store-bought.”
Crown Style #2: Soft Felt Crown with Ribbon Ties (Comfy and Photo-Ready)
Best for
- Toddlers and kids (soft edges)
- Baby shower “little prince/princess” parties
Time Estimate
- Per crown: 35–60 minutes
Step-by-Step Instructions
- Cut the felt base. Cut a strip 3 inches (7.5 cm) tall and about:
- Toddler: 18 inches (46 cm)
- Child: 20 inches (51 cm)
- Create points (optional). For a classic look, cut 4–6 rounded points along the top. Rounded points are more forgiving than sharp triangles.
- Add ribbon ties. Cut two ribbons, each 18 inches (46 cm) long. Glue or stitch one ribbon to each end of the crown strip. (Fabric glue works; hot glue works but can stiffen felt.)
- Decorate with felt shapes. Cut stars, hearts, or circles from contrasting felt. Layer shapes for dimension (example: a gold star on a white circle). Glue onto the front center.
- Fit and tie. Place on the head, then tie in a bow at the back. Trim ribbon ends at an angle for a clean finish.
Advanced Variation
- Stitched edge: Use embroidery floss and a simple blanket stitch along the bottom edge for a polished look.
- 3D felt jewels: Lightly stuff a small felt diamond shape and stitch closed before attaching.
Crown Style #3: Glam Foam Crown with Rhinestone Trim (Durable + Sparkly)
Best for
- Teen parties, New Year’s celebrations, bachelorette themes
- DIY costume accessories that won’t flop
Time Estimate
- Per crown: 30–50 minutes
Step-by-Step Instructions
- Cut the foam strip. Use EVA foam, 3.25 inches (8.3 cm) tall by 24 inches (61 cm) long (adult) or 22 inches (56 cm) (child).
- Shape the top. Draw 5–7 tall points (about 2.5 inches / 6 cm above the top edge). Cut carefully—foam shows jagged cuts more than paper, so slow, steady snips help.
- Close the crown. Overlap ends by 1 inch (2.5 cm) and hot glue. Press firmly until set.
- Add rhinestone trim. Apply self-adhesive rhinestone strips along the bottom edge and around the base of points. If adhesive feels weak, reinforce with tiny dots of hot glue.
- Add one statement piece. A large center gem, a foam cutout initial, or a glittery star makes it feel like a “real” crown.
Pro Tips for Beautiful Results (Even If You’re Short on Time)
- Batch your steps: cut all base strips first, then cut points, then decorate assembly-line style.
- Keep weight balanced: heavy decorations (big gems, flowers) should sit at the front center so the crown doesn’t rotate.
- Make it comfy: add a 1/4 inch (6 mm) foam strip or felt strip along the inside bottom edge to soften the feel.
- Photo tip: use one metallic accent color (gold, silver, or rose gold) across all crowns so the set looks cohesive in pictures.
- Kid-safe option: skip sharp points and use rounded scallops. Use double-sided tape instead of hot glue for supervised kids’ crafting.
Fun Variations for Different Party Themes
Floral Garden Crown
- Base: felt or cardstock band
- Decor: small faux flowers + greenery
- Tip: keep flowers to 5–7 blooms so it stays lightweight
Space / Galaxy Crown
- Base: black glitter cardstock
- Decor: star stickers, silver paint pen constellations
- Add-on: attach a small paper “planet” on one point with foam tape
Under-the-Sea Crown
- Base: teal foam
- Decor: shell shapes, pearl beads, iridescent sequins
- Tip: outline shapes with a white gel pen for a crisp look
Royal Minimalist (Modern Birthday)
- Base: matte white cardstock
- Decor: one gold center gem + thin gold washi tape border
- Perfect for: chic parties and neutral balloon garlands
Troubleshooting: Fixes for Common Crown Problems
- Crown keeps popping open: increase overlap to 1.5 inches (3.8 cm), use hot glue, and hold closed for 15–20 seconds. For cardstock, add a staple and cover it with a sticker.
- Crown won’t stand up (floppy points): switch to heavier cardstock (110 lb / 300 gsm), shorten point height by 1/2 inch (12 mm), or add a second layer of cardstock just on the points.
- Glue showing: use smaller glue dots, or cover seams with ribbon, gem trim, or a decorative strip.
- It’s too tight: cut the back seam and add a small extender strip (about 1–2 inches / 2.5–5 cm) decorated to match.
- Decorations falling off: clean dusty foam with a dry cloth first, reinforce adhesive gems with tiny hot-glue dots, and avoid placing heavy pieces right on a seam.
Common Crafting Mistakes to Avoid
- Skipping a fit test before decorating: always size and close the crown first, then add embellishments.
- Using thin printer paper: it wrinkles and collapses. Choose heavy cardstock, foam, or felt.
- Overloading the front with heavy decor: it slides down the forehead. Keep big pieces centered and moderate in number.
- Messy cutting on foam: foam shows uneven edges. Use sharp scissors and take your time; turn the foam, not your hand angle.
- Hot glue burns or strings: use a low-temp glue gun for kids’ projects and keep a small bowl of cool water nearby for quick fingertip relief.
- Not planning hair compatibility: for updos or thick curls, make the crown slightly larger or use ribbon ties for adjustability.
FAQ: DIY Crowns for Parties
1) What’s the best material for a kids’ party crown?
EVA foam or felt is the most comfortable and durable for kids. Cardstock works great too—just choose heavy cardstock (80–110 lb / 216–300 gsm) and keep decorations lightweight.
2) How do I make crowns ahead of time without them getting crushed?
Store crowns upright in a shallow box, layered with tissue paper. For pointed crowns, place them side-by-side instead of stacking directly on top of one another.
3) Can I make these crowns without a hot glue gun?
Yes. Use strong double-sided tape for cardstock and fabric glue for felt. For foam crowns, tacky glue can work but needs longer drying time and may require clips while it sets.
4) How do I make a crown adjustable for different head sizes?
Add ribbon ties (18 inches / 46 cm on each side) or use a hole punch with ribbon lacing. You can also attach a short piece of elastic at the back for stretch fit.
5) How many crowns can I make in an afternoon?
If you batch steps, you can typically make 6–12 simple cardstock crowns in 2–3 hours, or 3–6 highly embellished crowns in the same time.
Wrap-Up: Your Party Just Got a Handmade Upgrade
DIY crowns are one of those handmade party projects that deliver big results with simple supplies. You get a fun crafting session, an instant party accessory, and a decoration guests will actually wear—plus the photos are always worth it. Start with a basic crown style, keep your first one simple, and then try a bolder variation once you see how quickly they come together.
Want more DIY crafts, party decorations, and handmade project ideas? Explore more creative how-tos and smart party prep tips at smartpartyprep.com.
More Articles
 How to Turn Off 3rd Party Cookies in 2024: A Step-by-Step Guide That Actually Works (No Tech Jargon, Just Real Browser Instructions)
 Easy Wooden Signs for Beginners
 Is Primal Queen Third Party Tested? The Truth About Lab Verification, What ‘Certified’ Really Means, and How to Spot Genuinely Transparent Brands (Not Just Marketing Claims)
 What Is the Cocktail Party Effect Psychology? The Surprising Truth About How Your Brain Filters Noise — And Why You Miss Critical Signals (Even When You're 'Listening')
 How to Make Party Hat in 7 Minutes Flat — No Glue Gun, No Scissors, No Stress (Just Paper, Tape & Joy)
 How to Make Confetti at Home
 25 Creative Painted Canvas Ideas
 How to Hang Streamers for a Party Without Tape Mess, Sagging, or Last-Minute Panic: 7 Foolproof Methods That Actually Stick (Tested on 32 Parties)
 Budget DIY Pressed Flower Art Under $15
 How to Make a Party Hat Out of Paper in Under 12 Minutes (No Glue Gun, No Scissors Required — Just Printer Paper & Tape)