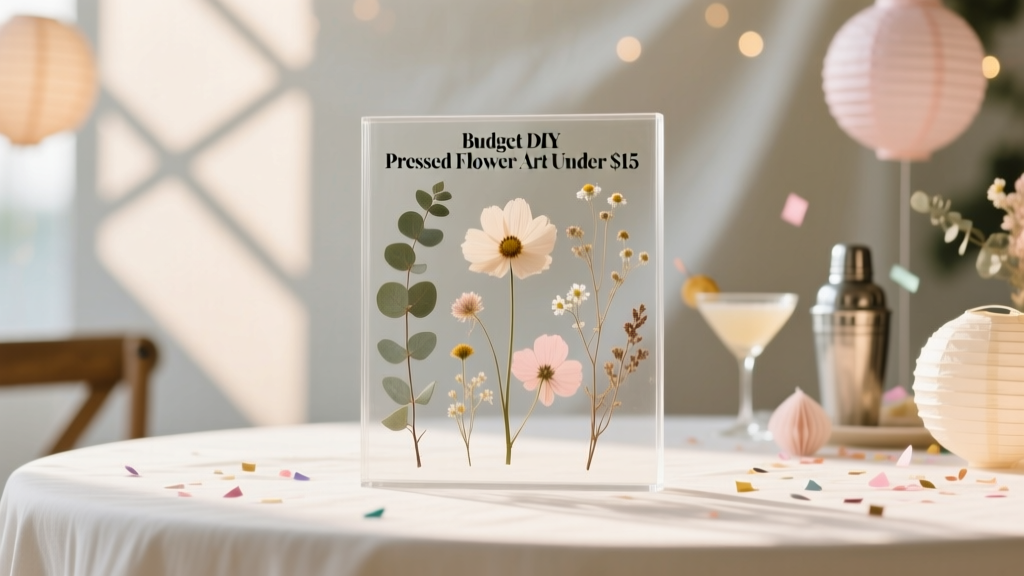
Budget DIY Pressed Flower Art Under $15
Pressed flower art is one of those DIY crafts that feels instantly special—like you captured a tiny moment of spring and turned it into a keepsake. It’s calming to make, surprisingly beginner-friendly, and the results look far more expensive than they are. Even better? You can customize it to match party themes, seasonal celebrations, and handmade decorations for your home.
If you’re looking for a budget-friendly party decoration idea, pressed flowers are perfect for creating table signs, photo booth backdrops (mini framed clusters), place cards, or a sweet “thank you” display for a bridal shower, baby shower, or birthday. You can keep it simple with a minimalist design, or go bold with color-blocked petals and layered layouts.
This step-by-step guide walks you through creating pressed flower art under $15, with time estimates, tool recommendations, and plenty of variations—so you can make one piece for your wall or a whole set for a party setup.
Project Overview: Skill Level + Time + Budget
- Skill level: Beginner (with easy upgrades for intermediate/advanced crafters)
- Total active time: 30–60 minutes (assembly + layout)
- Pressing time: 3–14 days (depending on method)
- Total cost: $8–$15 for one framed piece (often less if you already have supplies)
- Finished size: 5" x 7" or 8" x 10" recommended for party decor
Materials List (With Estimated Costs)
These materials are chosen to keep your pressed flower art budget-friendly while still looking polished for party-ready handmade decorations.
Basic Supplies (Under $15)
- Budget photo frame (5" x 7" or 8" x 10") – $4–$8
- Look for thin-profile frames with a clear front (glass or acrylic)
- Party-friendly tip: matching frames make a coordinated dessert table display
- White cardstock or watercolor paper (1–2 sheets) – $0.50–$2
- Recommended weight: 65–110 lb cardstock or 140 lb watercolor paper
- School glue stick OR clear-drying craft glue – $1–$3
- Glue stick is easiest for beginners and less likely to wrinkle paper
- Pressed flowers/leaves – $0–$5
- Free option: press your own from a garden or bouquet leftovers
- Fast option: buy a small pressed flower assortment online or at a craft store
- Parchment paper or printer paper (for pressing) – $0–$2
Tools (Most Are Household Items)
- Heavy book (dictionary/cookbook) or two books for extra weight
- Scissors or small craft scissors (for trimming stems)
- Tweezers (highly recommended for delicate petals) – $1–$4
- Ruler (for centering and spacing)
- Optional: clear tape (for a “floating” look), fine-tip pen for labels, or a small paintbrush for applying glue precisely
Budget Example (Typical Build)
- 5" x 7" frame: $5
- Cardstock sheet: $1
- Glue stick: $2
- Flowers: free (pressed from a bouquet)
- Total: ~$8
Choosing Flowers That Press Beautifully
Not all blooms press the same. For crisp, flat results (especially for party decor that needs to look neat up close), pick flowers that aren’t too thick and don’t hold a lot of moisture.
Great Beginner-Friendly Flowers
- Cosmos
- Pansies/violas
- Daisies
- Hydrangea (single florets)
- Baby’s breath
- Ferns and small leafy stems
Flowers That Can Be Tricky (But Still Possible)
- Roses (press individual petals instead of full blooms)
- Tulips (petals only)
- Thick flowers with bulky centers (they may brown or mold if not dried well)
How to Press Flowers (2 Methods)
If you already have pressed flowers, skip ahead to assembly. If not, choose one of these methods based on your timeline.
Method 1: Book Pressing (Cheapest + Best Quality)
- Time needed: 7–14 days for best results (some thin flowers: 3–7 days)
- Best for: vibrant, flat flowers with minimal curling
- Pick flowers that are dry on the surface (avoid morning dew).
- Trim stems to about 1/4"–1/2" (or remove stems entirely for a cleaner look).
- Place flowers face-down between two sheets of parchment paper (or printer paper).
- Slide the paper “sandwich” into the middle of a heavy book.
- Add extra weight: stack another heavy book on top.
- Leave undisturbed. Check after 7 days. If petals still feel cool or flexible, press longer.
Method 2: Quick Press (Iron Method for Last-Minute Party Prep)
- Time needed: 10–20 minutes per batch (results vary)
- Best for: simple leaves or sturdy petals when you’re short on time
- Place flowers between two sheets of parchment paper.
- Set your iron to low heat with no steam.
- Press in short bursts: 5–10 seconds at a time.
- Let cool for 30 seconds and check flatness.
- Repeat until dry and flattened. Let them rest under a book for 30–60 minutes to reduce curling.
Step-by-Step: Assemble Your Pressed Flower Art (Framed)
This is the fun part—turning your pressed pieces into handmade party-ready decor.
Step 1: Pick Your Frame Size and Background
- Recommended sizes: 5" x 7" (cute for shelf/table) or 8" x 10" (statement piece)
- Background options:
- White cardstock (clean, modern)
- Watercolor paper (soft texture, slightly elevated look)
- Light kraft paper (rustic party theme)
Measurement tip: If your frame is 8" x 10", cut your paper to 7 7/8" x 9 7/8" so it fits without bending. For a 5" x 7" frame, cut paper to 4 7/8" x 6 7/8".
Step 2: Plan Your Layout Before Gluing
Do a “dry arrangement” first. Use tweezers to avoid tearing petals.
- Easy beginner layouts:
- Single stem centered vertically
- Top-left to bottom-right diagonal
- Mini wreath shape (small leaves/ferns)
- Party decor layouts:
- Monogram or number outline (great for birthdays)
- Heart shape (bridal shower, engagement, anniversary)
- Half-border along the bottom (perfect for table signs)
Spacing guide: Leave at least 1/2" margin around the edges so the design doesn’t look cramped once framed.
Step 3: Attach Flowers Carefully
- Lift one flower at a time with tweezers.
- Apply adhesive:
- Glue stick: lightly swipe the back of thicker petals/leaves
- Liquid glue: use a tiny dot applied with a toothpick or small paintbrush
- Press gently with clean fingertips or the flat edge of tweezers.
- Continue until your layout is complete.
Dry time: Let the artwork dry flat for 10–20 minutes before framing.
Step 4: Frame It for a Clean, Party-Ready Finish
- Wipe the inside of the frame’s glass/acrylic with a lint-free cloth.
- Place your background paper into the frame.
- Insert the artwork carefully to avoid shifting petals.
- Seal and close the frame.
Optional “floating” look: Skip the paper background and attach flowers to a clear sheet (thin acetate) using tiny dots of clear-drying glue, then frame it for a modern, airy effect.
Pro Tips for Beautiful Results
- Work from largest to smallest: Place big petals/leaves first, then tuck in tiny flowers like baby’s breath.
- Keep hands clean and dry: Natural oils can darken delicate petals over time.
- Use tweezers for precision: This one tool makes DIY pressed flower art look noticeably more professional.
- Protect color: Display away from direct sunlight; pressed flowers can fade faster on bright windowsills.
- Make it party-functional: Add a label on the bottom (e.g., “Cards & Gifts,” “Thank You,” or table numbers) with a fine-tip pen or printed strip.
Creative Variations (Beginner to Advanced)
Beginner-Friendly Adaptations
- Minimalist single bloom: One pressed pansy centered with a tiny caption underneath
- Confetti scatter: Use small petals to create a “sprinkled” look for birthday party decorations
- Simple border: A row of leaves across the bottom plus a printed message
Intermediate Party Decor Ideas
- Set of three mini frames: Create a matching trio for a dessert table backdrop (keep each design consistent)
- Table number frames: Pressed floral corners + bold numbers in the center
- Color theme match: Choose flowers in party colors (blush, lavender, sunflower yellow)
Advanced Variations
- Layered composition: Overlap translucent petals for depth (use tiny dots of glue)
- Hand-lettered quote + florals: Add a short phrase like “Celebrate” or “Love in Bloom” with brush pen
- Resin-style look without resin: Use a floating glass frame and arrange florals between panes for a modern display
Troubleshooting: Fix Common Pressed Flower Problems
- Problem: Flowers turned brown.
- Cause: Too much moisture or flowers were too thick
- Fix: Press thinner pieces (petals instead of whole blooms); extend pressing time; change paper midway through pressing
- Problem: Petals curled after framing.
- Cause: Not fully dried
- Fix: Re-press for a few days; avoid humid rooms
- Problem: Glue marks show.
- Cause: Too much liquid glue
- Fix: Switch to glue stick; apply tiny dots with a toothpick; hide adhesive under thicker areas
- Problem: Flowers crumble when handled.
- Cause: Over-dried or very delicate variety
- Fix: Handle only with tweezers; choose sturdier flowers; consider a floating frame to reduce pressure
Common Crafting Mistakes to Avoid
- Using flowers that are wet or dewy: This can lead to moldy pressing pages and browned petals.
- Rushing the pressing time: If it feels even slightly flexible, give it more days—your finished art will last longer.
- Skipping the dry layout step: Rearranging glued petals usually tears them. Always plan first.
- Overloading the design: Negative space is your friend, especially for party decorations that need to read clearly from a distance.
- Forgetting frame depth: Some frames press against the artwork; if your flowers are thick, choose a frame with a little extra depth or use thinner petals.
- Placing finished art in direct sun: UV light fades pressed flowers quickly—choose indoor shade or use it for party day and store afterward.
FAQ: Budget DIY Pressed Flower Art
1) Can I make pressed flower art the same day as my party?
Yes, with limitations. Use the iron method for quick pressing and stick to thinner flowers or leaves. If you want the cleanest, flattest results, press ahead of time (at least 3–7 days).
2) What’s the best adhesive for pressed flowers?
A glue stick is the easiest and most forgiving for beginners. For delicate placement, use clear-drying craft glue applied in tiny dots with a toothpick or small paintbrush.
3) How do I keep pressed flowers from fading?
Keep framed art out of direct sunlight and away from humidity. For party decor, display it indoors and store it in a cool, dry place after the event.
4) Can I use store-bought flowers from a bouquet?
Absolutely. Bouquet flowers press beautifully, especially if you separate petals and choose thinner blooms. Let flowers air-dry for a few hours first if they feel damp.
5) What are the best frame styles for party decorations?
Thin black, white, or gold frames look polished and photograph well. For rustic themes, light wood frames work nicely. Matching frames across a set makes the whole party setup feel coordinated.
6) How many pieces can I make under $15?
If you already have glue and paper, you can often make 2–3 smaller framed pieces under $15 by using budget frames and pressing free flowers from your garden or leftover bouquets.
Wrap-Up: A Tiny Budget, A Big Handmade Impact
Pressed flower art is a simple DIY craft with a high “wow” factor—perfect for party decorations, thoughtful gifts, and handmade projects you’ll want to display long after the celebration ends. Start with one small frame, keep your layout clean, and let the flowers do the decorating for you.
If you make a set for a party, keep one for yourself as a memory of the day. That’s the magic of pressed flowers: they’re both decor and a keepsake.
Want more budget-friendly DIY party decor and handmade craft ideas? Explore more creative projects on smartpartyprep.com and keep your celebrations personal, beautiful, and affordable.
More Articles
 Which Political Party Supported Slavery? Quizlet Won’t Tell You the Full Truth — Here’s What Textbooks Omit About Whig, Democratic, and Republican Roles in Slavery (1820–1865)
 DIY Masks Party Favors
 Stop Wasting $47 on Boring Party Favors: 12 Stunning, Low-Effort DIY Party Favors for Adults That Guests Actually Keep (Not Toss!) — No Glue Gun Required
 Easy Wooden Signs for Beginners
 How to Make Paper Party Hats in Under 12 Minutes (No Glue Gun, No Scissors Required!) — 5 Foolproof Methods That Actually Hold Their Shape All Night
 DIY Embroidered Patches Party Favors
 How to Draw a Party in 7 Simple Steps (Even If You Can’t Draw Stick Figures): No Fancy Tools, No Art School Required — Just Paper, Pencil & Joy
 How to Make Party in Infinite Craft (Step-by-Step Guide): The 4 Hidden Combinations You’re Missing — Plus Why ‘Fire + Music’ Fails Every Time
 How to Know If a Supplement Is Third Party Tested: 7 Non-Negotiable Checks That Reveal Hidden Contaminants, Fake Labels, and Dangerous Gaps — Before You Swallow One Capsule
 How to Enable Third Party Cookies on Mac in 2024: A Step-by-Step Safari & Chrome Guide (Plus Why You Might Not Want To)