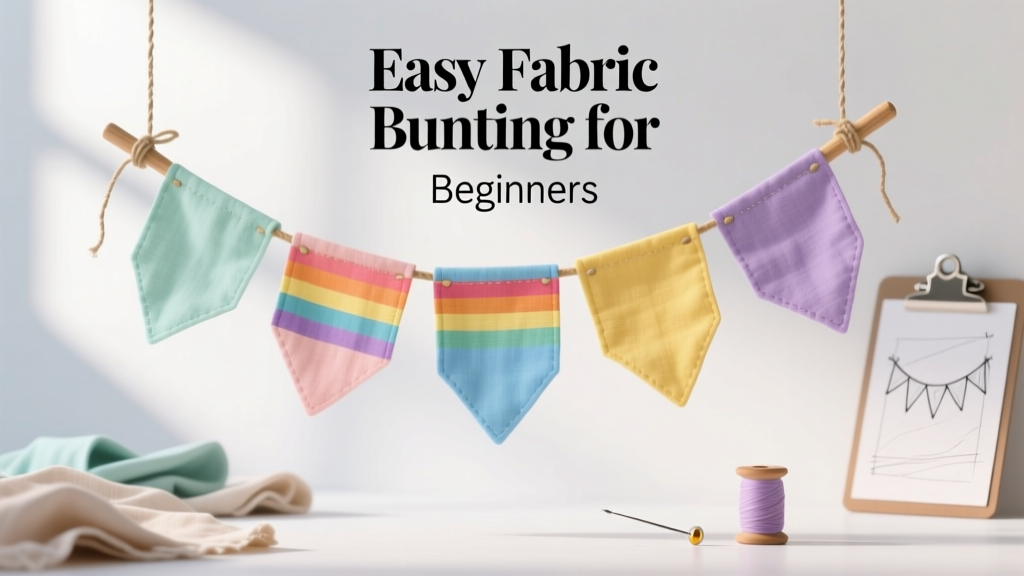
Easy Fabric Bunting for Beginners
Fabric bunting is one of those DIY party decorations that looks instantly cheerful—whether it’s strung across a dessert table, along a mantel, or above a gift station. It’s colorful, reusable, and way sturdier than paper banners, which makes it a smart handmade project for birthdays, baby showers, graduations, backyard barbecues, and holiday gatherings.
The best part? You don’t need fancy tools or expert sewing skills to make it look polished. This beginner-friendly fabric bunting tutorial walks you through simple shapes, easy measuring, and stress-free finishing options—plus a few upgraded variations if you want to level up.
If you love quick, satisfying DIY crafts that instantly transform a space, this is your project. Pick fabrics that match your theme, put on a favorite playlist, and you’ll have a party-ready banner before you know it.
Project Overview
- Skill level: Beginner (no-sew option included); confident beginner for sewing methods
- Time estimate: 60–120 minutes for a 6–8 ft bunting (depending on method and number of flags)
- Finished size: Typically 6–10 ft long; fully customizable
- Best for: DIY party decorations, photo backdrops, dessert tables, kids’ rooms, seasonal décor
Materials & Tools (With Estimated Costs)
Costs vary by brand and what you already have on hand. These estimates are typical for big craft stores or online marketplaces.
Fabric & Flag-Making Supplies
- Cotton quilting fabric (fat quarters or yardage): 3–8 fat quarters for a multi-color banner ($1–$5 each) or 1 yard total across 2–3 prints ($8–$15)
- Fusible interfacing (optional, for crisp flags): lightweight, iron-on ($4–$10)
- Thread: all-purpose polyester thread ($3–$6)
- Fabric marking tool: washable fabric pen or tailor’s chalk ($3–$8)
Binding / Hanging Options
- Double-fold bias tape (easiest binding): 1/2 inch or 3/4 inch wide, 3 yards ($3–$8)
- Grosgrain ribbon (cute and simple): 3/8 inch to 7/8 inch wide, 3–5 yards ($4–$12)
- Cotton twill tape (classic bunting look): 1/2 inch wide, 3–5 yards ($4–$10)
Tools (Pick Based on Your Method)
- Scissors: fabric shears recommended ($10–$25)
- Rotary cutter + self-healing mat + ruler (optional but fast): ($25–$60 total)
- Sewing machine: basic straight stitch is perfect (optional, but fastest)
- Iron + ironing board: helps everything look crisp (highly recommended)
- Pins or sewing clips: ($3–$8)
- Hot glue gun or fabric glue (for no-sew option): ($6–$15)
Choose Your Bunting Style (Beginner-Friendly Options)
These are the most popular fabric bunting shapes for party décor. All are beginner-friendly—choose the look you love.
Option A: Classic Triangle Flags (Most Popular)
- Fast to cut and assemble
- Works with almost any theme
- Great for mixing patterns
Option B: Pennant Flags (Sporty + Modern)
- A longer triangle shape (more “banner” vibe)
- Looks great for graduations and game-day parties
Option C: Swallowtail / Notched Flags (Extra Festive)
- Same as triangle but with a “V” cut at the bottom
- Super cute for birthdays and whimsical themes
Measurements That Make Bunting Look Balanced
You can absolutely eyeball this project, but a few go-to measurements make it look intentional.
Recommended Flag Size (Great for Party Setups)
- Triangle flag: 7 inches wide x 9 inches tall
- Pennant flag: 5 inches wide x 10–12 inches tall
- Spacing between flags: 1/2 inch to 1 inch (or no gap for a fuller look)
- Extra hanging length: add 10–12 inches of blank tape/ribbon on each end for tying
How Many Flags Do You Need?
A quick estimate for 7-inch-wide flags:
- 6 ft bunting: about 8–10 flags
- 8 ft bunting: about 12–14 flags
- 10 ft bunting: about 15–18 flags
Tip: If you’re decorating a photo backdrop, going a little longer and fuller always looks better in pictures.
Step-by-Step: Easy Fabric Bunting (Sewn Method)
This method creates durable bunting you can reuse for multiple parties. You’ll sew simple triangles and attach them into bias tape or ribbon.
Step 1: Make a Triangle Template
- Cut a piece of cardstock or thin cardboard to 7 inches wide x 9 inches tall.
- Mark the center of the 7-inch top edge at 3.5 inches.
- Draw lines from the top corners to the bottom center point to form a triangle.
- Cut it out—this is your reusable template.
Step 2: Cut Your Fabric
- Iron your fabric first (wrinkles can throw off cutting).
- Trace around the template on the wrong side of the fabric using chalk or a washable marker.
- For double-sided flags (recommended), cut two triangles per flag.
- Cut carefully with fabric shears or a rotary cutter for clean edges.
Beginner-friendly shortcut: Use pinking shears to reduce fraying on woven fabrics.
Step 3: Sew Each Flag
- Place two triangles right sides together.
- Sew along the two long sides with a 1/4-inch seam allowance, leaving the top edge open.
- Trim the point slightly (don’t cut through stitching) to help it turn neatly.
- Turn the flag right side out and use a chopstick or turning tool to gently push out the point.
- Press flat with an iron.
Step 4: Prepare the Binding (Bias Tape or Ribbon)
- Cut your bias tape or twill tape to your desired length.
- Add 10–12 inches extra on each end for tying onto hooks, nails, or command strips.
- If using bias tape, open it and press if it’s wrinkled.
Step 5: Attach Flags to the Binding
- Slide the top edge of each flag into the folded bias tape (or fold ribbon over the top edge).
- Pin or clip each flag in place.
- Keep spacing consistent: 1/2 inch to 1 inch gap looks neat.
- Sew a straight stitch along the edge of the tape/ribbon to secure all flags.
Stitch recommendation: Straight stitch length 2.5–3.0 on most machines. For extra durability, stitch near the top edge and then add a second row of stitching below it.
No-Sew Fabric Bunting (Fast Party Decor Option)
If you don’t have a sewing machine (or you’re making bunting the night before the party), this no-sew option still looks adorable.
Best Fabrics for No-Sew
- Felt (won’t fray)
- Fleece (minimal fraying)
- Cotton fabric with pinked edges + fabric glue (works in a pinch)
Steps
- Cut triangles (single layer is fine) using the same 7 x 9 inch template.
- If using cotton, cut with pinking shears to reduce fraying.
- Lay ribbon or twill tape flat and arrange flags with 1/2–1 inch spacing.
- Fold the ribbon over the top edge of each flag (or overlap the flag onto the ribbon by 1/2 inch).
- Use hot glue or fabric glue to secure each flag, pressing firmly.
- Let glue fully cure before hanging (check your glue’s recommended drying time—often 30–60 minutes).
Pro Tips for Crisp, Professional-Looking Bunting
- Press as you go: Ironing after turning each flag makes a huge difference.
- Use interfacing for structure: Iron lightweight fusible interfacing to the wrong side before sewing if your fabric is floppy.
- Chain sew: Sew all flags one after another without cutting thread between each to save time.
- Keep patterns facing the same direction: If your fabric has words, animals, or directional prints, align your template carefully.
- Pick a “hero” fabric: Use 1 bold print plus 2–3 supporting solids or small prints for a designer look.
- Photograph-friendly palette: High contrast (like navy + white + gold) pops nicely in party photos.
Fun Variations (Beginner to Advanced)
Beginner Variations
- Mini bunting: Use 4-inch wide x 5-inch tall triangles for centerpieces, high chair banners, or cake table décor.
- Single-sided rustic bunting: Use canvas drop cloth or denim scraps and let edges be raw for a farmhouse vibe.
- Holiday bunting: Swap fabrics seasonally—hearts for Valentine’s, red/green for Christmas, pastels for spring parties.
Advanced Variations
- Reverse appliqué letters: Add initials or “HAPPY BIRTHDAY” on each flag (great for milestone parties).
- Quilted bunting: Sew scraps into patchwork triangles before assembling the flags.
- Lined + topstitched flags: After turning, topstitch 1/8 inch from the edge for a crisp, tailored finish.
- Add trims: Pom-pom trim, ric-rac, or tassels along the bottom edge of each flag for extra flair.
Troubleshooting: Quick Fixes for Common Issues
- My flag points look bulky: Trim seam allowance at the point and press with steam. A turning tool helps shape it cleanly.
- Edges are fraying: Use pinking shears, zigzag stitch the raw edges before turning, or choose felt for a no-fray option.
- My bunting curves or twists when hanging: Make sure your flags are evenly spaced and not pulling the tape. Press the tape flat before sewing.
- Bias tape is hard to sew straight: Use clips instead of pins and stitch slowly. A wider tape (3/4 inch) is often easier for beginners.
- Flags are uneven sizes: Stack-cut fabric layers (2–4 layers at a time) using a rotary cutter and ruler for consistency.
Common Crafting Mistakes to Avoid
- Skipping the ironing step: Pressed fabric cuts and stitches more accurately—this is the fastest way to make bunting look “store-bought.”
- Making flags too big for the space: Oversized flags can overwhelm a small table. Measure your hanging area first.
- Not adding extra length on the ends: Those 10–12 inches of extra tape on each end make hanging so much easier.
- Using stretchy fabric without stabilizer: Jersey knits can warp. If you love the look, use interfacing and go slowly.
- Forgetting directional prints: Once the flags are sewn, upside-down cupcakes are hard to unsee. Double-check before cutting.
- Rushing glue time (no-sew method): If you hang too soon, flags may slide. Let it cure fully.
FAQ: Fabric Bunting for Parties
How much fabric do I need for a standard bunting?
For a 6–8 ft bunting with 10–14 flags (7 x 9 inches), you can usually make it with 3–6 fat quarters depending on how you mix prints and whether your flags are double-sided.
What’s the easiest fabric for beginners?
Cotton quilting fabric is the easiest: it cuts cleanly, presses well, and sews without slipping. For a true no-sew option, felt is the least stressful because it won’t fray.
Can I wash and reuse fabric bunting?
Yes—especially if it’s sewn. Use a gentle cycle or hand wash, then air dry. Press lightly before storing. If you used hot glue, washing may loosen bonds, so spot-clean instead.
How do I hang bunting without damaging walls?
Try removable adhesive hooks or painter’s tape for lightweight bunting. For heavier sewn bunting, command hooks or small nails/hooks work well.
How do I keep bunting from sagging in the middle?
Use a stronger hanging tape (twill tape is great), reduce the number of flags per length, or add a third hook in the center to support the weight.
Can I make this without a sewing machine?
Absolutely. Use felt triangles and attach them with fabric glue or hot glue to ribbon or twill tape. It’s one of the quickest handmade party decoration wins.
Wrap-Up: Your Party Space Just Got Happier
Easy fabric bunting is a classic DIY craft for a reason: it’s budget-friendly, beginner-approved, and it instantly upgrades any party setup. Make one for a birthday now, and you’ll find yourself reaching for it again for holidays, showers, and last-minute get-togethers.
Try your first banner with simple triangle flags and cotton fabric, then experiment with lettered flags, pom-pom trim, or mini bunting for centerpieces when you’re ready for more. Your future self (and your party photos) will thank you.
Want more handmade party decorations and beginner-friendly DIY crafts? Explore more creative project ideas on smartpartyprep.com.
More Articles
 Personalized Custom Stickers Gifts
 How to Make Pet Party Invitations That Actually Get RSVPs: 7 Foolproof Steps (No Design Skills Needed + Free Templates Inside)
 No-Sew Masks Tutorial
 How to Enable Third Party Cookies in 2024: A Step-by-Step Browser Guide (Chrome, Safari, Firefox, Edge) — Because Yes, Some Sites Still Need Them (and Here’s Exactly How to Do It Safely)
 Budget DIY Custom Stickers Under $25
 Kids' Craft: Confetti
 How to Make a Partiful: The 7-Step No-Stress Guide That Turns Craft Panic Into Confident Creativity (Even If You’ve Never Glued Sequins Before)
 How to Make Party in Infinite Craft (Step-by-Step Guide): The 4 Hidden Combinations You’re Missing — Plus Why ‘Fire + Music’ Fails Every Time
 Step-by-Step T-Shirts Tutorial
 12 Do It Yourself Party Hats You Can Make in Under 30 Minutes (No Sewing, No Glue Gun, and Zero Craft Store Runs Needed)