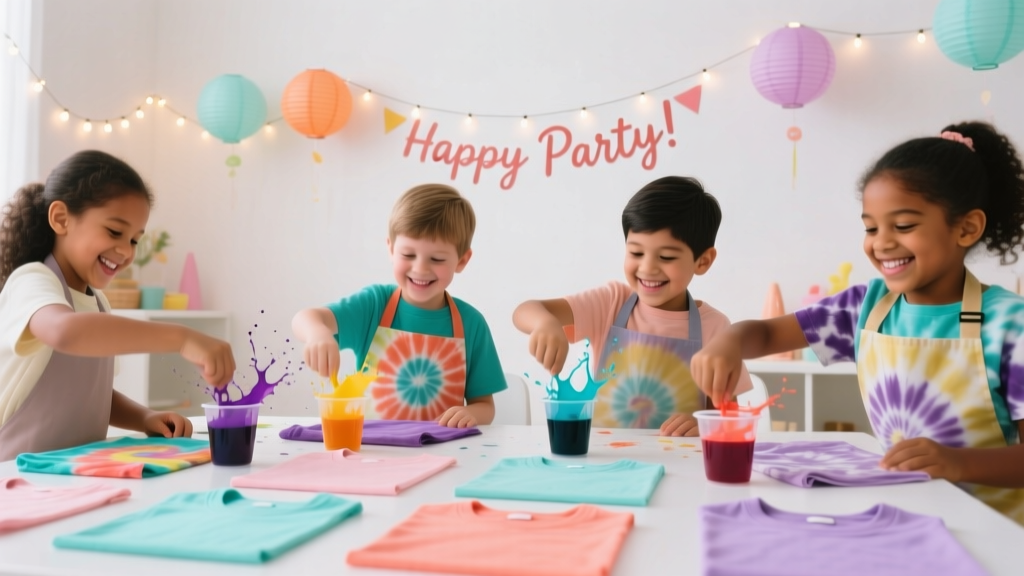
Kids' Craft: Tie-Dye Shirts
Few kids’ crafts bring instant party energy like tie-dye shirts. The colors are bold, the process feels like a science experiment (without the boring parts), and every shirt turns into a wearable souvenir. Whether you’re planning a birthday bash, a summer playdate, a camp-style backyard party, or a team celebration, DIY tie-dye is one of those handmade projects that doubles as an activity and a party favor.
It’s also wonderfully flexible: you can keep it super simple for beginners with one or two colors and basic spirals, or go big with advanced patterns, ombrés, and themed palettes that match your party decorations. Kids love the surprise of the final reveal, and adults love that it’s budget-friendly, customizable, and easy to scale for groups.
This step-by-step guide walks you through materials, setup, kid-friendly techniques, and pro tips so your tie-dye party craft feels fun and organized (not chaotic). You’ll end with vibrant shirts that look great in photos—and you’ll have a repeatable DIY craft idea you can use again and again.
Project Overview: Skill Level, Time, and Best Ages
- Skill level: Beginner (with adult help) to Intermediate (for advanced patterns)
- Best ages: Ages 6+ (younger kids can participate with more hands-on help)
- Active crafting time: 30–60 minutes per group session (plus batching/setup)
- Set time (dye soaking): 6–8 hours minimum; 12–24 hours for richest color
- Wash/dry time: 60–90 minutes (mostly machine time)
- Group planning tip: For 8–12 kids, plan a 60–90 minute activity window so everyone can dye without rushing.
Materials and Estimated Costs
Shirts and Dye Supplies
- 100% cotton white T-shirts (best color results; pre-washed): $3–$7 each (bulk packs can be $2–$4 each)
- Fiber-reactive tie-dye kit (squeeze bottles included; look for “Procion MX” style dyes): $15–$30 for a kit that covers 6–15 shirts (depending on color intensity)
- Soda ash (fixative) (if not included in kit): $5–$10 per 1 lb bag (often enough for many projects)
- Plastic zip-top bags (1–2 gallon size) for each shirt: $0.10–$0.25 each
- Rubber bands (multiple sizes; thick bands hold best): $3–$6 per bag
Tools and Protective Gear (Highly Recommended)
- Disposable gloves (nitrile preferred for dye work): $6–$12 per box
- Plastic tablecloths or painter’s plastic to cover surfaces: $2–$6
- Wire rack or cooling rack (keeps shirts off puddles for cleaner patterns): $6–$15
- Measuring cups/spoons (dedicated for crafts): $5–$10
- Large bucket or bin (for soda ash soak): $5–$12
- Aprons or oversized T-shirts to protect clothing: $0–$10 (depending on what you have)
- Paper towels and trash bags: $3–$8
Optional “Party Host” Add-Ons
- Disposable squeeze bottles (extra colors or better control): $1–$2 each
- Plastic baskets to organize stations (bands/gloves/bags): $1–$5 each
- Name labels or masking tape + marker for each bag: $2–$6
Before You Start: Setup for a Smooth Tie-Dye Party
Choose Your Dye Area
- Best option: Outdoors on a patio/driveway for easy cleanup
- Indoor option: Garage, laundry room, or a table covered with plastic (plus a drop cloth underfoot)
Pre-Wash Shirts (Don’t Skip This)
Wash and dry shirts without fabric softener. This removes coatings that can block dye absorption and helps you get bright, even color.
Soda Ash Soak (For Brighter, Longer-Lasting Color)
If your kit includes soda ash, follow that ratio. If you’re mixing your own:
- Mix 1 cup soda ash per 1 gallon (3.8 L) warm water in a bucket.
- Soak shirts for 15–20 minutes.
- Wring out until damp (not dripping). Damp fabric takes dye more smoothly.
Station Plan (Great for Groups)
- Folding station: shirts, rubber bands, a sample pattern card
- Dye station: bottles, gloves, rack, paper towels
- Bagging station: labeled zip bags, extra gloves
- Handwash station: baby wipes or a nearby sink with soap
Step-by-Step: How to Tie-Dye Shirts (Kid-Friendly and Party-Ready)
Step 1: Prep the Shirt
- Put on gloves and cover your table with plastic.
- Start with a damp shirt (from soda ash soak or lightly spritzed with water).
- Lay it flat and smooth out wrinkles so folds are clean.
Step 2: Pick a Pattern (Beginner to Advanced)
Pattern A: Classic Spiral (Beginner Favorite)
- Pinch the center of the shirt (or slightly off-center for a more modern look).
- Twist in one direction until the shirt forms a flat “swirl disk.”
- Wrap 3–4 rubber bands across the disk to create wedge sections (like pizza slices).
Tip: For smaller kid hands, adults can twist while kids place rubber bands.
Pattern B: Bullseye (Easy and Bold)
- Pinch a point where you want the center (front chest works well).
- Lift the fabric upward and smooth into a cone shape.
- Place rubber bands every 1.5–2 inches (4–5 cm) down the cone.
Pattern C: Stripes (Great for Team or Party Colors)
- Fold the shirt like an accordion (vertical or horizontal) with folds about 1–2 inches (2.5–5 cm) wide.
- Add rubber bands every 2–3 inches (5–7.5 cm) along the folded bundle.
Pattern D: Heart (Intermediate, Very “Party Photo” Friendly)
- Fold the shirt in half vertically (like a book).
- On the folded side, imagine half a heart shape and pinch/pleat along that curve.
- Bind tightly with rubber bands along the curved line (a tighter bind gives a cleaner heart).
Step 3: Apply Dye (Color Placement Made Simple)
- Place the tied shirt on a wire rack over a covered surface (reduces muddy puddles).
- Apply dye one color at a time, saturating each section until the dye soaks through.
- Flip the bundle and repeat on the back to avoid large white patches.
- How much dye? Aim for “fully saturated but not swimming.” If dye is dripping heavily, you’re likely using more than needed.
- Color plan for beginners: Choose 2–3 colors that blend well (blue + purple, pink + purple, blue + green).
- Avoid accidental brown: Don’t overlap too many complementary colors (red + green, blue + orange, yellow + purple) unless you want a grungier, muted look.
Step 4: Bag and Set (The Waiting Game That Pays Off)
- Slide the dyed bundle into a labeled zip-top bag.
- Seal it and let it sit at room temperature for 12–24 hours for brightest color (minimum 6–8 hours).
Party tip: If the tie-dye is the main activity, send shirts home bagged with care instructions. It becomes a fun “reveal” the next day.
Step 5: Rinse, Wash, and Dry
- Put on gloves again. Rinse the shirt under cold running water while still tied until water runs less inky.
- Remove rubber bands and continue rinsing.
- Wash shirts in warm water with a small amount of detergent. For the first wash, wash tie-dye separately or with similar colors.
- Dry on medium heat or hang dry.
First-wash tip: If you’re dyeing a big batch, consider adding a color-catcher sheet to help trap loose dye in the wash.
Pro Tips for Bright Colors and Clean Patterns
- Use cotton for best results: 100% cotton takes dye most vibrantly. Cotton blends (like 60/40) can look softer and more vintage.
- Damp, not dripping: Too much water can dilute dye and cause pale results. Wring out thoroughly after soda ash soak.
- Tighter ties = more white lines: Tight rubber bands create crisp resist lines and defined patterns.
- Less is more with colors: Two or three colors often look cleaner than six.
- Warm room = better curing: Dye reacts best around 70–80°F (21–27°C). If it’s chilly, extend set time.
- Label everything: Use masking tape on bags with the child’s name and color choices.
Fun Variations for Parties and Handmade Decorations
Beginner-Friendly Variations
- Two-color spiral: Alternate wedges with Color A and Color B for a high-contrast design.
- Monochrome ombré: One color, lighter at one end (use less dye and more white space).
- “Splatter” look (controlled): Use a squeeze bottle to dot dye on a loosely scrunched shirt.
Advanced Variations (For Older Kids/Teens or Crafty Adults)
- Ice dye (wow-factor): Place tied shirt on a rack, cover with ice, sprinkle powdered dye, and let melt into the fabric. Gorgeous watercolor blends—messier but stunning.
- Reverse tie-dye: Start with a dark shirt, tie it, apply a bleach solution (adult-only), then rinse thoroughly and overdye with bright colors.
- Geode style: Create multiple tight bound “nodes” with rubber bands, dye around them with layered colors for a crystal-like effect.
Make It Match Your Party Decorations
- Color-theme palettes:
- Mermaid party: teal + aqua + purple
- Rainbow party: red + yellow + blue (leave space so it doesn’t muddy)
- Sports team: two team colors + white space for crisp contrast
- Boho party: mustard + terracotta + sage (muted, modern)
- DIY photo moment: Have kids pose with their dye bundles (gloves on) at a “craft station” backdrop for a fun party memory.
Troubleshooting: Fixes for Common Tie-Dye Problems
- Problem: Colors look pale.
- Cause: Shirt too wet, not enough dye, short set time, or no soda ash.
- Fix: Wring better next time, saturate more evenly, and let set 12–24 hours. Confirm you’re using fiber-reactive dye for cotton.
- Problem: Big white patches (not the cute kind).
- Cause: Dye didn’t soak through to the back/inside folds.
- Fix: Apply dye on both sides and gently press dye into thicker areas.
- Problem: Colors turned brown or muddy.
- Cause: Too many overlapping colors, especially complementary colors.
- Fix: Use fewer colors and keep them in separate sections with a bit of white space.
- Problem: Dye bled everywhere, pattern looks blurry.
- Cause: Loose tying, shirt overly wet, or dye pooling on the table.
- Fix: Tie tighter, wring out more, and use a rack to keep the shirt out of puddles.
- Problem: Dye stains on hands or table.
- Cause: No gloves or uncovered surfaces.
- Fix: Gloves + plastic tablecloths. Keep a “clean hands only” zone for snacks and phones.
Common Crafting Mistakes to Avoid
- Skipping the pre-wash: Factory finishes can block dye and cause uneven results.
- Using fabric softener: It can repel dye and lead to patchy color.
- Trying every color in the kit at once: More colors often means more mud. Keep it curated.
- Not labeling shirts: At a party, unclaimed tie-dye bags happen fast—add names immediately.
- Rinsing in hot water right away: Start with cold water to remove excess dye before warm washing.
- Letting kids handle concentrated powder dyes (if not pre-mixed): If you’re using powdered dye, pre-mix it yourself and keep lids on bottles between uses.
FAQ: Kids’ Tie-Dye Shirts
1) Do I have to use soda ash?
If you want bright, long-lasting color on cotton, soda ash makes a big difference. Many all-in-one tie-dye kits include it. You can still get color without it, but it’s more likely to fade or look pastel.
2) What fabric works best for tie-dye shirts?
100% cotton is the easiest and most vibrant for this DIY craft. Rayon also dyes well. Polyester-heavy shirts won’t get very bright with fiber-reactive dye and may look washed out.
3) How many shirts can one tie-dye kit make?
It depends on the kit size and how saturated you like your colors. As a general party planning estimate, a $20–$30 kit often covers 8–12 youth shirts with solid color, or fewer if you’re using lots of deep, dark shades.
4) How do I keep colors from bleeding in the wash?
Rinse thoroughly until water runs mostly clear, then wash newly dyed shirts separately for the first wash or two. After that, they can usually be washed with similar colors. Avoid overloading the washer so shirts can rinse clean.
5) Can we do this as a party activity without making a huge mess?
Yes—set up stations, use gloves, cover surfaces, and bag each shirt immediately after dyeing. A wire rack helps prevent puddles and keeps patterns cleaner. Pre-mix dyes and keep a dedicated “dye zone” away from food and party decorations.
6) What’s the easiest pattern for beginners?
The spiral and bullseye are the most beginner-friendly and consistently cute. They’re also quick, which helps when you’re crafting with a group.
Wrap-Up: A Party Craft That Becomes a Keepsake
Tie-dye shirts are the kind of kids’ craft that checks every box: creative, hands-on, photo-worthy, and genuinely useful after the party ends. With a simple setup, a few smart material choices, and a clear step-by-step plan, you’ll get bright results without stress—plus a stack of one-of-a-kind handmade projects kids will be proud to wear.
If you try this for a birthday, summer party, or school celebration, keep one extra shirt for yourself—you’ll want a matching “party host” tee. For more DIY crafts, party decorations, and creative handmade project ideas, explore more tutorials on smartpartyprep.com.
More Articles
 Rustic Dream Catchers Ideas
 How to Unblock 3rd Party Cookies on Mac: A Step-by-Step Safari & Chrome Guide (No Tech Degree Required — Just 90 Seconds & Your Settings App)
 How to Make T-Shirts at Home
 Is Primal Queen Third Party Tested? The Truth About Lab Verification, What ‘Certified’ Really Means, and How to Spot Genuinely Transparent Brands (Not Just Marketing Claims)
 Does Hasbro Hate Third Party Transformers? The Truth Behind Licensing, Cease-and-Desists, and Why Fans Keep Building Anyway — A Deep Dive for Customizers, Collectors & Makers
 How to Enable 3rd Party Cookies on Safari in 2024: The Real Truth (Spoiler: You Can’t — But Here’s What Actually Works Instead)
 How to Make a Tea Party Hat in Under 45 Minutes (No Sewing, No Fancy Tools—Just Paper, Glue & Joy!)
 Easy Soap Bars for Beginners
 No-Sew Masks Tutorial
 How Do You Make a Party Hat in Under 12 Minutes? 5 Foolproof Methods (No Glue Gun Needed) + Printable Templates & Pro Tips to Avoid Lopsided Crowns