A Cooking Class on a Budget: How to Plan a Fun, Organized, Low-Cost Culinary Event
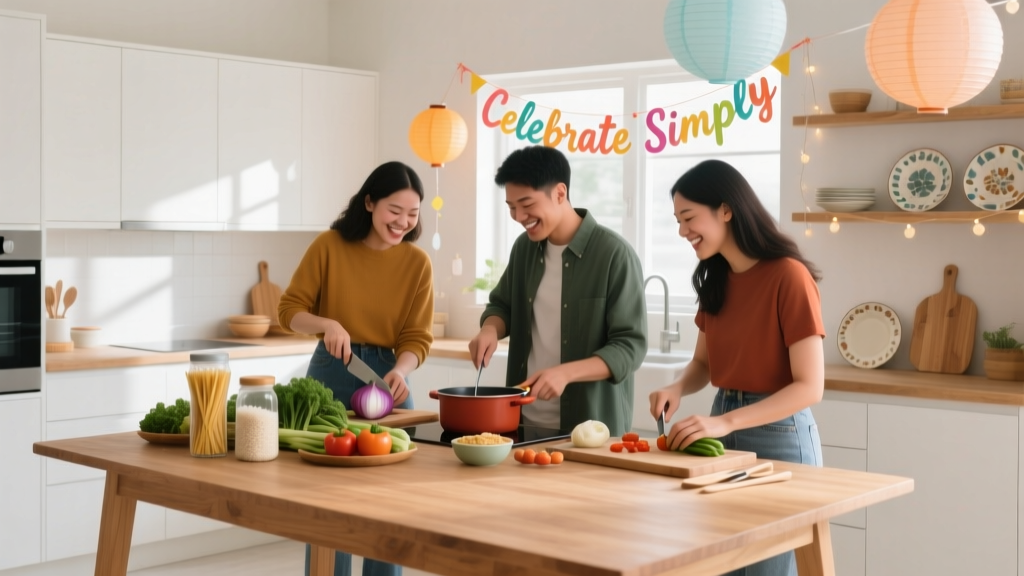
A cooking class is one of the easiest ways to turn “just a get-together” into an experience people talk about for weeks. It blends entertainment, connection, and a built-in meal—perfect for birthdays, team-building events, couples’ nights, shower activities, and neighborhood gatherings. The catch: without a plan, costs creep fast. Ingredients multiply, equipment gets overlooked, and the schedule runs late, leaving guests hungry and hosts stressed.
Proper event planning matters even more for a budget-friendly cooking class because food is both the activity and the main expense. When you map out the menu, group size, timing, and roles ahead of time, you can buy smarter, waste less, and deliver a polished experience without paying premium prices. A well-coordinated plan also keeps the kitchen safe and the class engaging—two things guests always remember.
This guide walks you through step-by-step party organization and coordination strategies—from timelines and checklists to cost-saving vendor tips—so you can host a cooking class on a budget that still feels elevated and intentional.
Decide Your Cooking Class Format (Budget Starts Here)
Your format determines the ingredient list, staffing needs, equipment, and timing. Choose the simplest format that still matches your event goals.
Popular budget-friendly formats
- Demo + tasting (lowest cost, lowest stress): Host demonstrates key steps; guests help with 1–2 stations. Great for small kitchens.
- Hands-on stations (interactive, moderate cost): Guests cook in pairs or small groups. Requires more tools and prep.
- Cook-and-compete “mini challenge” (high energy): Teams assemble variations using a shared pantry. Works well for corporate events but needs tight coordination.
- Virtual/hybrid cooking class (trend-forward, scalable): Instructor leads on video; guests cook at home using a shared shopping list or kit.
Group size guidance
- 8–12 guests: Ideal for most home kitchens with 2–3 work zones.
- 12–20 guests: Better in a community center, church kitchen, or rented studio; consider a demo-first structure.
- 20+ guests: Consider partnering with a culinary school, restaurant off-hours, or hiring an instructor with assistants.
Set a Clear Goal and Theme (So You Don’t Overspend)
Budget events stay on track when every decision ties back to a defined purpose. Answer these planning questions early:
- Occasion: Birthday, bachelorette, team-building, fundraiser, client appreciation?
- Skill level: Beginner-friendly recipes reduce waste and keep the timeline realistic.
- Dietary needs: Clarify allergies and restrictions before you pick the menu.
- Takeaway: Will guests leave with leftovers, a recipe card, or a small prize?
Budget-friendly themes that feel premium: pasta night, taco workshop, dumpling folding, pizza-from-scratch, salad + dressing masterclass, brunch boards, “one-pan wonders,” or seasonal farmers-market cooking.
Budget Breakdown: What a Low-Cost Cooking Class Really Costs
Start with a total budget cap, then allocate by category. Here are realistic ranges for a 10–12 person cooking class.
Sample budget ranges (10–12 guests)
- Food & ingredients: $80–$180
- Beverages: $20–$80 (or BYOB to reduce cost)
- Disposable/serving supplies: $15–$45
- Décor + printing (optional): $10–$35
- Instructor fee (optional): $0–$300+
- Venue (optional): $0–$250+
- Contingency (10%): $15–$60
Three example budgets (real-world planning scenarios)
- $150 “Friends at Home”: host-led demo + hands-on garnish station, pasta + salad, sparkling water, printed recipe sheets.
- $300 “Birthday Cooking Party”: rented community room, taco bar workshop, simple balloon/photo corner, small prizes for best plating.
- $600 “Team-Building Lite”: instructor-led dumpling class, ingredient kits pre-portioned, branded recipe cards, non-alcoholic drinks.
Money-saving rule: Spend on the ingredients guests will taste most (protein, fresh herbs, quality cheese) and simplify everything else (decor, disposables, extra menu items).
Menu Planning That Saves Money (and Prevents Kitchen Chaos)
The best budget cooking class menus share three traits: minimal specialty tools, short cooking times, and flexible ingredients.
Choose a “core skill” menu
Build the class around one skill that feels valuable:
- Knife skills + quick sauces
- Handmade pasta or gnocchi basics
- Perfect tacos: seasoning + salsas + assembly
- Dumplings: folding technique + dipping sauce
- Pizza: dough shaping + topping strategy
Budget-smart ingredient strategies
- Seasonal shopping: Plan around what’s in season to reduce cost and improve flavor.
- One protein, two uses: Example: rotisserie chicken used for enchilada filling and a quick soup starter.
- Batch-friendly items: Rice, pasta, beans, and roasted vegetables scale cheaply.
- Skip expensive single-use items: Specialty flours, niche spices, or rare garnishes can inflate the bill.
- Limit the menu: Aim for 1 main, 1 side, 1 simple dessert (or no dessert).
Example low-cost class menu (12 guests)
- Main: Build-your-own taco workshop (chicken or beans)
- Side: Street corn salad (served cold—easy timing)
- Skill focus: seasoning, quick pickles, salsa tasting
- Optional dessert: store-bought churro bites + chocolate dip
Venue, Equipment, and Setup (Without Renting a Studio)
Current event planning trends lean toward “experience-first” gatherings in practical spaces: homes, community rooms, coworking kitchens, and even outdoor pavilions with portable burners.
Budget-friendly venue ideas
- Your home or a friend’s home: $0, most control.
- Community center / park district room: Often affordable with kitchen access.
- Church or school kitchen: May be low-cost with insurance requirements.
- Restaurant off-hours: Some will host a class if you buy a minimum food package.
- Local culinary professional’s space: Higher cost, but includes tools and staff.
Equipment checklist (avoid last-minute purchases)
- Cutting boards (1 per 2 guests)
- Knives (or ask guests to bring one chef’s knife if appropriate)
- Mixing bowls, measuring cups/spoons
- Sheet pans, sauté pans, stock pot
- Spatulas, tongs, whisks
- Hot pads, towels, disposable gloves (optional)
- Food storage containers or foil for leftovers
- Labeling tape + marker (highly recommended)
Smart setup that keeps the class moving
- Create stations: prep, cooktop/oven, plating, beverage.
- Use tray kits: set each station with pre-measured tools and ingredients.
- Plan traffic flow: keep raw protein prep separate from ready-to-eat items.
- Assign a dish drop zone: one bin for trash, one for recyclables, one for dirty tools.
Vendor Selection Tips (When You Need Help Without the High Price)
If you’re hiring help—an instructor, venue, or catering add-on—shop like an event coordinator: compare packages, negotiate scope, and confirm exactly what’s included.
Hiring an instructor on a budget
- Look for culinary students, local chefs building a brand, or experienced home cooks with teaching experience.
- Ask for a flat fee vs. per-person if your headcount might fluctuate.
- Clarify deliverables: menu development, shopping, setup, teaching, cleanup, and recipe cards.
- Request a short run-of-show so timing stays realistic.
Ingredient sourcing shortcuts
- Warehouse stores: best for proteins, cheese, tortillas, flour, and bulk produce.
- Ethnic markets: great value on spices, herbs, rice, and specialty items.
- Grocery pickup: reduces impulse spending and saves planning time.
Step-by-Step Planning Timeline (with Checklists)
Use this event planning timeline template for smooth coordination.
4–6 weeks out (or ASAP)
- Define budget cap and preferred format (demo vs hands-on).
- Choose date/time (weeknight 6–9 pm works well for adults).
- Confirm venue and kitchen access (ovens, burners, fridge space, parking).
- Pick theme + draft menu with 1–2 backup substitutions.
- Create guest list and send invites with dietary/allergy form.
2–3 weeks out
- Finalize headcount range and shopping strategy.
- Build station plan (what gets prepped where).
- Inventory equipment; borrow missing items from friends or neighbors.
- Confirm any vendors (instructor, rental items, venue contact).
- Design simple recipe cards (print 1-page front/back).
7–10 days out
- Write a detailed run-of-show schedule (start, demo, cook, eat, cleanup).
- Create a master shopping list by category (produce, dairy, pantry, disposables).
- Buy shelf-stable ingredients and disposables.
- Confirm final RSVP and collect allergy reminders.
2–3 days out
- Buy perishables (produce, proteins, dairy).
- Pre-portion dry ingredients into labeled containers.
- Prep make-ahead items: sauces, dressings, marinades, chopped toppings.
- Set up stations and label drawers/cabinets for helpers.
Event day
- 3–4 hours before: clear counters, sanitize, set up stations, chill drinks.
- 1 hour before: set out name tags (optional), recipes, aprons, handwashing reminders.
- Arrival: greet guests, explain flow and safety (knives, heat, allergies).
- Class time: teach in short segments (5–10 minutes), then hands-on practice.
- Meal + photos: schedule a 10-minute plating window for great results.
- Cleanup: assign 2–3 volunteers, run a “wash as you go” system.
Post-event (next day)
- Send recipes and a quick thank-you message.
- Share photo album link.
- Note what ran over time and what ingredients were left over for future planning.
Run-of-Show Template (Copy/Paste)
- 0:00–0:15 Arrival, handwashing, overview, station assignments
- 0:15–0:30 Demo core skill (knife cuts, dough shaping, sauce base)
- 0:30–1:15 Hands-on cooking in stations
- 1:15–1:30 Plating + photos
- 1:30–2:00 Eat, discuss variations, Q&A
- 2:00–2:30 Pack leftovers + group cleanup
Common Planning Mistakes to Avoid
- Overly ambitious recipes: Long cook times or advanced techniques cause delays and frustration.
- Not enough prep space: Too many guests at one counter leads to safety issues and slow progress.
- Forgetting the “hidden costs”: foil, parchment, storage containers, ice, and spices can add up.
- Skipping allergy planning: Failing to label ingredients or cross-contamination zones can put guests at risk.
- No cleanup plan: A cooking class without a cleanup system ends with a messy kitchen and tired hosts.
- Timing the meal too late: Guests get hungry—schedule tasting moments (chips + salsa, bread + dip) early.
Practical Cost-Saving Tips That Still Feel “Event-Ready”
- Use a signature “welcome sip”: one batch beverage (lemonade, iced tea, mocktail) instead of a full bar.
- Minimal décor, maximum impact: linen-like table covering, simple menu cards, and one centerpiece (herb bundle or seasonal fruit).
- Offer one upgrade: a quality finishing salt, fresh basil, or good Parmesan makes the meal feel premium.
- Make it semi-potluck: guests bring a bottle of wine or dessert while you handle the class and main meal.
- Leverage current trends: “interactive food stations,” “experiential gatherings,” and “intentional small groups” are popular—and naturally budget-friendly.
FAQ: Cooking Class Event Planning on a Budget
How much food should I plan per person for a cooking class?
Plan for a full meal unless you’re marketing it as a tasting. For adults, include one main portion plus a side; add 10% extra for seconds and unexpected guests. If it’s hands-on, buy a little extra of the key ingredients in case of mistakes (tortillas, pasta, rice, herbs).
What’s the easiest cooking class format for a small kitchen?
A demo-first format with 1–2 hands-on stations works best. Guests can rotate through tasks (chopping, mixing, assembling) while you handle the stove/oven steps to keep traffic and safety manageable.
Should I hire an instructor or host it myself?
If your goal is a relaxed social event and you’re comfortable cooking, hosting yourself saves the most money. Hire an instructor when you want a true “classroom” experience, have a larger group, or need help managing timing and station flow.
How do I handle dietary restrictions without doubling the budget?
Choose a menu that’s naturally adaptable (tacos, grain bowls, pasta with optional protein). Offer one base recipe and a couple of add-ons rather than separate full recipes. Label ingredients clearly and set up a dedicated allergy-safe station when needed.
What are the best ways to keep the event on schedule?
Pre-measure ingredients, keep demos to short bursts, and assign roles (station leads or pairs). Schedule a firm plating/eating time, and build your menu around quick-cook items or make-ahead components like sauces and dressings.
Next Steps: Plan Your Cooking Class with Confidence
Start by picking a simple theme and format, then lock your guest count range and menu. Use the timeline above to map shopping, prep, and station setup, and protect your budget with a clear category breakdown and a 10% contingency. With smart party organization and a clean run-of-show, you’ll deliver an experience that feels polished—without overspending.
Want more step-by-step event planning guides, checklists, and party coordination ideas? Explore more resources on smartpartyprep.com and keep building events that feel effortless and memorable.
More Articles
 What Did the Boston Tea Party Lead To? The Shockwave Timeline Every Educator & Event Planner Needs — From Colonial Protest to Revolution, Tax Reform, and Modern Civic Activism (12 Key Outcomes You’re Missing)
 What Is the Conservative Party? — A Clear, Nonpartisan Breakdown for Voters, Students & New Citizens (No Jargon, No Spin, Just Facts You Can Trust)
 What Is the Purpose of a Party Platform? (Spoiler: It’s Not Just Speeches — Here’s How It Actually Drives Voter Trust, Fundraising, and Real Policy Wins in 2024)
What to Serve at a Kentucky Derby Party: The Realistic, Crowd-Pleasing Menu Plan (No Fancy Mixology or $200 Hors d’Oeuvres Required)
What Is the Purpose of a Party Platform? (Spoiler: It’s Not Just Speeches — Here’s How It Actually Drives Voter Trust, Fundraising, and Real Policy Wins in 2024)
What to Serve at a Kentucky Derby Party: The Realistic, Crowd-Pleasing Menu Plan (No Fancy Mixology or $200 Hors d’Oeuvres Required)
 How to Plan a Birthday Party Without Losing Your Mind: The 7-Step Stress-Proof Framework That Cuts Planning Time by 63% (Backed by 127 Real Parties)
 What Is the Purpose of a Third Party? 7 Real-World Reasons You’re Overlooking Critical Risk Mitigation, Trust Building, and Scalable Execution in Your Next Event
Where to Have an Adult Birthday Party: 7 Unexpected Venues That Spark Joy (Not Stress) — No More Last-Minute Hotel Ballrooms or Awkward Backyards
What Political Party Is Jimmy Kimmel? The Truth Behind His Public Statements, Donations, and Why His 'Non-Partisan' Label Is More Complicated Than It Seems — Here’s What IRS Filings and On-Air Moments Reveal
What Is the Purpose of a Third Party? 7 Real-World Reasons You’re Overlooking Critical Risk Mitigation, Trust Building, and Scalable Execution in Your Next Event
Where to Have an Adult Birthday Party: 7 Unexpected Venues That Spark Joy (Not Stress) — No More Last-Minute Hotel Ballrooms or Awkward Backyards
What Political Party Is Jimmy Kimmel? The Truth Behind His Public Statements, Donations, and Why His 'Non-Partisan' Label Is More Complicated Than It Seems — Here’s What IRS Filings and On-Air Moments Reveal
 What to Wear to a 90's Party Guys: The 7-Item Minimalist Checklist That Saves You 3 Hours of Stress (No Thrift Store Scrolling Required)