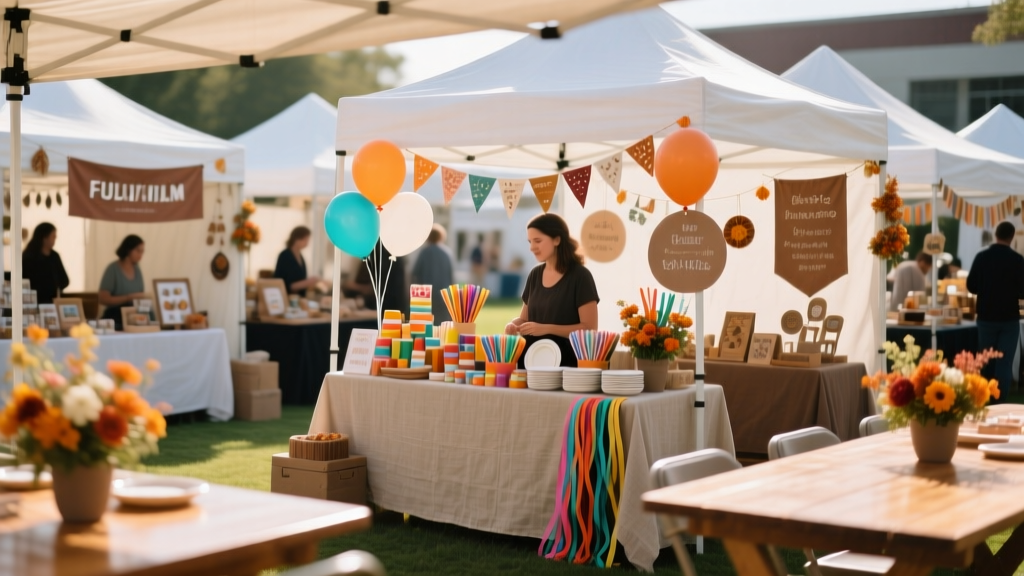
Community Festival Vendor Selection Tips
A community festival can be the highlight of the year—bringing neighbors together, showcasing local talent, and strengthening community pride. The vendors you choose shape nearly every part of the guest experience: the food people remember, the activities kids talk about, the makers attendees discover, and the services that keep the day running smoothly.
Proper planning is what turns a good idea into a safe, organized, well-attended event. Vendor selection is not just filling booths—it’s building a balanced mix that supports your mission, fits your site logistics, meets safety requirements, and stays within budget. When you treat vendor coordination like a structured project with clear timelines, criteria, and communication, you’ll reduce last-minute cancellations, prevent bottlenecks, and create a festival that feels intentional and welcoming.
This guide walks you through practical, step-by-step vendor planning and coordination—complete with timeline templates, budget considerations, real-world examples, and common mistakes to avoid—so you can confidently book vendors that match your community’s needs.
Start with Your Festival Goals and “Vendor Mix” Strategy
Before you open vendor applications, define the purpose of the festival and the experience you want attendees to have. This clarifies who to invite, what to prioritize, and how to evaluate vendors fairly.
Define your goals (and use them as your selection filter)
- Community impact: Promote local businesses, fundraise for a cause, or celebrate a cultural heritage.
- Audience experience: Family-friendly, teen-focused, senior-accessible, or all-ages with multiple zones.
- Revenue model: Booth fees, sponsorships, percentage-of-sales, ticketing, donations, or a hybrid.
- Brand values: Sustainability, inclusivity, local-first, wellness, or arts-centered programming.
Plan the right vendor categories (balanced and intentional)
A strong community festival usually includes a mix of:
- Food & beverage: Trucks, pop-ups, beverage carts, dessert stands, coffee vendors.
- Retail/market vendors: Handmade goods, artisans, farmers, community groups.
- Activities & attractions: Face painting, crafts, inflatables (if appropriate), games, photo booth.
- Entertainment: Stage talent, DJs, cultural performances, roaming performers.
- Services & operations: Portable restrooms, sanitation, waste hauling, security, medical/first aid, power.
Vendor “mix” example (for a 2,000–3,000 attendee neighborhood festival)
- 8–12 food vendors (aim for varied cuisines and dietary options)
- 20–35 market vendors (local makers + community orgs)
- 4–8 activity vendors (kids’ zone + all-ages)
- 1–2 beverage partners (depending on permits; include non-alcoholic specialty options)
- Operational vendors as needed: restrooms, dumpsters, security, EMS standby, power distribution
Vendor Selection Criteria That Protect Your Event (and Reputation)
Use consistent criteria so decisions feel fair, organized, and aligned with your festival’s goals. This also helps if you receive more applications than you can accept.
Core criteria checklist
- Fit for your audience: Is the product appropriate and appealing for attendees?
- Quality and presentation: Photos, booth setup, branding, and professionalism.
- Pricing accessibility: Community festivals do best with a range of price points.
- Safety and compliance: Health permits, insurance, fire safety, generator safety.
- Operational readiness: Can they handle crowds, lines, payment methods, and quick service?
- Reliability: References, prior event history, communication speed.
- Uniqueness: Avoid too many duplicate offerings (e.g., five candle vendors or four identical taco menus).
Current event planning trends to consider
- Cashless-ready vendors: Encourage vendors to accept cards and mobile payments to speed lines.
- Sustainability expectations: Compostable serviceware, refill stations, and waste sorting signage.
- Inclusive options: Vegetarian/vegan, gluten-free, allergy-aware menus; accessible booth layouts.
- Experience-based booths: Interactive demos, hands-on crafts, “try-it” stations increase dwell time.
- Micro-sponsorships: Local businesses sponsoring kid zones, hydration stations, or stage segments.
Step-by-Step Planning Timeline (with Vendor Checklist)
Vendor coordination becomes manageable when you treat it like a project plan with milestones. Use this timeline as a template and adjust for your city’s permitting lead times.
12–16 weeks out: Foundation and outreach
- Confirm event date, hours, and rain plan
- Lock in venue/site and capacity estimate
- Draft vendor categories, target counts, and booth map concept
- Create vendor application (form + fee structure + rules)
- Build a vendor info packet including:
- Load-in/load-out times and routes
- Booth sizes (10x10, food truck footprints, etc.)
- Power availability and generator policies
- Waste requirements and water access
- Insurance requirements (COI) and permit expectations
- Start outreach to anchor vendors (popular food trucks, community partners)
8–12 weeks out: Applications, selection, and contracts
- Open applications publicly (website, local business groups, social media)
- Set a clear application deadline and decision date
- Review applicants using a scorecard (sample below)
- Send acceptance emails with invoice/booth fee and next steps
- Collect:
- Signed vendor agreement
- Certificate of Insurance (COI) with your organization listed as additional insured (when required)
- Health permits/temporary food permits (as applicable)
- Fire safety compliance details for cooking (extinguishers, tent ratings)
4–7 weeks out: Site logistics and communication
- Finalize vendor list and backups/waitlist
- Create a detailed site map with booth numbers and zones
- Confirm operational vendors (restrooms, dumpsters, security, first aid)
- Coordinate power drops or generator placement plan
- Send Vendor Update #1:
- Schedule overview
- Parking instructions
- Booth assignment timing
- Required signage (prices, ingredients/allergens if relevant)
2–3 weeks out: Final confirmations and contingency planning
- Confirm headcount estimates and anticipated rush times
- Double-check permits are in progress or approved
- Collect any missing COIs and documents
- Confirm vendor contact sheet (cell numbers for day-of)
- Create a waitlist fill plan for cancellations
- Send Vendor Update #2:
- Load-in time windows by zone
- Rules for vehicle movement on site
- Weather protocol (wind limits for tents, rain procedures)
- Emergency and medical procedures
Event week: Execute with calm, clear systems
- Print:
- Vendor check-in sheets
- Site maps
- Vehicle passes (if used)
- Incident report forms
- Assign a vendor coordinator and zone leads
- Prepare a vendor check-in station:
- Wristbands/badges
- Booth number signs
- Zip ties, tape, markers
- Quick reference sheet for questions
- Do a pre-event walk-through of:
- Power access
- Restroom placement
- Trash flow
- Emergency access lanes
Vendor Application and Scoring System (Proven Organizational Strategy)
A simple scorecard helps you stay consistent, especially when you have more applicants than booths.
Sample vendor scorecard (1–5 scale)
- Product fit for audience (x2 weight)
- Uniqueness (avoid duplicates)
- Presentation/booth aesthetics
- Pricing accessibility
- Operational readiness (staffing, speed of service)
- Compliance readiness (permits/insurance)
- Local/community connection (optional weight if mission-driven)
Real-world example: balancing duplicates
If you receive 10 dessert vendor applications, select a mix: one ice cream, one baked goods, one churro/donut option, one fruit-based/health-forward vendor, and one specialty beverage dessert. This variety reduces direct competition and keeps attendee interest high across the whole festival.
Budget Considerations: Vendor Fees, Costs, and Smart Tradeoffs
Vendor revenue can help cover event costs, but pricing must match your audience and the value you provide (foot traffic, marketing, power access, security, etc.).
Common vendor fee models
- Flat booth fee: Simple to manage; best for market vendors.
- Tiered pricing: Different rates for 10x10, 10x20, premium corners, food trucks.
- Percentage-of-sales: Can increase revenue but requires tracking and trust.
- Sponsorship offsets: Reduce vendor fees for nonprofits or local startups.
Sample budget breakdown (mid-size community festival)
Every site is different, but these ranges help with planning:
- Permits and insurance: 5–12%
- Security and medical/first aid: 10–18%
- Restrooms and sanitation: 8–15%
- Waste management (dumpsters/hauling): 4–10%
- Power (distribution, generators, electricians): 6–14%
- Entertainment/stage/AV: 10–20%
- Marketing and signage: 5–12%
- Staff/volunteer support (shirts, water, radios): 3–8%
- Contingency fund: 8–12%
Practical budget tips for vendor coordination
- Charge for power when it’s scarce: Offer an add-on power fee or limit power to food and essentials.
- Offer “bring-your-own” options: Market vendors bring tents and tables; specify requirements clearly.
- Use sponsorship strategically: A sponsor can underwrite restrooms, kids’ zone, or a community stage—reducing pressure to increase booth fees.
- Plan for waste costs: Food-heavy events generate more trash; budget accordingly or require vendors to use compostable serviceware.
Vendor Selection Tips That Save You Time (and Prevent Day-Of Stress)
Ask operational questions before you accept
- How many staff will be on-site?
- What is your expected service time per customer?
- Do you accept card/mobile payments?
- What is your power draw (amps/watts) and plug type?
- Do you use a generator? If yes, what decibel rating and placement needs?
- Do you have experience with crowds of this size?
Build a waitlist like a pro
Plan for 10–20% vendor churn (life happens). Create a waitlist by category so you can fill a gap fast without throwing off your vendor mix.
Write agreements that protect both sides
- Clear refund policy and cancellation deadlines
- Weather policy (rain date, credit options, force majeure language)
- Compliance requirements (permits, COI, health regulations)
- Rules on subletting booths (typically not allowed)
- Load-in and vehicle policies (no vehicle movement during open hours)
Prioritize attendee flow with zoning
- Cluster food vendors near seating and waste stations.
- Place kid activities in a contained zone away from generators and heavy cooking.
- Use anchors (popular vendors or stage) at opposite ends to distribute foot traffic.
- Keep emergency lanes clear and mark them on the map.
Common Community Festival Planning Mistakes to Avoid
- Overbooking similar vendors: Too many duplicates reduces vendor satisfaction and attendee excitement.
- Ignoring power planning: “We’ll figure it out day-of” leads to blown circuits, unsafe cables, and delays.
- Unclear load-in instructions: Creates traffic jams and unsafe vehicle movement.
- Skipping insurance and permit verification: A major risk for organizers and venue partners.
- Underestimating waste and restrooms: Comfort issues hurt guest experience fast.
- Not communicating updates: Vendors need reminders and clear expectations to show up prepared.
- No contingency plan: Weather shifts, cancellations, and staffing gaps are normal—plan for them.
Mini Templates You Can Reuse
Vendor outreach email (short and effective)
Subject: Vendor Opportunity: [Festival Name] on [Date]
Hello [Name],
We’re hosting [Festival Name] on [Date] at [Location] and would love to invite you to apply as a vendor. We expect approximately [Attendance Range] attendees and will feature [Food/Market/Entertainment details].
Apply here: [Link]. Applications close [Deadline]. Accepted vendors will be notified by [Decision Date].
Thanks,
[Organizer Name / Role / Phone]
Day-of vendor check-in checklist
- Verify vendor name, booth number, and category
- Confirm COI/permit status (if not already)
- Provide parking/load-out instructions
- Issue wristbands/badges and vehicle pass
- Confirm power needs and placement
- Share emergency contact and schedule highlights
FAQ: Community Festival Vendor Selection
How many vendors should a community festival have?
It depends on site size, attendee count, and layout. A practical starting point is 1 food vendor per 200–300 attendees for peak service periods, plus market vendors based on how much space you can support without crowding walkways.
Should we charge vendors a booth fee or take a percentage of sales?
Flat fees are simpler and more predictable. Percentage-of-sales can work for food vendors at high-traffic events, but it adds complexity. Many organizers use flat fees with optional add-ons (power, premium placement).
What permits and insurance should vendors provide?
Requirements vary by city and venue, but common needs include a Certificate of Insurance, health department permits for food handling, and fire safety compliance for cooking or propane. Share requirements early in your vendor packet.
How do we prevent too many duplicate vendors?
Limit category slots (for example: “max 2 candle vendors,” “max 1 kettle corn vendor”), use a scorecard for selection, and keep a category-based waitlist to replace cancellations without disrupting the mix.
How far in advance should we book vendors?
For most community festivals, begin outreach 12–16 weeks out and finalize the majority of vendors 6–8 weeks out. Popular food trucks and entertainment acts may need longer lead time, especially during peak seasons.
What’s the best way to communicate with vendors?
Use a central system (shared email address, vendor management spreadsheet, or event planning software), send scheduled updates (two is a good minimum), and provide one day-of point of contact for fast coordination.
Actionable Next Steps to Book the Right Vendors
- Write a one-page festival plan: goals, audience, hours, site notes, vendor categories, and target counts.
- Create your vendor application + info packet: include rules, deadlines, fees, and compliance requirements.
- Build a selection scorecard: commit to fair, consistent decision-making.
- Open applications and recruit anchors early: a few strong vendors help attract others.
- Finalize logistics: map, power plan, waste plan, and vendor communications schedule.
- Prepare a waitlist and contingency fund: your best defense against last-minute surprises.
If you want more step-by-step event planning, party organization checklists, and vendor coordination strategies, explore the latest guides on smartpartyprep.com.
More Articles
 When Did Political Parties Switch? The Real Story Behind the Great American Realignment — Debunking the Myth That Democrats and Republicans Just 'Swapped Sides' Overnight
What Restaurants Have Party Rooms? 7 Proven Ways to Find & Book the Perfect Private Dining Space (Without Overpaying or Settling)
What Is Second Party System? The Real Story Behind America’s Forgotten Political Revolution — Not What Your Textbook Told You (And Why It Still Shapes Elections Today)
When Did Political Parties Switch? The Real Story Behind the Great American Realignment — Debunking the Myth That Democrats and Republicans Just 'Swapped Sides' Overnight
What Restaurants Have Party Rooms? 7 Proven Ways to Find & Book the Perfect Private Dining Space (Without Overpaying or Settling)
What Is Second Party System? The Real Story Behind America’s Forgotten Political Revolution — Not What Your Textbook Told You (And Why It Still Shapes Elections Today)
 Can you change your political party? Yes—but most voters don’t realize it’s not automatic, requires state-specific deadlines, and impacts primary access. Here’s exactly how to switch parties without missing a vote or triggering unintended consequences.
What to Wear for a Company Christmas Party: The 7-Second Dress Code Decoder (No More Awkward Outfits or Last-Minute Panic)
Stop Wasting Hours Comparing Venues & Rentals—Here’s Exactly What De La Rosa Event Space & Party Rentals Includes (No Hidden Fees, No Last-Minute Surprises, Just Real Photos & Transparent Pricing)
Can you change your political party? Yes—but most voters don’t realize it’s not automatic, requires state-specific deadlines, and impacts primary access. Here’s exactly how to switch parties without missing a vote or triggering unintended consequences.
What to Wear for a Company Christmas Party: The 7-Second Dress Code Decoder (No More Awkward Outfits or Last-Minute Panic)
Stop Wasting Hours Comparing Venues & Rentals—Here’s Exactly What De La Rosa Event Space & Party Rentals Includes (No Hidden Fees, No Last-Minute Surprises, Just Real Photos & Transparent Pricing)
 Is The Hunting Party Show Based on a Book? The Truth Behind Its Origins — And Why That Matters for Your Next Themed Event or Murder Mystery Night
What’s a Porta Potty Party? (And Why Your Next Backyard Bash Needs One Before You Book a Venue)
What Does It *Really* Mean to Be a German Member of Adolf Hitler's Political Party? 7 Truths Historians Wish You Knew Before Researching Nazi Affiliation — Because Misunderstanding This Term Risks Distorting History, Misidentifying Victims, and Confusing Ideological Complicity With Coerced Compliance
Is The Hunting Party Show Based on a Book? The Truth Behind Its Origins — And Why That Matters for Your Next Themed Event or Murder Mystery Night
What’s a Porta Potty Party? (And Why Your Next Backyard Bash Needs One Before You Book a Venue)
What Does It *Really* Mean to Be a German Member of Adolf Hitler's Political Party? 7 Truths Historians Wish You Knew Before Researching Nazi Affiliation — Because Misunderstanding This Term Risks Distorting History, Misidentifying Victims, and Confusing Ideological Complicity With Coerced Compliance