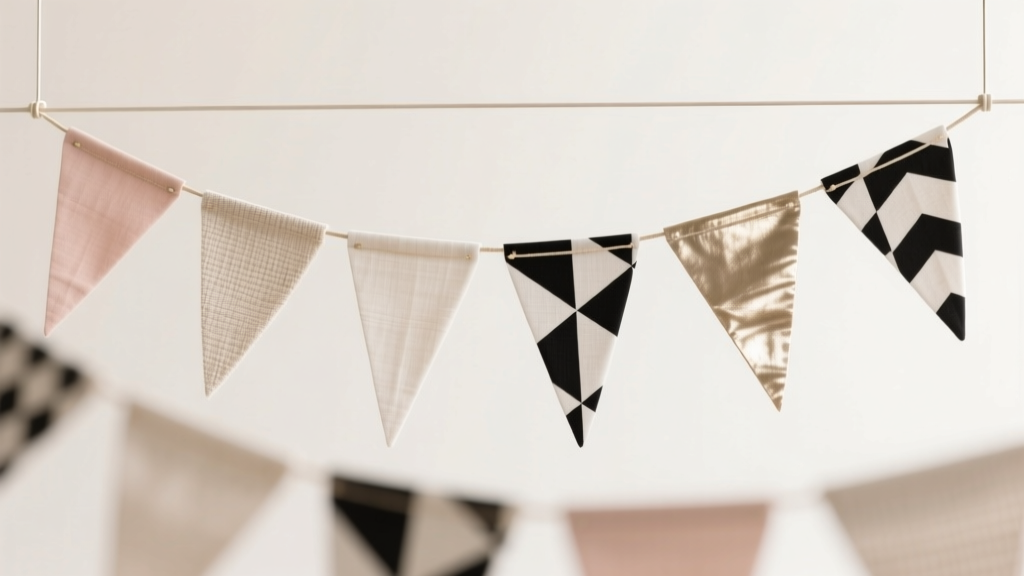
Modern Fabric Bunting Designs
Fabric bunting is one of those DIY party decorations that instantly makes a space feel styled, warm, and intentional—without needing a huge budget or a fully stocked craft room. It’s festive for birthdays, baby showers, backyard weddings, graduation parties, and holiday gatherings, but it also works as everyday décor in nurseries, craft rooms, and reading corners.
What makes modern fabric bunting especially fun is how customizable it is. You can keep it clean and minimal with solid linens and crisp edges, go bold with color-blocking, or add texture using velvet, gauze, or denim. Whether you’re a beginner who wants a quick win or an experienced maker ready to play with layered shapes and advanced finishes, there’s a design here you can make your own.
This guide walks you through materials, measurements, and step-by-step instructions for modern bunting styles—plus pro tips, variations, and troubleshooting so your finished garland looks polished and party-ready.
Skill Level, Time Estimates, and Finished Size Planning
Skill Levels
- Beginner: Single-layer triangle flags, pinked edges, simple stitching.
- Intermediate: Double-layer flags, bias tape casing, neat corners.
- Advanced: Quilted flags, layered shapes, grommets, tassels, typography/appliqué.
Time Estimates (for a 6 ft bunting)
- Beginner (no lining): 60–90 minutes
- Intermediate (lined + topstitch): 2–3 hours
- Advanced (custom shapes + embellishments): 3–5 hours
Modern Proportions (Quick Sizing Guide)
- Standard party bunting: Flags 7 in wide x 9 in tall, spaced 1–2 in apart
- Petite “minimal” bunting: Flags 5 in wide x 6.5 in tall, spaced 1 in apart
- Statement bunting (backdrop): Flags 9 in wide x 12 in tall, spaced 2 in apart
How many flags? For a modern look, plan 8–12 flags per 6 ft depending on spacing. Add 12–18 in of extra ties on each end for hanging.
Materials List (With Estimated Costs)
Costs vary by fabric choice and what you already have. These estimates assume you’re making one 6–8 ft fabric garland.
Fabric and Notions
- Quilting cotton (1/2 yard to 1 yard total) for flags ($5–$14)
- Optional lining fabric (muslin or matching cotton, 1/2 yard) ($3–$8)
- Binding/bias tape (extra-wide double-fold, 3/4 in, 3 yards) ($4–$8)
- Or twill tape (1/2 in–1 in, 3–4 yards) ($3–$7)
- Coordinating thread (all-purpose polyester) ($3–$6)
- Optional fusible interfacing (lightweight) for crisp flags ($4–$10)
- Optional embellishments: ric-rac, pom-pom trim, fringe, iron-on vinyl letters ($4–$15)
Tools (Recommended)
- Sewing machine (recommended for speed), or needle for hand-sewing
- Fabric scissors or rotary cutter + cutting mat (best for clean edges)
- Clear quilting ruler (6 in x 24 in is a great all-around size)
- Iron + ironing board (crucial for modern crispness)
- Fabric marking tool (chalk or washable pen)
- Clips or pins (clips are excellent for bias tape)
- Optional pinking shears for a no-hem look
Estimated total cost: $15–$35 for a fresh build, less if you’re using stash fabric.
Modern Fabric Bunting Design Ideas (Choose Your Style)
1) Clean-Lined Minimal Triangles (Modern Classic)
- Best for: birthdays, showers, neutral décor, Scandinavian-style parties
- Fabric picks: solids, linen-look cotton, tiny prints, tone-on-tone patterns
- Finish: double-layer with topstitching for sharp edges
2) Color-Block and Geometric Flags
- Best for: modern kids parties, graduation, rainbow themes
- Look: two fabrics per flag (diagonal split, half-and-half, or stripes)
- Tip: keep the palette to 3–5 colors for a designer feel
3) Raw-Edge “Modern Rustic” (Fast + Textural)
- Best for: outdoor parties, boho themes, casual gatherings
- Fabric picks: linen blends, canvas, denim, double gauze
- Finish: pinked or raw edges (great beginner shortcut)
4) Scallops, Pennants, and Mixed Shapes (High-End Statement)
- Best for: photo backdrops, dessert tables, weddings
- Look: alternate triangles with scallops or swallowtail pennants
- Finish: bias-bound tops with consistent spacing
Step-by-Step: How to Make Modern Fabric Bunting
This tutorial uses a clean-lined triangle bunting with bias tape at the top—an easy, polished method that works for almost every modern bunting design.
Step 1: Decide Your Measurements and Make a Template
- Recommended flag size: 7 in wide x 9 in tall
- Seam allowance: 1/4 in (included around edges if you’re sewing two layers)
- On cardstock or cereal-box cardboard, draw a triangle that’s 7 in wide at the top and 9 in tall.
- Cut it out neatly—this template keeps your bunting uniform (a key detail for a modern look).
- If you want extra-crisp points, slightly blunt the very tip by about 1/8 in (it helps the point turn cleanly).
Step 2: Calculate How Many Flags You Need
For an 8 ft finished bunting with ties:
- Reserve 18 in tie on each end = 36 in
- Remaining decorated span: 96 in - 36 in = 60 in
- Each flag uses 7 in width, plus spacing
A great plan is 10 flags with 1 in spacing:
- Flag width total: 10 x 7 in = 70 in (but overlap/attachment at the top reduces visual width slightly)
- If you need a tighter span, reduce to 8–9 flags or reduce spacing.
Step 3: Cut Your Fabric
For double-layer flags (recommended): cut 2 triangles per flag (front + back).
- Iron your fabric first so pieces cut accurately.
- Fold fabric right sides together and trace your template for faster cutting.
- Cut with fabric scissors or a rotary cutter.
Optional interfacing: If your fabric is flimsy and you want a crisp modern drape, fuse lightweight interfacing to the wrong side of one layer before sewing.
Step 4: Sew the Flags (Clean Finish)
- Place two triangles right sides together.
- Stitch down the two long sides using a 1/4 in seam allowance. Leave the top open.
- Trim bulk at the point (don’t cut through stitches).
- Turn right side out and use a blunt tool (like a chopstick) to gently push out the point.
- Press flat with an iron, shaping edges so the seam sits right on the edge.
- Topstitch 1/8 in from the edge for a crisp modern outline (optional but highly recommended).
Step 5: Attach Flags to Bias Tape (Neat + Durable)
Bias tape width: extra-wide double-fold (3/4 in) is beginner-friendly.
- Lay out your flags in the order you want (this prevents accidental color clumps).
- Open the bias tape and sandwich the top edge of each flag inside it.
- Leave 18 in tape free for the first tie.
- Space flags 1–2 in apart for a modern, airy look (or butt them close for a fuller look).
- Clip in place, then stitch along the open edge of the bias tape, catching both sides as you sew.
- When finished, fold the ends of the bias tape inward and stitch closed for tidy ties.
No bias tape? Use 1 in twill tape and stitch the tops of flags directly onto it with a reinforced rectangle stitch.
Pro Tips for a Modern, Professional Finish
- Pressing is your secret weapon: press after turning each flag, and again after topstitching for sharp edges.
- Use a longer stitch length: try 3.0 mm for topstitching so it looks clean and intentional.
- Balance your prints: alternate solids and patterns for a modern rhythm.
- Keep thread subtle: matching thread looks sleek; contrasting thread looks graphic and modern—choose one on purpose.
- Batch your steps: cut all flags, sew all flags, turn all flags, press all flags—faster and more consistent.
Variations (Beginner-Friendly to Advanced)
Beginner: No-Sew or Minimal-Sew Options
- Pinking-shear flags: cut single-layer triangles and attach with fabric glue to twill tape (best for indoor, short-term party décor).
- Fusible web bunting: fuse two layers wrong sides together, then topstitch around edges for stability.
Intermediate: Color-Block Triangles
- Cut two fabric rectangles 8 in x 10 in.
- Sew them together with a diagonal seam, press open.
- Place your triangle template on top and cut the finished triangle from the pieced fabric.
- Line and sew as usual.
Advanced: Scallop + Triangle Mixed Set
- Scallop size: 7 in wide x 7 in tall with a rounded bottom
- Alternate: triangle, scallop, triangle, scallop for a boutique-party look.
- Add trim (mini pom-pom or fringe) to the bottom edge before sewing layers together.
Advanced: Quilted or Padded Flags
- Add a layer of thin batting (like cotton quilt batting) inside each flag.
- Quilt simple vertical lines 1 in apart before assembling.
- Best for reusable home décor bunting that holds its shape beautifully.
Troubleshooting: Quick Fixes for Common Issues
- Points look rounded or bulky: trim seam allowance at the tip and gently push out with a blunt tool; consider blunting the template tip by 1/8 in.
- Flags look wavy: press with steam and avoid stretching bias tape as you sew.
- Bias tape won’t stay aligned: use clips every 2–3 in; sew slowly and keep the tape folded evenly.
- Flags twist on the string: make sure the top edges are inserted evenly; use lined flags for more weight and stability.
- Uneven flag sizes: always cut using a template and stack-cut in small batches.
Common Crafting Mistakes to Avoid
- Skipping pressing: unpressed seams make bunting look homemade in the “unfinished” way instead of the charming way.
- Using stretchy fabric without stabilizer: knits and jersey can sag; if you use them, add interfacing or choose woven fabrics.
- Overcrowding too many patterns: busy prints on every flag can look chaotic; mix solids and patterns for modern balance.
- Not leaving enough tie length: short ends make hanging frustrating—aim for 12–18 in per side.
- Rushing the layout: arrange flags on the floor first to distribute colors and prints evenly.
FAQ: Modern Fabric Bunting Designs
How much fabric do I need for a standard bunting?
For a 6–8 ft bunting with 8–12 flags (7 in x 9 in), plan on 1/2 yard to 1 yard total depending on whether you’re lining the flags and mixing multiple fabrics. If you want double-sided bunting with different front/back fabrics, you may need closer to 1 yard.
What fabric is best for DIY party bunting?
Quilting cotton is the easiest: it’s stable, presses well, and comes in tons of modern prints. For a more elevated look, try linen blends or cotton canvas (slightly heavier). Avoid very stretchy fabrics unless you stabilize them.
Can I make fabric bunting without a sewing machine?
Yes. Use pinking shears to cut single-layer flags and attach them with fabric glue to twill tape for quick party decorations. For a longer-lasting handmade decoration, hand-sew the flags with a simple backstitch and use bias tape to hold them.
How do I make bunting look modern instead of “crafty”?
Choose a limited color palette (3–5 colors), mix solids with one or two prints, keep spacing consistent, and press everything. Adding topstitching in matching thread also gives a clean, finished edge.
How do I hang bunting for a party backdrop?
Use removable hooks, painter’s tape (for lightweight bunting), or clear command hooks. For outdoor setups, zip ties or twine work well. If you’re layering multiple strands, hang the top row first and work downward, keeping the center points aligned.
Can I wash and reuse fabric bunting?
If you used washable fabrics and stitched (not glued) the bunting, you can typically hand-wash or gentle-cycle wash and air dry. Press with an iron afterward. Avoid washing bunting with heavy trims unless they’re colorfast and securely stitched.
Wrap-Up: Make It, Hang It, Celebrate It
Modern fabric bunting is one of the most satisfying DIY party projects: it’s approachable, customizable, and reusable—and it adds that “styled celebration” feel in minutes. Start simple with clean triangle flags, then experiment with color-blocking, mixed shapes, and trims as your confidence grows.
If you make your own handmade bunting, take a photo before the party starts—you’ll want to remember how good it looked. For more DIY crafts, party decorations, and creative handmade projects, explore fresh ideas anytime at smartpartyprep.com.
More Articles
 How Do You Make a Party Hat Out of Paper in Under 10 Minutes? (No Glue Gun, No Scissors Required — Just 3 Sheets & 1 Stapler)
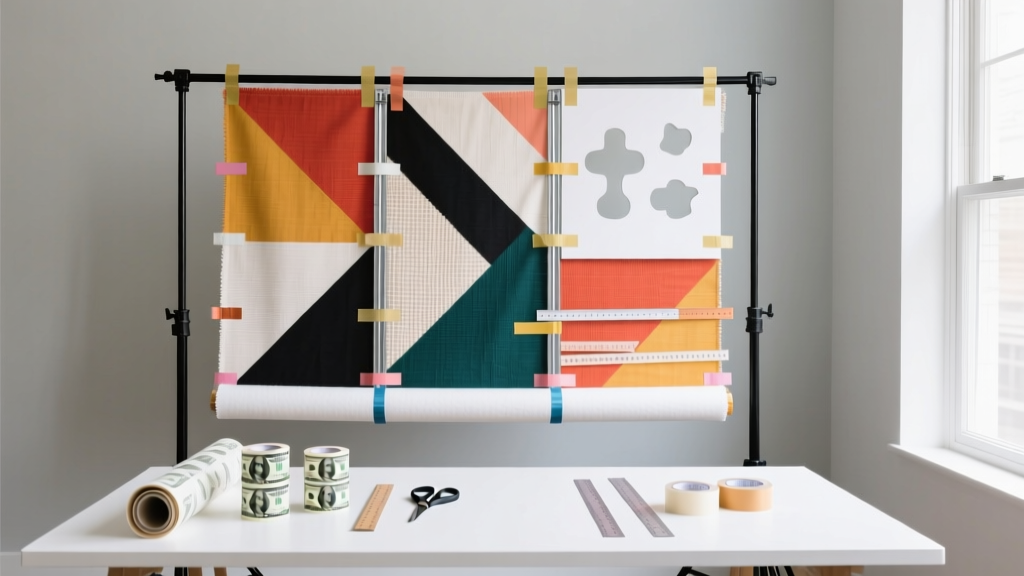 How to Make a Party Backdrop That Looks Pro (Without Spending $200): 7 Foolproof DIY Methods Using Dollar Store Supplies, Reusable Frames & Zero Sewing
 How to Unblock Third Party Cookies on iPad in 2024: A Step-by-Step Guide That Actually Works (No More ‘Blocked by Safari’ Errors)
 How to Make a Party Hat Out of Paper in Under 12 Minutes (No Glue Gun, No Scissors Required — Just Printer Paper & Tape)
 How to Make a Photo Booth for a Party in Under 90 Minutes (No Pro Gear Needed): 7 Foolproof Steps That Actually Work — Even If You’ve Never Built One Before
 Why Don’t Third Parties Usually Succeed on Quizlet? The 5 Hidden Structural Barriers That Kill Outside Study Tools (And How to Beat Them)
 How to Make Party in Infinity Craft: 7 Foolproof Steps (No Modding Skills Needed) + Free Blueprint Pack for Instant Build-Ready Celebrations
 Budget DIY Mason Jar Crafts Under $5
 How to Make a Party Popper in 7 Minutes (No Glue, No Mess, No Store-Bought Kits) — A Foolproof DIY Guide That Actually Works Every Time
 How to Make a Backdrop for Party in Under 90 Minutes (No Sewing, No Pro Tools — Just $12 & Your Dining Table)