How to Send Invitations for an Art Exhibition
An art exhibition lives or dies on two things: the work on the walls and the people in the room. Even the most thoughtfully curated show can feel quiet if the right guests don’t hear about it—or hear about it too late. Invitations are more than a formality; they’re a key part of event planning and coordination that shapes attendance, energy, and sales potential.
Unlike casual parties, art events have specific needs: a clear opening window, gallery etiquette, optional VIP moments, press considerations, and often a goal beyond attendance (sales, commissions, community buzz, donor engagement). Proper planning keeps your invitation process organized, reduces last-minute stress, and helps you create a guest experience that matches the quality of the exhibition.
This guide walks you through a practical, step-by-step invitation strategy—complete with timelines, checklists, budget planning, vendor tips, and common mistakes to avoid—so you can promote your exhibition professionally and confidently.
Clarify the Exhibition Goals Before You Invite Anyone
Strong event coordination starts with clarity. Your invitation list, wording, and channels depend on what success looks like for this exhibition.
Define your primary goals
- Sales-focused opening: Attract collectors, buyers, and art consultants; consider a VIP preview.
- Community visibility: Drive foot traffic and social sharing; emphasize accessibility and timing.
- Press and partnerships: Invite media, influencers, and local organizations; provide a press kit link.
- Fundraising benefit: Include sponsor recognition, ticketing info, and donation pathways.
Choose the event format that supports those goals
- Opening reception (most common): 2–3 hours, peak energy, strongest RSVP needs.
- VIP/collector preview: 30–60 minutes before the public opening, limited invite list.
- Artist talk / guided tour: Great for engagement; include a start time and seating note.
- Multi-day exhibit: Invite to opening plus list exhibit dates/hours for later visits.
Build a Guest List That Matches Your Art Exhibition
Creating a strategic guest list is a proven organizational strategy in event planning—especially for exhibitions where the right audience matters as much as the size of the crowd.
Guest list categories to include
- Collectors and potential buyers: past buyers, gallery clients, interior designers, art advisors
- Press and creators: local arts journalists, community calendars, bloggers, photographers
- Community connectors: business owners, arts nonprofits, cultural leaders, alumni groups
- Friends and supporters: people who will attend, post, and bring energy
- Sponsors and partners: brand collaborators, donors, venue supporters
Practical guest list tools
- Master spreadsheet: Name, email, phone, category, RSVP status, plus-one, notes
- CRM/event platform: Useful for galleries and recurring shows; simplifies segmentation
- Privacy check: Keep BCC practices and permission-based lists for email marketing
Real-world example: simple segmentation
Example: A solo show with a sales goal might segment invitations like this:
- 40 VIP collectors/designers (personal invites + early preview)
- 80 general guests (email invite + social reminders)
- 20 press/community calendars (press email + image + short release)
Choose the Right Invitation Channels (And Use More Than One)
Current event planning trends favor a multi-channel approach: digital invitations for speed and tracking, plus personal outreach for VIPs. For an art exhibition, layering channels is often the difference between “some interest” and a lively opening night.
Email invitations (best for tracking)
- Ideal for: general guests, community list, partners
- Strengths: easy RSVPs, reminders, analytics
- Tip: use a branded header image (artwork detail) for instant impact
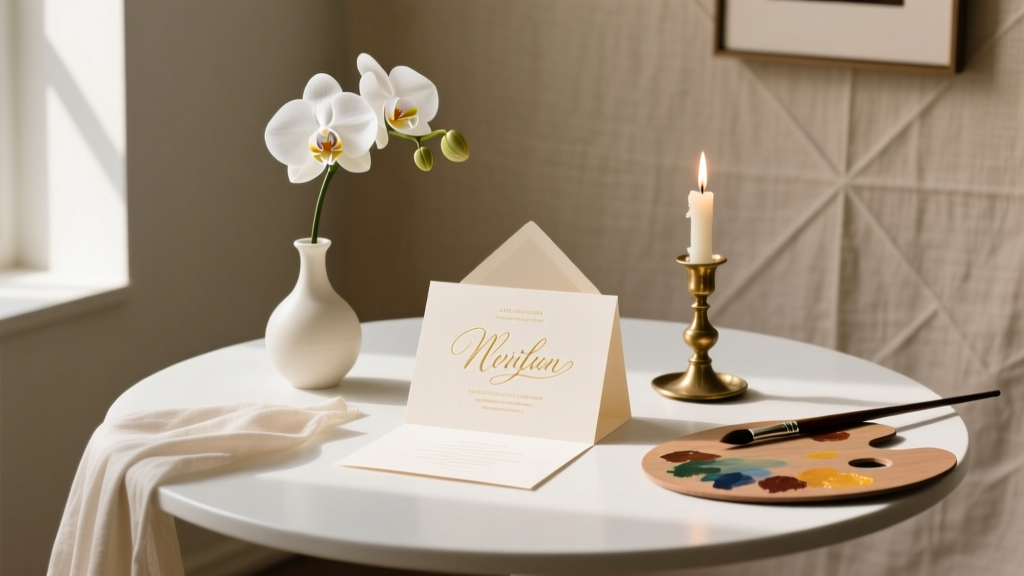
Printed invitations (best for prestige and collectors)
- Ideal for: collectors, donors, sponsors, VIPs
- Strengths: tactile, memorable, aligned with fine art aesthetics
- Tip: keep it simple and high-quality—great paper beats flashy design
Text message outreach (best for last-mile attendance)
- Ideal for: close supporters, volunteers, “likely attendees” who need a nudge
- Strengths: high open rates, quick confirmations
- Tip: only text people who have an existing relationship with you
Social media + event listing (best for visibility)
- Ideal for: expanding reach beyond your list
- Strengths: shareable, supports reminders, builds momentum
- Tip: create a consistent posting plan; pin the event details for the final week
Personal calls/DMs (best for VIP conversion)
- Ideal for: collectors, curators, press, potential partners
- Strengths: personal connection, higher show-up rates
- Tip: keep it short, specific, and respectful of time
What to Include in an Art Exhibition Invitation (Template-Ready)
Your invitation should answer every guest’s practical question in seconds. Confusion is one of the biggest causes of no-shows.
Invitation essentials checklist
- Exhibition title and artist name(s)
- Date and time window (ex: 6:00–9:00 PM)
- Location with address (and venue name, floor, suite number)
- Parking/transit info (even a short line helps)
- RSVP method (link, email, phone) and RSVP deadline
- Dress code (optional, but helpful: “cocktail casual” or “come as you are”)
- Accessibility notes (elevator, ramps, seating availability)
- Exhibit dates/hours (so people who miss opening can still attend)
- Partner/sponsor recognition (if applicable)
Sample invitation copy (general public)
Subject line: You’re invited: Opening Reception for “Light & Line”
Body:
Join us for the opening reception of “Light & Line”, new works by Avery Chen.
Friday, Oct 18 | 6:00–9:00 PM
Harbor Studio Gallery, 214 King Street, Suite 3B
RSVP: harborstudio.com/rsvp by Oct 14
Parking available on King St. (metered) + 2-minute walk from the Green Line stop.
Exhibition on view Oct 18–Nov 10 (Wed–Sun, 12–6 PM).
Sample invitation copy (VIP preview)
Subject line: Private Preview Invitation: “Light & Line” (Collectors Preview)
Body:
We’d love to host you for a private preview of “Light & Line” before the opening reception.
Friday, Oct 18 | 5:00–6:00 PM (preview) | 6:00–9:00 PM (reception)
Harbor Studio Gallery, 214 King Street, Suite 3B
Please RSVP to events@harborstudio.com (plus-one welcome).
Step-by-Step Invitation Timeline for an Art Exhibition
This timeline works for most openings. Adjust based on your audience: collectors and press often need more lead time; community events may thrive with a shorter runway and more social reminders.
6–8 weeks before: foundation and assets
- Confirm: date, time, venue address, parking, accessibility details
- Choose your RSVP method (Eventbrite, website form, email RSVP, QR code)
- Build your master guest list and segment it (VIP, general, press, partners)
- Gather visuals: 1 hero image + 2–3 details for social/email headers
- Draft invitation copy (general + VIP + press version)
4–5 weeks before: send “save the date” to key groups
- Send a short save-the-date to VIPs, partners, and press
- Order printed invites if using them (allow design + print + delivery time)
- List your event on local calendars (many require 3–4 weeks notice)
3 weeks before: main invitation launch
- Send the main email invitation to your general list
- Mail printed invitations to VIPs and collectors
- Create your social event page and start posting weekly
10–14 days before: RSVP push + personal outreach
- Send the first RSVP reminder email to non-responders
- Make personal calls/DMs to priority guests (collectors, press, sponsors)
- Confirm photographer, catering, rentals based on early RSVP trends
5–7 days before: details and logistics
- Send a “Know before you go” message: parking, entrance, start time, RSVP link
- Post daily social stories/reels featuring installation progress (trend: behind-the-scenes content)
- Prepare check-in materials: printed list, QR check-in, name tags (optional)
24–48 hours before: final confirmation
- Text or email a short reminder to “Yes” RSVPs
- Reconfirm vendor arrival times (catering, bar, rentals, security)
- Print signage: schedule, price list availability, artist talk time, hashtag/QR codes
Post-event (within 48–72 hours): follow-up and relationship building
- Send thank-you emails with exhibit hours for those who missed the opening
- Share a photo recap (tag partners and attendees where appropriate)
- Send a separate note to VIPs/collectors with available works or catalog link
Invitation Planning Checklist (Copy/Paste)
- Event details confirmed (date/time/location/accessibility)
- Guest list created and segmented
- RSVP system set up and tested
- Invitation copy written (general/VIP/press)
- Design finalized (email header + social graphics + print if needed)
- Save-the-date sent (if applicable)
- Main invitation sent
- Reminders scheduled (2-week, 1-week, 48-hour)
- Press outreach sent with images and details
- Event listings submitted to local calendars
- Check-in plan ready (list/QR/name tags)
- Post-event thank-you and follow-up scheduled
Budget Considerations: What Invitations Really Cost
Budgeting is part of smart party organization. Invitations can be minimal or premium, but they should always be intentional. Here’s a realistic budget breakdown to help you plan.
Typical invitation budget ranges
- DIY digital-only: $0–$75 (email platform, simple design tools)
- Digital + light print: $150–$600 (postcards, basic postage, small run)
- Premium print suite: $600–$2,000+ (high-end paper, letterpress, custom envelopes, postage)
Line-item budget breakdown (example for 100 printed invites)
- Graphic design (freelancer or template customization): $150–$500
- Printing 100 postcards or flat cards: $80–$250
- Envelopes (if needed): $30–$80
- Postage (domestic, varies): $70–$120
- RSVP platform fees (optional): $0–$50
Ways to keep costs down without looking “cheap”
- Print postcards instead of folded cards
- Use one strong artwork image and clean typography (gallery-style design)
- Mail print only to VIPs and send digital invites to everyone else
- Include a QR code linking to details rather than printing long text blocks
Vendor Selection Tips (Design, Print, and RSVP Tools)
Choosing a designer
- Ask for examples of event or gallery collateral
- Confirm they can deliver files for both email and print (correct dimensions, bleed, color)
- Set deadlines: first draft, revisions, final delivery
Choosing a printer
- Request a paper sample pack if you care about texture and weight
- Confirm turnaround time and shipping timing (build in buffer days)
- Ask whether they can print QR codes cleanly and at a scannable size
Choosing an RSVP platform
- Best for simple RSVPs: a website form or Google Form
- Best for ticketed openings: Eventbrite or similar ticketing tools
- Best for branded experience: a custom landing page on your site
- Must-have: mobile-friendly, easy export of attendee list, reminder emails
Common Invitation Mistakes (And How to Avoid Them)
- Sending invites too late: VIPs and press need lead time. Use the timeline above and send a save-the-date.
- Forgetting the “time window”: “6–9 PM” is clearer than “6 PM.” It signals flexibility and reduces late-arrival anxiety.
- Unclear location details: Add suite number, entry instructions, and parking. Confusion equals drop-offs at the door.
- No RSVP strategy: You don’t need perfection, but you do need a count to plan staffing, catering, and flow.
- Over-inviting without capacity planning: Match invite volume to venue size; consider timed entry if space is tight.
- One-and-done sending: A single email is rarely enough. Plan reminders and a final 48-hour confirmation.
- Not segmenting your outreach: VIPs, press, and general guests should not receive the same message.
Real-World Coordination Example: A Smooth Invitation Plan
Scenario: A group exhibition at a small gallery with a 120-person comfortable capacity and a goal of attracting buyers and local press.
- 6 weeks out: Build segmented list (30 VIP, 120 general, 15 press). Create RSVP landing page with exhibit dates.
- 4 weeks out: Send VIP save-the-date; submit to local arts calendars with 1 hero image.
- 3 weeks out: Mail 30 VIP postcards; send general email invitation; create social event page.
- 2 weeks out: Personal outreach to 10 key collectors and 5 press contacts; reminder email to non-responders.
- 48 hours out: Text “looking forward to seeing you” reminder to confirmed guests; post behind-the-scenes installation reel.
- After: Thank-you email with a link to available works + visiting hours for the rest of the show.
FAQ: Art Exhibition Invitations
How far in advance should I send invitations for an art exhibition?
Send VIP and press outreach 4–6 weeks ahead (or earlier for major events). Send the main invitation to your general audience about 3 weeks ahead, with reminders at 10–14 days and 48 hours.
Should I require RSVPs for an opening reception?
If you have limited capacity, catering, or a VIP preview, yes. Even for casual openings, RSVPs help with staffing and event coordination. Offer a simple RSVP option to reduce friction.
Is it better to use printed invitations or digital invitations?
For most exhibitions, use both: printed invitations for VIPs/collectors (high impact) and digital invitations for broader reach and tracking. This hybrid approach aligns with current event planning trends.
What’s the best wording for “plus-one” on an invitation?
Use clear language like “Plus-one welcome” or include an RSVP field for guest count. If space is limited, specify “Due to limited capacity, please RSVP for yourself only.”
How do I invite press the right way?
Send a short, professional email with the event details, 1–3 images (or a link), and a concise press note. Offer a media contact and a time for previews or interviews if available.
What if I’m worried about low attendance?
Start with list-building and personal outreach. Attendance improves when you (1) segment your audience, (2) send reminders, (3) share behind-the-scenes content, and (4) make it easy to RSVP and attend (clear parking, clear times, welcoming tone).
Next Steps: Send Better Invitations and Fill the Room
- Set your event goals (sales, community, press) and confirm the format.
- Create a segmented guest list and choose your RSVP method.
- Draft invitation copy that answers every logistical question.
- Launch invitations on a timeline with planned reminders.
- Track RSVPs, adjust your outreach, and follow up after the event to build lasting relationships.
If you want more step-by-step support for event planning, party organization, and smooth coordination from invitations to day-of logistics, explore more planning guides on smartpartyprep.com.
More Articles
 Do You Take a Present to a Gender Reveal Party? The Unspoken Etiquette Rules (and Why Showing Up Empty-Handed Might Be the Smartest Move)
 What Do You Wear to a White Party? 7 Mistakes Everyone Makes (and How to Look Effortlessly Chic Without Overpaying or Overthinking)
What Goes Well With Pizza for a Party? 12 Crowd-Pleasing Pairings (Backed by 37 Host Surveys + Time-Saving Prep Hacks You’re Missing)
What Do You Wear to a White Party? 7 Mistakes Everyone Makes (and How to Look Effortlessly Chic Without Overpaying or Overthinking)
What Goes Well With Pizza for a Party? 12 Crowd-Pleasing Pairings (Backed by 37 Host Surveys + Time-Saving Prep Hacks You’re Missing)