How to Plan a Food Festival Like a Pro
A food festival can feel like pure magic: packed lines at the best booths, live music in the background, families lounging at communal tables, and vendors proudly serving signature bites. Behind that “effortless” vibe is a highly structured event planning process—because when food, crowds, and multiple vendors come together, small oversights quickly become big problems.
Proper planning protects your guests, your budget, and your reputation. It’s also the difference between a festival that earns repeat attendance and one that struggles with long waits, unhappy vendors, or a confusing layout. With today’s event planning trends—cashless payments, sustainability expectations, heightened food safety awareness, and social-media-driven experiences—your planning and coordination needs to be sharper than ever.
This guide walks you through a proven, step-by-step approach to organizing a successful food festival, including a timeline template, budget breakdown, vendor selection tips, and real-world examples you can adapt for your own event.
Define Your Festival Concept and Success Metrics
Choose a clear theme and audience
Strong food festivals are easy to describe in one sentence. Start by defining your “why” and who you’re serving. Examples:
- Neighborhood Taste Walk: local restaurants + community vibe
- BBQ & Blues Weekend: pitmasters + live music + family-friendly
- Vegan Street Food Fest: plant-based vendors + wellness partners
- International Night Market: small plates + lantern lighting + late hours
Set measurable goals
Build your event planning decisions around outcomes. Common goals include:
- Attendance target (e.g., 2,000 guests)
- Vendor satisfaction (e.g., 80% rebook interest)
- Revenue target (tickets, sponsorships, booth fees)
- Community impact (local vendor percentage, charity donation)
- Guest experience benchmarks (average wait time, cleanliness ratings)
Real-world example: concept clarity prevents scope creep
A “Local Bites Food Festival” planned for a town square stayed on track by limiting vendors to a 25-mile radius and requiring 2 signature items per booth. The organizer avoided adding unrelated attractions that would strain staffing and budget, and instead invested in seating, shade, and clear signage—improving guest flow and vendor sales.
Build the Right Team and Planning System
Key roles to assign early
Even small festivals benefit from clearly defined responsibilities. Consider assigning:
- Festival Director: final decisions, permits, budget approvals
- Vendor Manager: outreach, onboarding, load-in schedules, vendor support
- Operations Lead: site map, rentals, power, waste, water, cleaning plan
- Safety & Compliance Lead: health department coordination, fire safety, insurance
- Marketing & Ticketing Lead: promotions, partnerships, on-site check-in
- Volunteer Coordinator: recruitment, training, shift schedules
Use proven organizational strategies
- Shared planning hub: one cloud folder for permits, contracts, vendor docs, site maps
- Weekly planning cadence: one meeting + written action items
- Run-of-show document: minute-by-minute schedule for setup, gates, programming, teardown
- Master checklist: broken into “must-have” and “nice-to-have” items to protect the budget
Step-by-Step Planning Timeline (with Checklist)
12–16 Weeks Out: Foundations
- Lock the date (check competing events, holidays, school calendars)
- Select your venue and confirm capacity, hours, noise limits, curfews
- Create a site plan draft (vendor rows, stage, seating, exits, restrooms)
- Start permit research (temporary event, food service, alcohol, fire, street closure)
- Secure insurance (general liability; add liquor liability if applicable)
- Build a budget v1 with conservative revenue estimates
- Outline sponsorship packages (stage sponsor, tasting cup sponsor, VIP sponsor)
8–12 Weeks Out: Vendors, Logistics, and Ticketing
- Open vendor applications and finalize participation criteria
- Confirm rental needs: tents, tables, chairs, barricades, fencing, staging
- Plan utilities: power drops, generators, water access, gray water disposal
- Implement ticketing (QR code check-in, timed entry if needed)
- Develop security and crowd management plan
- Book entertainment and create programming blocks (music, demos, contests)
- Set up a vendor info packet (load-in rules, waste policy, power specs, contact list)
4–8 Weeks Out: Marketing Push and Final Vendor Onboarding
- Launch a vendor spotlight campaign (social posts + email)
- Confirm menus and pricing ranges (encourage $5–$10 “entry bites”)
- Collect vendor documents: licenses, permits, insurance COIs
- Finalize the site map and vendor booth assignments
- Order signage: directional signs, menus, rules, sponsor banners
- Recruit and schedule volunteers (check-in, sanitation, info booth)
2–4 Weeks Out: Operational Readiness
- Confirm restroom quantities and service schedule
- Finalize waste plan: trash, recycling, compost (if offered)
- Create an inclement weather plan and communication templates
- Print run-of-show and contact sheets for staff and vendors
- Do a walkthrough with venue + key vendors (power, access points, emergency routes)
- Test cashless payment options (Wi-Fi hotspots, vendor POS readiness)
Event Week: Execution
- Send a final vendor email with arrival times, parking, emergency contacts
- Prepare the command kit: radios, batteries, first aid, tape, zip ties, clipboards
- Mark the ground for booths and critical zones
- Brief volunteers: guest flow, FAQs, escalation steps
- Confirm health/fire inspections and keep documentation accessible
Day-Of Checklist (Quick-Scan)
- Check-in stations staffed, QR scanners working
- Vendor load-in routes open; traffic control in place
- Handwashing stations stocked; water access confirmed
- Restrooms unlocked and serviced
- Signage installed: entrances, exits, first aid, rules, restrooms
- Sound check completed; stage schedule posted
- Waste stations placed and labeled
- Staff/volunteer communication tested (radios/group text)
Post-Event (Within 72 Hours): Wrap-Up
- Vendor and guest surveys (keep it short: 5–7 questions)
- Reconcile budget: ticketing, sponsorships, expenses, refunds
- Document lessons learned and update templates
- Share photo recap and early-bird interest form for next year
Budget Planning: Practical Breakdown and Cost Controls
Sample budget categories (typical ranges)
Costs vary by city, venue, and size, but these categories show where money usually goes:
- Permits & compliance: event permits, health department fees, alcohol permits
- Insurance: general liability, liquor liability, additional insured requirements
- Rentals: tents, tables/chairs, staging, fencing, barricades, lighting
- Utilities: generators, fuel, power distribution, water access
- Sanitation: portable restrooms, handwashing stations, waste hauling, cleaning crew
- Staffing & security: security guards, EMT/medical, event staff, traffic control
- Marketing: paid ads, printing, banners, wayfinding signage
- Entertainment/programming: performers, AV, demonstration supplies
- Technology: ticketing fees, Wi-Fi/hotspots, POS support
- Contingency: 10–15% buffer for last-minute needs
Simple budget example (mid-size, 2,000 guests)
- Permits & insurance: $4,000
- Rentals (tents/tables/fencing/stage): $12,000
- Power & lighting: $5,000
- Sanitation & waste: $4,500
- Security & medical: $6,000
- Marketing & signage: $4,000
- Staffing/volunteers (shirts, meals, supplies): $2,000
- Entertainment/AV: $3,500
- Contingency (12%): $5,000
Total estimated expenses: $46,000
Cost-control tips that protect guest experience
- Prioritize flow and comfort: seating, shade, restrooms, and signage drive satisfaction.
- Bundle rentals: one vendor for tents/tables/fencing can reduce delivery fees.
- Use sponsorship strategically: sponsor rest areas, water stations, or wristbands to offset high-impact costs.
- Limit free “extras”: every add-on increases staffing, power, and permitting.
Vendor Selection and Management (Where Pros Win)
How to choose the right vendor mix
Great vendor curation is a core event coordination skill. Aim for:
- Variety: savory, sweet, beverages, and at least a few dietary-friendly options
- Price accessibility: encourage at least one “starter bite” to reduce sticker shock
- Speed: vendors who can serve quickly during peak windows
- Visual appeal: booths and menu items that photograph well (a modern marketing advantage)
Vendor application essentials
- Menu items + estimated serve time per order
- Power needs (amps, plug types), propane use, water needs
- Licenses/permits and insurance requirements
- Setup footprint (tent size, trailer length)
- Payment methods (cashless readiness)
Real-world example: reducing lines with smart booth placement
A street food festival placed high-demand vendors at the ends of vendor rows and created two parallel service corridors. This reduced bottlenecks in the center, improved circulation, and lowered the “line anxiety” that causes guests to leave early.
Vendor communication that prevents day-of chaos
- Send a load-in schedule with assigned arrival windows
- Provide a site map with booth numbers and power drop locations
- Define rules for noise, generators, grease disposal, and gray water
- Share a support protocol: who to call for power, cleanup, or safety concerns
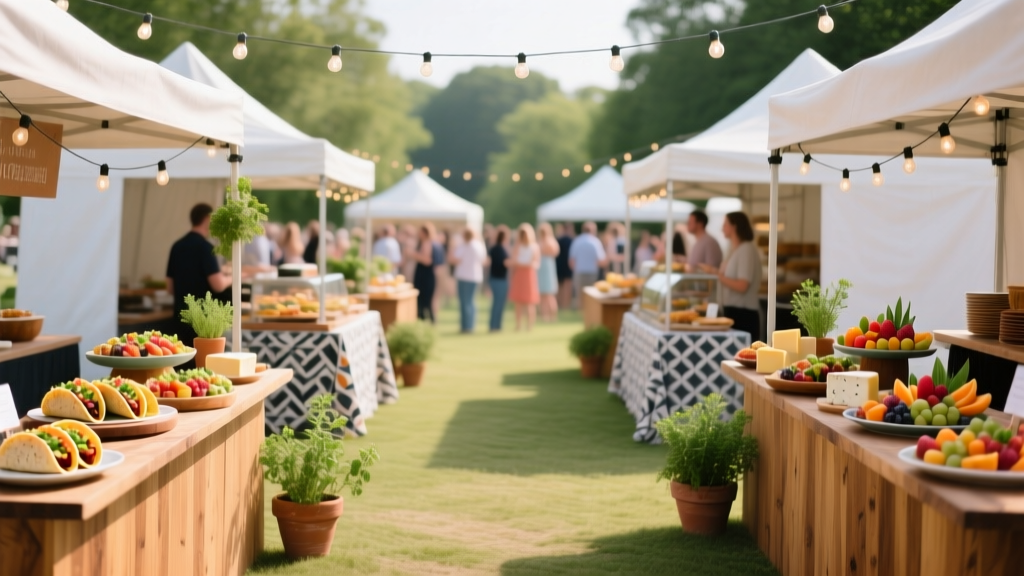
Site Layout, Guest Flow, and Experience Design
Layout principles for food festivals
- Design for movement: wide aisles, clear entrances/exits, visible landmarks
- Separate queues from walking paths: use stanchions or marked queue boxes
- Create comfort zones: seating clusters, shade, water refill points
- Place restrooms strategically: not hidden, not dead center near food seating
- Make the info booth obvious: near entry with a big sign
Current trends guests expect
- Cashless-first options: QR payment, tap-to-pay, and fast POS
- Sustainability: clearly labeled waste stations, compostable serviceware where feasible
- Instagrammable moments: branded photo wall, well-lit signage, visually cohesive decor
- Accessibility planning: ADA routes, seating options, clear signage, inclusive menus
Safety, Permits, and Compliance Basics
Food events carry higher risk due to cooking equipment, temperatures, crowds, and waste. Build a safety-first plan early:
- Health department requirements: temporary food permits, handwashing, temperature controls
- Fire safety: propane rules, extinguisher requirements, clearance distances
- Medical coverage: EMT presence or first aid station depending on size
- Security: bag policies, incident response, lost child protocol
- Emergency plan: severe weather, evacuation routes, communication chain
Common Food Festival Planning Mistakes to Avoid
- Underestimating sanitation: too few restrooms, not enough waste stations, or no grease disposal plan.
- Not planning for peak surges: lunch/dinner rush creates long lines without queue design and vendor speed standards.
- Weak vendor onboarding: missing COIs, unclear load-in instructions, and unknown power needs lead to day-of delays.
- Overstuffed programming: too many activities pull attention away from food and complicate the run-of-show.
- Skipping contingency funds: last-minute fencing, extra trash pickup, or weather rentals can blow up the budget.
- Poor signage and wayfinding: guests shouldn’t have to ask where restrooms, first aid, or exits are.
FAQ: Food Festival Planning and Coordination
How many vendors should a food festival have?
It depends on venue size, guest count, and vendor throughput. As a practical starting point, plan for enough booths that guests have variety without overwhelming lines—often 10–20 vendors for smaller community events and 25+ for mid-size festivals. Balance the mix (savory/sweet/drinks) and consider how fast each vendor can serve.
Do I need tickets, or can it be free entry?
Both models work. Ticketed entry helps manage capacity and fund essentials like sanitation and security. Free entry can boost attendance but often requires stronger sponsorship and vendor fee revenue. Hybrid options are popular: free general entry plus paid VIP, tasting packages, or fast-lane perks.
What’s the best way to handle payments?
Cashless payments are a leading event planning trend because they reduce friction and increase spend. Decide whether vendors handle their own sales (simpler) or the festival uses a centralized token/credit system (more control, more complexity). If you go cashless-first, provide Wi-Fi/hotspot support and require vendors to have tap-to-pay readiness.
How do I reduce long lines?
Combine layout planning and vendor standards:
- Require at least 1–2 fast-serve menu items
- Place popular vendors where lines won’t block traffic
- Use clear queue zones and wide aisles
- Encourage prep-ahead items and batch service
What should be in a vendor contract?
Include fees and payment deadlines, permitted items, setup footprint, arrival/load-in rules, power/water terms, insurance requirements, compliance expectations, refund/cancellation language, and behavior policies. Clear contracts are a cornerstone of professional event coordination.
How far in advance should I start planning?
For a small food festival, 10–12 weeks can work if permits are straightforward. For larger festivals or public spaces with multiple approvals, start 4–6 months ahead to secure the venue, vendors, sponsors, and required permits without rushing.
Next Steps: Turn This Plan Into Your Festival Blueprint
To move from idea to execution, take these actions this week:
- Write your one-sentence festival concept and define your top 3 success metrics.
- Shortlist venues and request requirements for permits, insurance, power, and sanitation.
- Draft a simple site map and use it to estimate vendor capacity and guest flow.
- Build a budget v1 with a 10–15% contingency and identify 2–3 sponsorship opportunities.
- Create a vendor application and start outreach to anchor vendors that match your theme.
When your planning system is solid, the festival becomes easier to manage, safer for guests, and more profitable for vendors—exactly what brings people back year after year.
Explore more event planning, party organization, and coordination guides at smartpartyprep.com to keep building your pro-level playbook.
More Articles
 What Is The TV Show The Hunting Party About? — A Behind-the-Scenes Breakdown of How This Reality Series Redefines Event Planning, Social Strategy, and High-Stakes Entertainment (Spoiler-Free)
How to Send Graduation Party Invitations the Right Way: 7 Mistakes That Cost You RSVPs (and How to Fix Them in Under 10 Minutes)
What Is a Slasher Party in Real Life? 7 Truths You Won’t Hear From Horror Fans (Spoiler: It’s Not About Blood — It’s About Belonging, Banter, and Brilliant Thematic Storytelling)
What Is The TV Show The Hunting Party About? — A Behind-the-Scenes Breakdown of How This Reality Series Redefines Event Planning, Social Strategy, and High-Stakes Entertainment (Spoiler-Free)
How to Send Graduation Party Invitations the Right Way: 7 Mistakes That Cost You RSVPs (and How to Fix Them in Under 10 Minutes)
What Is a Slasher Party in Real Life? 7 Truths You Won’t Hear From Horror Fans (Spoiler: It’s Not About Blood — It’s About Belonging, Banter, and Brilliant Thematic Storytelling)
 What to Wear at a Graduation Party as a Guest: 7 Stress-Free Outfit Rules (That Actually Work for Backyard BBQs, Rooftop Toasts, and Fancy Dinners)
 What to Wear to a Swimming Pool Party: 7 Non-Negotiable Outfit Rules (That Prevent Awkwardness, Sunburn, and Wet-Chair Disasters)
Why Is It Called the Boston Tea Party? The Surprising Truth Behind the Name (It’s Not Just About Tea—or Even a Party!)
What to Wear to a Swimming Pool Party: 7 Non-Negotiable Outfit Rules (That Prevent Awkwardness, Sunburn, and Wet-Chair Disasters)
Why Is It Called the Boston Tea Party? The Surprising Truth Behind the Name (It’s Not Just About Tea—or Even a Party!)
 What political party does Panera Bread support? The truth about its nonpartisan stance, PAC activity, and how to evaluate restaurant values for your next corporate event or community gathering
What Is a White Trash Party? The Unfiltered Truth About This Irreverent, Budget-Savvy Celebration — No Judgment, Just Joy, Jell-O Shots, and Zero Pretense
What political party does Panera Bread support? The truth about its nonpartisan stance, PAC activity, and how to evaluate restaurant values for your next corporate event or community gathering
What Is a White Trash Party? The Unfiltered Truth About This Irreverent, Budget-Savvy Celebration — No Judgment, Just Joy, Jell-O Shots, and Zero Pretense