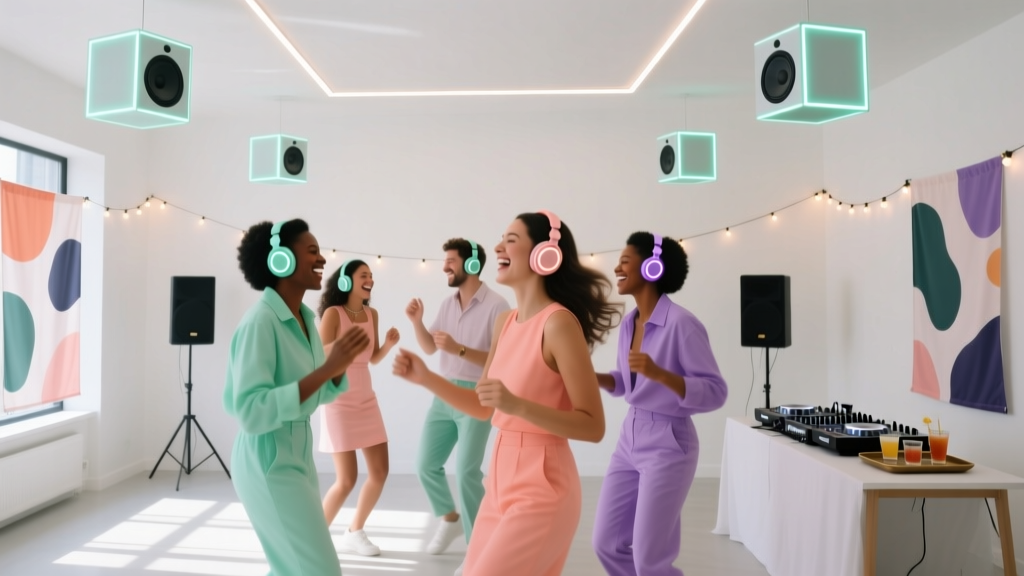
How to DIY a Silent Disco
A silent disco looks effortless on social media: a packed dance floor, smiling guests, and three different music “vibes” happening at once. What you don’t see is the planning that makes it feel seamless—audio logistics, headset counts, channel assignments, check-in flow, and a backup plan for everything from dead batteries to last-minute venue curveballs.
DIYing a silent disco is absolutely doable (and often more cost-effective than hiring a full-service production team), but it rewards organized, step-by-step event planning. When you plan the guest experience as carefully as you plan the playlist, you end up with an event that feels premium, runs smoothly, and keeps people dancing longer—without noise complaints or awkward downtime.
This guide breaks down how to plan, organize, and coordinate a silent disco from start to finish—complete with timeline templates, checklists, budget considerations, vendor selection tips, and the most common mistakes that derail otherwise great parties.
What a Silent Disco Is (and Why It’s Trending)
A silent disco is a dance party where guests wear wireless headphones and choose between multiple audio channels—typically two or three. Instead of loud speakers, sound is delivered directly to each headset. Guests can switch channels at any time, creating a personalized experience and a surprisingly social environment (you’ll see impromptu sing-alongs when groups land on the same track).
Silent discos are growing in popularity for:
- Noise-sensitive venues (rooftops, museums, community spaces, hotels)
- Mixed-age events (weddings, corporate parties, reunions)
- Outdoor parties where permits or neighbors limit amplified sound
- Experience-driven events—a key current event planning trend
Step 1: Define Your Event Plan (Goals, Guest Count, and Format)
Before you price headsets or book a DJ, lock in a few planning decisions that affect every other line item.
Choose your silent disco format
- DJ-led (most common): 1–3 DJs, each on a dedicated channel.
- Curated playlist party: You create Spotify/Apple playlists and run them through transmitters (great for birthdays, smaller events, and budget-conscious hosts).
- Hybrid: One live DJ + one playlist channel (popular for weddings and corporate events).
Set a realistic guest count (and headset count)
Headphones are the “seat count” of a silent disco. You can’t improvise this on event day.
- Full count: 1 headset per guest (best experience, best photos).
- 80–90% count: Works when guests will mingle, eat, or rotate (common for corporate mixers).
- 70% count: Risky unless you’re very confident in turnover.
Decide on channels and music “lanes”
Three channels is the sweet spot for most events. Example channel themes:
- Channel A: Top 40 / current hits
- Channel B: Throwbacks (90s/2000s)
- Channel C: EDM/house or hip-hop/R&B
Step 2: Pick the Right Venue and Layout
Silent discos are flexible, but venue selection still matters. You’re trading speaker concerns for signal, space planning, and crowd flow.
Venue checklist (silent disco-friendly)
- Space for dancing plus a nearby “rest zone” for breaks
- Power access for transmitters/DJ gear (and charging station if needed)
- Minimal signal interference (thick concrete walls can reduce range; ask vendors about typical coverage)
- Lighting control (dimmable lights or space for uplighting/party lights)
- Check-in area near the entrance for headset distribution
Layout planning tips (pro coordination moves)
- Create a single-point check-in/check-out to control inventory.
- Keep the DJ/transmitter station slightly elevated or protected to reduce accidental unplugging.
- Designate a “help desk” corner for quick swaps (dead headset, volume issues, channel confusion).
- Use clear signage for channels: “Red = Hits,” “Blue = Throwbacks,” “Green = EDM.”
Step 3: Source Equipment (DIY Rental vs. Buying)
For most one-off events, renting is the best value and lowest risk. Vendors typically provide headphones, transmitters, charging equipment, and quick-start instructions.
Core silent disco equipment list
- Wireless headphones (multi-channel with LED colors)
- Transmitter(s) (one per channel)
- Audio sources (DJ controller, laptop, phone/tablet with playlists)
- Cables/adapters (RCA, 3.5mm, XLR depending on setup)
- Charging station(s) and spare charging cables
- Optional: Microphone channel for announcements
Vendor selection tips (what to ask before you book)
- What’s included? Confirm transmitter count, cables, and charging equipment.
- Battery life: Ask for realistic runtime based on volume levels.
- Range/coverage: Confirm indoor vs outdoor range; ask about interference troubleshooting.
- Support: Is there on-call tech support during your event window?
- Inventory policy: Deposits, lost/damaged headset fees, and how returns work.
- Delivery: Shipping timing, local pickup, and what happens if a box arrives late.
DIY playlist setup (real-world example)
Example: A 60-person backyard silent disco with two channels and no DJ.
- Channel 1: Spotify “Dance Pop” playlist from a laptop
- Channel 2: 2000s throwbacks from a phone
- One organized host acts as “MC” for quick announcements and energy boosts
- Result: Low cost, minimal gear, high guest participation
Step 4: Build a Planning Timeline (with Checklist Templates)
Use a timeline like a professional event coordinator: decide early, confirm vendors, then focus on guest experience and day-of execution.
4–6 weeks before (foundation and booking)
- Confirm date, time, and guest count
- Choose venue and verify power, setup time, and noise rules
- Book silent disco rental vendor (or purchase equipment if recurring)
- Decide on 2–3 channels and assign a DJ/playlist owner for each
- Build a simple event budget (see breakdown below)
- Send invites with clear event expectations: “Headphones provided; choose your channel”
2–3 weeks before (experience design and logistics)
- Create or request music plans (DJ briefs or playlist drafts)
- Map your floor plan: dance area, check-in, help desk, rest zone
- Plan lighting (uplights, party lights, glow sticks, LED signage)
- Order supplies: wristbands, signage, headset tags, gaffer tape
- Confirm staffing: check-in attendant(s), floor host, tech point person
7 days before (final confirmations)
- Confirm rental delivery/pickup times and return instructions
- Finalize playlists (download offline if possible)
- Print channel signage and quick-start instructions
- Prepare a headset tracking system (deposit, ID check, or numbered assignment)
- Draft an event-day run of show (sample below)
48 hours before (prep and packing)
- Charge any devices you own (phone/tablet/laptop power banks)
- Pack an “event kit”: adapters, tape, extension cords, backup aux cables
- Confirm weather plan for outdoor events (tent, covered area, indoor backup)
- Text staff/vendors arrival times and responsibilities
Event day (execution checklist)
- Arrive early: 60–90 minutes minimum for DIY; 2 hours if complex.
- Set up check-in station: headsets organized, numbered, and counted.
- Test each channel: volume, clarity, range test at far corners.
- Post signage: channel colors + music styles + how to switch.
- Start with a “welcome moment” (30 seconds): how it works, where to get help.
- Monitor flow: swap dead units, keep dance floor energy up, manage returns.
- Final 20 minutes: announce last songs, begin headset returns, do a count.
Simple run of show template (3-hour party)
- 0:00–0:20 Arrival + headset pickup + warm-up tracks
- 0:20–1:30 Peak dance set (channel competition encouraged)
- 1:30–1:45 Break moment (photo moment, snack restock)
- 1:45–2:45 Second peak set + requests
- 2:45–3:00 Final songs + headset return + closing
Budget Considerations (with Practical Breakdown)
Your budget depends heavily on headset count and whether you hire DJs. Plan for a per-headset rental fee plus add-ons.
Typical DIY silent disco budget categories
- Headphone rental package: Often priced per headset with transmitter(s)
- DJs (optional): One to three DJs or one DJ + playlist channel
- Venue fees/permits: Especially for parks, rooftops, public spaces
- Lighting: Uplighting, dance lights, string lights, neon/LED signs
- Staffing: Check-in attendant and a floater to troubleshoot
- Decor and signage: Channel signs, instructions, headset tags
- Food and beverage: A major satisfaction driver for guests
- Contingency: 10–15% buffer for last-minute needs
Sample budget (75 guests, 75 headsets, 3 channels, playlist-only)
- Headset rental package: 55–70% of budget
- Lighting and decor: 10–15%
- Staffing/help (1–2 people): 10–15%
- Signage/supplies (tape, tags, bins): 3–5%
- Contingency: 10%
Ways to save without sacrificing guest experience
- Use two channels instead of three for smaller events.
- Invest in lighting even on a tight budget—it makes the party feel intentional.
- Skip expensive decor and focus on great check-in flow and clear signage.
- Offer a simple menu and put effort into hydration stations (silent discos run hot).
Guest Experience Upgrades (High Impact, Low Stress)
Current event planning trends favor interactive, personalized experiences. Silent discos naturally deliver that—these add-ons amplify it.
- Channel ���battles”: Announce a 10-minute theme—“Best 2010s chorus wins.”
- Glow accessories: Glow sticks, LED foam sticks, or light-up bracelets.
- Photo moment: A backdrop with a sign: “Which channel are you on?”
- Request board: A clipboard or QR code form for song requests by channel.
- Quiet lounge corner: Seating + water + snacks for breaks.
Common Silent Disco Planning Mistakes (and How to Avoid Them)
- Under-ordering headphones: Fix by ordering 90–100% of guest count or setting clear rotation expectations.
- No check-in system: Fix by numbering headsets and using one entry/exit point with a deposit or ID hold policy.
- Skipping a range test: Fix by testing all channels at venue corners before guests arrive.
- Relying on streaming only: Fix by downloading playlists offline and having a backup device.
- Not labeling channels clearly: Fix with large color-coded signage and a 30-second demo at the start.
- Overcomplicated setup: Fix by minimizing adapters and using a single “tech table” with taped-down cables.
- No plan for dead batteries or defects: Fix by asking vendor for spares (or renting a few extra units).
Day-Of Coordination Tips (Run It Like a Pro)
- Assign roles: One person owns tech, one owns check-in, one floats on the floor.
- Use bins: “Clean/ready,” “Needs charging,” and “Issue—do not use.”
- Keep a micro toolkit: gaffer tape, spare aux cable, multi-adapter dongle, extension cord.
- Manage sound levels: Encourage comfortable volumes to extend battery life and reduce fatigue.
- Plan a calm closing: Start returns during the last songs and do a final count before teardown.
FAQ: DIY Silent Disco Planning
How many headphones do I need for a silent disco?
For the smoothest guest experience, plan one headset per guest. If your event includes dinner, networking, or multiple activity zones, 80–90% can work with good communication and a solid check-in system.
Do I need DJs, or can I use playlists?
You can absolutely run a silent disco with playlists. It’s a popular DIY approach for birthdays, house parties, and smaller events. DJs add live energy, transitions, and crowd reading—ideal for weddings and corporate events where you want a premium feel.
What’s the biggest technical risk?
The most common issues are signal range limitations, wrong cables/adapters, and device/streaming failures. Solve these by testing at the venue, packing adapters, and downloading music offline.
How do I handle lost or damaged headphones?
Use a simple inventory process: numbered headsets, one check-in station, and either a refundable deposit, ID hold, or signed acknowledgment. Confirm vendor replacement fees in advance so there are no surprises.
Can I host a silent disco outdoors?
Yes—outdoor silent discos are common. Plan for weather (tent or covered area), protect the tech table from moisture, and test range early. Also confirm local rules for gatherings and any park permits.
What lighting works best for a silent disco?
Prioritize lighting that enhances the dance floor: uplights, moving party lights, string lights for ambiance, and LED signage for channel info. Great lighting is one of the fastest ways to make a DIY event look professionally produced.
Your Next Steps: Turn This Plan Into a Real Event
- Choose your format (DJ, playlists, or hybrid) and confirm guest count.
- Reserve a silent disco rental package with the right number of channels.
- Build your timeline, assign roles, and create clear check-in logistics.
- Finalize music and signage, then run a full test before guests arrive.
When you treat a silent disco like a coordinated event—not just a fun idea—you get the best outcome: a smooth setup, energized guests, and a dance floor that stays active all night.
Want more step-by-step event planning checklists, party organization templates, and coordination tips? Explore more guides on smartpartyprep.com.
More Articles
 What Are Third Party Apps? The Hidden Risks & Real Benefits You’re Not Checking Before Integrating Them Into Your Event Tech Stack — Here’s Exactly What to Audit, Block, or Approve in 2024
Has a third party ever won? The shocking truth about independent candidates—and what 2024’s surge in outsider campaigns means for your event planning, voter engagement strategy, and ballot-access logistics.
What Does No Party Affiliation Mean? The Truth Behind Independent Voters — Why It’s Not Just ‘Not Picking a Side’ (And How It Affects Your Ballot, Primaries, and Civic Power)
How Much Is a Party at Urban Air? We Called 12 Locations, Compared 5 Packages, and Found Hidden Fees That Could Add $97 — Here’s Exactly What You’ll Pay in 2024 (No Surprises)
Where the Party At Tour Review: What 12,000+ Attendees Wish They’d Known Before Buying Tickets (Spoiler: It’s Not Just About the Music)
What a Bachelor Party *Really* Is (and Why 73% of First-Time Planners Get It Wrong Before the First Drink is Ordered)
How to Throw a Cool Party (Without Stress or Overspending): 7 Real-World Tactics That Actually Work — Backed by Data from 127 Hosts Who Nailed It
What Party Was Martin Van Buren? The Surprising Truth Behind America’s First ‘Professional Politician’ — And Why His Party Switch Changed Presidential Politics Forever
What to Wear to a Work Xmas Party: The 7-Second Dress Code Decoder (No More Awkward Outfits, Last-Minute Panic, or HR Side-Eye)
Is the DSA a political party? The truth behind its legal status, ballot access, and why it matters for organizers, candidates, and coalition-building in 2024 elections.
What Are Third Party Apps? The Hidden Risks & Real Benefits You’re Not Checking Before Integrating Them Into Your Event Tech Stack — Here’s Exactly What to Audit, Block, or Approve in 2024
Has a third party ever won? The shocking truth about independent candidates—and what 2024’s surge in outsider campaigns means for your event planning, voter engagement strategy, and ballot-access logistics.
What Does No Party Affiliation Mean? The Truth Behind Independent Voters — Why It’s Not Just ‘Not Picking a Side’ (And How It Affects Your Ballot, Primaries, and Civic Power)
How Much Is a Party at Urban Air? We Called 12 Locations, Compared 5 Packages, and Found Hidden Fees That Could Add $97 — Here’s Exactly What You’ll Pay in 2024 (No Surprises)
Where the Party At Tour Review: What 12,000+ Attendees Wish They’d Known Before Buying Tickets (Spoiler: It’s Not Just About the Music)
What a Bachelor Party *Really* Is (and Why 73% of First-Time Planners Get It Wrong Before the First Drink is Ordered)
How to Throw a Cool Party (Without Stress or Overspending): 7 Real-World Tactics That Actually Work — Backed by Data from 127 Hosts Who Nailed It
What Party Was Martin Van Buren? The Surprising Truth Behind America’s First ‘Professional Politician’ — And Why His Party Switch Changed Presidential Politics Forever
What to Wear to a Work Xmas Party: The 7-Second Dress Code Decoder (No More Awkward Outfits, Last-Minute Panic, or HR Side-Eye)
Is the DSA a political party? The truth behind its legal status, ballot access, and why it matters for organizers, candidates, and coalition-building in 2024 elections.