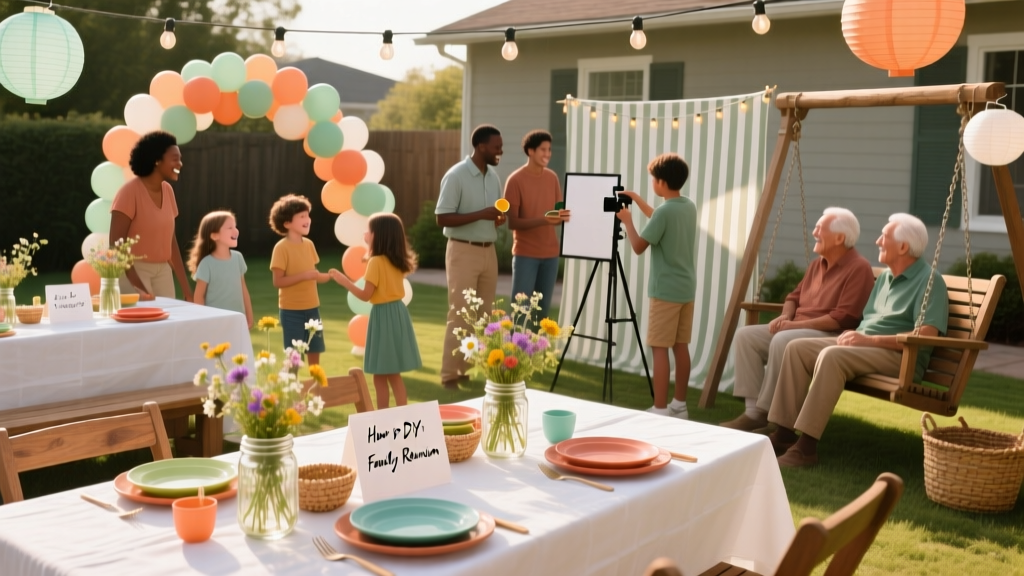
How to DIY a Family Reunion
A family reunion is more than a party—it’s a living scrapbook in the making. Done well, it reconnects generations, preserves stories, and creates new traditions that people talk about for years. Done poorly, it can feel chaotic: missed messages, unclear schedules, not enough food, and awkward gaps where no one knows what’s next.
Proper event planning turns a reunion from “let’s all meet up” into an organized, welcoming experience. A clear timeline, a realistic budget, and a few smart coordination strategies help you manage expectations and reduce last-minute stress. With the right approach, you can DIY your family reunion confidently—without needing a professional planner.
This guide breaks down family reunion planning step-by-step, with practical checklists, budget ideas, vendor selection tips, and real-world examples so you can host a meaningful event that runs smoothly.
Step 1: Define the Reunion Vision (Before You Book Anything)
Start with the “3 W’s”: Who, When, Where
- Who: Estimate headcount by households (this matters for budgeting). Identify key groups: elders, kids, out-of-town travelers, and anyone with accessibility needs.
- When: Consider school calendars, holiday weekends, and travel costs. Current event planning trends favor shorter, more structured gatherings (e.g., a main event plus optional add-ons) to reduce schedule conflicts.
- Where: Choose a location that supports your goals: relaxed socializing, activities, meals, and photos. If the family is spread out, a central “hub” city can improve attendance.
Set the Reunion Format
DIY family reunions work best when you decide the “shape” of the weekend early. Common formats:
- One-day reunion: Park pavilion + potluck + games (simplest, lowest cost).
- Weekend reunion: Friday welcome meetup, Saturday main event, Sunday brunch (best for travelers).
- Destination reunion: Resort/cabin/campground with shared lodging (higher planning needs, strong bonding).
Real-world example: A simple weekend structure
- Friday 6–8 PM: Casual meet-and-greet at a local restaurant patio (everyone pays own tab)
- Saturday 12–6 PM: Main reunion at a park pavilion with catered BBQ + family games + group photo
- Sunday 10 AM: Optional coffee and pastries drop-in at a relative’s house
Step 2: Build Your Planning Team (DIY Doesn’t Mean Doing It Alone)
One person can lead, but a small committee makes coordination easier and prevents burnout. Use a “roles over opinions” approach: assign clear responsibilities so decisions don’t stall.
Suggested committee roles
- Coordinator/Lead: Manages timeline, decisions, and master checklist
- Budget & Payments: Tracks costs, collects fees, manages reimbursements
- Food Lead: Potluck assignments or catering coordination, dietary tracking
- Activities Lead: Games, schedule flow, kids’ activities
- Communications: Invitations, reminders, RSVP tracking, updates
- Memory Keeper: Photo list, slideshow, family tree board, shared album
Organizational strategy that works
Use one “source of truth” for planning:
- A shared spreadsheet (guest list, RSVPs, payments)
- A group chat for quick updates (keep decisions summarized elsewhere)
- A simple digital invitation platform for RSVP and email reminders
Step 3: Choose the Venue and Date (With Logistics in Mind)
Venue options and what to consider
- Park pavilion/community center: Affordable, flexible; check weather backup plans and permit rules
- Backyard reunion: Warm and personal; consider parking, restrooms, tents, and neighbor noise limits
- Restaurant private room: Easiest food logistics; may require minimum spend and limited mingling space
- Campground or lodge: Great for multi-day; confirm quiet hours, accessibility, and meal facilities
Vendor selection tips (even for “simple” reunions)
- Ask venues for what’s included (tables, chairs, trash, electricity, kitchen access).
- Confirm insurance requirements. Some parks require event insurance for large groups.
- Check setup/teardown times so you’re not paying for extra hours or rushed.
- Request a written quote and cancellation policy for any vendor—catering, rentals, photographer, DJ.
Step 4: Create a Family Reunion Budget (With a Realistic Breakdown)
Smart party organization starts with a budget that matches your headcount and style. Decide upfront: will the reunion be fully hosted, potluck-based, or fee-per-person?
Common cost categories
- Venue rental/permits
- Food & beverage (catering, potluck supplies, ice)
- Rentals (extra tables/chairs, tent, cooler)
- Decor (banners, tablecloths, name tags)
- Activities (game prizes, craft supplies, kids’ items)
- Printing (programs, signage, family tree board)
- Photo/video (photographer, photo booth, instant camera film)
- Contingency (10–15% buffer)
Sample budget breakdown (75 guests, park pavilion, Saturday main event)
- Venue & permits: $200–$500
- Food (BBQ catering or deli platters): $900–$1,800 (approx. $12–$24/person)
- Drinks, ice, water stations: $120–$250
- Rentals (optional tent, extra chairs): $150–$600
- Decor & paper goods: $80–$250
- Games & prizes: $50–$200
- Photo plan (DIY + one pro hour): $0–$350
- Contingency (10%): $150–$400
Estimated total: $1,650–$4,350 depending on catering and rentals.
Cost-saving strategies that still feel elevated
- Choose one “wow” element (catered main dish, professional group photo, or a custom banner) and keep the rest simple.
- Use a water + lemonade station instead of individually bottled drinks.
- Ask family members to sponsor specific items: ice, desserts, games, or photo printing.
- Pick décor that doubles as keepsakes (family photo timeline, reunion logo stickers, recipe cards).
Step 5: Send Invitations and Manage RSVPs Like an Event Pro
Family reunions need more lead time than most parties because of travel, schedules, and multi-household coordination.
What to include in your reunion invite
- Date, time, and full location address (plus parking instructions)
- Schedule overview (even if it’s simple)
- Cost and payment method (if collecting fees)
- Food plan (potluck assignments or catering details)
- What to bring (chairs, lawn games, sun hats, swimsuits, etc.)
- Accessibility notes and contact person
- RSVP deadline and how to RSVP
Trend: Digital-first invites with a printed option
Many planners now use digital invitations for speed and tracking, then mail a one-page printed flyer to older relatives who prefer paper. It improves attendance and reduces missed information.
Step-by-Step Planning Timeline (DIY Family Reunion Checklist)
6–9 months out
- Choose reunion lead and committee roles
- Pick date range and city (survey top 2–3 options)
- Estimate headcount by households
- Set budget style: hosted, potluck, or per-person fee
- Shortlist venues and request quotes/availability
4–6 months out
- Book venue and any key vendors (catering, rentals)
- Send “Save the Date” with lodging suggestions
- Create RSVP tracker and contact list
- Outline the event schedule and activity plan
- Decide on reunion theme or color palette (optional but helps décor cohesion)
2–3 months out
- Send formal invitation with RSVP deadline
- Finalize food plan (potluck sign-up or catering menu)
- Order décor basics: banner, name tags, tablecloths
- Plan group photo logistics (time, location, who coordinates)
- Confirm rentals (tent, extra tables/chairs, sound system)
4–6 weeks out
- Follow up with non-responders
- Confirm headcount with caterer and venue
- Create a printed day-of schedule and signage list
- Gather supplies: coolers, serving utensils, first aid, sunscreen
- Assign day-of helpers for setup, food table, and cleanup
1–2 weeks out
- Send final event email/text with parking, weather plan, and timing
- Prepare name tags (include hometowns—easy conversation starter)
- Print family games sheets, trivia cards, or bingo cards
- Confirm deliveries and pickup times
- Build a “day-of box” with tape, scissors, markers, trash bags, wipes
Day before
- Buy ice, beverages, and last-minute supplies
- Pack décor, signage, and activity materials by station
- Charge speakers/cameras; test slideshow if using one
- Send a quick reminder: start time, weather plan, what to bring
Event day (execution checklist)
- Arrive early for setup (60–90 minutes for a pavilion is typical)
- Set up stations: welcome table, food table, drinks, games, photo area
- Post a simple schedule sign where everyone can see it
- Announce key moments: meal time, group photo, family recognition
- Assign cleanup roles and do a final sweep before leaving
Food, Activities, and Flow: The Reunion Run-of-Show
Food planning options
- Potluck: Lowest cost; requires clear sign-up categories (mains/sides/desserts) and serving utensil reminders
- Catering: Best for simplicity and timing; request kid-friendly and dietary options
- Hybrid: Cater mains, potluck desserts/sides—often the easiest compromise
Vendor tip: Questions to ask a caterer
- What is your per-person minimum and service style (drop-off vs. staffed)?
- Do you provide serving utensils, plates, and napkins?
- How do you handle dietary needs (gluten-free, vegetarian, allergies)?
- What is your hot-holding plan for outdoor events?
Activities that work for mixed ages
- Family trivia: Questions about ancestors, old neighborhoods, favorite recipes
- Photo scavenger hunt: Pair teens with elders to capture memories
- Family bingo: Squares like “Has lived in 3 states,” “Plays an instrument”
- Story circle: 20-minute hosted segment where elders share a memory
- Kids corner: Bubbles, sidewalk chalk, simple crafts, and a shaded rest area
Keep the schedule light but intentional
A common planning win is to anchor the day with three set moments and let the rest be open:
- Welcome + quick announcements (5 minutes)
- Meal time (60–90 minutes)
- Group photo + recognition (15–20 minutes)
Coordination Details That Make It Feel Seamless
Create “zones” instead of cluttered tables
- Welcome table: Name tags, schedule, contact number, optional donation box
- Food zone: Label dishes and allergens; set plates at the start of the line
- Drinks zone: Two coolers (non-alcoholic vs. adult beverages if applicable)
- Memory zone: Photo timeline, “write a memory” cards, family tree poster
- Play zone: Lawn games away from food traffic
Signage saves time (and questions)
- “Food line starts here”
- “Allergen key” and dish labels
- “Group photo at 2:30 PM”
- Parking and restroom arrows (especially at parks)
Common Family Reunion Planning Mistakes to Avoid
- Waiting too long to pick a date: Popular weekends book fast; families need travel time.
- No RSVP system: Guessing the headcount leads to food shortages or overspending.
- Overpacking the schedule: Too many activities can feel forced; focus on conversation time.
- Underestimating weather needs: Always plan shade, water, and a rain backup (tent or indoor alternative).
- Unclear costs: If collecting fees, share exactly what it covers and the payment deadline.
- No day-of assignments: DIY event coordination fails when setup, food, and cleanup aren’t owned by someone.
FAQ: DIY Family Reunion Planning
How far in advance should I plan a family reunion?
For a local one-day reunion, 3–4 months can work. For a weekend or destination reunion, plan 6–9 months ahead to lock in venues, coordinate travel, and collect RSVPs.
Should we charge per person or do a potluck?
It depends on your family’s preferences. Per-person fees simplify budgeting for catering and rentals. Potlucks reduce costs but require more coordination. A hybrid approach (cater mains, potluck desserts) often feels fair and manageable.
What’s a good headcount strategy when people don’t RSVP?
Use household-based tracking, set a firm RSVP deadline, and follow up with one designated communicator per family branch. If you still have unknowns, budget food with a 10–15% cushion and prioritize crowd-friendly options.
How do we keep kids and teens engaged?
Create a kids’ station and a teen-friendly activity like a photo scavenger hunt, playlist voting, or a casual sports bracket. Assign a few adults to rotate supervision so parents can socialize.
What are the best ways to capture memories without hiring a big photo team?
Set up a shared digital album, designate one “memory keeper,” and schedule a specific group photo time. Add a simple backdrop area with good light so people naturally take photos.
How do we handle sensitive family dynamics?
Keep seating open, avoid forcing group activities, and maintain a clear schedule so people can opt in or out. Assign a calm point person to handle issues privately and redirect attention to the event flow.
Next Steps: Your DIY Reunion Action Plan
- This week: Choose your date range, estimate headcount, and recruit 3–5 helpers.
- Next: Request venue quotes and decide your budget style (hosted, potluck, or fee).
- Then: Send a save-the-date and start RSVP tracking in one shared spreadsheet.
- Finally: Build a simple schedule with three anchor moments and assign day-of roles.
With a practical timeline, a clear budget, and a few smart coordination systems, your family reunion can feel relaxed, welcoming, and memorable—exactly what people hope for when they make the trip.
For more step-by-step event planning, party organization, and coordination guides, explore the latest resources on smartpartyprep.com.
More Articles
 What to Wear to a Luau Party: The 7-Second Rule (No Hawaiian Shirt Overload, No Barefoot Blunders—Here’s Exactly What Works in 2024)
Is Wisconsin a two party consent state? Yes — here’s exactly what that means for your next meeting, call, or interview (and how to stay legally safe without killing trust or productivity)
What Is Pop Up Party? The Truth Behind the Trend: Why 73% of Event Planners Say It’s Not Just Another Fad (But Most Still Get It Wrong)
What to Wear to a Luau Party: The 7-Second Rule (No Hawaiian Shirt Overload, No Barefoot Blunders—Here’s Exactly What Works in 2024)
Is Wisconsin a two party consent state? Yes — here’s exactly what that means for your next meeting, call, or interview (and how to stay legally safe without killing trust or productivity)
What Is Pop Up Party? The Truth Behind the Trend: Why 73% of Event Planners Say It’s Not Just Another Fad (But Most Still Get It Wrong)
 How to Serve Hot Cider at a Party Without Spills, Soggy Cinnamon Sticks, or Cold Cups: A Stress-Free 7-Step Setup That Keeps It Steaming for 3+ Hours (Even in Drafty Garages)
How to Change My Party Affiliation in Florida: A Step-by-Step, No-Stress Guide (2024 Deadlines, Online Forms, & What Happens If You Miss the Cut-Off)
How to Serve Hot Cider at a Party Without Spills, Soggy Cinnamon Sticks, or Cold Cups: A Stress-Free 7-Step Setup That Keeps It Steaming for 3+ Hours (Even in Drafty Garages)
How to Change My Party Affiliation in Florida: A Step-by-Step, No-Stress Guide (2024 Deadlines, Online Forms, & What Happens If You Miss the Cut-Off)
 What political party does Google support? The truth behind its neutrality policy, lobbying records, employee donations, and why the question itself reveals a deeper misunderstanding about tech governance and corporate responsibility in 2024.
 What Is the Progressive Party? The Stress-Free Blueprint for Hosting a Memorable, Multi-Location Celebration Without Logistics Nightmares or Guest Confusion
What to Wear to Dress to Impress Party: The 7-Second Rule (and Why Your 'Nice Outfit' Isn’t Enough Anymore)
What Is Considered a Large Party at a Restaurant? The Real Thresholds (and Why Your 12-Person Booking Might Get Denied Without a Deposit)
What Is the Progressive Party? The Stress-Free Blueprint for Hosting a Memorable, Multi-Location Celebration Without Logistics Nightmares or Guest Confusion
What to Wear to Dress to Impress Party: The 7-Second Rule (and Why Your 'Nice Outfit' Isn’t Enough Anymore)
What Is Considered a Large Party at a Restaurant? The Real Thresholds (and Why Your 12-Person Booking Might Get Denied Without a Deposit)