How to DIY a Dance Party
A great DIY dance party looks effortless—but the best ones are built on solid event planning. When you plan the flow (from arrivals to the last song), manage the budget, and prepare for predictable hiccups, you get a party that feels energetic, safe, and well-paced. Without a plan, even a fun playlist and a few lights can turn into awkward lulls, audio problems, overcrowded spaces, or last-minute spending that adds up fast.
The good news: you don’t need a full production team to pull off a dance party people talk about for weeks. With a smart timeline, a realistic checklist, and a few proven coordination strategies, you can create the right vibe—whether you’re hosting in a living room, a backyard, a community hall, or a rented studio.
This guide walks you through step-by-step dance party planning, including budgeting, vendor selection tips (DJ, rentals, lighting), layout planning, and a practical timeline you can reuse for future events.
Step 1: Define Your Dance Party Vision (Before You Buy Anything)
Pick the purpose and guest experience
Start with clarity. Your theme doesn’t need costumes, but it does need direction—because the music, schedule, lighting, and food service all depend on the vibe.
- Type of dance party: birthday, graduation, engagement, office party, fundraiser, neighborhood block party, teen dance, or adults-only dance night
- Energy level: “cocktail + dancing,” nonstop dance floor, or structured dance lessons + open dance
- Success metric: packed dance floor, great photos, fundraising goal, or a smooth, low-stress night
Choose a theme that simplifies decisions
Current party planning trends favor “micro-themes” that guide the details without forcing a full costume commitment. Examples:
- Decade nights: 70s disco, 90s throwback, Y2K
- Color themes: black-and-gold glam, neon rave, all-white party
- Music-first themes: Latin night, Afrobeats, pop hits, EDM-lite, line dance
Real-world example: theme that drives the plan
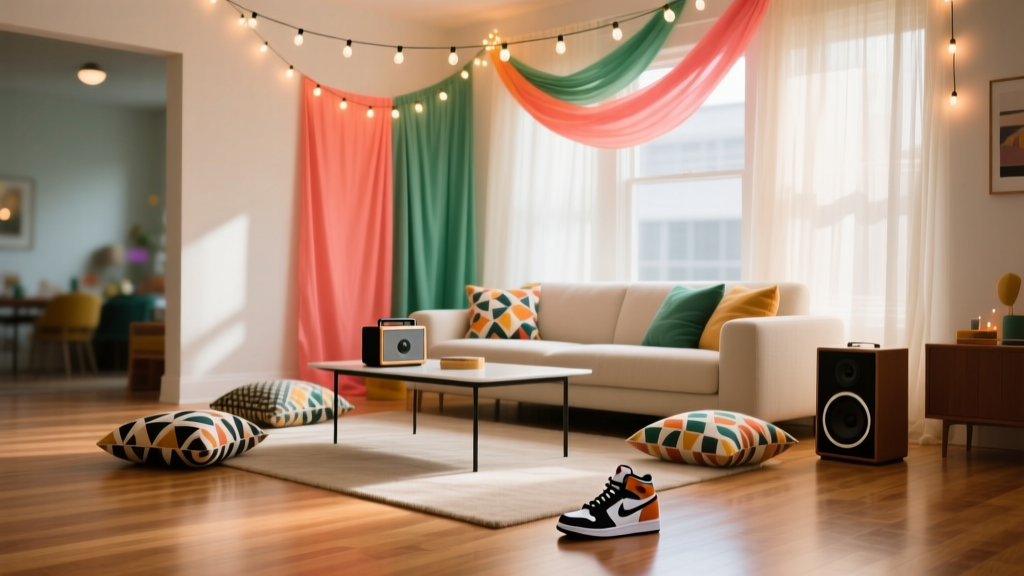
Example: A “Neon Night” house party for 35 guests. The host used affordable UV bulbs, glow bracelets, and a high-contrast photo corner. Because the theme relied on lighting, the host prioritized power strips, extension cords, and a speaker test two days before the event—preventing the most common DIY dance party issue: weak sound and poor lighting setup.
Step 2: Set Your Budget (And Protect It with Categories)
Most dance party budgets get derailed by last-minute upgrades—extra lighting, emergency ice runs, or “we need another speaker.” Use a category-based budget so you can make trade-offs without overspending.
Sample budget breakdown (DIY Dance Party)
Use this as a starting point and adjust based on guest count and venue type.
- Music & sound (20–35%): speaker rental, DJ, microphone, adapters
- Lighting & atmosphere (10–20%): LED lights, disco ball, fog machine (if allowed), batteries
- Food & beverage (25–40%): snacks, water, non-alcoholic drinks, bar basics
- Space & rentals (10–25%): venue fee, tables, cocktail tables, fan/space heater
- Decor & signage (5–10%): welcome sign, themed accents, photo corner
- Staffing & support (0–15%): security for larger events, bartender, cleaning help
- Contingency (8–12%): unexpected costs, replacement items
Quick cost snapshot by party size
- 20–40 guests (home/backyard): $250–$900 (DIY playlist + rental speaker + basic lighting)
- 40–80 guests (community hall): $800–$2,500 (bigger sound, more lighting, possible security)
- 80–150 guests (venue rental): $2,500–$7,500+ (DJ, professional sound/lighting, staffing)
Money-saving tips that don’t lower the vibe
- Spend on sound first. Guests forgive simple decor; they don’t forgive muddy audio.
- Choose “wow zones.” Put the best decor and lighting where people gather: dance floor + photo area.
- Limit the menu. Dance parties work best with grab-and-go items and lots of water.
- Borrow strategically. Extension cords, coolers, folding tables, and ice buckets are easy to source.
Step 3: Choose the Right Space (Layout and Flow)
Dance floor rules of thumb
- Space planning: Allow roughly 2–4 sq ft per dancer depending on how energetic the crowd is.
- Keep the dance floor central with clear pathways to restrooms and drinks.
- Create “rest zones.” Add seating on the perimeter so guests can cool down without leaving the room.
DIY layout blueprint
- Entry zone: welcome sign, coat area, wristbands (if needed), quick rules
- Bar/drinks zone: water first, then other beverages; keep it away from electronics
- Food zone: separate from the dance floor to reduce spills and traffic jams
- Dance floor: speakers angled toward the center, lighting aimed away from guests’ eyes
- Photo moment: simple backdrop + consistent lighting (ring light or LED panel)
Trend spotlight: experience-driven zones
One of today’s strongest event planning trends is creating small “experience zones” instead of decorating every surface. For a dance party, this typically means:
- A high-impact photo corner
- A clear, comfortable dance floor
- A hydration station (water dispenser, cups, electrolyte packets)
Step 4: Music, Sound, and Lighting (Where DIY Parties Win or Lose)
Playlist vs. DJ: which should you choose?
- DIY playlist works best for 15–60 guests, casual parties, and hosts who can plan the flow.
- DJ works best for 50+ guests, mixed-age crowds, fundraisers, or when you want strong crowd-reading and smooth transitions.
If you use a playlist: build it like a set
A common organizational strategy is to treat your playlist like a “run of show.” Create separate sections:
- Arrival (20–40 min): upbeat but not intense; easy conversation
- Warm-up (30–45 min): recognizable, medium tempo
- Peak (60–120 min): high-energy hits, remixes, sing-alongs
- Cool-down (15–30 min): smoother tracks, lower BPM
- Last song + exit (5–10 min): memorable closer
- Tip: Add 20–30% more music than you need to avoid scrambling.
- Tip: Download playlists for offline playback in case Wi-Fi fails.
Sound equipment essentials (DIY checklist)
- 1–2 powered speakers (size based on room/guest count)
- Audio source (phone/tablet/laptop) + charger
- Adapters: 3.5mm to RCA, USB-C to 3.5mm, lightning adapter
- Extension cords + gaffer tape (safer than duct tape for floors)
- Backup: a second phone with the playlist downloaded
Lighting that instantly upgrades the party
- LED party lights aimed at the dance floor (not into faces)
- Disco ball with pin spot for classic movement
- Uplights (even a few) to transform plain walls
- Smart bulbs for color scenes that match your theme
Step 5: Food, Drinks, and Timing (Keep It Dance-Friendly)
Best food format for a dance party
Choose items that are easy to grab, not too messy, and don’t require guests to sit for long.
- Slider tray, wraps, pizza bites, taquitos
- Chips + salsa/guacamole, popcorn bar, pretzels
- Fruit skewers, veggie cups, mini desserts
Hydration plan (often overlooked)
- Water dispensers at two points if possible (reduce lines)
- Clear signage: “Water + cups”
- Optional: electrolyte packets or flavored sparkling water
Alcohol considerations (if applicable)
- Offer a simple signature drink to control costs
- Use measured pours or batch cocktails
- Plan safe rides: rideshare code, designated drivers, or clear end time
Step 6: Vendor Selection Tips (DJ, Rentals, Venue, and More)
If you’re bringing in help, treat vendor selection like a mini hiring process. The goal is reliability, not just the lowest price.
DJ selection checklist
- Ask for video clips from similar events (not just a curated mix)
- Confirm they provide sound + basic lighting (and what “basic” means)
- Discuss do-not-play and must-play lists
- Ask about MC style: minimal, hype, or formal announcements
- Get the setup time in writing and confirm power requirements
Rental/vendor coordination tips
- Delivery windows: choose a buffer of at least 60–90 minutes
- Contact sheet: create one page with names, numbers, arrival times
- Confirm what’s included: cables, stands, microphones, batteries
- Insurance: some venues require vendor insurance—ask early
DIY Dance Party Planning Timeline (with Checklist)
4–6 weeks before
- Pick date/time and guest count target
- Set budget categories and spending caps
- Choose venue/location and confirm rules (noise, end time, parking)
- Select theme and dress code (optional)
- Decide DJ vs. playlist; book DJ if needed
3 weeks before
- Create a floor plan (dance floor, seating, drinks, food, photo spot)
- Source sound and lighting (rent or borrow)
- Draft your playlist structure (arrival/warm-up/peak/cool-down)
- Send invites with clear start/end time and parking info
2 weeks before
- Finalize menu and beverage plan; assign shopping list
- Order decor and consumables (cups, napkins, wristbands)
- Confirm vendor details and delivery/pickup times
- Plan your “run of show” (key moments: toast, birthday song, group photo)
1 week before
- Test speakers, adapters, and playlist playback (offline)
- Confirm lighting placement and power access
- Build a day-of contact sheet (hosts, vendors, helpers)
- Prep signage: welcome, water station, photo spot, house rules
48 hours before
- Pre-clean venue/party area and clear the dance floor space
- Grocery run for shelf-stable items and beverages
- Charge devices, label cords, pack a “party kit” (see below)
Day of event (sample schedule)
- 4–6 hours before: move furniture, set zones, tape cords
- 3 hours before: sound check + lighting test; set volume limits
- 2 hours before: set bar/food; chill drinks; set trash/recycling
- 30 minutes before: start arrival playlist; final walkthrough
- During: refresh water/ice; tidy high-traffic zones every 45–60 min
- Last 20 minutes: cool-down set; last call for photos
- After: secure valuables, quick clean sweep, pack rentals for pickup
DIY “Party Kit” packing list
- Gaffer tape, scissors, zip ties
- Extension cords, power strips
- Phone chargers, backup battery pack
- First aid basics, stain remover wipes
- Trash bags, paper towels, disinfecting wipes
- Sharpies + labels (for bins, coolers, leftover containers)
Common DIY Dance Party Planning Mistakes (And How to Avoid Them)
- Underestimating sound needs: A single small speaker often won’t cover a full room. If guests can’t feel the beat, they won’t dance.
- No plan for power and cords: Tripping hazards and unplugged speakers are avoidable with taped-down cable paths and labeled outlets.
- Starting too intense: If peak songs hit at 8:10, you burn the energy early. Build gradually.
- Food too messy or too far from drinks: Keep it simple and accessible; avoid sauces near electronics.
- Ignoring neighbor/venue rules: Confirm quiet hours and keep a volume plan (especially outdoors).
- Not assigning roles: Even DIY events need coordination. Assign one person to music, one to drinks/ice, one to quick tidying.
FAQ: DIY Dance Party Planning
How long should a dance party last?
For most social events, 3–5 hours is the sweet spot. A typical flow is 30–60 minutes for arrivals and socializing, 2–3 hours of strong dance time, and a 15–30 minute wind-down.
What’s the best way to keep people dancing?
Use a structured playlist (warm-up to peak), keep the dance floor clear, and maintain comfort basics: good temperature control, easy access to water, and a couple of “reset” moments like a group photo or a quick sing-along track.
Do I need special lighting?
No, but lighting is one of the fastest upgrades for a DIY dance party. Even two LED party lights plus dimmed ambient lights can change the entire mood. Prioritize safe cord management and avoid aiming lights directly into guests’ eyes.
How do I plan a dance party on a tight budget?
Allocate most of your budget to sound, keep decor focused on one “wow zone,” and simplify food. Borrow what you can (tables, coolers, cords), and choose a playlist over a DJ for smaller guest counts.
Should I rent speakers or buy them?
If you host events occasionally, renting is usually more cost-effective and gives you better output for the price. If you plan multiple parties per year, buying a quality powered speaker can make sense—just factor in storage, cables, and backup options.
How do I handle noise and neighbor concerns?
Set an end time, keep bass levels reasonable (bass travels), and close doors/windows if possible. For outdoor parties, angle speakers inward and communicate the schedule to neighbors ahead of time when appropriate.
Next Steps: Your DIY Dance Party Action Plan
Start by locking in your guest count target, budget categories, and a simple theme that guides music and lighting choices. Then build your timeline: book any vendors early, test your sound setup in advance, and use a zone-based layout to keep traffic flowing. A well-coordinated DIY dance party doesn’t require perfection—just smart planning, clear roles, and a realistic checklist.
- Create your budget with category caps and a 10% contingency
- Sketch your layout (dance floor, drinks, food, photo moment)
- Decide DJ vs. playlist and build a set-style music plan
- Run a full sound + lighting test at least one week out
Want more event planning checklists, timelines, and party organization tips? Explore more step-by-step guides on smartpartyprep.com and keep building your hosting toolkit.
More Articles
 How We Do Party Song: The Exact 7-Step System Top DJs & Event Planners Use to Keep Crowds Dancing All Night (No Guesswork, No Awkward Lulls)
 What Political Party Does Home Depot Support? The Truth Behind Its PAC Donations, Lobbying Records, and Why It Doesn’t Endorse Parties — And What That Means for Your Community Projects
 Which Party Freed the Slaves? The Truth Behind Lincoln, the Republicans, and Why This Question Misses the Real Story of Emancipation — A Historian’s Clear Breakdown
How Did DMAC the Party Starter Die? Separating Verified Facts from Social Media Rumors — What Every Event Planner & Host Needs to Know About Legacy, Crisis Communication, and Planning with Purpose
Which Party Freed the Slaves? The Truth Behind Lincoln, the Republicans, and Why This Question Misses the Real Story of Emancipation — A Historian’s Clear Breakdown
How Did DMAC the Party Starter Die? Separating Verified Facts from Social Media Rumors — What Every Event Planner & Host Needs to Know About Legacy, Crisis Communication, and Planning with Purpose