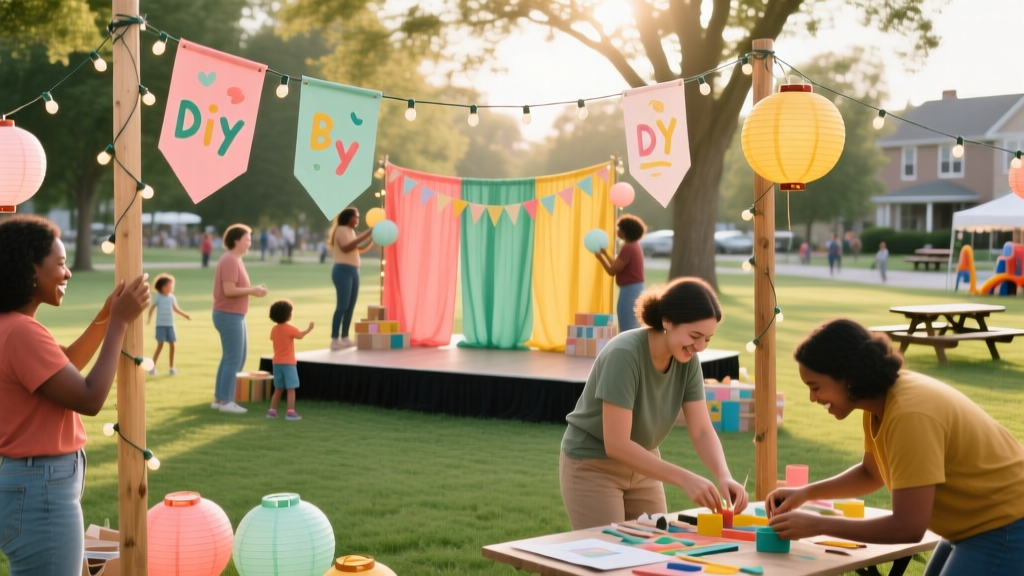
How to DIY a Community Festival
A community festival can turn a neighborhood into a destination for a day—bringing families together, supporting local businesses, and strengthening community pride. But the same qualities that make festivals exciting (multiple activities, vendors, crowds, moving parts) also make them easy to underestimate. DIY doesn’t mean “wing it.” It means building a clear plan, coordinating partners, and delivering a safe, welcoming experience on a realistic budget.
Proper planning is the difference between a festival that feels effortless and one that feels chaotic. When you map out timelines, permits, staffing, vendor coordination, and contingency plans ahead of time, you create room for the fun: live music, great food, kid-friendly activities, and memorable moments that keep people coming back next year.
This guide breaks down community festival planning into practical steps, complete with checklists, a planning timeline, budget considerations, vendor selection tips, and common pitfalls to avoid—so you can organize a successful event with confidence.
1) Define the Festival Vision (and Keep It Simple)
Choose a clear purpose
Start with a concise goal statement. It helps you make decisions quickly when choices multiply.
- Community-building: bring neighbors together
- Fundraising: support a school, nonprofit, or civic project
- Local business support: spotlight vendors and creators
- Cultural celebration: heritage, art, music, or seasonal events
Pick a format that matches your resources
A DIY community festival should feel intentional—not overextended. Consider these common formats:
- Street fair: vendors + strolling entertainment + food trucks
- Park festival: stage + lawn games + family zone
- Night market: artisan booths + lighting + live acoustic sets
- Mini-fest: 10–20 vendors, one stage area, a few featured activities
Real-world example: “Main Street Fall Fest” (right-sized)
- Attendance target: 800–1,200
- Footprint: 1–2 blocks + adjacent parking lot
- Programming: 3 local bands, kids craft zone, 15 vendors, 4 food options
- Why it works: limited stages, limited power needs, manageable staffing
2) Build Your Festival Team and Roles
Strong event coordination starts with assigning responsibilities early. Even a small community festival needs owners for key areas.
Core roles to assign
- Event Director: final decisions, master timeline, city liaison
- Vendor Coordinator: applications, booth map, load-in/load-out
- Entertainment/Programming Lead: performers, schedule, stage needs
- Operations Lead: site layout, rentals, power, sanitation, signage
- Volunteer Coordinator: recruiting, training, shift schedules
- Marketing Lead: promo plan, partnerships, social posts, email updates
- Finance/Sponsorship Lead: budget tracking, sponsor outreach, invoices
- Safety Lead: emergency plan, first aid, crowd flow, accessibility
Pro organizational strategy: shared “festival hub”
Use one central place for event planning documents:
- Cloud folder for permits, vendor certificates, contracts
- Shared spreadsheet for budget and vendor status
- Project board (Kanban style) for tasks and deadlines
- One master contact sheet with phone numbers for day-of coordination
3) Secure Location, Date, Permits, and Insurance
Location checklist
- Capacity and crowd flow (entry/exit points)
- Restrooms (on-site or rented)
- Power availability (or generator plan)
- Parking and ADA accessibility
- Noise considerations and curfews
- Shade, seating opportunities, and weather shelter options
Permits and approvals to ask your city/county about
- Special event permit
- Street closure permit and traffic control requirements
- Food permits/temporary food service requirements
- Alcohol permit (if applicable) and wristbanding rules
- Fire department approvals (tents, cooking, generators)
- Amplified sound permit
- Signage permits and banner approvals
Insurance basics
Most venues and municipalities require general liability insurance and may request that they’re listed as “additional insured.” If you have vendors, you may also require each vendor to provide their own insurance certificate. If your festival includes inflatables, alcohol service, or rides, expect higher coverage requirements.
4) Step-by-Step Planning Timeline (with Checklists)
Use this timeline template as a starting point. Adjust based on the size of your community festival and local permit lead times.
6–9 months out: Foundations
- Define festival goal, theme, and target attendance
- Choose date(s) and rain date policy
- Secure location and start permit conversations
- Draft a preliminary budget and revenue plan
- Build organizing committee and assign roles
- Create vendor categories (food, artisan, nonprofit, sponsor booths)
- Outline entertainment concept (stage, roaming performers, contests)
4–6 months out: Lock in the big pieces
- Submit permits, confirm insurance requirements
- Open vendor applications and sponsor packages
- Book key rentals: tents, tables, chairs, stage, sound, generators
- Confirm restroom plan (portable toilets/handwashing stations if needed)
- Draft site map and traffic/crowd flow plan
- Start marketing: event name, logo, listing pages, “save the date” posts
2–3 months out: Build the experience
- Confirm performers and finalize run-of-show schedule
- Close key vendor categories (especially food vendors)
- Order signage: parking, entrances, schedules, vendor rows, first aid
- Recruit volunteers and set shift needs
- Plan family-friendly activities (craft tent, games, community booths)
- Review safety plan with local authorities if required
4–6 weeks out: Finalize logistics
- Send vendor packet: load-in times, map, rules, emergency contacts
- Collect vendor documents: permits, insurance certificates, licenses
- Confirm rentals delivery/pickup windows
- Finalize power plan (who needs outlets, who brings quiet generators)
- Create volunteer schedule and day-of contact list
- Push marketing harder: local groups, email blasts, flyers, partner posts
1–2 weeks out: Prepare for showtime
- Print maps, schedules, check-in sheets, wristbands/tickets if used
- Prepare cashless payment signage and donation QR codes
- Confirm first aid kit, water stations, lost-and-found plan
- Hold a team run-through: timeline, who calls what, escalation plan
- Reconfirm all vendors, performers, and deliveries
Day-before and day-of: Execution checklists
Day-before checklist
- Mark booth locations and stage area
- Pre-stage signage, cones, barricades (if permitted)
- Confirm weather forecast and activate contingency plan if needed
- Charge radios/phones, prep volunteer badges, pack “command kit”
Day-of checklist
- Set up check-in area and info booth
- Vendor load-in management (traffic control and timing)
- Sound check and stage safety sweep
- Volunteer briefing: shifts, key locations, customer service standards
- Open gates with clear signage and welcoming greeters
- Ongoing: trash checks, restroom checks, crowd monitoring, schedule adherence
- Load-out plan to prevent vehicle/pedestrian conflicts
- Final sweep and site restoration
5) Budget Planning: Practical Breakdown and Money-Smart Choices
Community festival budgets vary widely. The most common DIY mistake is underestimating operational costs (especially rentals, sanitation, and security). Build a budget that’s realistic, transparent, and trackable.
Sample budget breakdown (mid-size festival, 1,000–2,000 attendees)
- Permits/fees: 5–10%
- Insurance: 3–8%
- Rentals (tents, tables, chairs, stage): 20–35%
- AV (sound, microphones, tech): 10–18%
- Sanitation (restrooms, handwashing, trash): 8–15%
- Security/medical (as required): 8–15%
- Marketing/signage: 5–12%
- Decor/activities/programming: 5–12%
- Contingency: 8–12%
Revenue options to offset costs
- Vendor booth fees (tiered pricing for nonprofits vs. commercial vendors)
- Sponsorships (stage sponsor, kids zone sponsor, banner placements)
- Donations and QR code giving
- Ticketed add-ons (workshops, VIP seating, tasting passport where legal)
- Merch (shirts, tote bags) if you have strong local branding
Budget-saving tips that don’t sacrifice quality
- Right-size your footprint: fewer blocks = fewer barricades, less staffing, simpler sanitation.
- Share infrastructure: central seating area, one stage, fewer power drops.
- Use sponsorship “in-kind”: local printer donates flyers; hardware store sponsors supplies; radio station promotes.
- Prioritize guest comfort: restrooms, shade, seating, and clear signage often matter more than expensive décor.
6) Vendor Selection and Coordination Tips
Your vendors shape the guest experience. Strong vendor management is a core event planning skill—treat it like its own project.
How to choose the right vendors
- Curate variety: aim for a balanced mix (food, drinks, artisan, nonprofit, kids activities).
- Limit duplicates: too many similar booths reduces vendor sales and satisfaction.
- Prioritize reliability: fast communication and clear setup needs are green flags.
- Ask for proof: required permits/licenses, insurance, and photos of prior setups.
Create a vendor packet that prevents day-of confusion
- Load-in route and time window
- Booth size rules and what is provided (tables, tents, power)
- Power policies (approved cords, no daisy-chaining, generator guidelines)
- Trash expectations and grease disposal requirements
- Weather policy and cancellation terms
- Contact info for vendor coordinator and day-of operations lead
Current trend: cashless and fast lines
Guests increasingly expect quick, cashless transactions. Encourage vendors to accept tap-to-pay and consider:
- Posting “cashless preferred” signage
- Providing a few charging stations (for vendor use)
- Designing the layout to prevent bottlenecks at popular food trucks
7) Layout, Guest Flow, and Experience Design
Great festivals feel easy to navigate. That’s not luck—it’s planning.
Layout best practices
- Anchor zones: stage area, food court, family zone, community/sponsor row.
- Clear main path: keep it wide enough for strollers and wheelchairs.
- Rest areas: seating clusters in shade near food and entertainment.
- Visibility: tall signage for restrooms, first aid, info booth, exits.
Accessibility and inclusion
- ADA routes without steep curbs or gravel choke points
- Reserved accessible parking (where possible)
- Clear signage with high contrast and simple language
- Family-friendly facilities: changing stations or a designated quiet area
8) Safety, Risk Management, and Weather Planning
Safety planning protects guests, volunteers, vendors, and your organizing team. Build a simple, actionable plan that your team can follow under pressure.
Festival safety essentials
- First aid station or designated medical contact
- Emergency communication plan (who calls 911, who meets responders)
- Severe weather thresholds (wind, lightning, extreme heat)
- Lost child procedure (one central protocol, trained staff)
- Food safety rules for vendors
- Crowd management: keep fire lanes clear and monitor peak areas
Weather-ready checklist
- Pop-up shade and hydration plan for hot days
- Sandbags/weights for tents (never rely on stakes only where prohibited)
- Covered areas for sound equipment and performers
- Clear messaging plan: social updates + signage + announcer script
9) Common Community Festival Planning Mistakes to Avoid
- Starting permit conversations too late: some approvals take months, especially for street closures.
- Underestimating sanitation: too few restrooms or overflowing trash can derail guest satisfaction quickly.
- No contingency budget: last-minute rentals, weather needs, and staffing gaps cost money.
- Overbooking entertainment: too many schedule changes create delays and frustrate performers and guests.
- Unclear vendor communication: vague load-in instructions lead to traffic jams and late openings.
- Ignoring volunteer care: without breaks, water, and clear instructions, volunteers burn out mid-event.
- Weak signage: guests shouldn’t have to ask where restrooms or first aid are.
10) Quick-Use Templates: Mini Timeline and Master Checklist
Mini timeline template (copy and customize)
- T-24 to 36 weeks: concept, date, location, committee roles
- T-16 to 24 weeks: permits, insurance, vendor/sponsor outreach
- T-8 to 12 weeks: confirm rentals, finalize layout, volunteer recruiting, marketing push
- T-4 to 6 weeks: vendor packets, signage orders, safety plan, run-of-show
- T-1 to 2 weeks: final confirmations, print materials, team briefing
- Event day: execute, monitor, communicate, document
- T+1 week: debrief, thank-yous, financial close, save learnings
Master checklist highlights
- Permits approved and on-site copies printed
- Insurance certificates collected (festival + vendors as required)
- Site map finalized (booths, stage, restrooms, first aid, exits)
- Vendor list confirmed with contact numbers
- Volunteer schedule + training notes
- Rentals confirmed (delivery times and responsible point person)
- Power plan confirmed (generators, fuel, cords, safety)
- Marketing plan executed (local partners, social, email, flyers)
- Safety plan and weather policy communicated to staff and vendors
- Day-of “command kit” packed (tape, zip ties, scissors, markers, batteries, clipboard)
FAQ: DIY Community Festival Planning
How far in advance should I start planning a community festival?
For a small park-based festival, 3–4 months may be enough. For street closures or larger crowds, plan for 6–9 months to allow time for permits, insurance, vendor recruitment, and rentals.
Do I need insurance if it’s a free community event?
Usually, yes. Free admission doesn’t reduce liability exposure. Many venues and municipalities require general liability coverage regardless of ticketing.
How do I price vendor booths fairly?
Use a tiered approach: lower rates for nonprofits/community groups, standard rates for artisan vendors, and higher rates for food vendors (who typically generate more revenue). Compare local market rates and ensure booth fees cover real operational costs.
What’s the best way to handle weather cancellations?
Set a written weather policy up front: what conditions trigger delays or closure, how you’ll communicate updates, and whether vendor fees roll over, refund, or convert to credit. Share it in vendor packets and staff briefings.
How many volunteers do I need?
It depends on footprint and programming, but a practical starting point is 1 volunteer per 75–125 attendees during peak hours, plus dedicated leads for check-in, vendor support, sanitation checks, and information services.
What event planning trends should I consider for a modern community festival?
Current trends include cashless payments and QR code info hubs, curated local maker markets, family zones with structured activities, sustainability (recycling/compost options where feasible), and “experience” moments like photo backdrops or interactive art that encourage social sharing.
Next Steps: Turn Your Plan into a Festival Day That Runs Smoothly
Start by choosing a right-sized format, assigning clear roles, and building a planning timeline you can actually follow. Then lock in the essentials—permits, insurance, rentals, and vendor coordination—before spending energy on décor and extras. If you do three things exceptionally well, prioritize guest comfort (restrooms, seating, shade), clear communication (vendor packets, signage, staff briefings), and smart logistics (layout, power, load-in).
For your next action step, draft a one-page festival summary today:
- Festival goal + date + location
- Estimated attendance
- Simple site layout concept (zones)
- Budget target and revenue plan
- Your top 10 tasks for the next 30 days
Thanks for reading—explore more event planning, party organization, and coordination guides at smartpartyprep.com to keep building your festival toolkit.
More Articles
 What Is an Effect of a Competitive Two Party System? 7 Real-World Consequences You’re Not Hearing About — From Polarization to Policy Gridlock and Surprising Voter Turnout Shifts
What Gift for an Engagement Party? The 7-Step Gifting Framework That Prevents Awkwardness, Saves Money, and Actually Strengthens Your Relationship with the Couple (No More Last-Minute Panic or Regrettable Amazon Orders)
How to Plan a Gender Reveal Party Without Stress, Overspending, or Awkward Moments: A Realistic 7-Step Timeline (With Budget Tracker & Inclusive Alternatives)
What Is an Effect of a Competitive Two Party System? 7 Real-World Consequences You’re Not Hearing About — From Polarization to Policy Gridlock and Surprising Voter Turnout Shifts
What Gift for an Engagement Party? The 7-Step Gifting Framework That Prevents Awkwardness, Saves Money, and Actually Strengthens Your Relationship with the Couple (No More Last-Minute Panic or Regrettable Amazon Orders)
How to Plan a Gender Reveal Party Without Stress, Overspending, or Awkward Moments: A Realistic 7-Step Timeline (With Budget Tracker & Inclusive Alternatives)
 What Is an Economic Protest Party? (Not a Celebration — Here’s How It Actually Works, Why It’s Surging in 2024, and 5 Tactical Steps to Join or Organize One Effectively)
Why Does Benvolio Want to Crash the Party? The Real Strategic Reasons Behind Uninvited Attendance — And What Modern Event Planners Can Learn From Shakespearean Social Engineering
What to Serve at Super Bowl Party: The 7-Minute Menu Blueprint That Serves 20+ Guests Without Burning Your Kitchen (or Your Budget)
What Is an Economic Protest Party? (Not a Celebration — Here’s How It Actually Works, Why It’s Surging in 2024, and 5 Tactical Steps to Join or Organize One Effectively)
Why Does Benvolio Want to Crash the Party? The Real Strategic Reasons Behind Uninvited Attendance — And What Modern Event Planners Can Learn From Shakespearean Social Engineering
What to Serve at Super Bowl Party: The 7-Minute Menu Blueprint That Serves 20+ Guests Without Burning Your Kitchen (or Your Budget)
 What Is a LAN Party? The Surprising Truth Behind This Nostalgic Gaming Tradition (And Why It’s Booming Again in 2024)